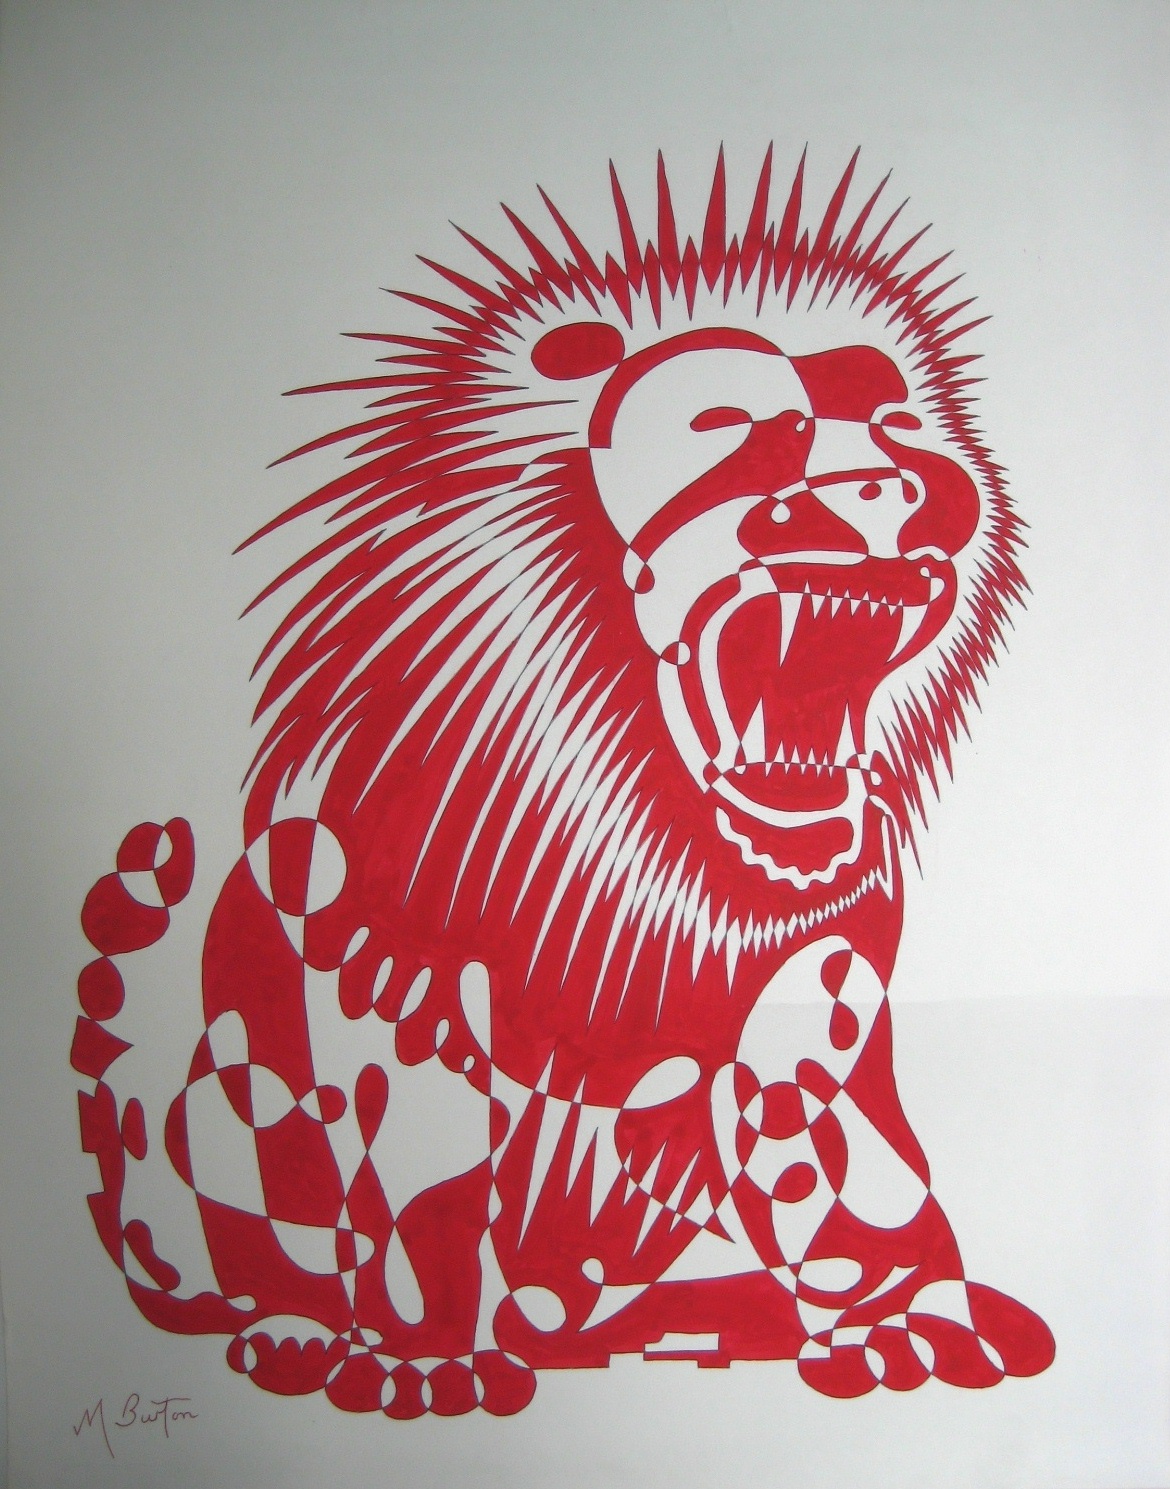
Continuous lines overdrawn on Skydiver formation design, using Four Colour Theory method. Mick Burton
My recent post about the formation design used by the record breaking skydivers included a continuous line overdraw of their design (modified slightly be me to complete links which would have been present with more skydivers). I said that I would explain how the overdraw (above) was completed.
The structure is made up of circles which have 3 way junctions throughout (3 handed in the case of skydivers ! ). This can be regarded a map and so I will apply my Four Colour Theorem continuous line overdraw which I devised in the early 1970’s.
I was trying to prove the Four Colour Theorem, which states that no more than four colours are required to colour all the regions of a map. My basic idea was that drawing a single continuous overdraw throughout a map would split it into two chains of alternate regions, which would demonstrate that only 4 colours were required. If more than one continuous overdraw resulted then there were still only two types of chains of alternate regions.
As you will probably know, this theorem has many complexities which I will not attempt to cover here. In the mid 1970’s I corresponded with two mathematicians at the Open University about my approach, Robin Wilson and Fred Holroyd, who were both very helpful and encouraging. The theorem was proven in 1976 by Kenneth Appel and Wolfgang Haken, running one of the biggest computers for over 1000 hours. I soon decided that it was time to go onto other things! However, my journey had been fascinating with numerous amazing findings which have been so useful in my art.
I can keep to relatively simple methods for my pictures.
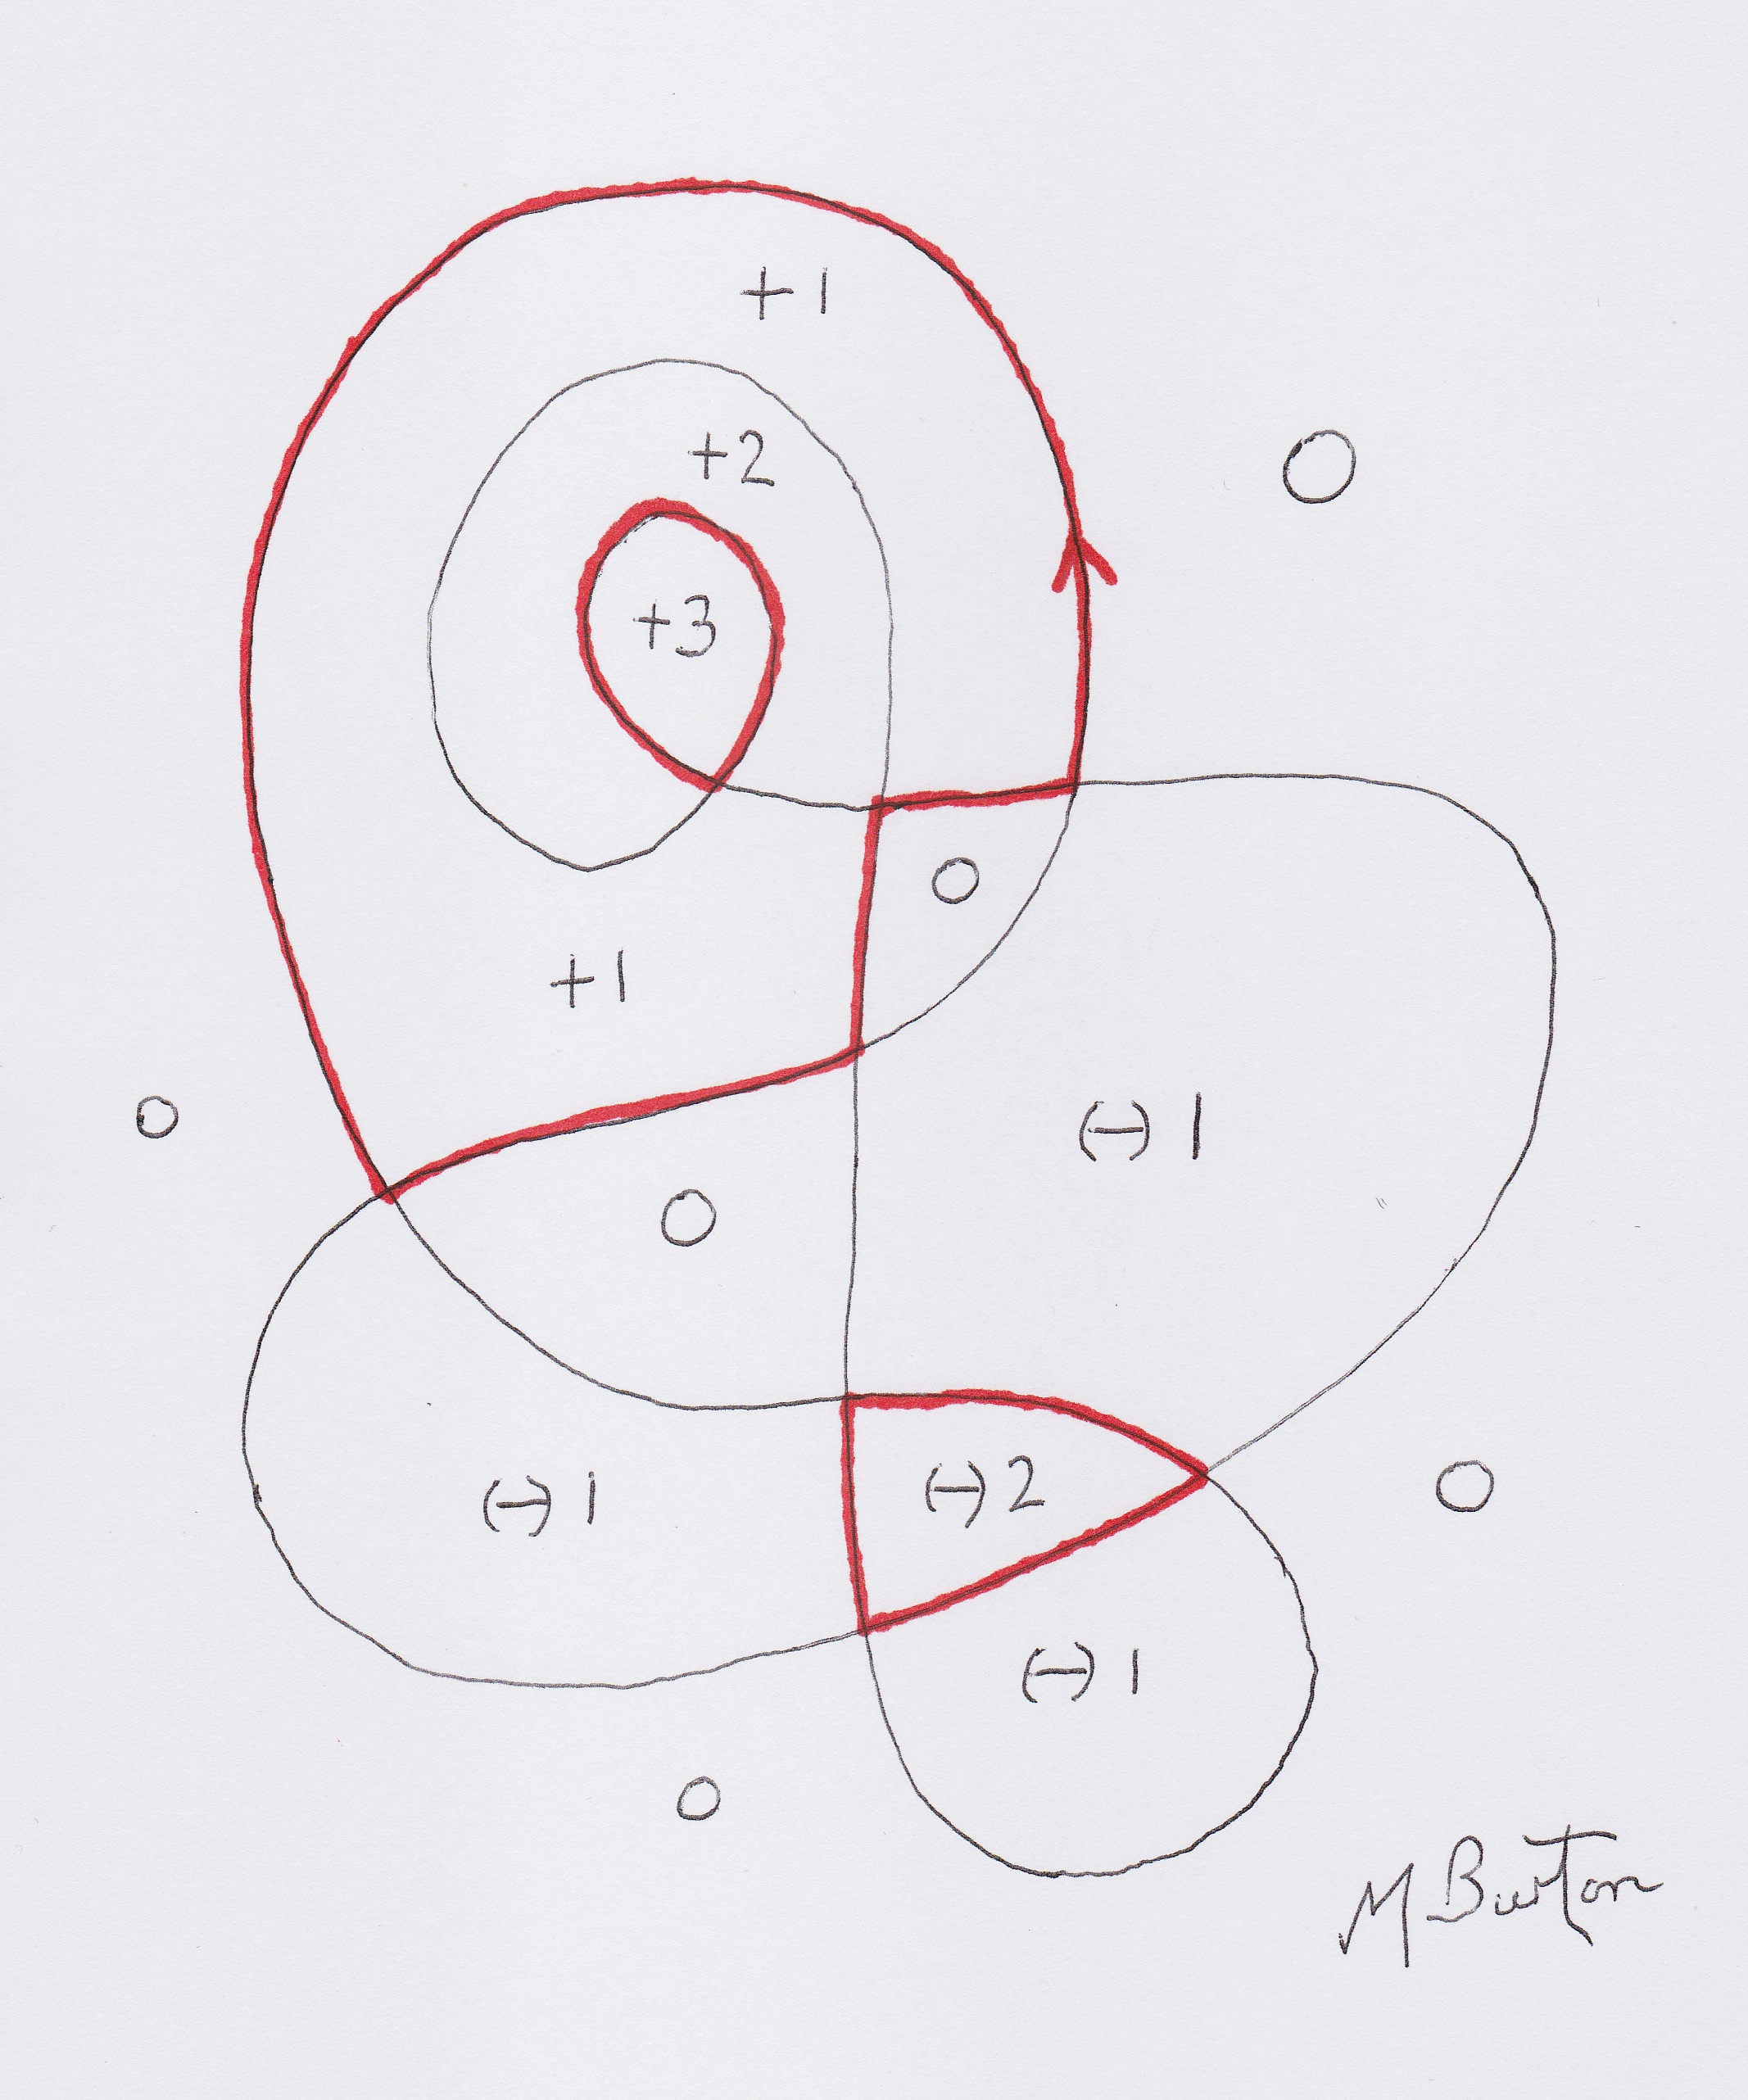
Here is the design, used above, with my initial overdraws shown in red.

Assumed formation design used by Skydivers, with initial overdraws. Mick Burton four colour overdraw.
On final completion of the overdraws, every junction should have two of its three legs overdrawn and so the start decision (1) above overdraws two legs and this means that the third leg, which I call a “spar”, links to another junction where the other two legs must be overdrawn.
We then carry on making decisions which trigger other overdrawn lines across spars. Usually there is a “knock on” effect where new overdraws connect with already overdrawn lines which then trigger more overdraws.
If we go wrong and a junction is triggered which has all three legs overdrawn, or none, we have to go back and change earlier decisions in a controlled process. I usually photocopy the overdraws completed, every two or three stages, so that going back is not too time consuming.
Here is the situation after decision (3). Decision (2) in blue had only triggered two overdraw sections but decision (3), in green, has triggered ten sections to be overdrawn in green.

Four Colour Overdraw decision 3 triggers 10 further overdraws, in green. Mick Burton, continuous line artist.
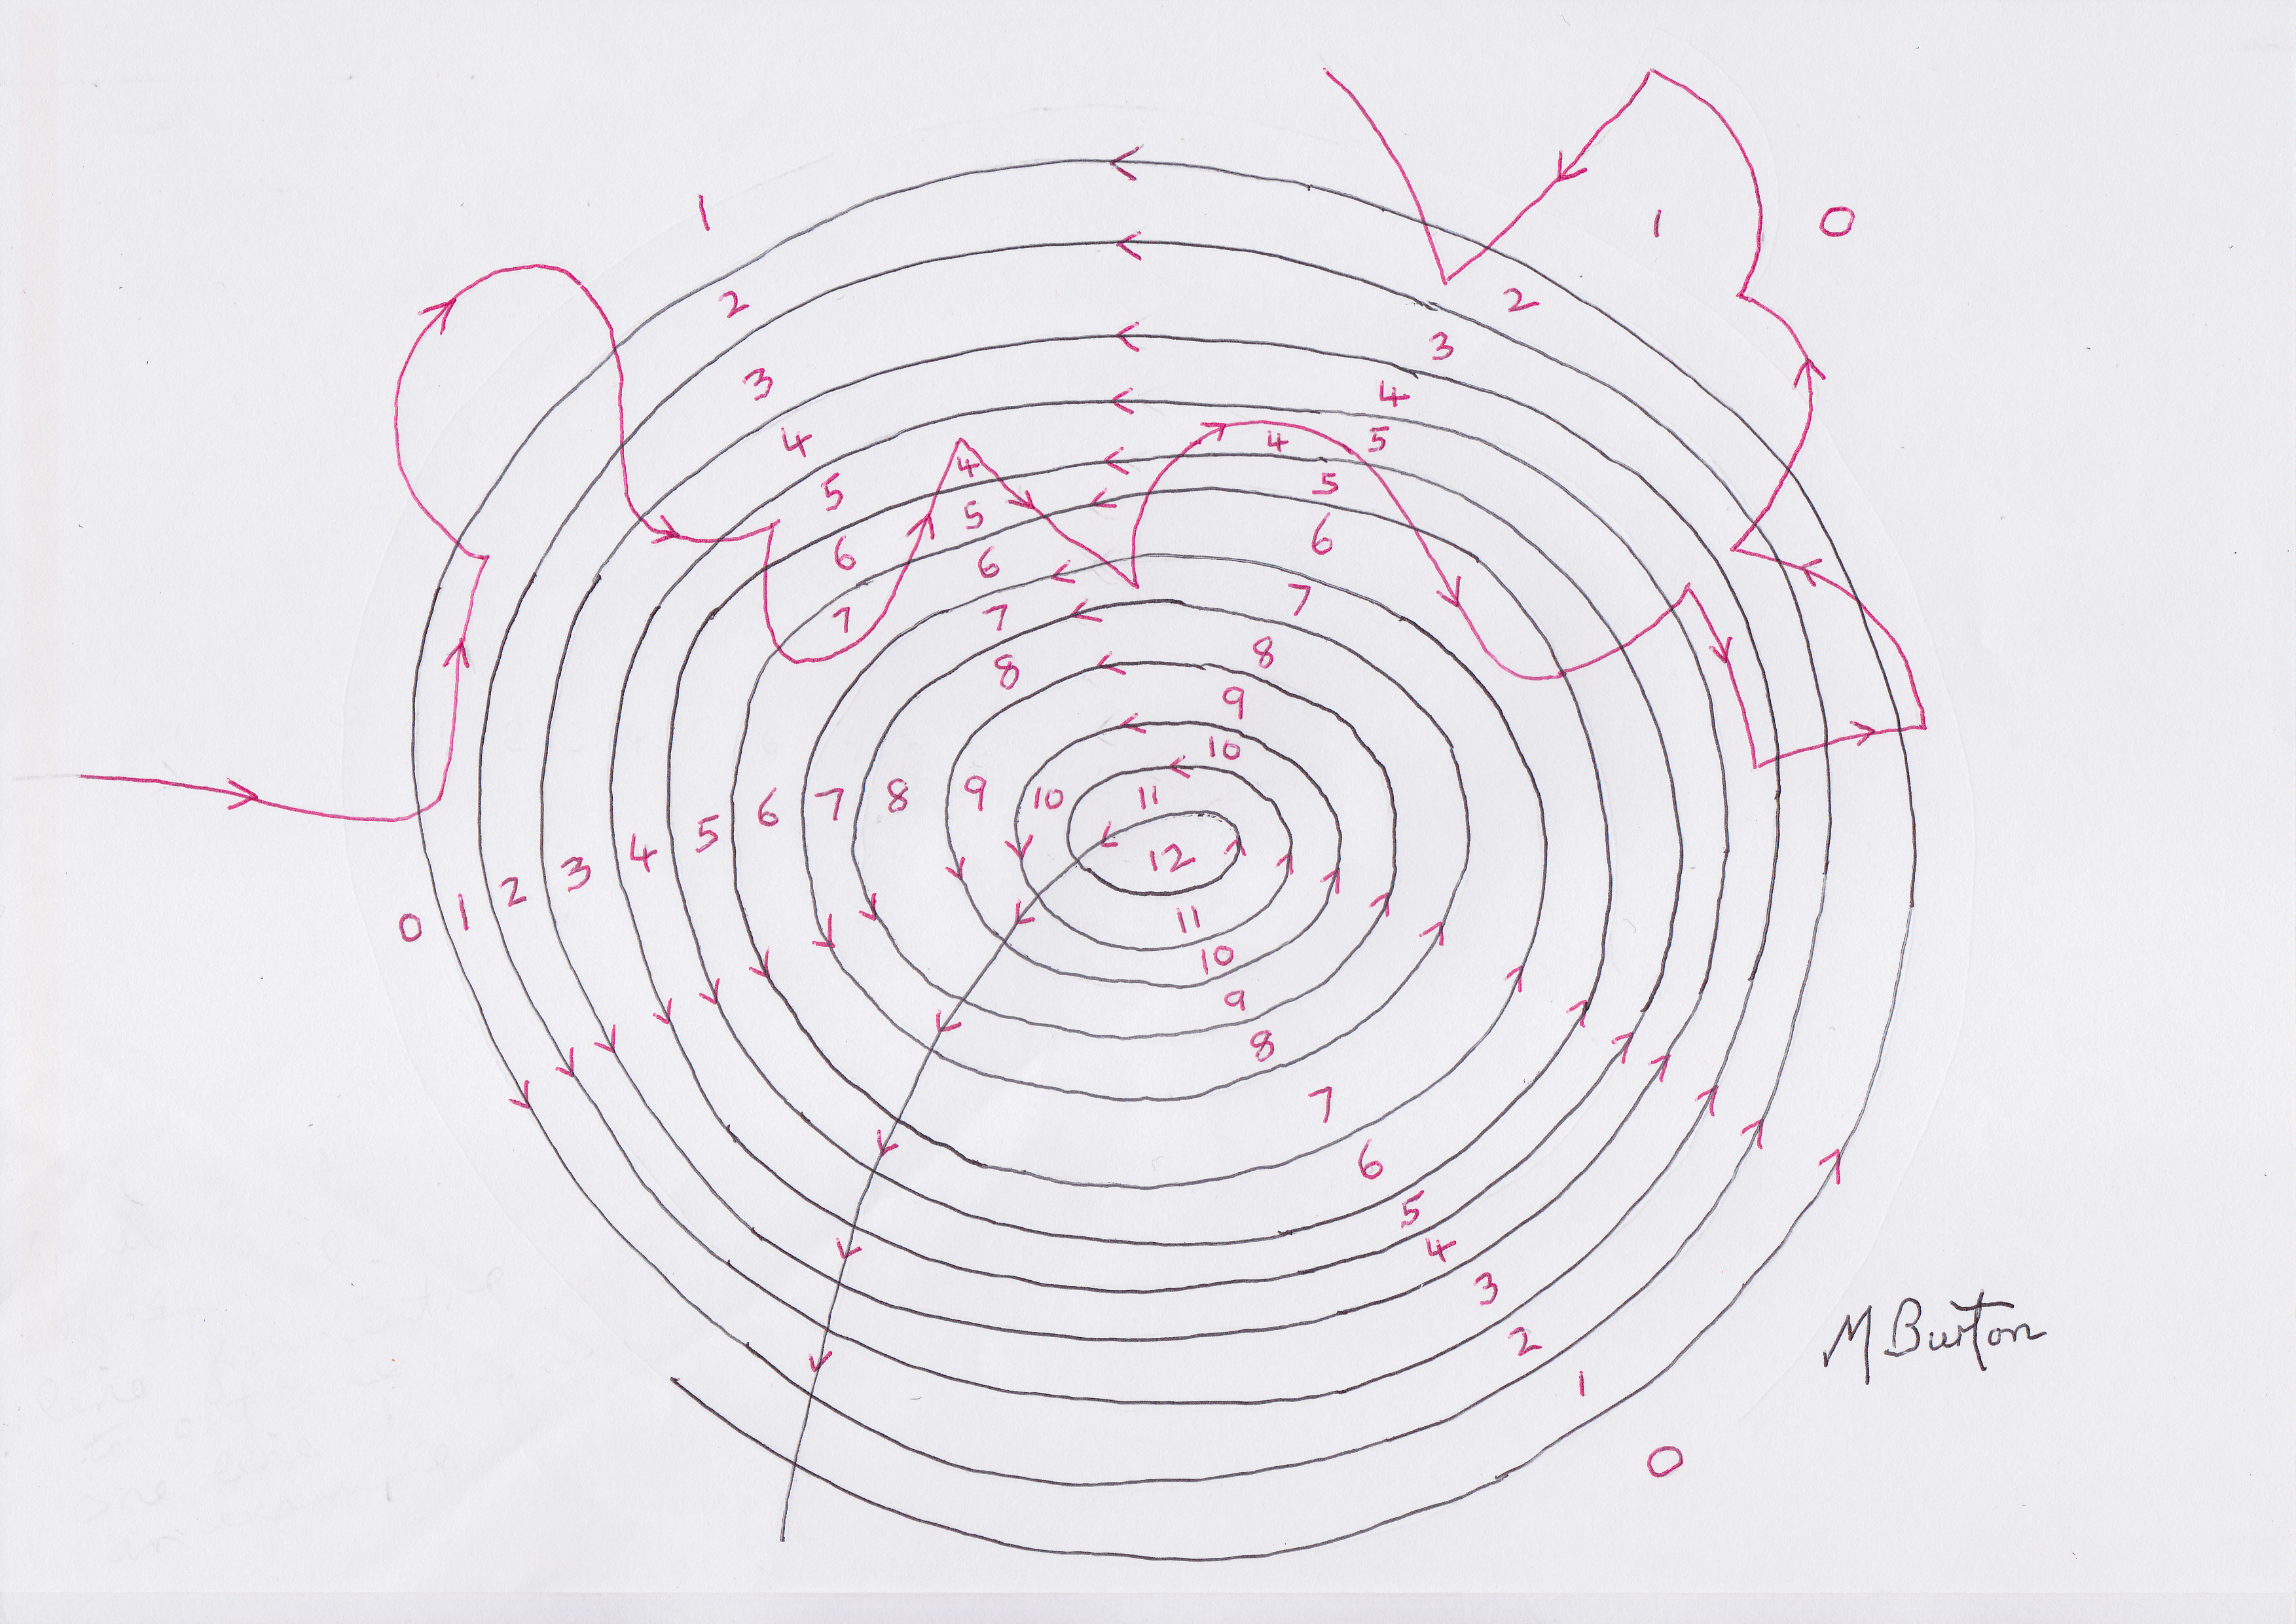
Here is the completed overdraw. It can be seen that some decisions still only trigger one or two overdraws, but decisions 5 and 7 triggered 13 and 12 overdraws respectively. There are 80 junctions in the design and it took 11 decisions to complete the overdraws.
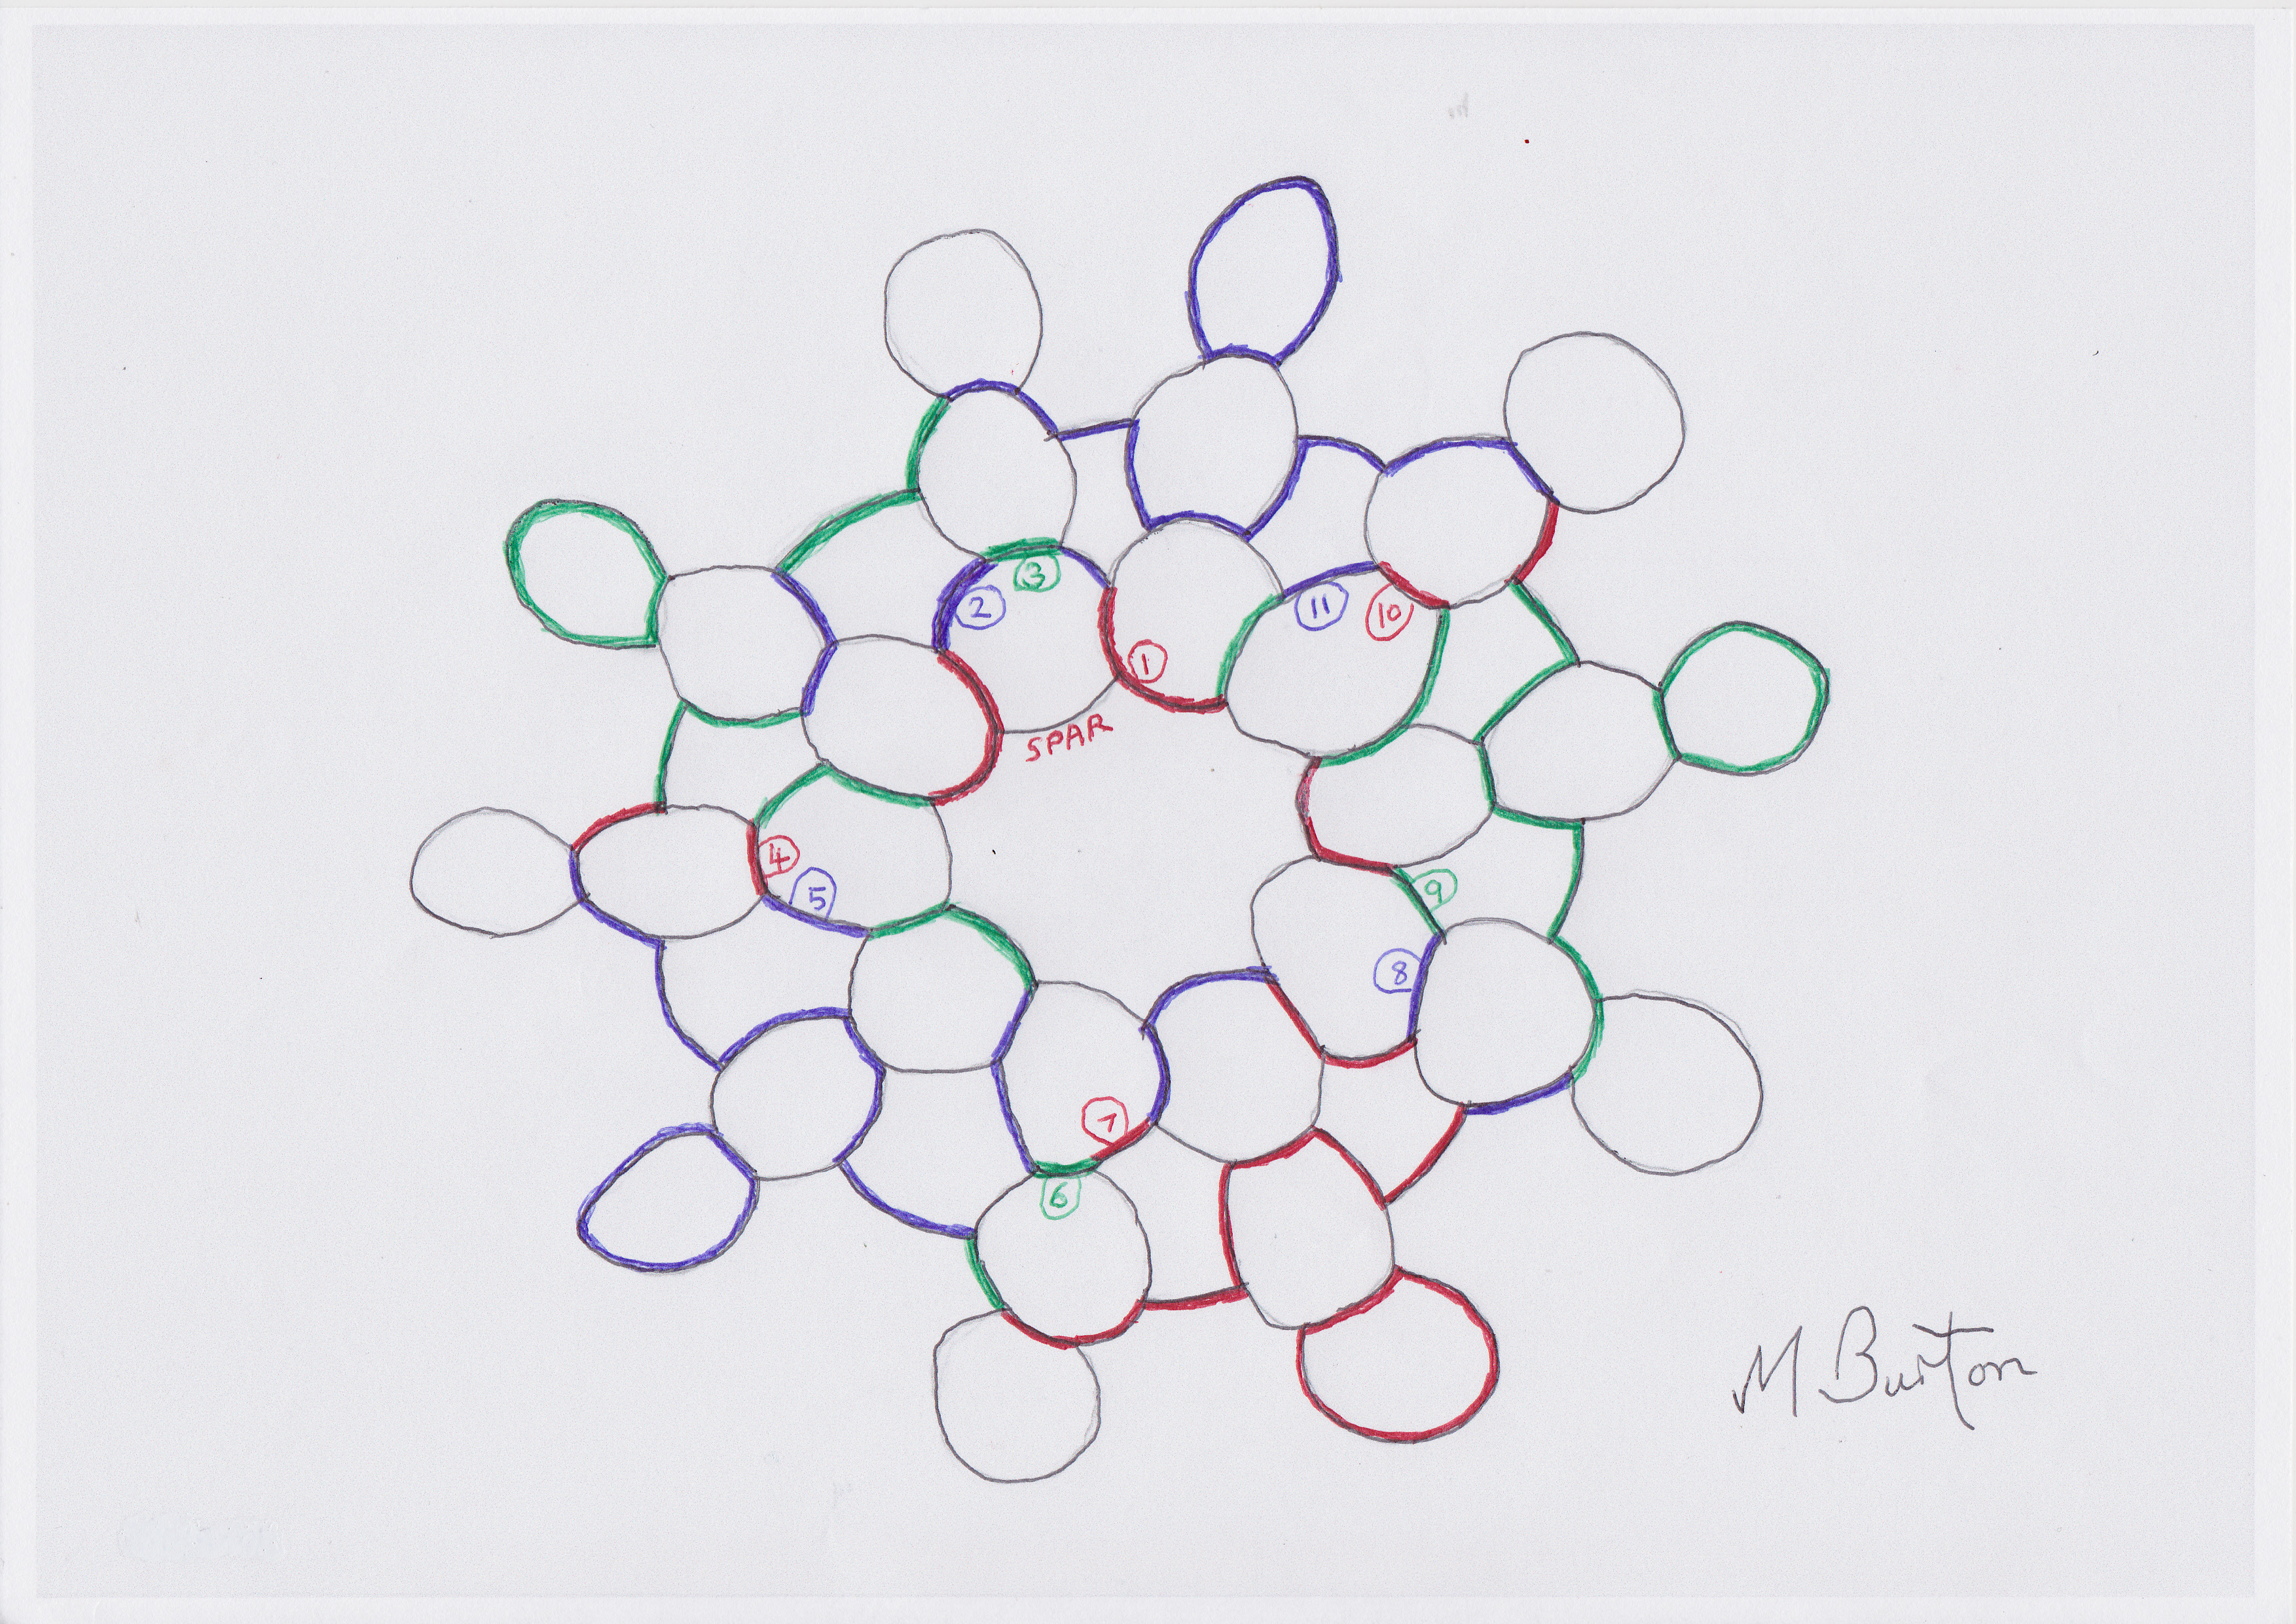
completed Four Colour Theorem overdraw, on design based upon Skydivers formation design. Mick Burton, continuous line artist.
The completed overdraw has several continuous overdraws. I tried other variations but had to accept that this design cannot be overdrawn with a Single Continuous overdraw. This is due to the design having basically only two full rings of circles, which means that some tips of petals cannot be included in a continuous overdraw.
Continuous lines overdrawn on Skydiver formation design, using Four Colour Theory method. Mick Burton
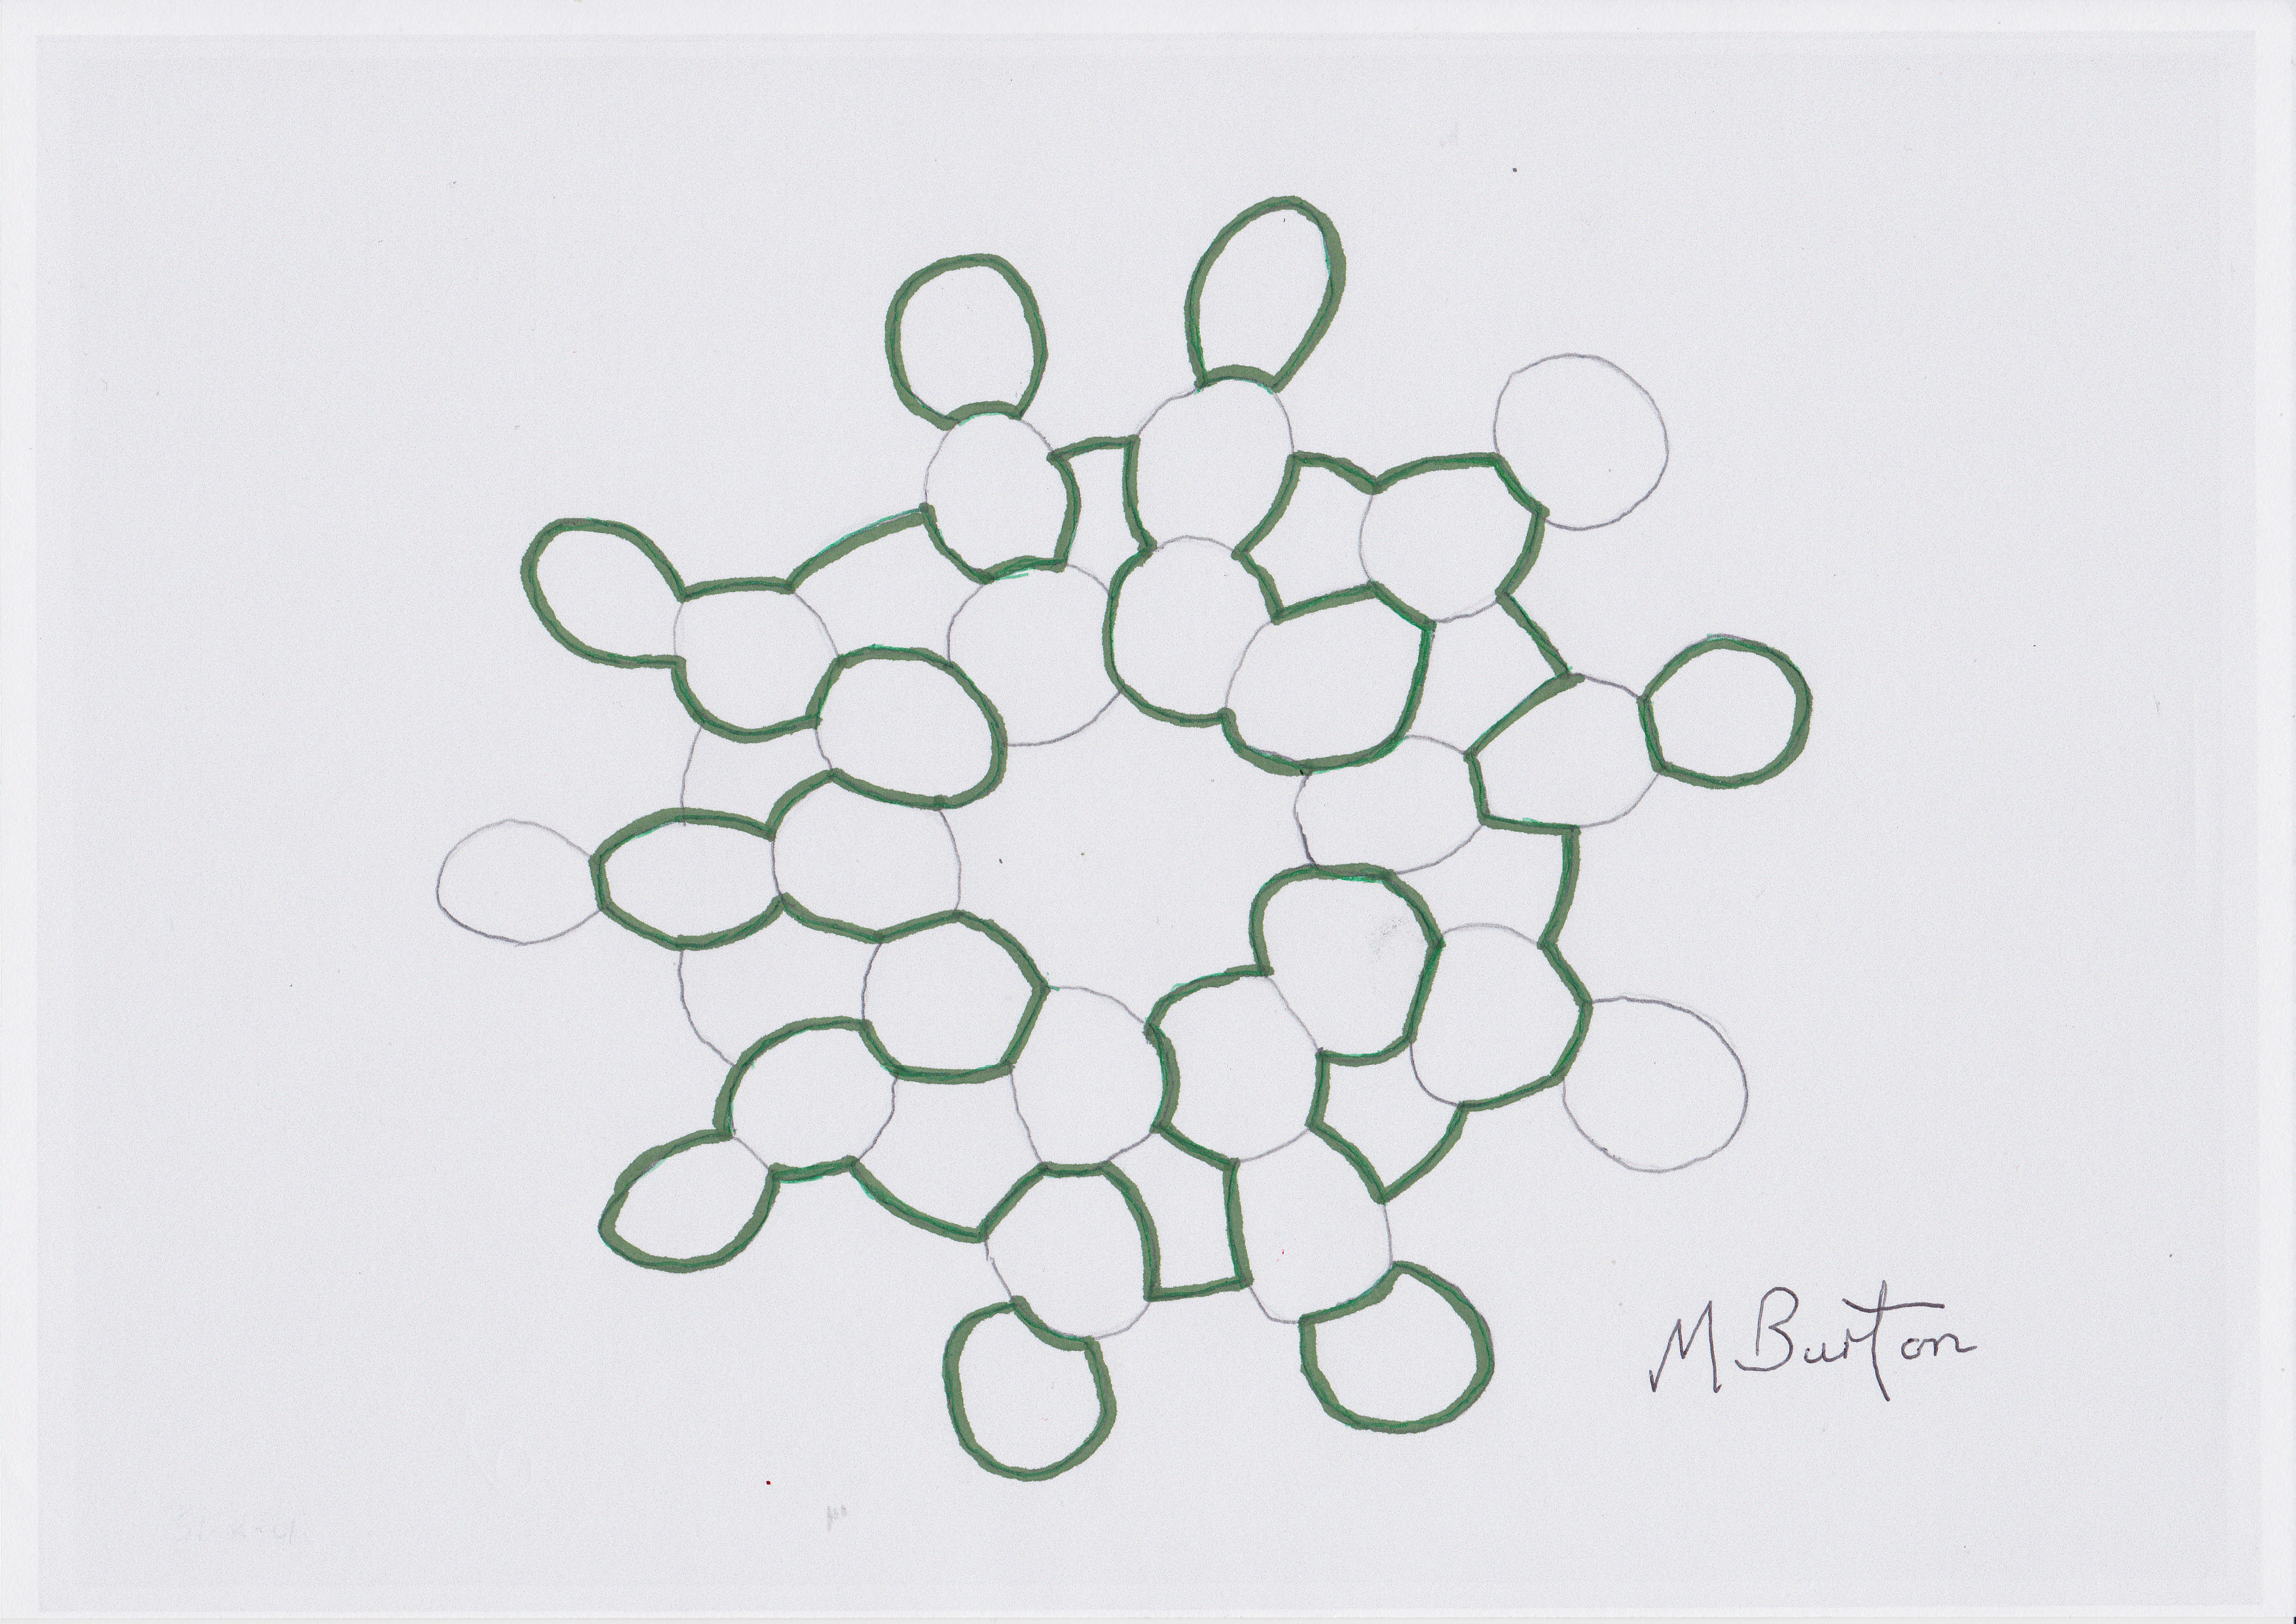
This situation can be overcome by adding links between the tips of the petals to produce that extra ring of areas. Here is the expanded design and the stages of overdraw. I managed to complete the Single Continuous overdraw in one sequence without having to go back to change any decisions.

Increased size design with successful Single Line Overdraw using Four Colour Theorem method. Overdraw decisions shown. Mick Burton.
Of course it looks better with one solid colour overdraw and no decision numbers.

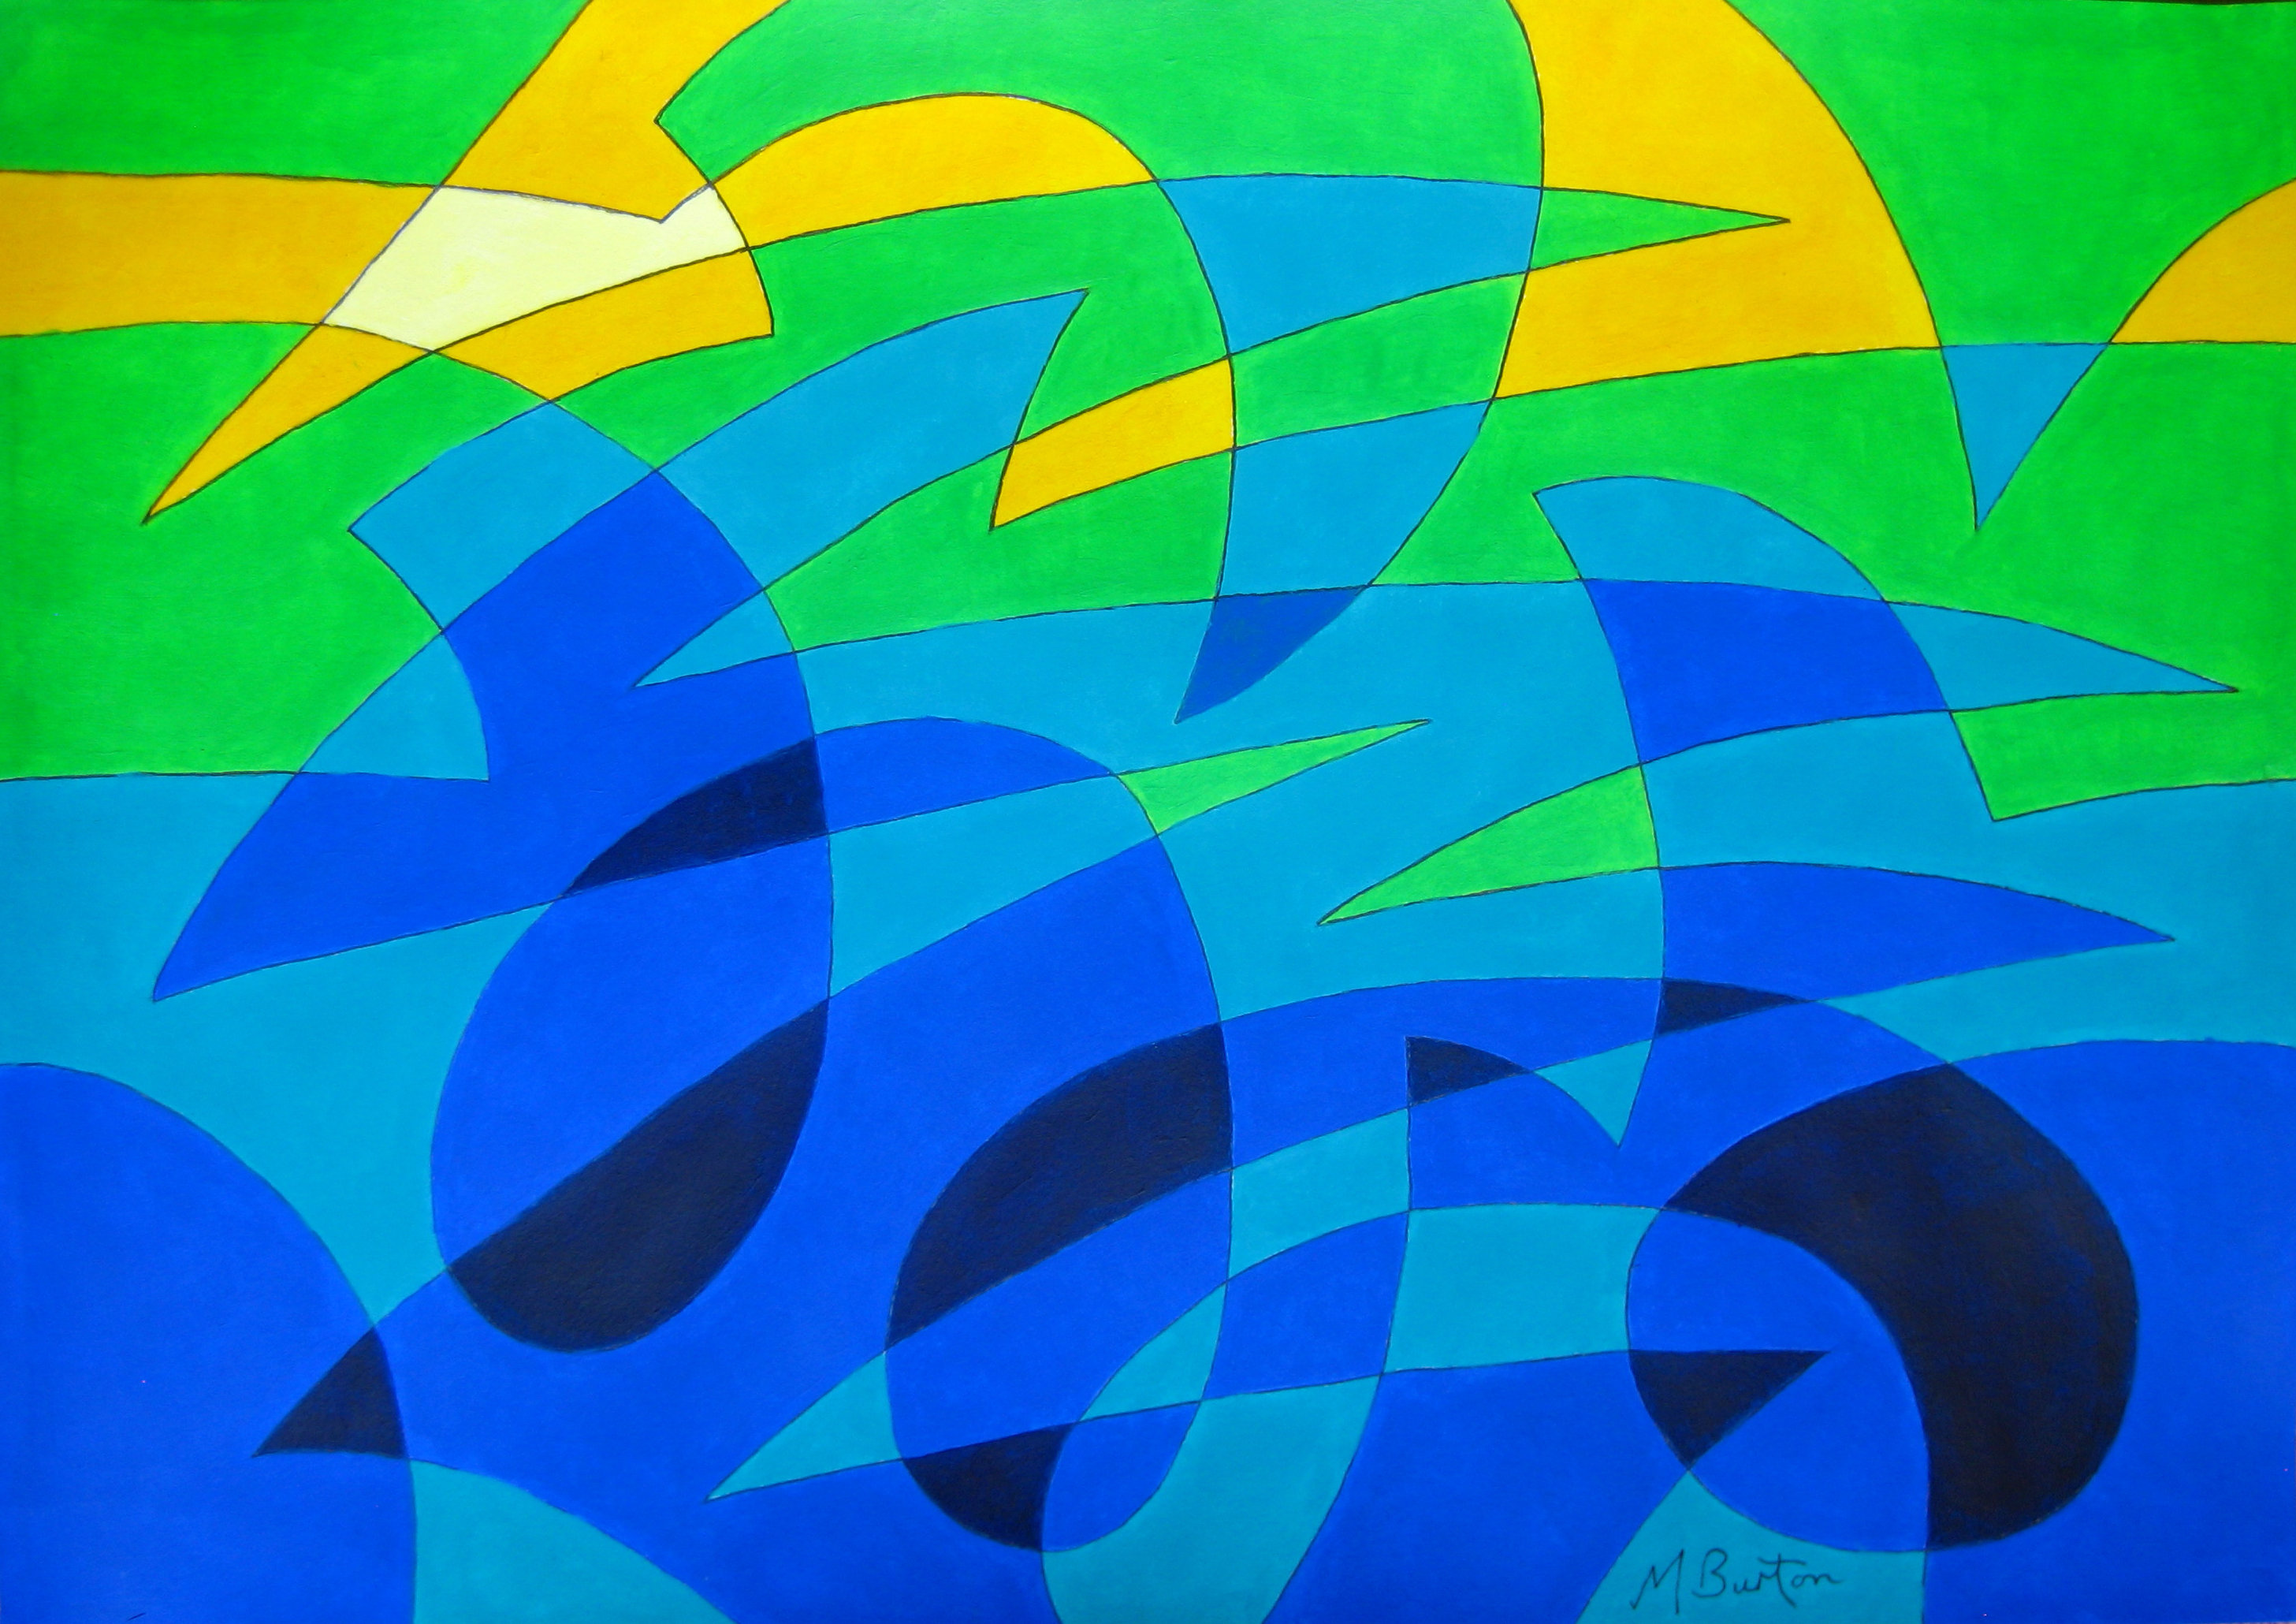
Skydiver formation design with links between out petals completed, overdrawn with a Single Continuous Line using Four Colour Theorem method. Mick Burton.
I have said that the method of overdraw was developed with Four Colours in mind, and so you could use one pair of colours alternately within the above overdraw and another pair of colours on the outside of the overdraw (which can include the background).
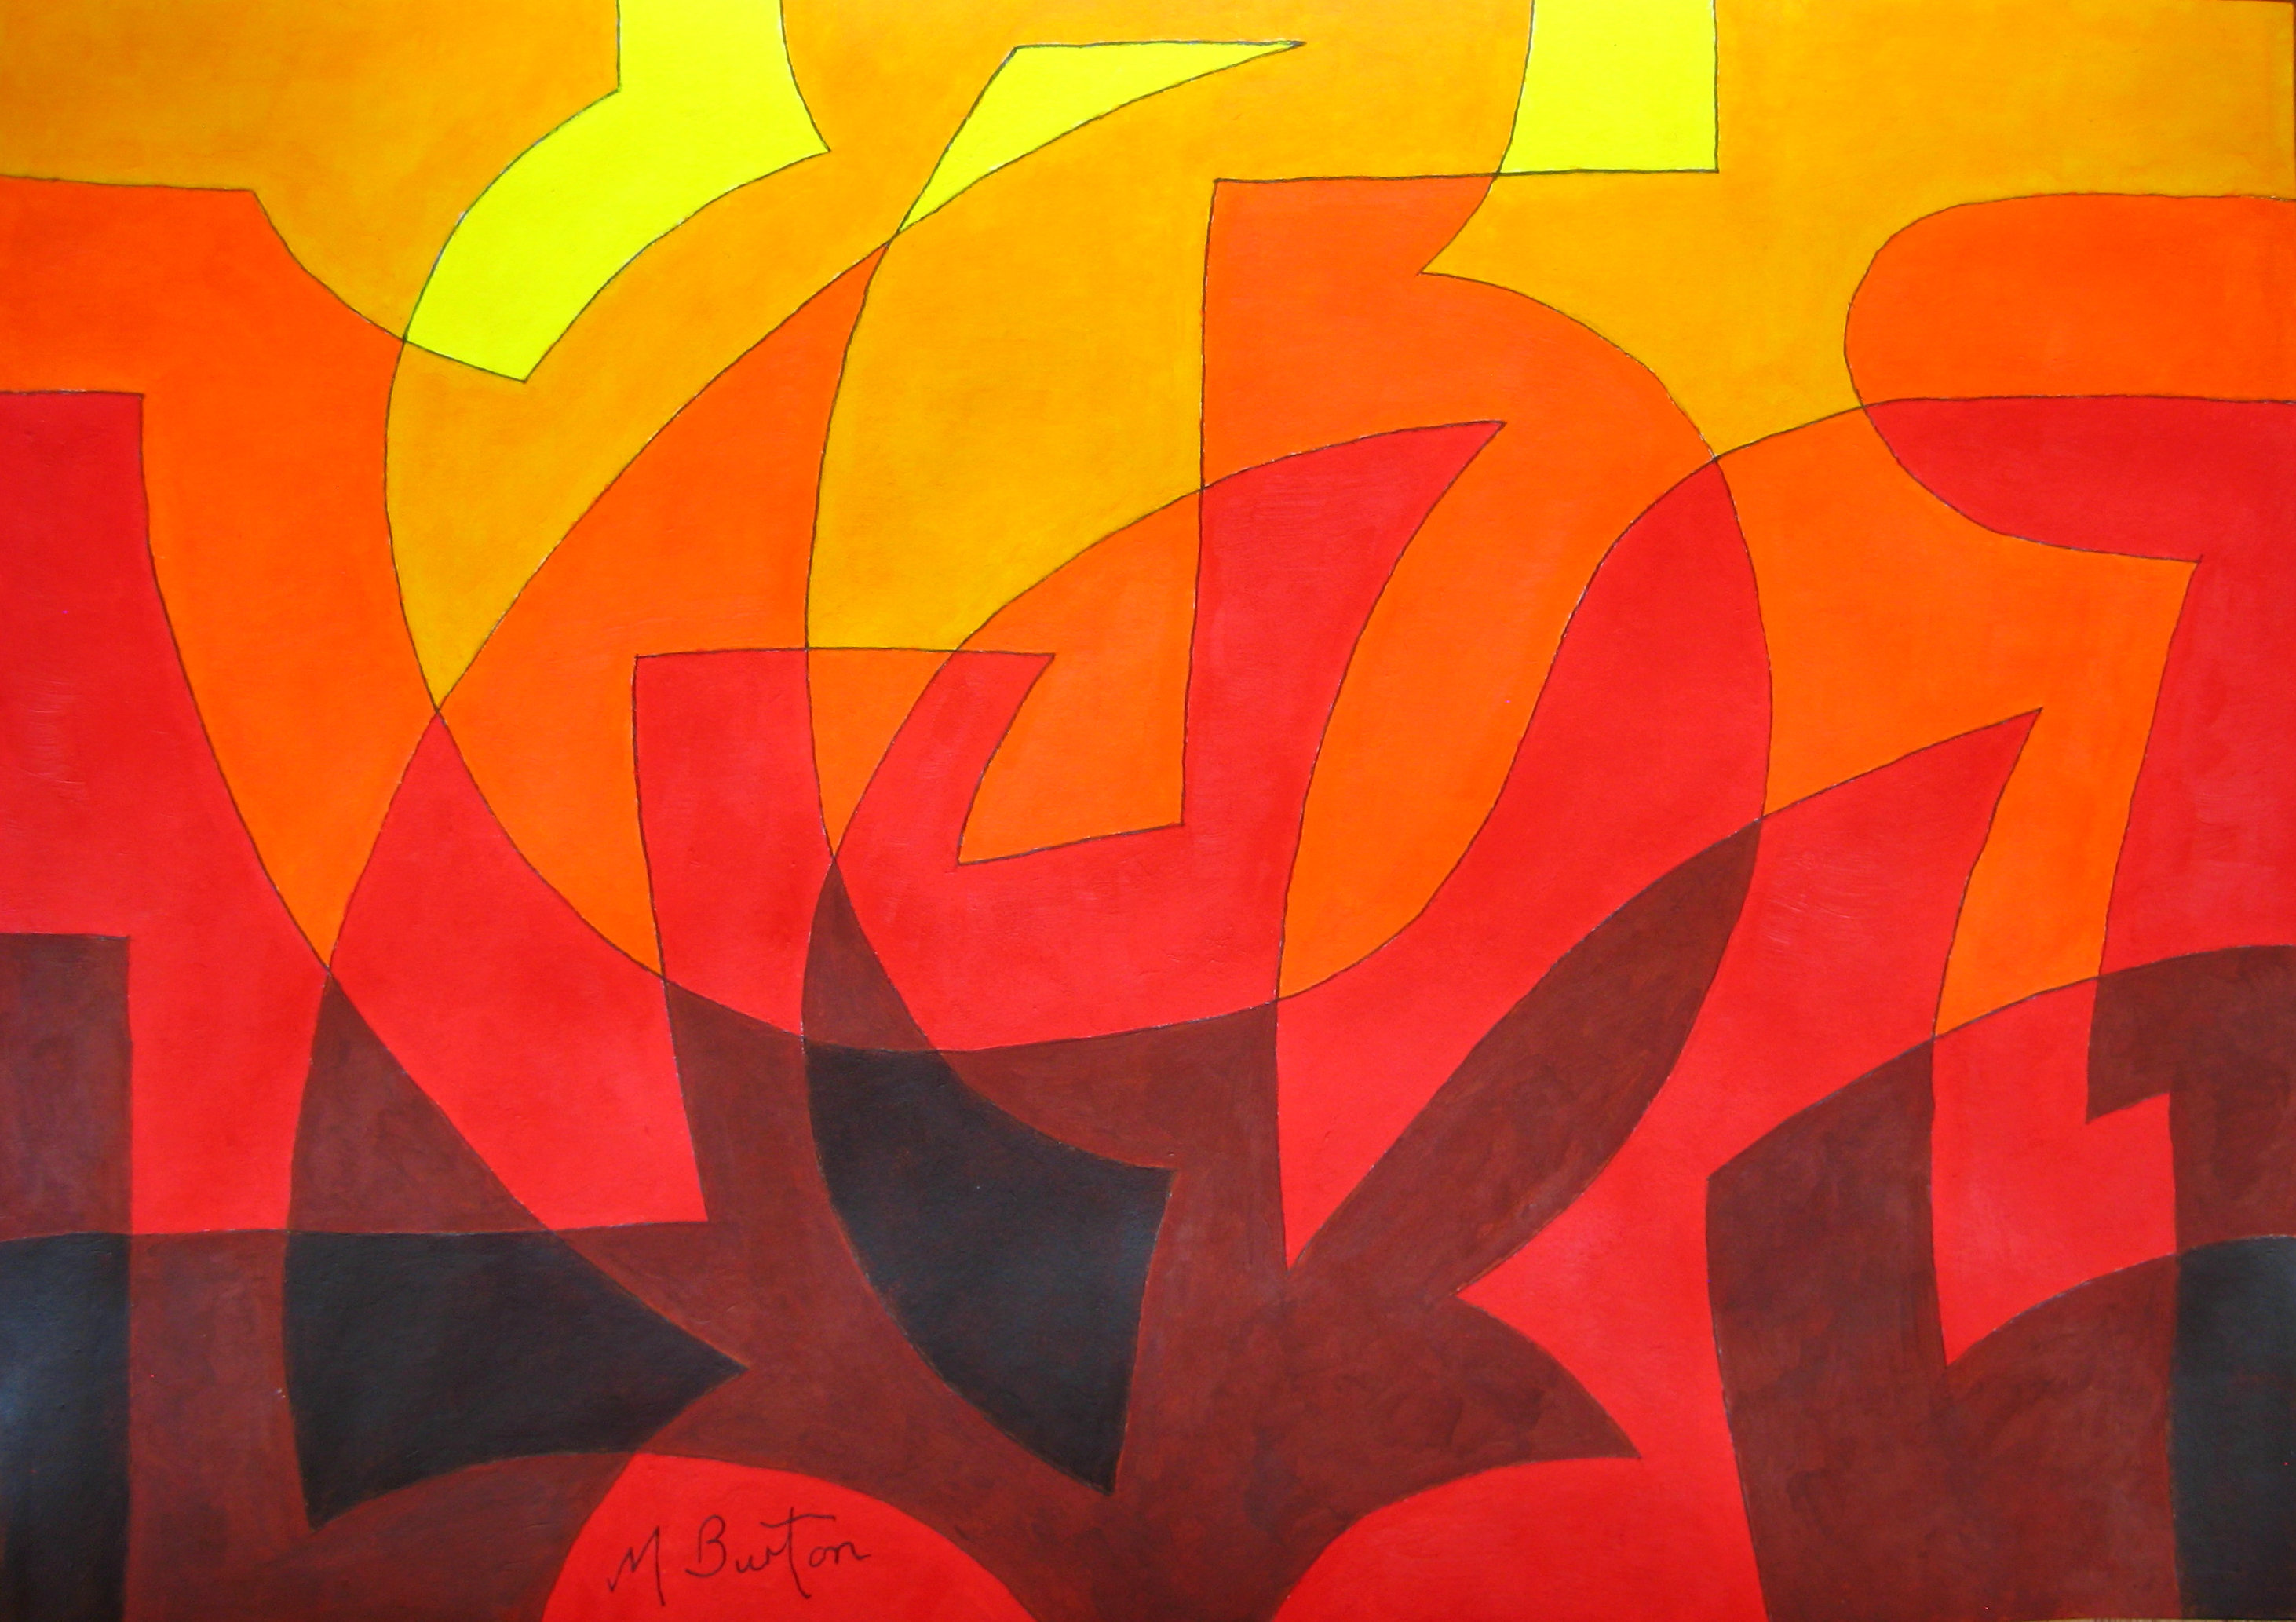
I have found another interesting result in that if you use strong colours inside the overdraw, as it is the main image, and neutral colours outside (or even leave the outside blank) then the gaps between the “petals” show good use of space. Here is the design simply coloured in strong red inside the overdraw, which creates a good contrast as the background seeps in.
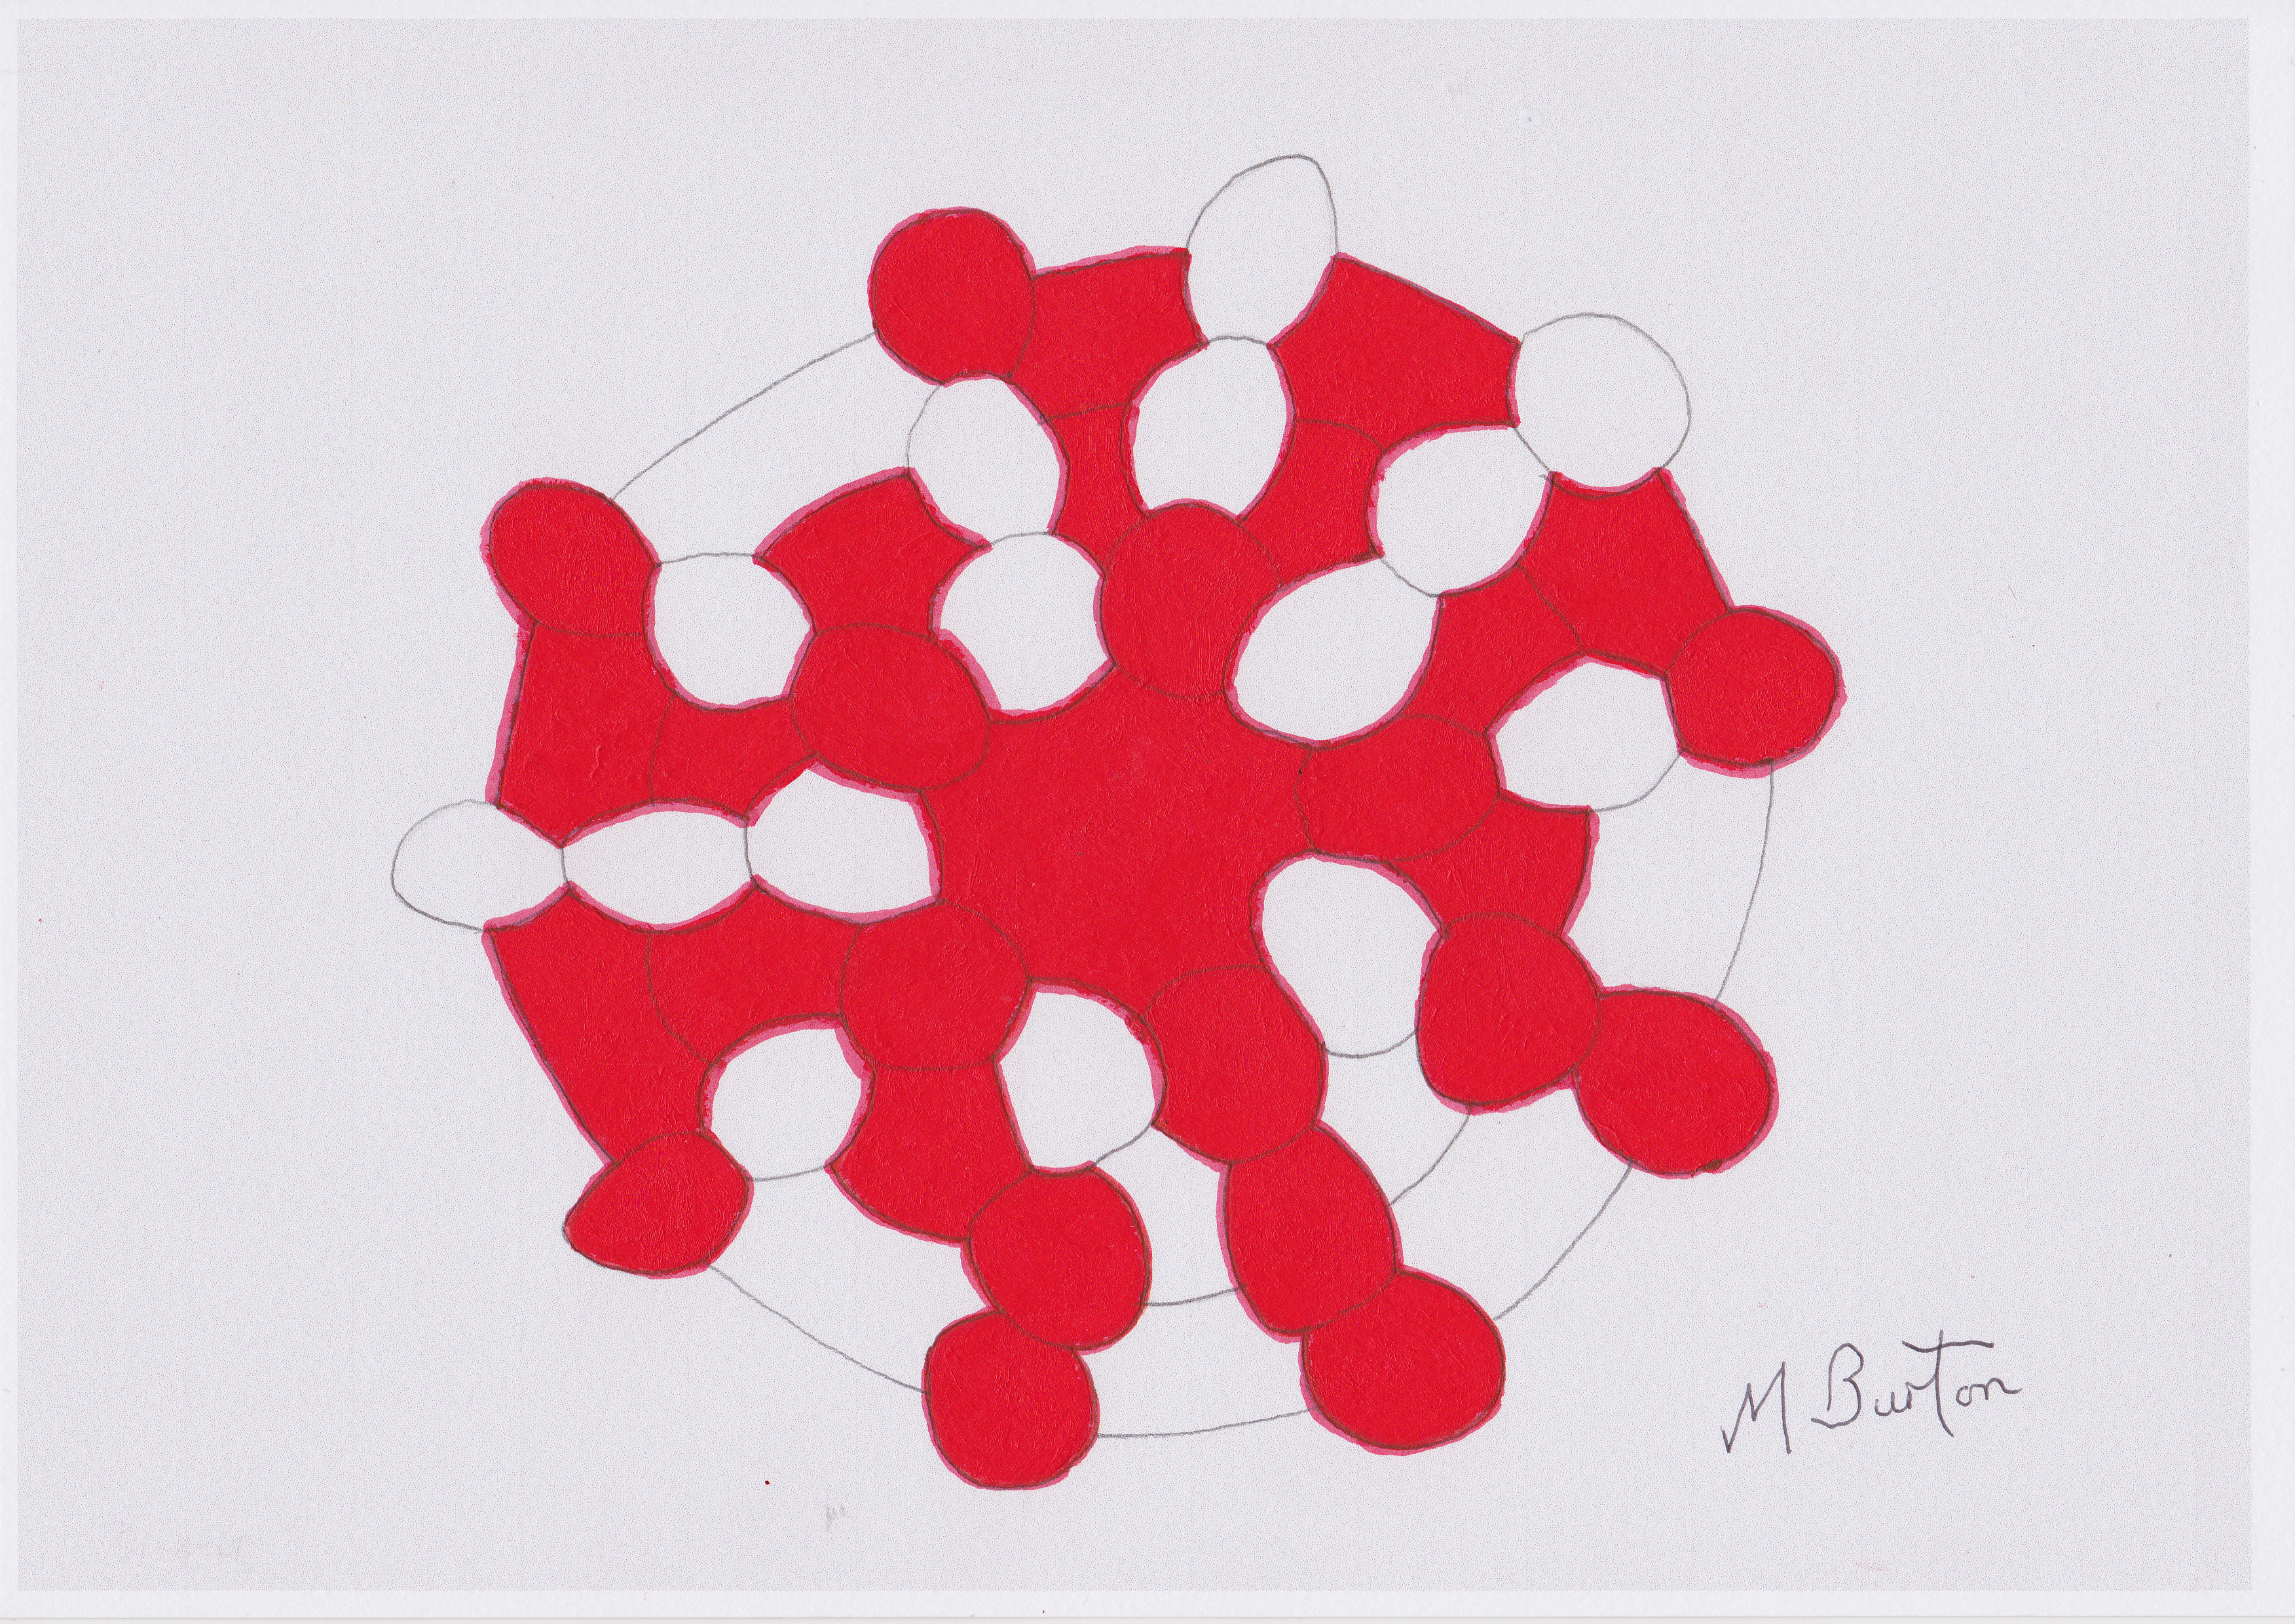
Solid colour within single continuous overdraw, with Four Colour method, showing good use of space. Mick Burton.
The chains of areas produced by the continuous overdraws can be coloured, not just in two pairs of colours to demonstrate Four Colours, but with a colour sequence or a mixture of sequence, alternate colours or even one colour. In the last picture I have used colour sequence on main chains of areas related to the central space and, as a contrast, light grey on the chains connected to the outside of the design.
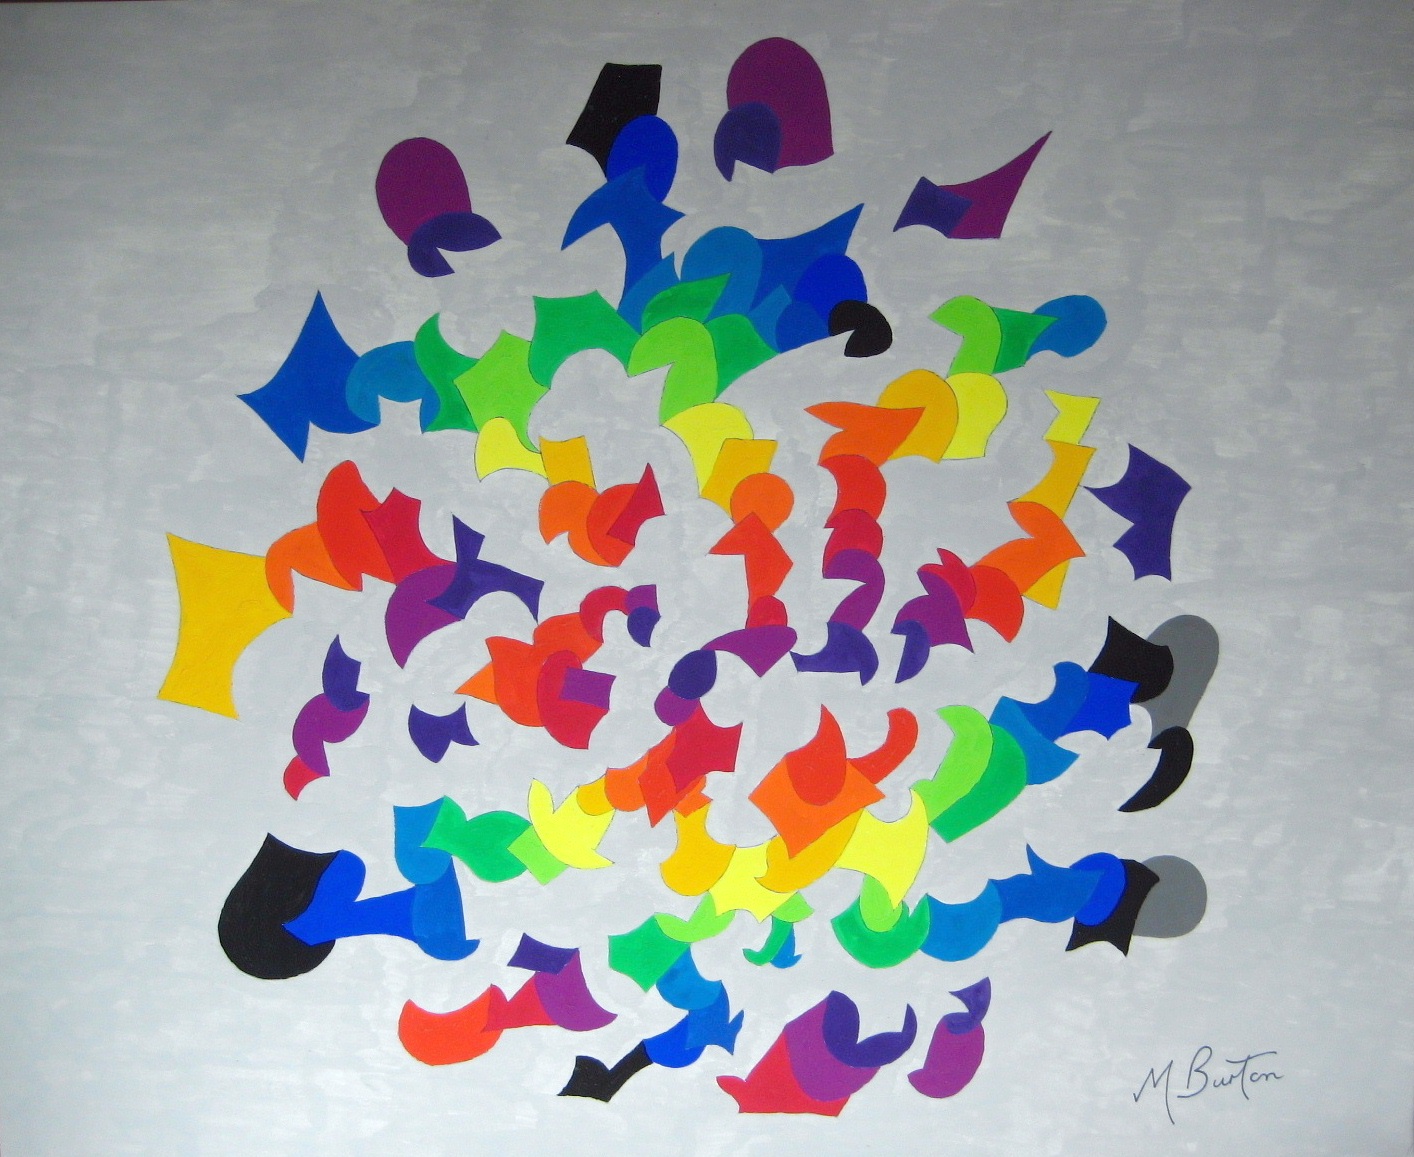
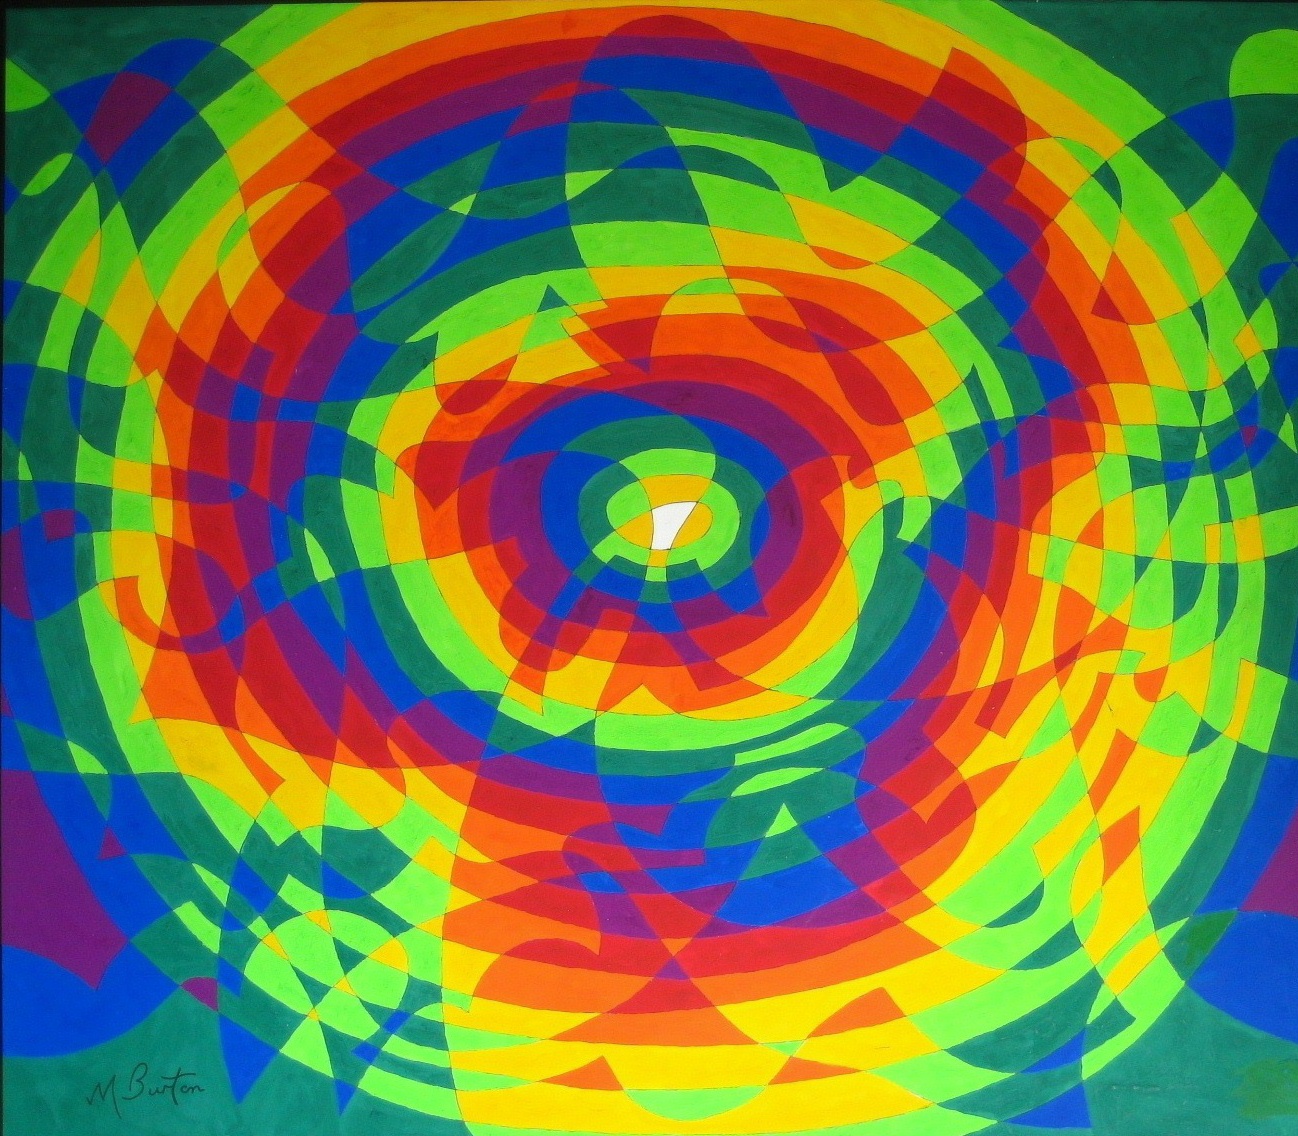
Star Burst. Four Colour Theorem applied to a map of shell shapes wound round from the centre. Rainbow sequence of colours. Mick Burton, 1971
This is one of the first paintings that I produced after discovering my Four Colour Theorem overdraw in 1971. I called the picture “Star Burst”, one of my first planetary pictures.