Tag Archives: Continuous Line

Twisting, Overlapping, Envelope Elephant. Continuous Line Drawing colouring.

“Fluorescephant”, the original version of “Elephant Grass” which is at the top of this continuous line blog, was my first successful Colour Sequence painting.  The sequence ran from yellow through greens to blues in steps of colour and tones which gave a natural three dimensional effect and dynamism.  Part of this was the overlapping nature of continuous lines which was reflected by the successive darker colouring.

The painting was accepted for the International Amateur Artist exhibition, in Warwick Square London, in February 1973 and then a month later in the National Society annual open exhibition in the Mall Galleries.

Fluorescephant. Continuous line drawing with colour sequence. National Society Open Exhibition, Mall Gallery, London, 1973. Mick Burton.

Fluorescephant. Continuous line drawing with colour sequence. National Society Open Exhibition, Mall Gallery, London, 1973. Mick Burton.

I was never totally happy with the colouring.  I thought that there was an extra natural effect, on top of the overlapping, which I was missing.  When I started my art again in 2012, after a gap of nearly 40 years, I once more tried to sort this out.  I realised that I could enhance the twisting of the design and highlight gaps where the outside would show through.

Here is the result, “Twisting, Overlapping, Envelope Elephant”.  Imagine that the continuous lines are describing a sheet of plastic, which is coloured Blue on the front and Red on the back.  Each time a twist occurs, against the outside background, then I colour it Red.  When the overlaps build up, the shades of the blue front go darker blue, and the shades of the twisted areas become darker red.  Where the blue front and the red back occasionally overlap, then I use violet to reflect the mix.

This continuous line drawing is coloured to represent a

This continuous line drawing is coloured to represent a “Twisting, Overlapping, Envelope Elephant”, which is Blue on one side and Red on the other. Mick Burton, 2013.

You can see considerable areas of background colour within the animal showing through. This looks natural within the form of the elephant.

The blue areas, including darker blue overlaps, are the same as the blue areas in the “Fluorescephant”, so it is good to keep a large part of the original colour sequence in this change of style.

One Line Drawing cover for Theatre Arts, October 1947, by Doug Anderson

The New Season on Broadway, a one line drawing cover for Theatre Arts magazine, October 1947, by Doug Anderson.

The New Season on Broadway, a one line drawing cover for Theatre Arts magazine, October 1947, by Doug Anderson.

Here is a terrific example of one line drawing by Doug Anderson, on the cover of Theatre Arts magazine in October 1947, which he entitles “The New Season on Broadway”.

Doug illustrates six plays on Broadway and includes the title in each whilst connecting them all up with his one line.  I know I go on about a Continuous Line Drawing starting and finishing at the same point and that it is only one line if it does not, but he starts under the last “e” in Theatre and ends on the left side towards the top, so he could easily have connected them up.

I like his use of small loops throughout, which helps the simplification of most male figures, the snake and the tramcar.  Lady’s dresses have lines stroked back and forth and their hats and hair have more detailed wiggling.  I love the progressive pattern of the window and heads in the tramcar.

Here are some detailed sections.

Street Car Named Desire, detail of The New Season on Broadway, cover for Theatre Arts, October 1947, by Doug Anderson.  One Line Drawing.

Street Car Named Desire, detail of The New Season on Broadway, cover for Theatre Arts, October 1947, by Doug Anderson. One Line Drawing.

High Button Shoes, detail of The New Season on Broadway cover for Theatre Arts, October 1947, by Doug Anderson.  One Line Drawing.

High Button Shoes, detail of The New Season on Broadway cover for Theatre Arts, October 1947, by Doug Anderson. One Line Drawing.

Man and Superman, detail of The New Season on Broadway, cover for Theatre Arts, October 1947 by Doug Anderson.  One Line Drawing.

Man and Superman, detail of The New Season on Broadway, cover for Theatre Arts, October 1947 by Doug Anderson. One Line Drawing.

Antony and Cleopatra, detail of The New Season on Broadway, cover for Theatre Arts, October 1947,  by Doug Anderson.  One Line Drawing.

Antony and Cleopatra, detail of The New Season on Broadway, cover for Theatre Arts, October 1947, by Doug Anderson. One Line Drawing.

How about the cat at the bottom !

Another difference compared to my approach to this style is that I usually think of the possibility of applying colours later. If you look at the lower foot of Antony, the outside space flows in through the foot which would confuse thoughts of colour. Similarly, the lady marked “Medea” to the left of Antony, has the outside flowing in through the bottom left of her dress.

It is interesting that this one line drawing dates from late 1947 and the pen and ink sketch that I have, in the style of Salvador Dali (covered in my post in August 2014), dates from 1948 when Dali was doing similar drawings.  So here it is again, “Guitar Player on a Horse”.

Dali continuous line drawing in pen and ink, guitar player on horse, dated 1948.

Dali continuous line drawing in pen and ink, guitar player on horse, dated 1948.

Sod’s Law tempered by Nature in Action

I have been improving the lawn.  A bit of filling a deeper area with soil and re-seeding.  It took a few weeks and the green grass had appeared and it looked good.

At this point, the roofer came to re-cover the top of the back bedroom bay window.  We first asked a builder friend of ours to do the job last autumn and he said that his business partner was a roofer and he would do it.  We had to get rid of the wasps first.  Then there were delays due to the frost – the resin reacts badly to frost.  We kept chasing and then a third person was now going to do the job.  Finally I rang my friend, who was upset at his associates for letting us down.  Later that day the third person rang and he would do the job in two days, and actually arrived (I found out later the gist of the conversation that had taken place, builder to builder ! ).

He brought two young blokes who actually did the job.  They had not been up on the roof long when I noticed a white plastic lid spinning down from the roof.  It landed slap bang in the middle of my newly seeded grass, which was about 10 yards from the house, inside downwards.  I told the lads and one dashed down the ladder to grab the lid back, saying that “everything would be ok”.  They completed the job and went.

Three days later we looked out of the bedroom window and saw a round white patch in the middle of the newly seeded area of lawn.  The grass blades had all turned white.

White patch on newly seeded area of lawn, caused by resin from roof.  Mick Burton photo.

White patch on newly seeded area of lawn, caused by resin from roof. Mick Burton photo.

We realised that although the resin may be vulnerable to frost it could be lethal to grass.  At the time I was reading a book entitled “Sod’s Law”, sub-titled “Why life always lands butter side down”.  I was also reading a book I had borrowed called “Time” by the nature and landscape sculptor Andy Goldsworthy.  He sets up sculptures in natural surroundings and watches how they cope with the elements.  In his early days it might be a “frost shadow” or a continuous line drawn with a stick on the beach.  I wondered whether Sod’s Law or nature would win in the battle for my new grass.

“Sod’s Law” by Sam Leith, Atlantic Books.

Two days later, Joan called me to the window.  Standing in the middle of the white patch on the lawn was our local blackbird.  It had brought a piece of bread and had dropped it.  He spent 10 minutes on the patch pecking away.  Had the resin lured all sorts of bugs and worms to the surface?  Could I class this as another of my Black and White creations?

Blackbird standing in white patch for 10 minutes, finding all sorts of treats.  Mick Burton photo.

Blackbird standing in white patch for 10 minutes, finding all sorts of treats. Mick Burton photo.

The blackbirds have been busy recently. They built a nest behind the small willow under the eves of the garage 10 feet from the kitchen window.  We were looking forward to the view of the chicks, but next door’s cat kept sitting on the garage roof just above the nest.  So they built another nest in the holly bush higher up the garden.

The blackbirds always provide much entertainment.   Last year we saw one fill its mouth full of worms in the front garden.

Blackbird last summer with a mouth full of worms.  Mick Burton photo.

Blackbird last summer with a mouth full of worms. Mick Burton photo.

Rhinoceros and Ostrich continuous line drawings

Rhinoceros, continuous line drawing with colour sequence.  Based on Mick Burton demonstration.

Rhinoceros, single continuous line drawing with colour sequence. Based on Mick Burton demonstration.

I did a demonstration and workshop at Horsforth Arts Society, in Leeds, in January 2015.  It was a freezing evening and I parked outside in a narrow back street.  This club is an end terrace house, extended into the next house I think, and they have sole use.  No one had arrived, but I was encouraged by a notice in the window “Demonstration of Continuous Line Drawing by Mick Burton at 7.30pm”.  Shirley, who arranged demonstrations, arrived but could not unlock the door.  I managed to open it.

So we were in and I could cart all my kit and pictures up the stairs and decide on my set up.  Joan came with me to help and the room soon filled up with friendly, expectant, members.  Shirley had seen me demonstrate at another club and gave an encouraging introduction.

After showing several pictures of my animals, mentioning a bit about my past and going through the basics of how to do a continuous line animal, it was time to do my first drawing before the members had a go themselves.

Firstly I put my key marks on a sketched Rhinoceros, showed how to join up the marks in the main areas such as the head and legs and asked the members to start on their own subjects whilst I connected up more lines.  I completed a rough and ready version of the Rhino, which a few weeks later I spruced up and added colours as above.  It is in the Harrogate and Nidderdale Art Club spring exhibition this weekend.

The members of the club completed pictures of animals or people with lines, but with a great variety of styles.  I did not insist on complete continuous lines, as the main idea was that their drawings could flow, and many good results emerged.  Several coloured in their creations.

Whilst they continued with their pictures, or started new ones, in the second half I started an Ostrich.  I did the head and neck and put some key marks elsewhere and invited members to come up and have a go at parts of the ostrich with my thick marker pen.  Several did and we arrived at the result below.  It has about three different lines going and a few dead ends.  This is fine at an early stage of my continuous line drawings, before loose ends are then connected up and one continuous line arrived at along with modifications to pattern and smoothing.

Ostrich continuous line, demonstration drawing by Mick Burton, with the assistance of members of Horsforth Arts Society.  January 2015.

Ostrich single continuous line drawing, demonstration by Mick Burton, with the assistance of members of Horsforth Arts Society. January 2015.

I thanked them for their help and in later weeks produced the picture “Ostrich Egg” below.  It has two continuous lines, one of which is the coloured Egg.

Ostrich Egg, continuous lines.  Based on Mick Burton demonstration.

Ostrich Egg, single continuous line drawing. Based on Mick Burton demonstration at Horsforth Arts Society.

A black pen version of the Ostrich is currently in the Association of Animal Artists annual exhibition.

I quite like including eggs in pictures.  “Harriet’s Busy Day”, which now resides in Worcestershire, was a finalist in Britain’s Got Artists in July 2012.

Harriet's Busy day.  Continuous line with colour sequence.  Background based on eggs.  Mick Burton, 2012.

Harriet’s Busy day. Single continuous line drawing with colour sequence. Background based on eggs. Mick Burton, continuous line artist 2012.

 When I showed the Hen picture to my sister Wendy she said  “Why have you stuck all those eggs to the ceiling”.

Escher Islamic Mosaic Continuous Lines, Create and Change Border. STAGE 4.

A key part of the Mural Mosaic tile painting by Escher in 1922, is that he has included the Border in detail. The Border gives an indication of what happens to the lines when they hit the sides and where they feed back into the design. In the quarter section detail of the mural below you can see marks on the Border.

A line leaving the design either joins the border (so that you can follow where it goes) or goes under the border (and you can deduce where it re-emerges).  It is not easy to work all these paths out at first, but there is a logic to it.  If in doubt between two choices, one of them usually has a clear answer leaving only one option for the other.  Another aid to us is that each side of the Border is identical in the same direction around the design, so if the marks are not clear on one side you can check at a corresponding point on another side.

Detail to show Border. Escher mural mosaic in the Alhambra. WikiArt. Mick Burton study.

Detail to show Border. Escher mural mosaic in the Alhambra. WikiArt. Mick Burton study.

.
When I first started this research I did a basic hand copy showing all the lines hitting the sides and then showed each one as a loose end outside the square.  I then studied the border on the Mosaic to work out how all the loose ends should be joined up and charted them – this initial chart was in STAGE 1, and I show it again at the end of this post.

That was relatively easy, observing the result of what artist had done.  The hard bit is working out  from scratch which loose ends to tie up to produce continuous lines in a way which would still enable the colours to be allocated by the Alternate Overdraw (or equivalent process used by the artist).

According to Eric Broug in his demonstration video’s, the tile rectangle containing the design would be selected out of a larger pattern area.  In my own art, when I have drawn a large continuous line pattern and completed the Alternate Overdraw (so that I know the colour sequence everywhere) I can pick out a small section to display which of course already has the Alternate Overdraws.  Similarly, the Islamic artist producing the Mosaic would know the full colouring etc for the tile section.

I show below the design with all the loose ends and Alternate Overdraws in Red.  At this stage the artist would not know how many continuous lines would occur in the tile section on its own.  He will have also needed to produce a straight edge on the corners and other parts of the perimeter to block unwanted lines which encroached from the outside pattern.

Section of larger pattern with Alternate Overdraws and loose ends showing whether overdrawn. Mick Burton study.

Section of larger pattern with Alternate Overdraws and loose ends showing whether overdrawn. Mick Burton study.

You will see from the loose ends that half of them are overdrawn in Red and half not. If you connect up pairs of the overdrawn, and pairs of the not overdrawn, loose ends then there will be continuous lines throughout the design and the Alternate Overdraw Template will be unaffected. If I connect up the not overdrawn pairs around each corner of the design, then working along the sides both overdrawn pairs and not overdrawn pairs work out consecutively. This matches the line direction message in the Border on the Mosaic design.  Here is a chart (previously in STAGE 1) showing all the loose end connections.  We know from STAGE 1 that there are two continuous lines, which makes the case strong regarding the artist using Alternate Overdraw, but it would not have mattered if there were more than two.

Escher Islamic Tile. Basic line structure, with border connections. Mick Burton continuous line study.

Escher Islamic Tile. Basic line structure, with border connections. Mick Burton continuous line study.

Having looked at Borders in detail, that prepares us for the final STAGE 5 where I show how we can turn this into a Single Continuous Line design.  

I will also give you my opinion on what the original Artist thought about a Single Continuous Line and why I think he is definitely an Artist and not just a craftsman.

Mick Burton Continuous Line Blog.

Colour Sequence Allocation on Escher Islamic Mosaic Continuous Lines, STAGE 3.

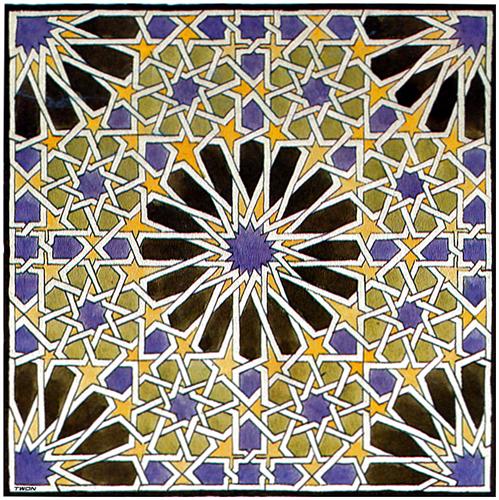
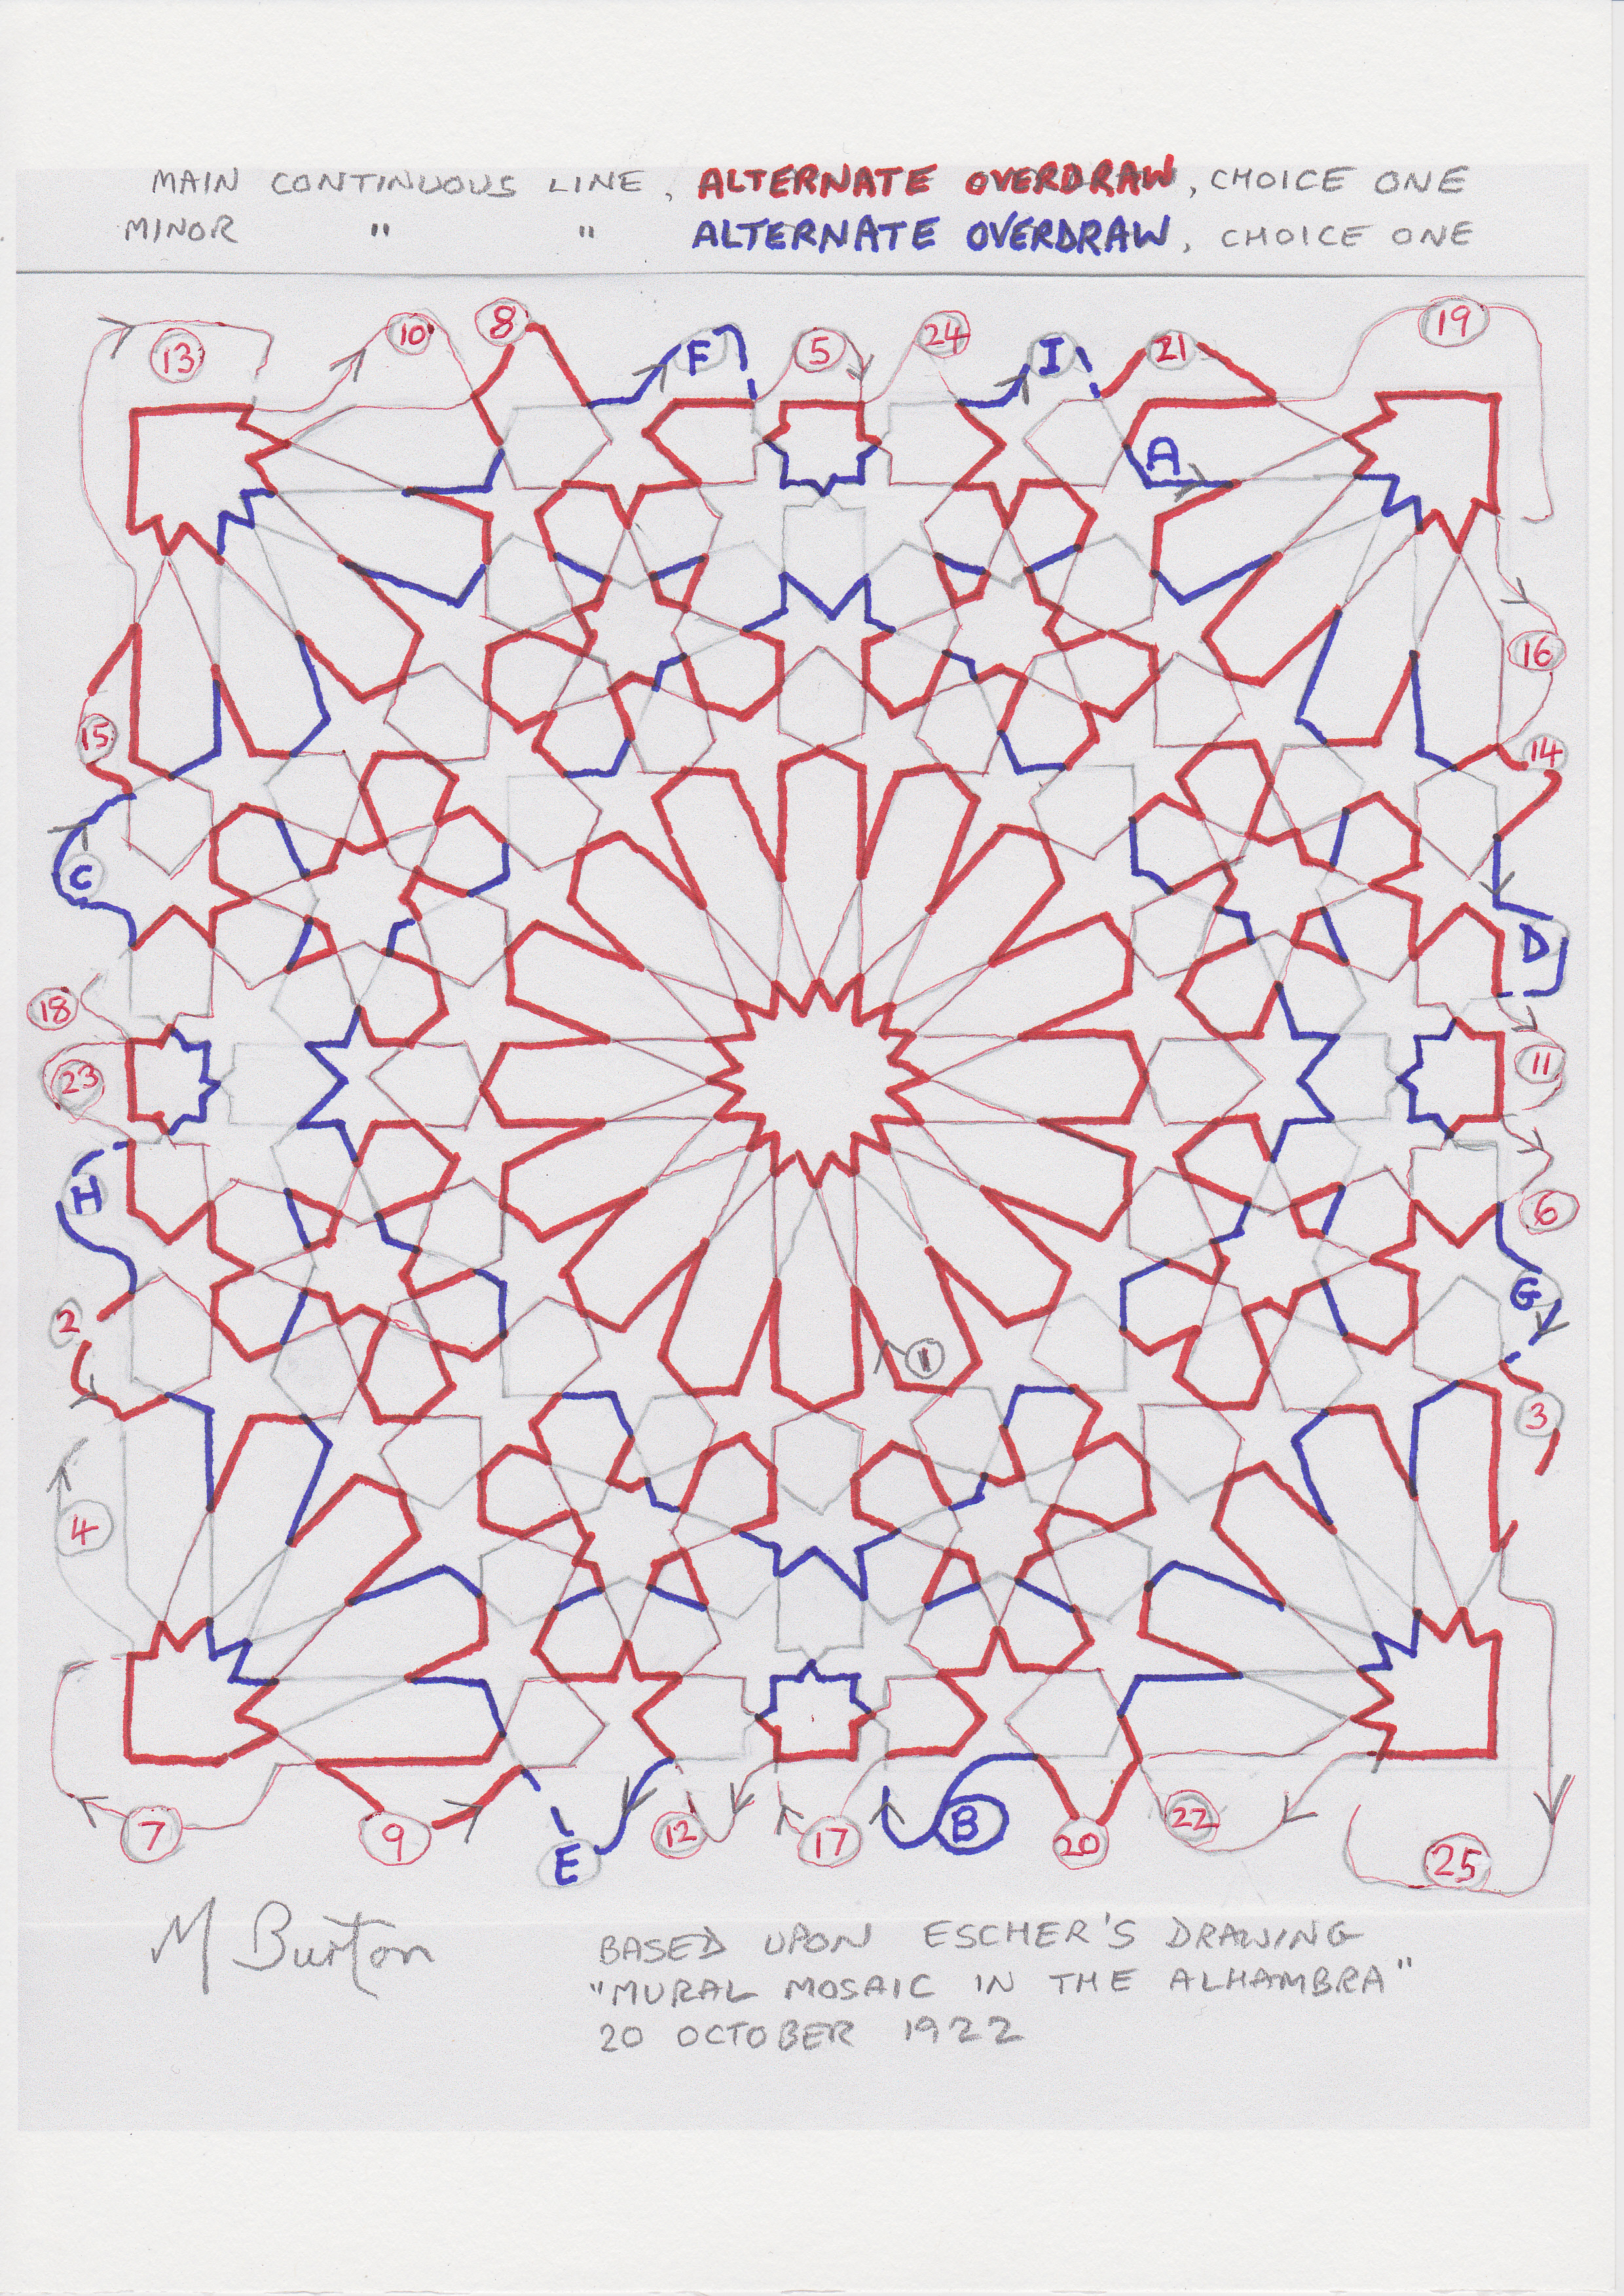
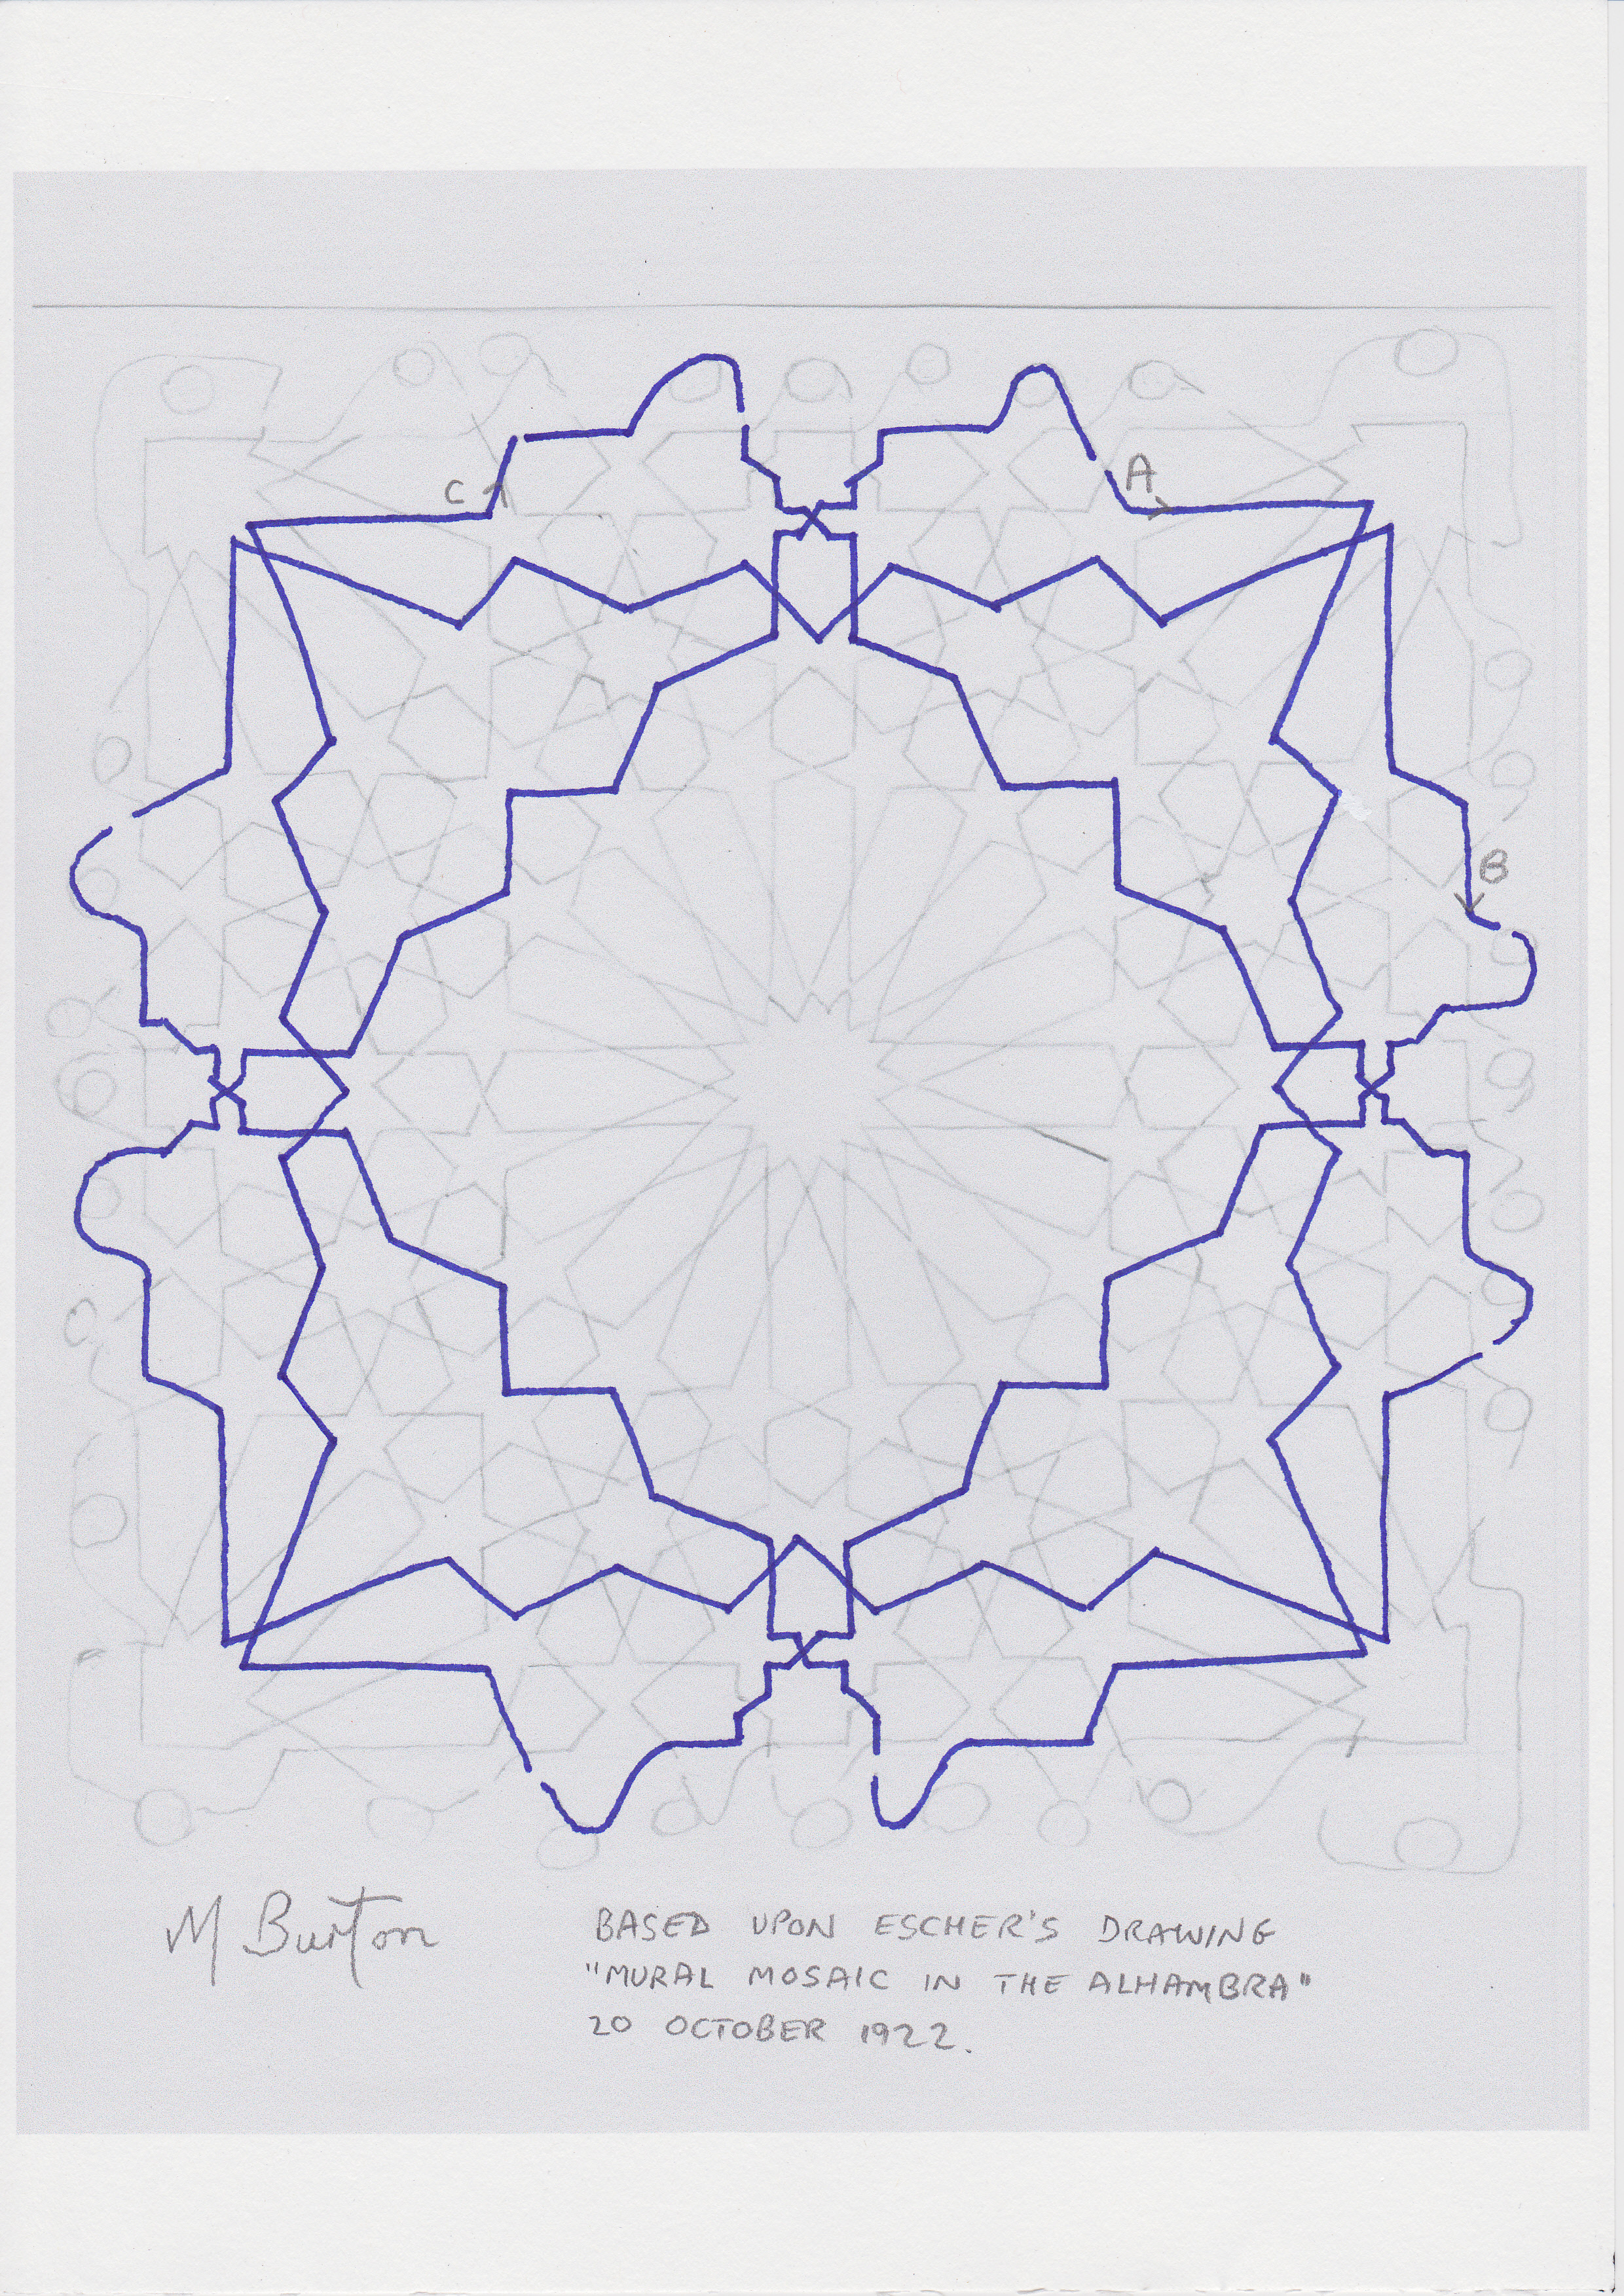
Now that we have applied my Alternate Overdraw to the Continuous Lines in the Escher Islamic design, I can show how I allocate colours.  We can then compare the result with the colours on the original Islamic design painted by Escher in 1922.

My basic method of allocating colours is covered in my Post on 27 September 2014 entitled “Colour Sequence on Continuous Line Drawing”.

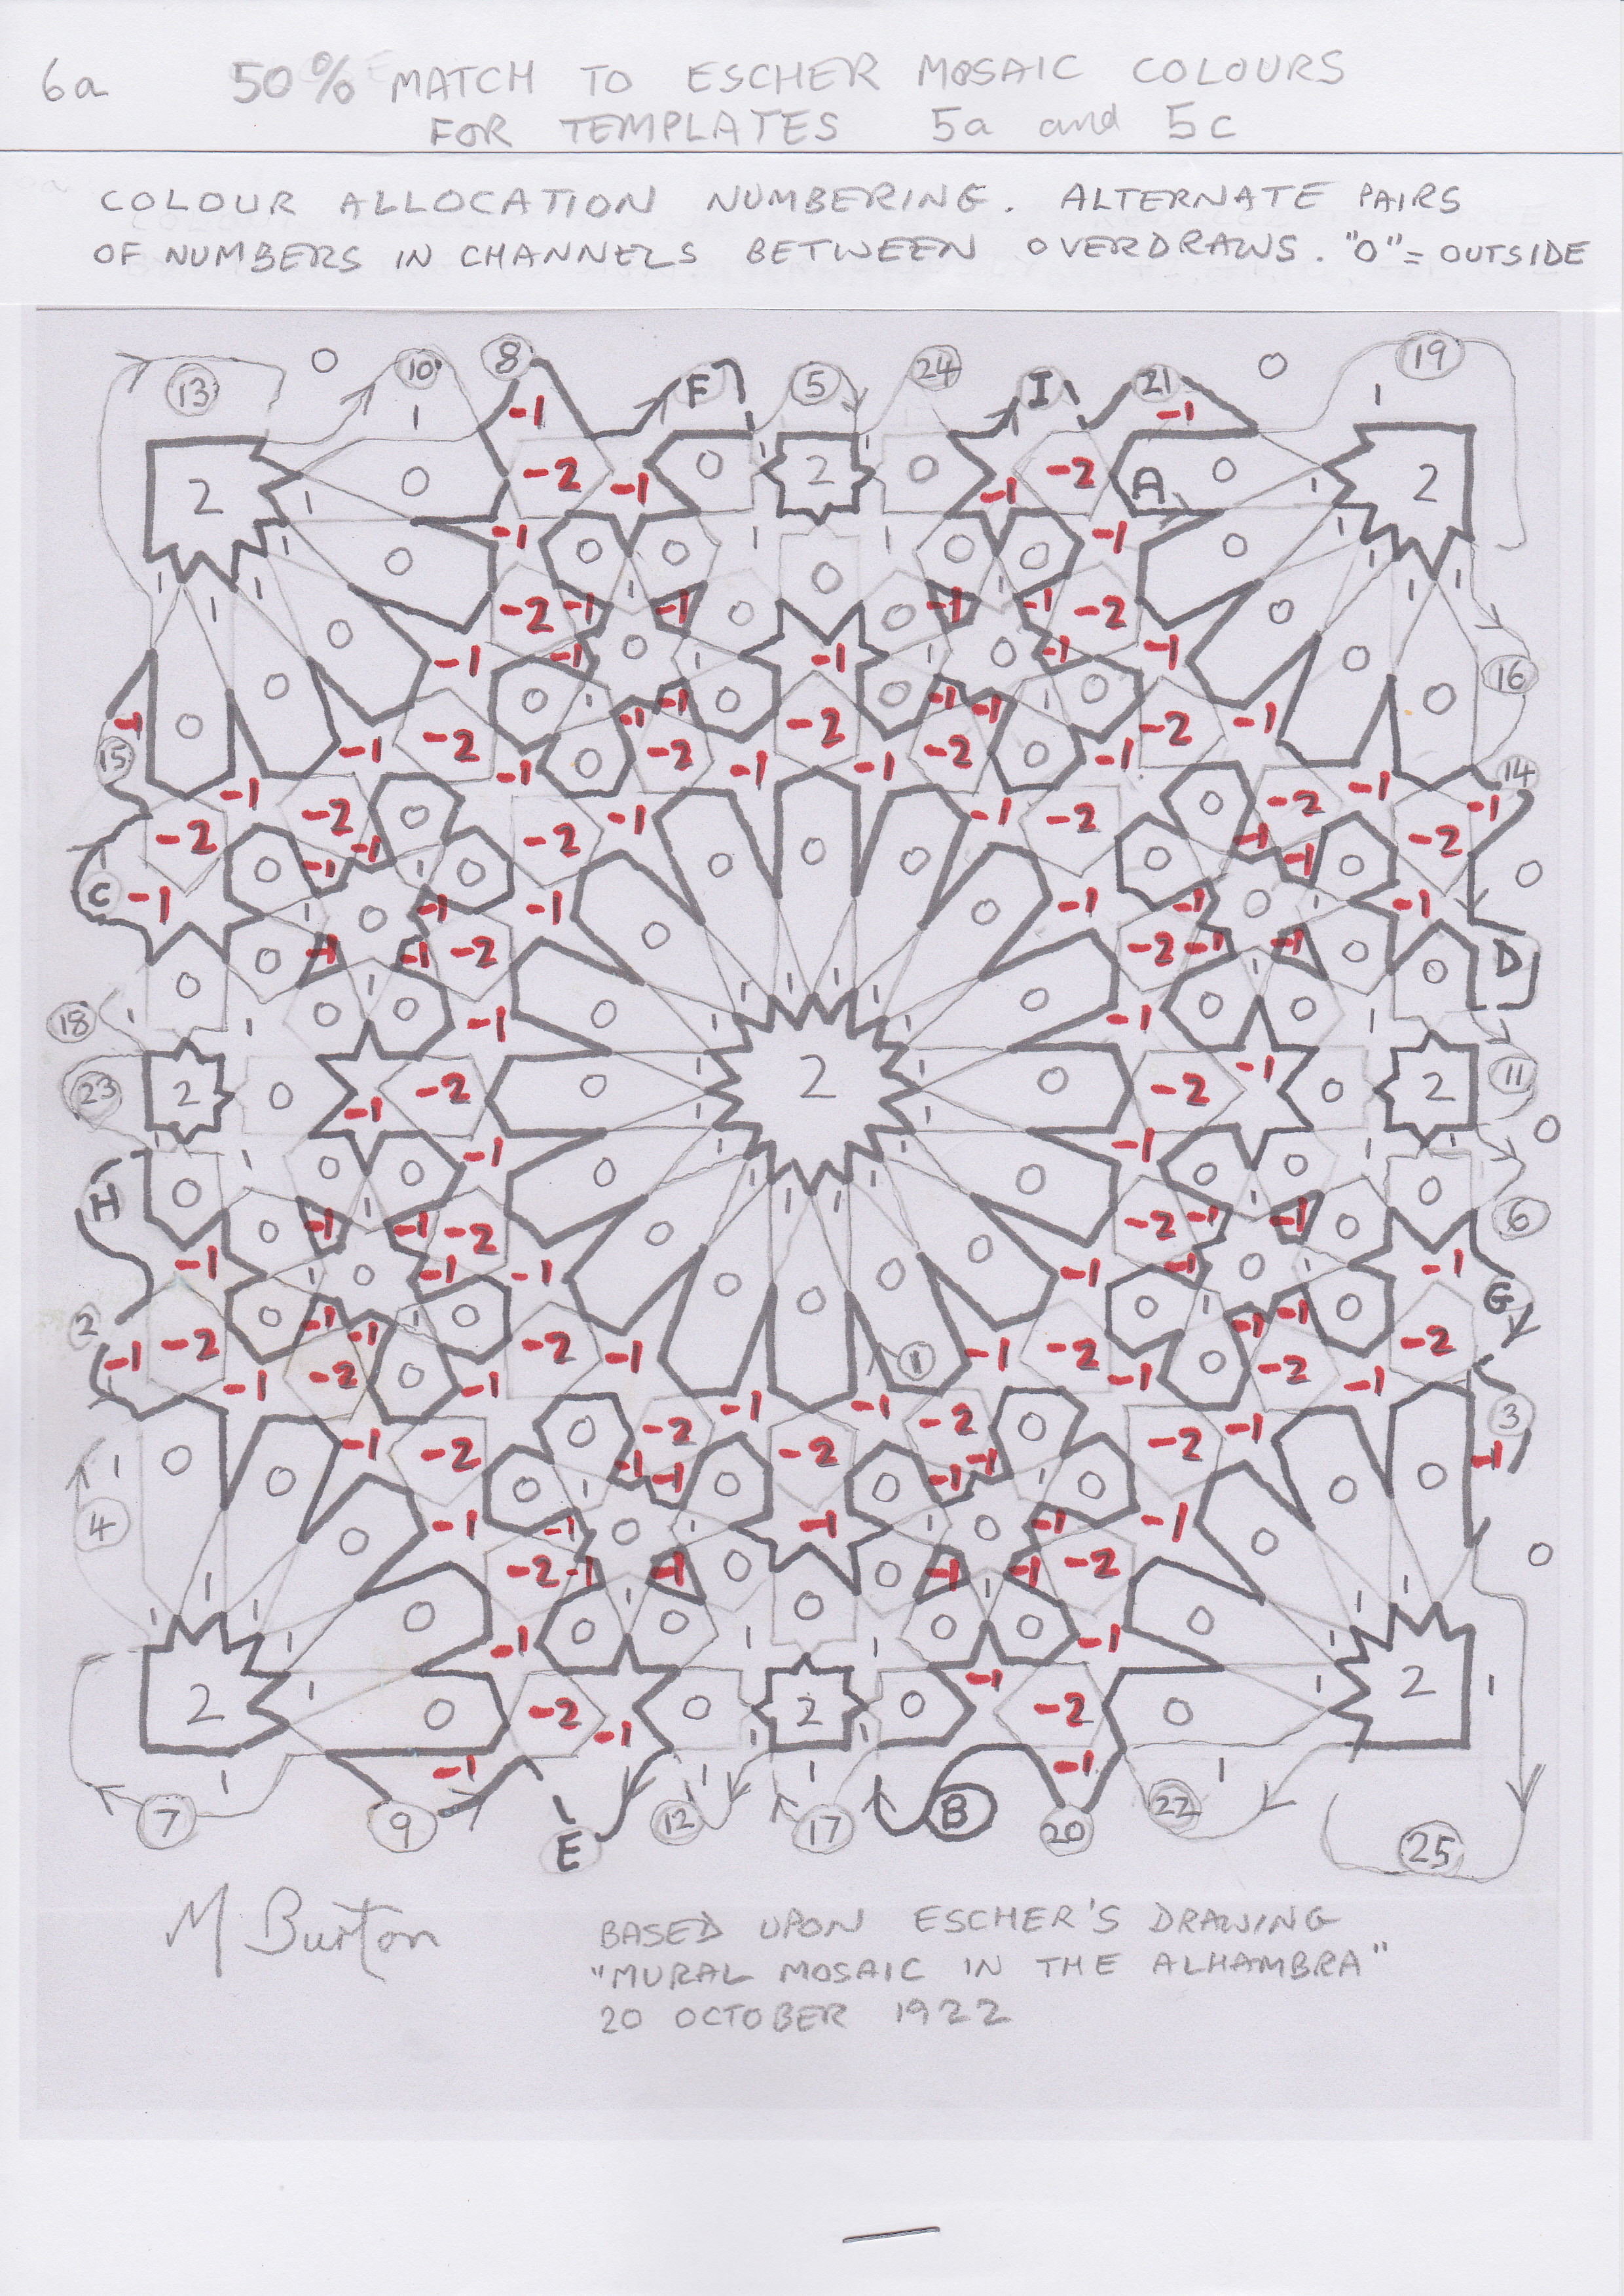
I will start with that same basic process where colour “0” is the outside of the drawing and this is alternated with “1” in its channel or channels.  When we cross through an overdraw from a “1” area we allocate “2” to this adjacent area on the other side and then alternate this with “3” (if there are any) in that channel.  In the negative direction, if we go from a “0” area through an overdraw we will allocate “(-)1” and alternate with “(-)2” in that channel.

Five colour number allocation on continuous lines for Escher Mosaic. Mick Burton study.

Five colour number allocation on continuous lines for Escher Mosaic. Mick Burton study.

There are no areas coloured “3” and so we have 5 colours allocated, compared to only 4 colours used in the original Mosaic.

At this stage things did not look promising.  Trying to equate the 4 original colours in the Mosaic to my 5 numbers produced a best set of matches of 156 out of 313 (I won’t go into much detail here) which is just under 50%.

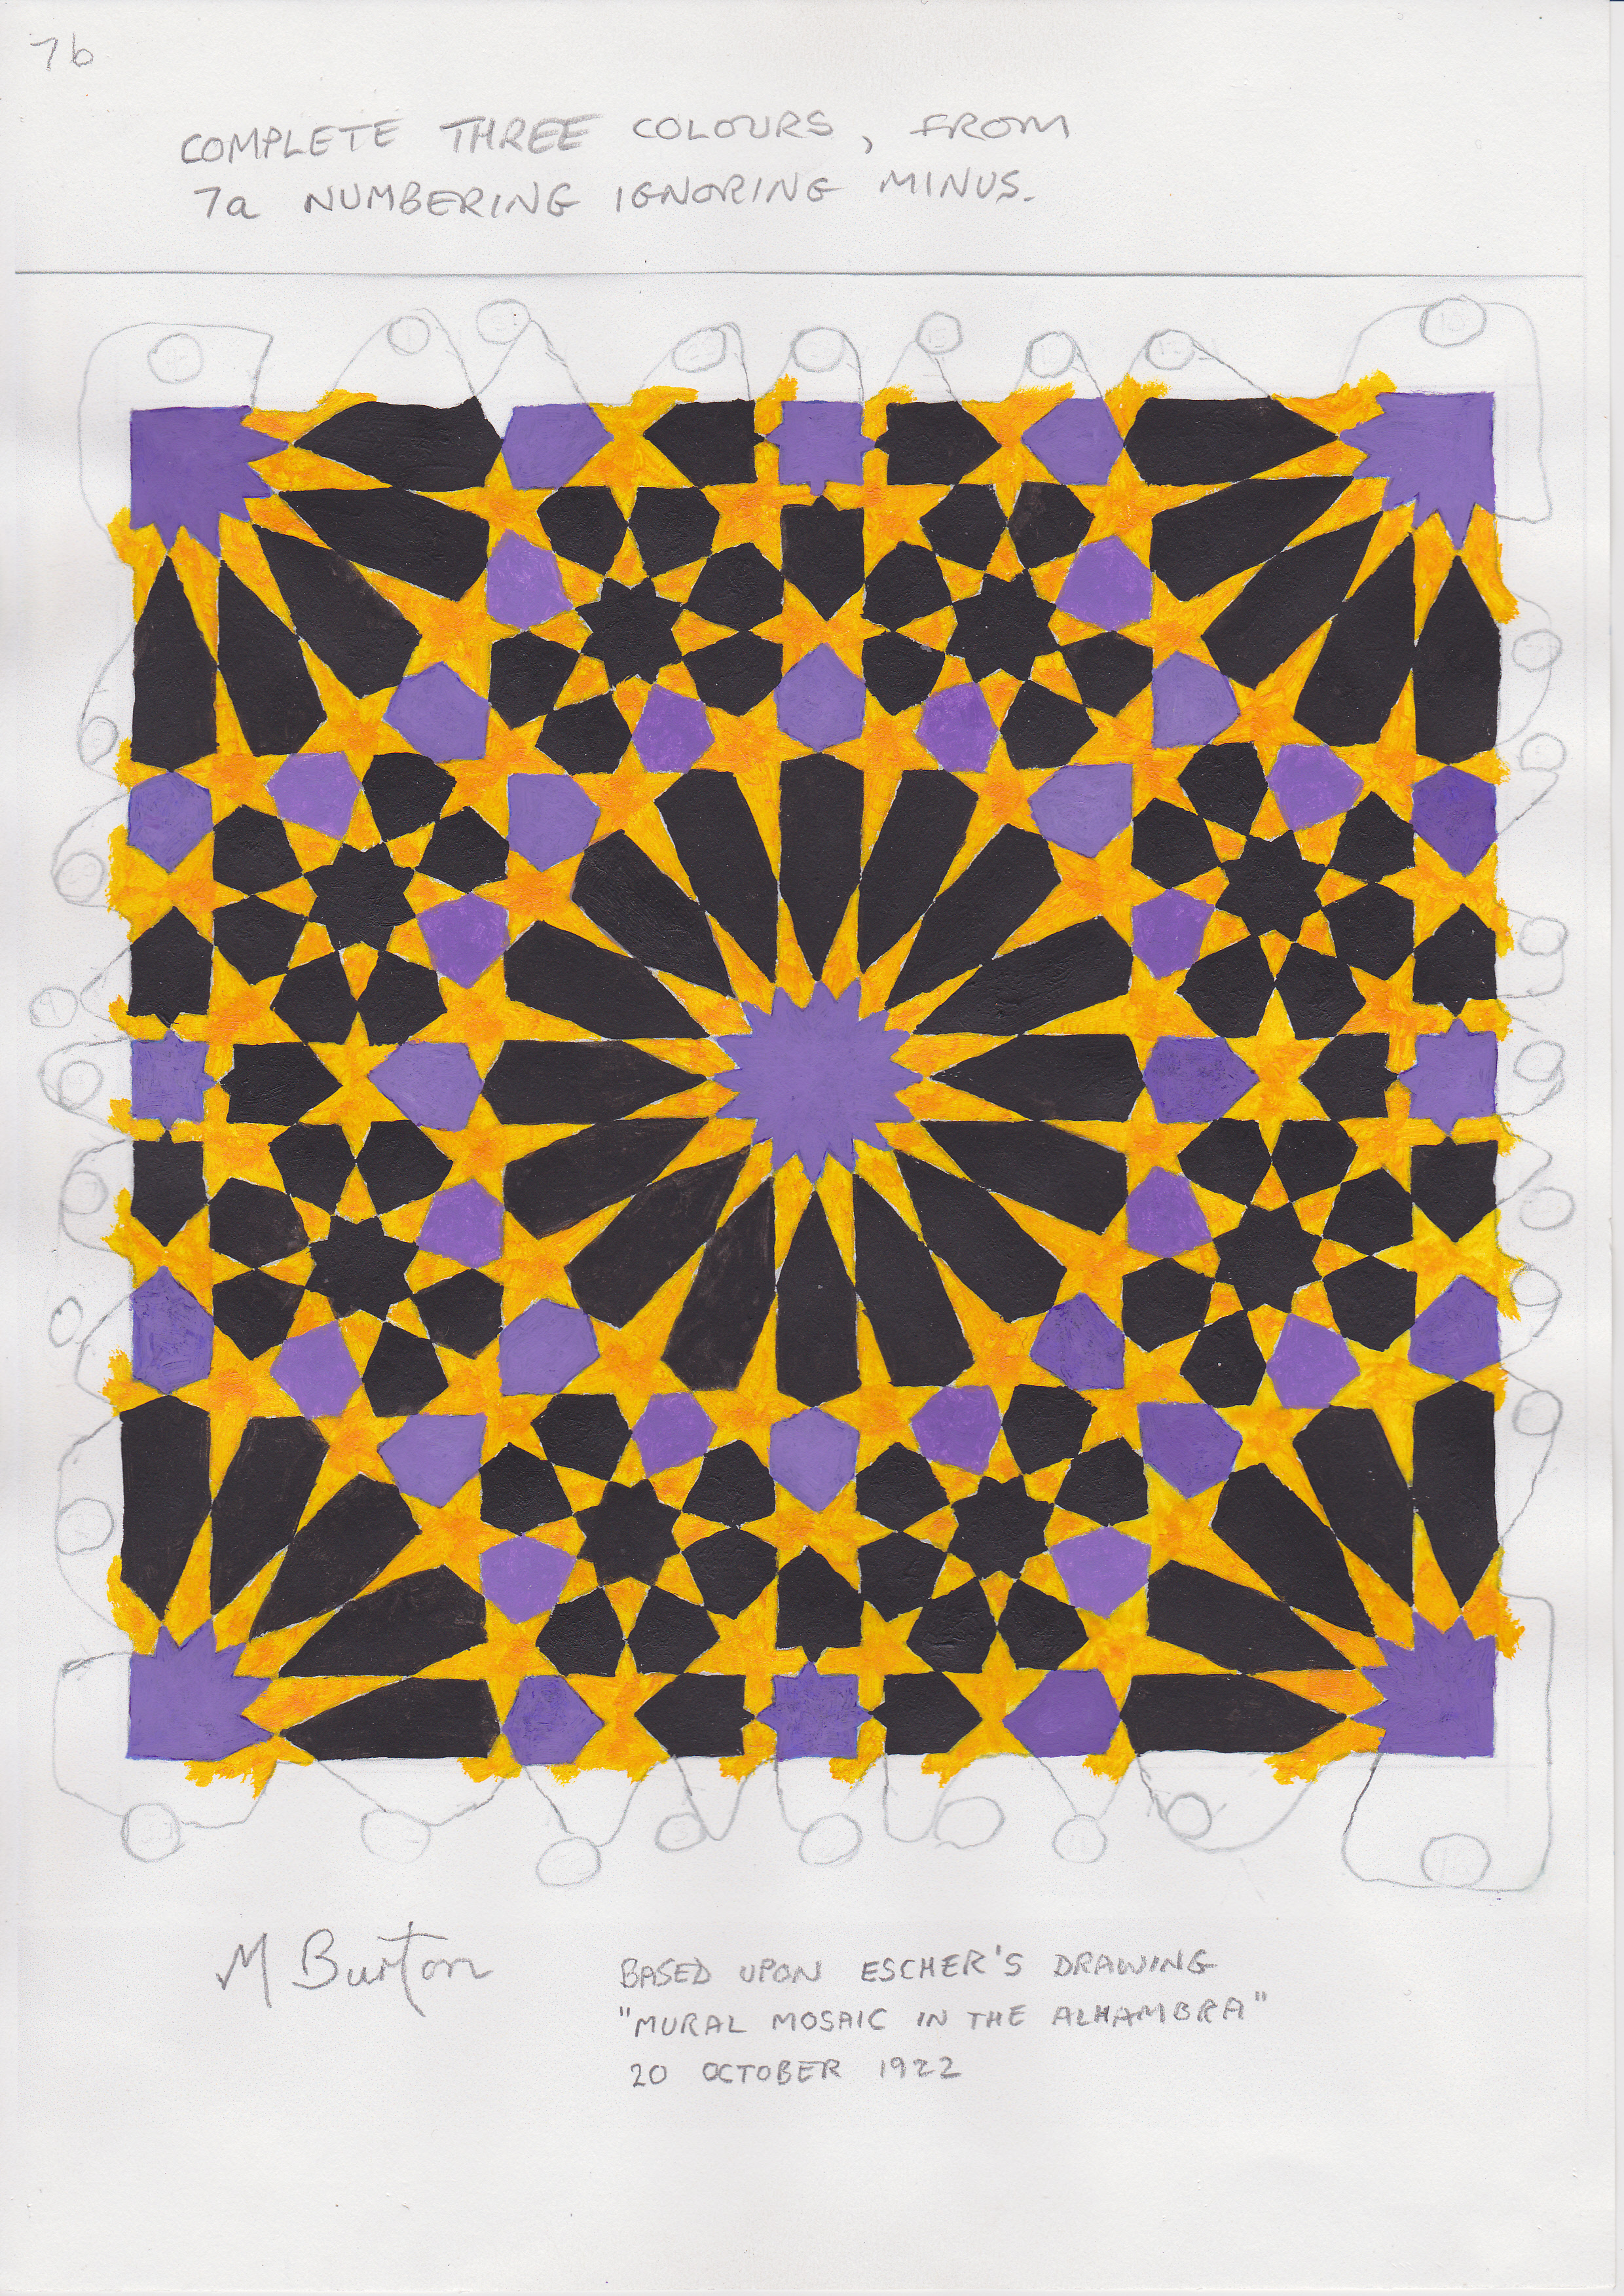
One thing that I did observe was that YELLOW matched “1” on 76 occasions and “(-)1” on 88 occasions.  This reminded me that I occasionally allocate colours positively by ignoring (-) signs.  When switched to simply using “0”, “1” and “2” I had 3 numbers to compare with the 4 original colours on the mosaic.  This now produced a best match of 241 colours out of 313 which gives 77% and was much more respectable.  Here is the 3 colour allocation.

Colour sequence allocation of 3 colours to continuous lines on Escher Mosaic. Mick Burton study.

Colour sequence allocation of 3 colours to continuous lines on Escher Mosaic. Mick Burton study.

Of course the fourth colour GREEN used in the mosaic does not appear at all in mine.

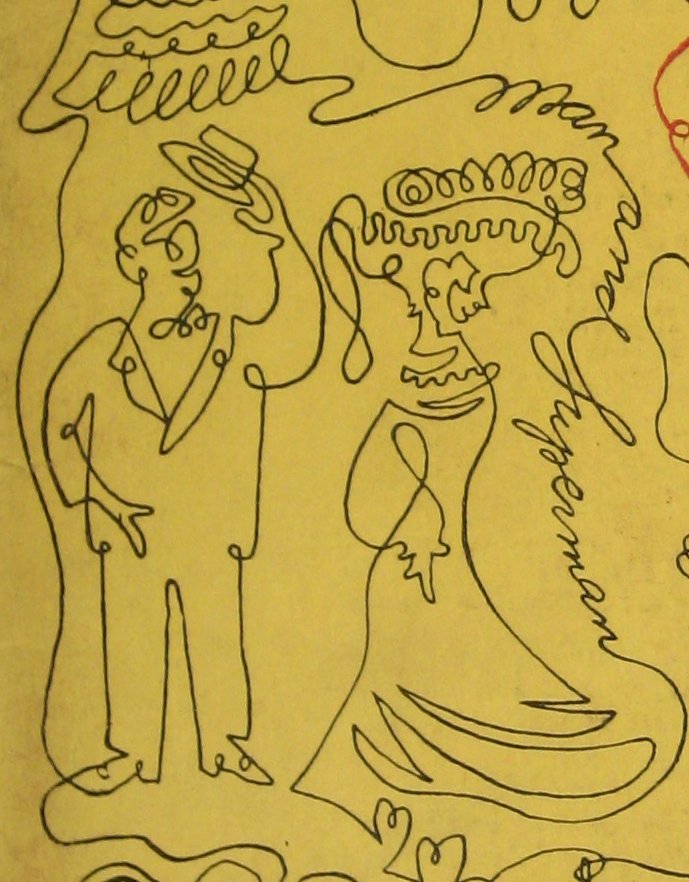
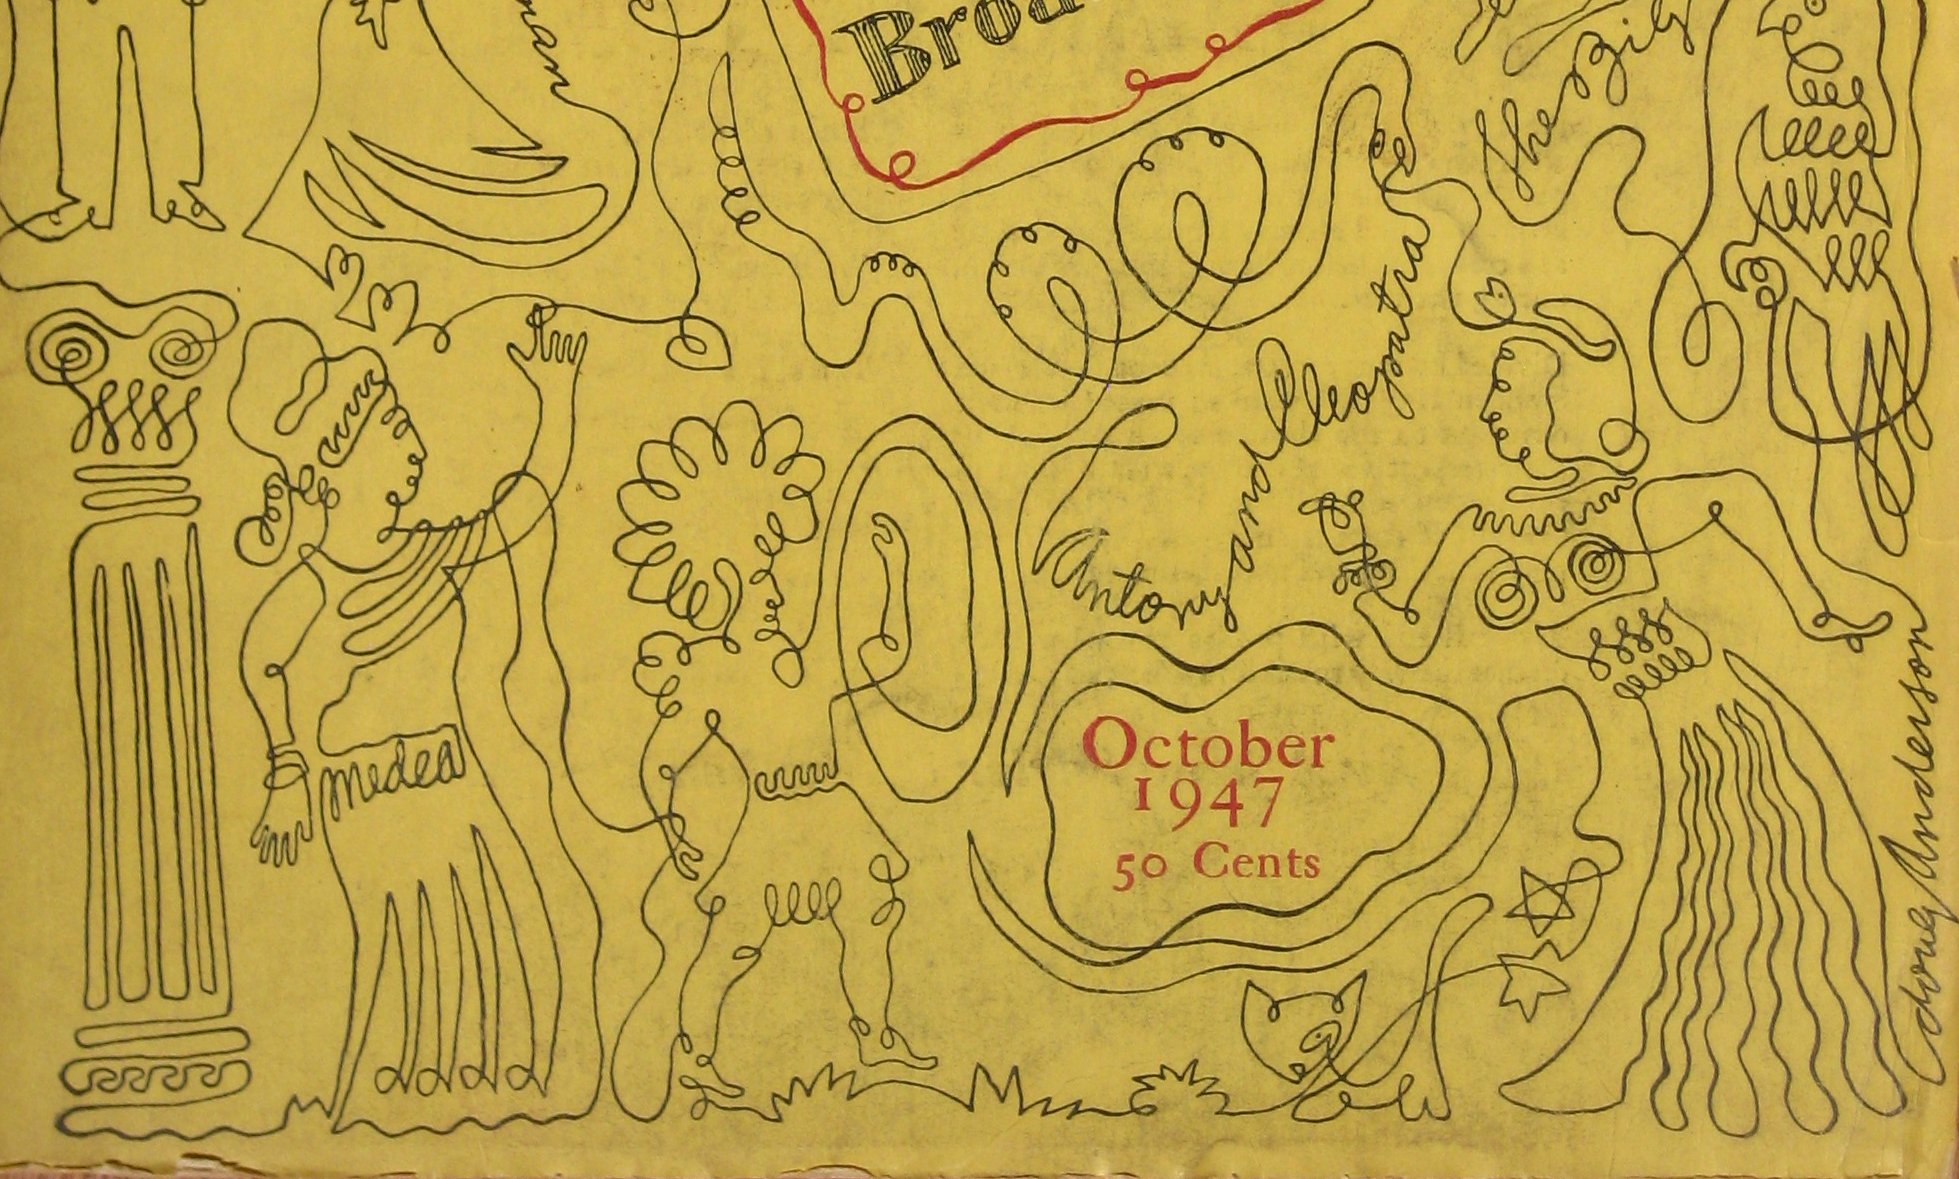
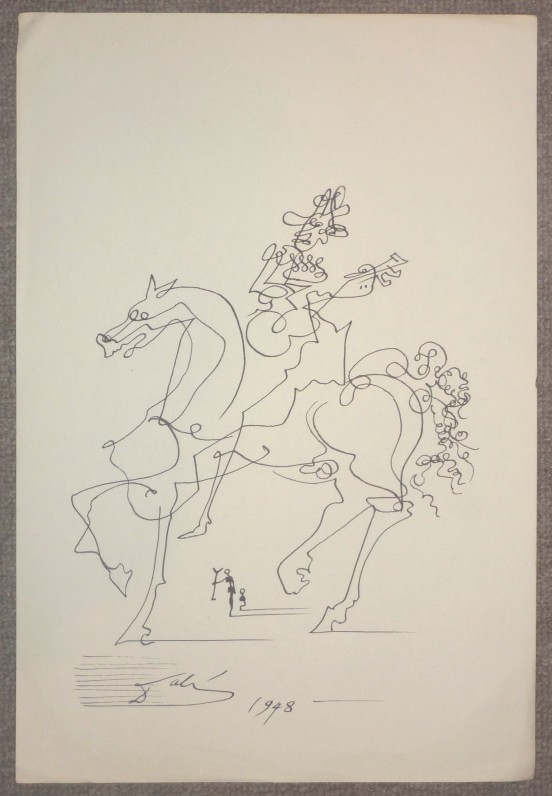
As with a lot of art, including craft, there may be processes (or even rules) which get you a long way in a design but you have to know when, and how, to break away from them.  I may be a bit rigid with my Continuous Lines but my studies of Picasso and Dali doing them demonstrates that nothing is certain.

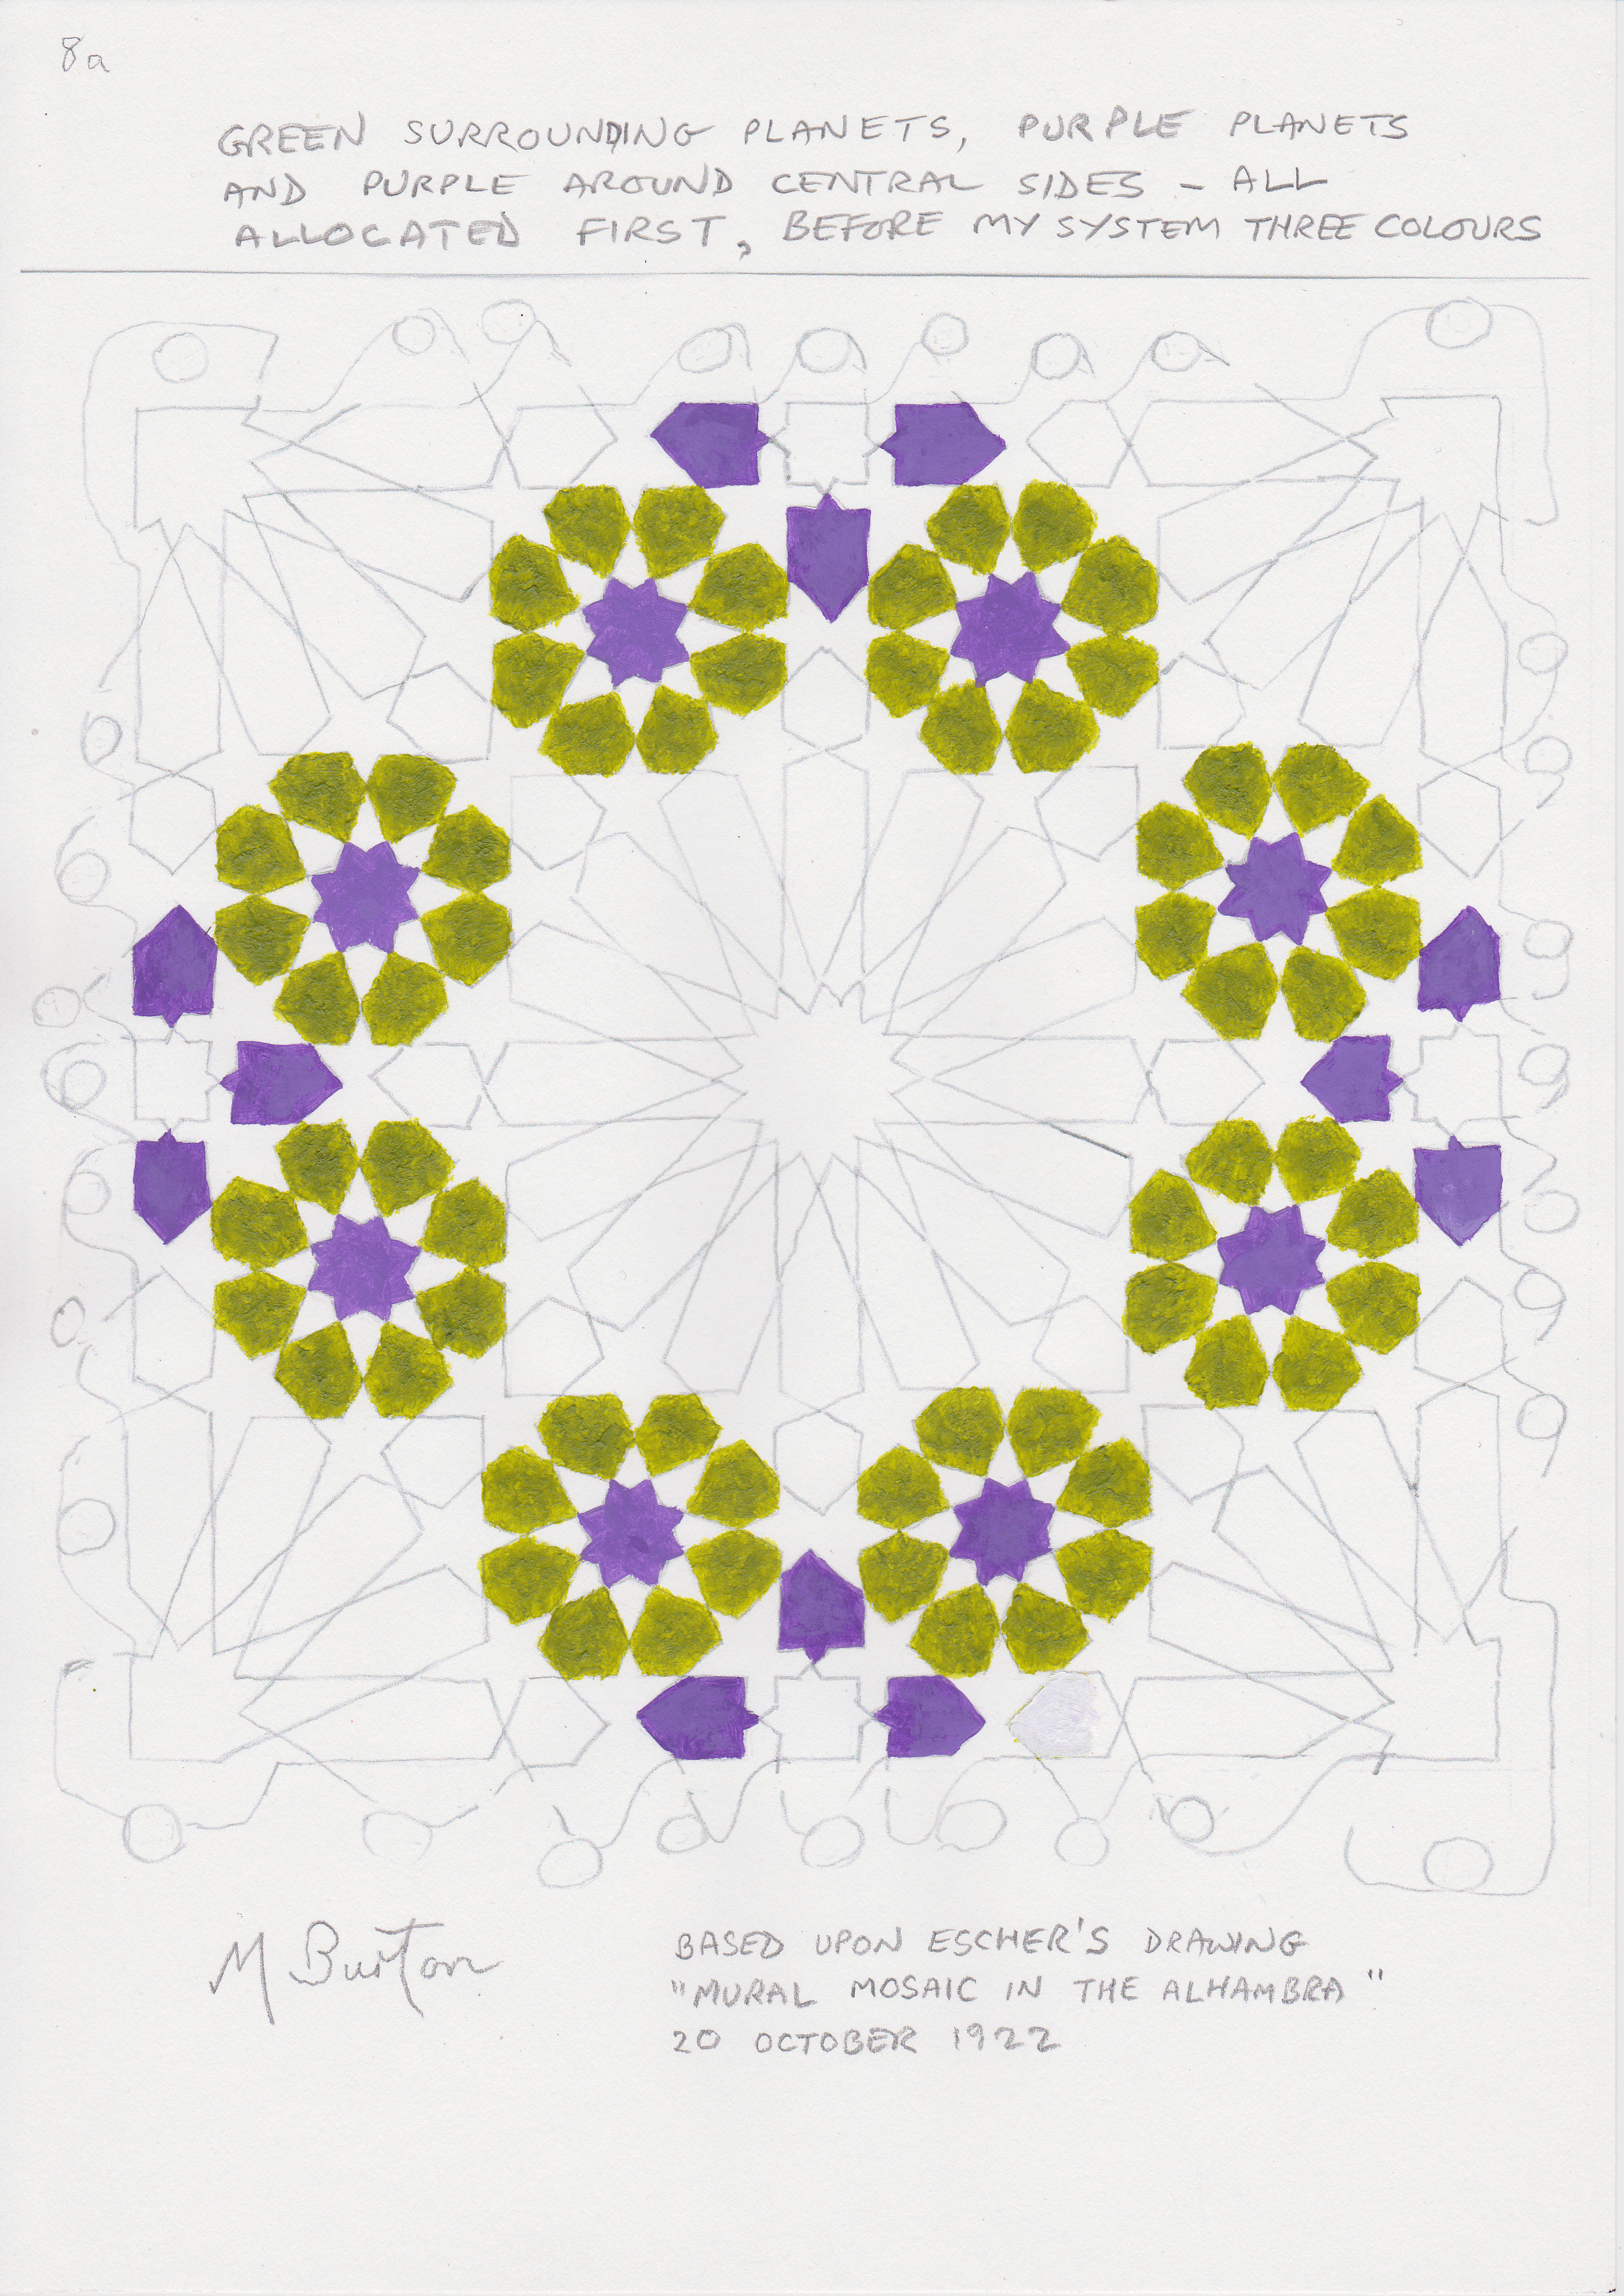
This Islamic artist, who I regard as very special, probably used a method equivalent to mine to allocate most of his colours but probably made the following over riding decisions to finish the colouring off –

a.   GREEN was allocated to the 8 areas surrounding each of the 8 planets, and nowhere else.

b.  Each of the 8 planets was coloured PURPLE, instead of black, to mirror its use for the centres of the Suns.

c.  Each Purple junction block at the middle of each side has three directional areas surrounding it which are coloured PURPLE instead of black.  I originally considered these to be decorative.

Allocation of all green colours and changes of black to purple on Escher Mosaic. Mick Burton study.

Allocation of all green colours and changes of black to purple on Escher Mosaic. Mick Burton study.

If the above decisions were made first, then the remaining allocations would be made totally on my 3 colour allocation.  That is 229 areas remaining where my allocation matches 100% with the original Escher Mosaic colours.

229 colour sequence areas matching original Escher Mosaic colouring. Mick Burton study.

229 colour sequence areas matching original Escher Mosaic colouring. Mick Burton study.

So there we are. I hope you have found my attempt to explain how this Escher Islamic Mosaic contains two continuous lines, which I believe was deliberate by the artist, and how most colours matched a colour sequence directly linked to the continuous lines.

The basic elements in the design largely match the template produced by my Alternate Overdraw method and, after specific allocation decisions were made by the artist, there was a total match of all other colours allocated by my method using the template.  Whether of not the artist used a similar method to myself, there is a direct link between the colour sequence and the two continuous lines.

In my searches through other forms of art, on the look out for continuous lines, I have not found any other example of art which contained both continuous lines and a related colour sequence, or signs of possible use of Alternate Overdraw with its Template.

There is a modern mathematical theory called “The Winding Number Theory” which could allocate colours in an equivalent way to my initial 5 colours, but it is not as much fun.

I will do a FURTHER POST (STAGE 4) on how the artist could have used Alternate Overdraw to help him to connect up the loose ends on the borders when actually constructing his continuous lines.

Mick Burton Continuous Line Blog.

Alternate Overdraw Applied to Escher Islamic Mosaic Continuous Lines, STAGE 2.

Escher painting 1922 of Islamic Mosaic tile at the Alhambra. WikiArt. Continuous line study by Mick Burton.

Escher painting 1922 of Islamic Mosaic tile at the Alhambra. WikiArt. Continuous line study by Mick Burton.

Before applying my Alternate Overdraw, which I use to allocate colours to Continuous Lines, I will give you my analysis of the colours in the original Mosaic and what I feel were the artist’s ideas behind the design.

Eric Broug states, in his YouTube demonstration “How Grids and Patterns Work Together” that this is a 16 point star surrounded by 8 point stars.  Geometrically you can produce stars with many different numbers of points.  Having done many planetary paintings myself, I feel that the original artist has realised that in this case we have a central Sun and 8 planets surrounding it which can represent our solar system (we can ignore Pluto as a planet as it only featured as such for a part of the last century).  The colours the artist uses reflect many aspects of this planetary situation –

a.  YELLOW is used as the colour for the flaming surfaces of the central Sun and the corner Suns.  All other yellow areas have star like shapes and represent distant stars peppering the background.

b.  PURPLE is used for the centres of the Suns and the 8 Planets.  Purple is also used for the lines of areas along the sides, vertically and horizontally from the centres of the sides and diagonally (the lines of purple areas may simply be decorative).

c.  BLACK is used for the “fan blade” shapes emanating from the Suns.  In my planetary paintings I often use black for the background outside a drawing and for the gaps through the  drawing .  The artist here could be using the same idea, so that the blades are in fact deep space seen beyond the Suns.

d.  GREEN is used to surround each Planet and I interpret this as representing life on each Planet, not just ours.

The process for completing an Alternate Overdraw is covered in my Post dated 10 September, 2014  (9/10/2014)  entitled “Alternate Overdraw on Continuous Line Drawing”.

In the previous post, STAGE 1, I showed that there are two continuous lines in the Mosaic.  I apply my Alternate Overdraw to produce a template for me to work with to allocate a colour sequence.  I have to bear in mind that there are 2 Overdraw results and 1 colour sequence for a single continuous line and 4 Overdraw results and 2 colour sequences for two continuous lines.

My experience tells me that the Alternate Overdraw, which will produce a Template best representing this Planetary composition, will have –

a.  An Overdraw for the Main continuous line commencing by overdrawing (in Red) a side of a fan blade of the central Sun, and

b.  An Overdraw for the Minor continuous line commencing by overdrawing (in Blue) a side of a fan blade on a corner Sun.

Main continuous line, Alternate Overdraw, choice 1. Mick Burton, Escher Mosaic study.

Main continuous line, Alternate Overdraw, choice 1. Mick Burton, Escher Mosaic study.

Minor Continuous Line, Alternate Overdraw in Blue, Choice 1. Mick Burton Escher Mosaic study.

Minor Continuous Line, Alternate Overdraw in Blue, Choice 1. Mick Burton Escher Mosaic study.

The aim  of the Alternate Overdraw is to create channels within the design where two colours can be allocated alternately within each channel and that adjacent channels have different pairs of colours.  An overall sequence of colours then follows across channel boundaries.

My experience told me, at this stage, that my colour sequence was likely to match the original Mosaic in and around the five Suns, but less so elsewhere.

I will show my attempts at allocating corresponding colours in the NEXT POST.  I will also explain why I feel that the original artist may have used the Alternate Overdraw or an equivalent method.

Mick Burton Continuous Line Blog.

Continuous Lines in Escher Islamic Mosaic painting, STAGE 1.

Escher painting 1922 of Islamic Mosaic tile at the Alhambra. WikiArt. Continuous line study by Mick Burton.

Escher painting 1922 of Islamic Mosaic tile at the Alhambra. WikiArt. Continuous line study by Mick Burton.

I look for continuous lines in all forms of art.  I first saw this design in my daughter Kate’s book “Escher, The Complete Graphic Work”, by J.L. Locher.   We are both long term admirers of this artist.  Escher did this detailed painting  in 1922 when in Granada at the Alhambra, and its quality really hit me.  It was of an Islamic mural Mosaic tile,  which was made up of those geometric lines which are often seen in Islamic art, and I assessed it for continuous lines.  

I could see that the overall symmetrical  pattern and I saw that Escher had painted the design BORDER, which seemed to indicate what happened to the lines after they hit the sides of the square.  I then worked out, from the Border Pattern, that the lines were fed back in the same routes on all four sides of the square.  From the point of view of finding a single continuous line, in my experience, such overall symmetry of the structure meant that it was very unlikely that there was only one line. 

Here is the basic structure which I arrived at, which shows the “wiring” connections indicated by the border.  Let’s see how many continuous lines there are.

Escher Islamic Tile. Basic line structure, with border connections. Mick Burton continuous line study.

Escher Islamic Tile. Basic line structure, with border connections. Mick Burton continuous line study.

When I traced over the lines I found that there were in fact two continuous lines making up the whole design.  Here are the two results, a Main continuous line (in red) and a Minor one (blue).

Main continuous line, one of two. Escher Islamic tile design. Mick Burton continuous line study.

Main continuous line, one of two. Escher Islamic tile design. Mick Burton continuous line study.

Minor continuous line, 2nd of two. Escher Islamic tile design. Mick Burton continuous line study.

Minor continuous line, 2nd of two. Escher Islamic tile design. Mick Burton continuous line study.


By experimenting with border changes, a bit like swapping wiring connections, I did come up with a single continuous line, but the borders were no longer symmetrical.  It seems likely that the artist realised that two continuous lines was the best he could hope for whilst retaining overall symmetry.   In a LATER POST I will show how a border can be “tweaked” by a slight alteration to make one continuous line in the mural mosaic, and how this answer is achieved.  I will also show how the artist is likely to have worked out how to achieve two continuous lines by connecting up the correct loose ends.

I now needed to know  “How important continuous lines were, within this design, to the artist?”   It could be that Continuous Lines were incidental to other aims, or they may have been of prime importance.

In my NEXT POST I will apply my Alternate Overdraw technique to produce a Template of closed lines, which I use to decide upon the colours to allocate.   I will also suggest what the artist’s ideas were for the design and his colour selection.  In a FURTHER POST you will see how my colour allocation compares with the original colours and to what extent I feel that my ideas were the same or similar to those used by the artist.

All this has been done without any reference to the construction of the original line structure.  I have taken the completed structure as a starting point to apply my ideas.  I did not research in any detail on Islamic line construction, until after my whole study was completed.

I have recently found YouTube demonstrations by Eric Broug entitled “How to Draw a Mamluk Quran Page” and “How Grids and Patterns Work Together”, which gave me a good insight into pattern construction and include an explanation of a larger tile containing this Escher Mosaic design as a section.  This is a fascinating process used by the Islamic artists over 500 years ago.  Otherwise, I have not found any reference to borders, colouring, or specific meaning of this design.

Possibly my ideas will generate a new view on aspects of the creation of this and other Islamic designs. 

Mick Burton, Continuous Line Blog. Continue reading

Continuous Line Drawings at “British Wildlife” Exhibition, Martin Mere.

"Mouseman Mouse" based upon Robert Thompson carved mouse.  Association of Animal Artists  "British Wildlife" Exhibition, Martin Mere, February & March 2015.  Mick Burton, Continuous Line Drawings.

“Mouseman Mouse” single continuous line drawing based upon Robert Thompson carved mouse. Association of Animal Artists
“British Wildlife” Exhibition, Martin Mere, February & March 2015. Mick Burton, Continuous Line Artist.

This is my second year taking part in the Association of Animal Artists exhibition at Martin Mere Wetlands Centre, Lancashire.  “British Wildlife” runs until 29 March 2015.  My chosen wildlife submissions are “Mouseman Mouse and “Gledhow Foxes Sunbathing”.

My grandad George Burton was born in Kilburn, North Yorkshire, and when I was young my Dad took me to the Church in Kilburn and pointed out the carved mice which appeared on the church furniture.  They were carved by Robert Thompson, who was at school with Grandad, and his family still run the furniture business in Kilburn which is now world famous.

As time went on I found out so many things about Robert “Mouseman” Thompson and his mouse trademark.  It seemed natural that I should do a  mouse in my continuous line drawing style and colour sequence.

Robert "Mouseman" Thompson's trademark carving on the Altar rail in Kilburn Parish Church, North Yorkshire.  Picture by Dave Sumpner at English Wikipedia.

Robert “Mouseman” Thompson’s trademark carving on the Altar rail in Kilburn Parish Church, North Yorkshire. Picture by Dave Sumpner at English Wikipedia.

Dad told me that Grandad and Robert were drinking companions in the late 1890’s and he passed on some stories of those times.

A man went to the pub in Kilburn with his groceries every day before setting off home.  He always went home over the “beck” footbridge, which had vertical rails with strappings through them.  The man habitually stopped half way across, sat on the straps and lit his pipe.  Grandad and others loosened the straps one day and the man later fell into the water.  There was a lot of “fuss” about that.

Another regular at the pub always parked his horse and trap outside and, of course, regardless of how much he had had to drink the horse could find its way home.  One night he came out of the pub and boarded the trap, not realising that the horse had been turned around between the shafts.  He drove off backwards to crash into the church wall.

I attended a talk by one of the Thompson family over 40 years ago in Leeds Central Library and spoke to him later.  He said that each wood carver had his own style of mouse.  Old Robert’s mouse had become very simple, like a wedge of cheese, and they called it “grand prix” mouse.

"Gledhow Foxes Sunbathing".  Association of Animal Artists "British Wildlife" exhibition, February & March 2015.  Mick Burton, Continuous line drawing.

“Gledhow Foxes Sunbathing”. Association of Animal Artists “British Wildlife” exhibition, February & March 2015. Mick Burton, Single Continuous line drawing.

I saw a fox cub at the east end of Gledhow Valley Woods when walking the Airedales over 30 years ago.  Since moving here foxes have regularly been in the garden in the day time.  Last summer they took up sun bathing at the top of the lawn virtually every day for a period.  This usually included a prolonged period of scratching.

When we were completing the patio, with the help of Helen, Janet and Richard, a fox came and sat at the top of the garden and watched.  He had the demeanour of an “overseer” or a General overlooking a battle.  On another day there were two of them sitting up there and they reminded me of the “King and Queen” sculpture by Henry Moore which I saw up on the hill at Yorkshire Sculpture Park in 1987.

Poster for Henry Moore exhibition at Yorkshire Sculpture Park, 1987.

Poster for Henry Moore exhibition at Yorkshire Sculpture Park, 1987.


Continuous line blog by Mick Burton.

Show me a real Green Cat.


Cat who slept on a heap of old green paint. Daily Mail, December 5, 2014.  Mick Burton, continuous line drawing.

Cat who slept on a heap of old green paint. Daily Mail, December 5, 2014. Mick Burton, continuous line drawing.

I always thought that Green was a natural colour for a cat done with my continuous line drawing, but I never realised that one would appear. Here we are, in the Daily Mail report on a cat who is actually green and wandering around quite happily. It turns out that the cat slept in a garage on an abandoned heap of green paint.

My original Green Cat was created in 1969 as one of four animals sold to J Arthur Dixon Ltd., a greetings card company that was based on the Isle of Wight.  They produced sets of Notelets with them on, sold in little cardboard boxes.  Here are the four designs.

Green Cat, continuous line drawing and alternate shading, by Mick Burton.  Notelet design for J Arthur Dixon Ltd, Isle of Wight, 1969.

Green Cat, single continuous line drawing and alternate shading, by Mick Burton. Notelet design for J Arthur Dixon Ltd, Isle of Wight, 1969.

Golden Horse, continuous line drawing and alternate shading, by Mick Burton.  Notelet design for J Arthur Dixon Ltd, Isle of Wight, 1969.

Golden Horse, single continuous line drawing and alternate shading, by Mick Burton. Notelet design for J Arthur Dixon Ltd, Isle of Wight, 1969.

Blue Elephant, continuous line drawing and alternate shading, by Mick Burton.  Notelet design for J Arthur Dixon Ltd, Isle of Wight, 1969.

Blue Elephant, single continuous line drawing and alternate shading, by Mick Burton. Notelet design for J Arthur Dixon Ltd, Isle of Wight, 1969.

Red Lion, continuous line drawing and alternate shading, by Mick Burton.  Notelet design for J Arthur Dixon Ltd, Isle of Wight, 1969.

Red Lion, single continuous line drawing and alternate shading, by Mick Burton. Notelet design for J Arthur Dixon Ltd, Isle of Wight, 1969.


I continued the Green theme for a cat when I started producing my own greetings cards in 2013. This time I used colour sequence from yellow, through greens to blues.

The narrative on the card is about a cat that we had who used to get into all sorts of scrapes. His real name was Sandy and he looked a bit like the cat in the background in the Daily Mail photo above.</strong

Ragamuffin, green cat, continuous line drawing with colour sequence.  Greetings Card (front)  by Mick Burton.

Ragamuffin, green cat, single continuous line drawing with colour sequence. Greetings Card (front)
by Mick Burton.

Ragamuffin, continuous line drawing with alternate shading.  Rear of Greeting Card by Mick Burton.

Ragamuffin, single continuous line drawing with alternate shading. Rear of Greeting Card by Mick Burton.

>