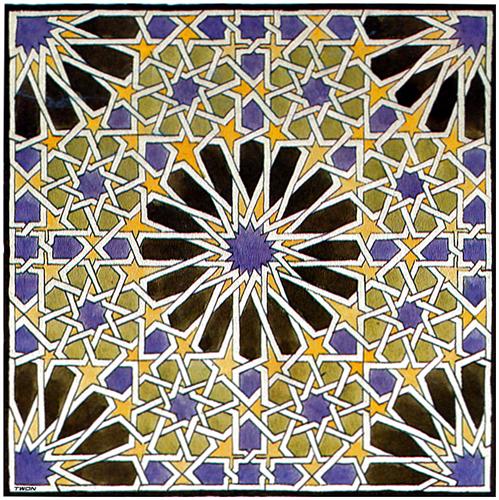
A key part of the Mural Mosaic tile painting by Escher in 1922, is that he has included the Border in detail. The Border gives an indication of what happens to the lines when they hit the sides and where they feed back into the design. In the quarter section detail of the mural below you can see marks on the Border.
A line leaving the design either joins the border (so that you can follow where it goes) or goes under the border (and you can deduce where it re-emerges). It is not easy to work all these paths out at first, but there is a logic to it. If in doubt between two choices, one of them usually has a clear answer leaving only one option for the other. Another aid to us is that each side of the Border is identical in the same direction around the design, so if the marks are not clear on one side you can check at a corresponding point on another side.

Detail to show Border. Escher mural mosaic in the Alhambra. WikiArt. Mick Burton study.
.
When I first started this research I did a basic hand copy showing all the lines hitting the sides and then showed each one as a loose end outside the square. I then studied the border on the Mosaic to work out how all the loose ends should be joined up and charted them – this initial chart was in STAGE 1, and I show it again at the end of this post.
That was relatively easy, observing the result of what artist had done. The hard bit is working out from scratch which loose ends to tie up to produce continuous lines in a way which would still enable the colours to be allocated by the Alternate Overdraw (or equivalent process used by the artist).
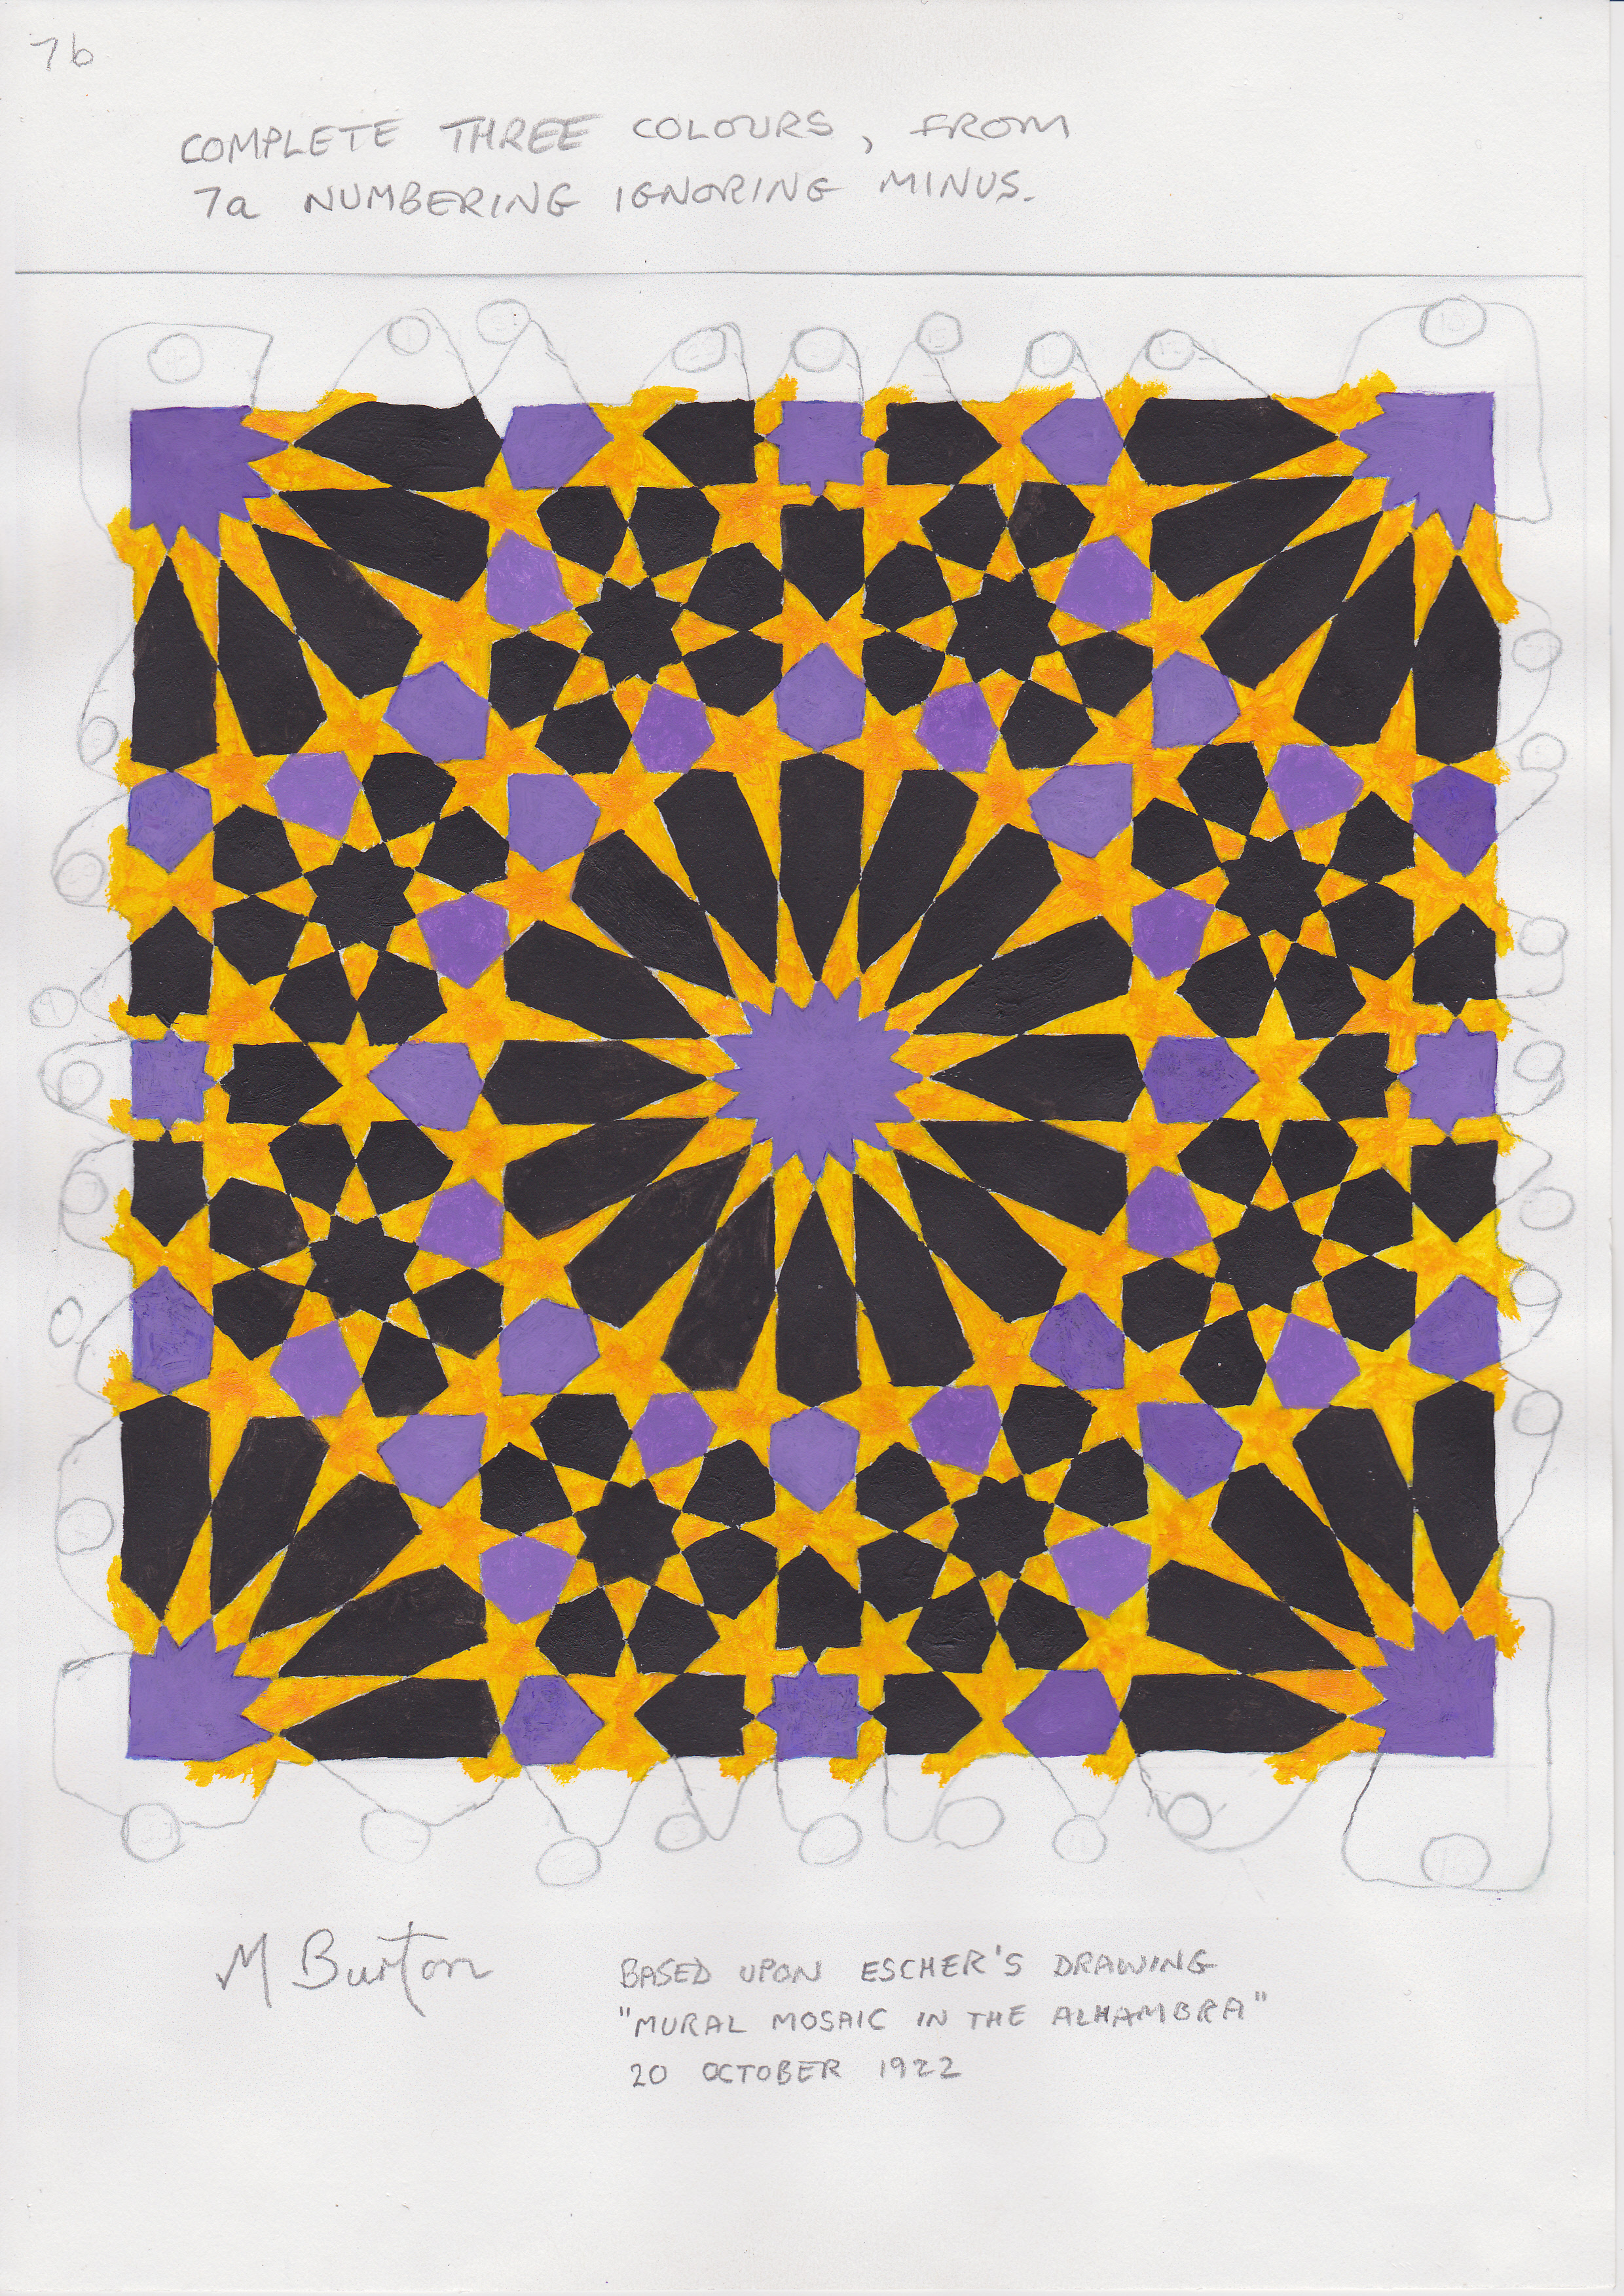
According to Eric Broug in his demonstration video’s, the tile rectangle containing the design would be selected out of a larger pattern area. In my own art, when I have drawn a large continuous line pattern and completed the Alternate Overdraw (so that I know the colour sequence everywhere) I can pick out a small section to display which of course already has the Alternate Overdraws. Similarly, the Islamic artist producing the Mosaic would know the full colouring etc for the tile section.
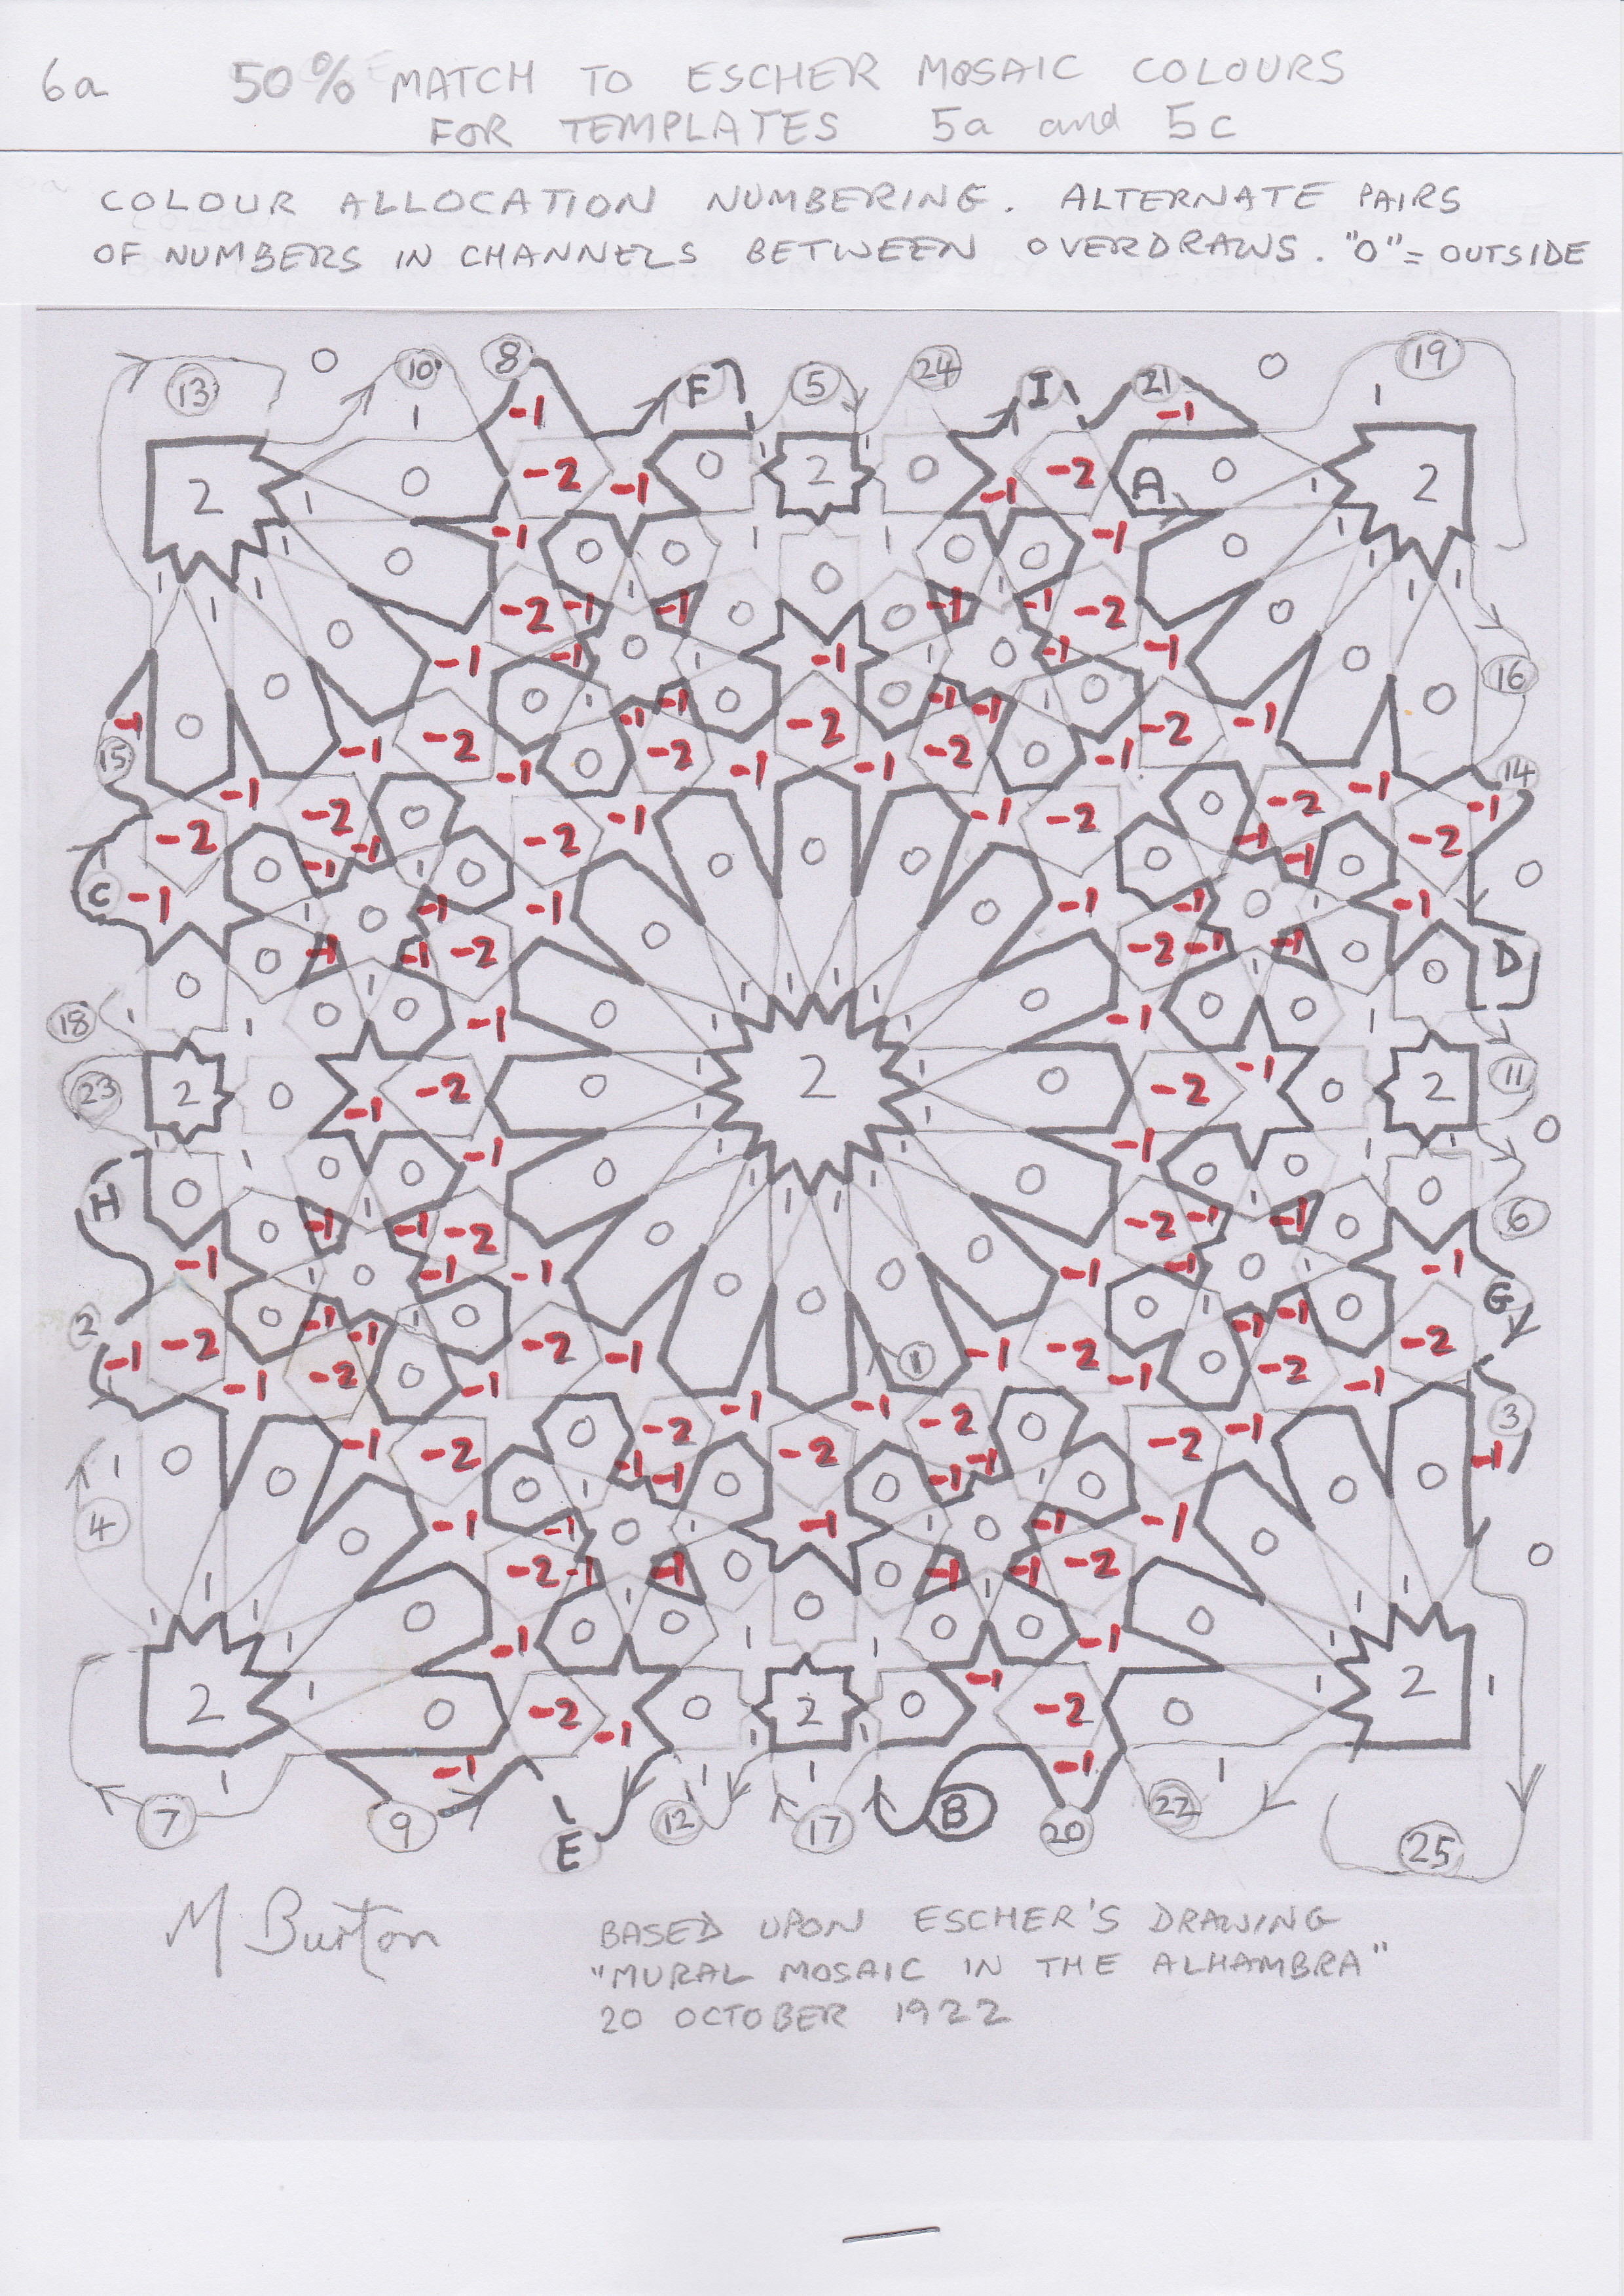
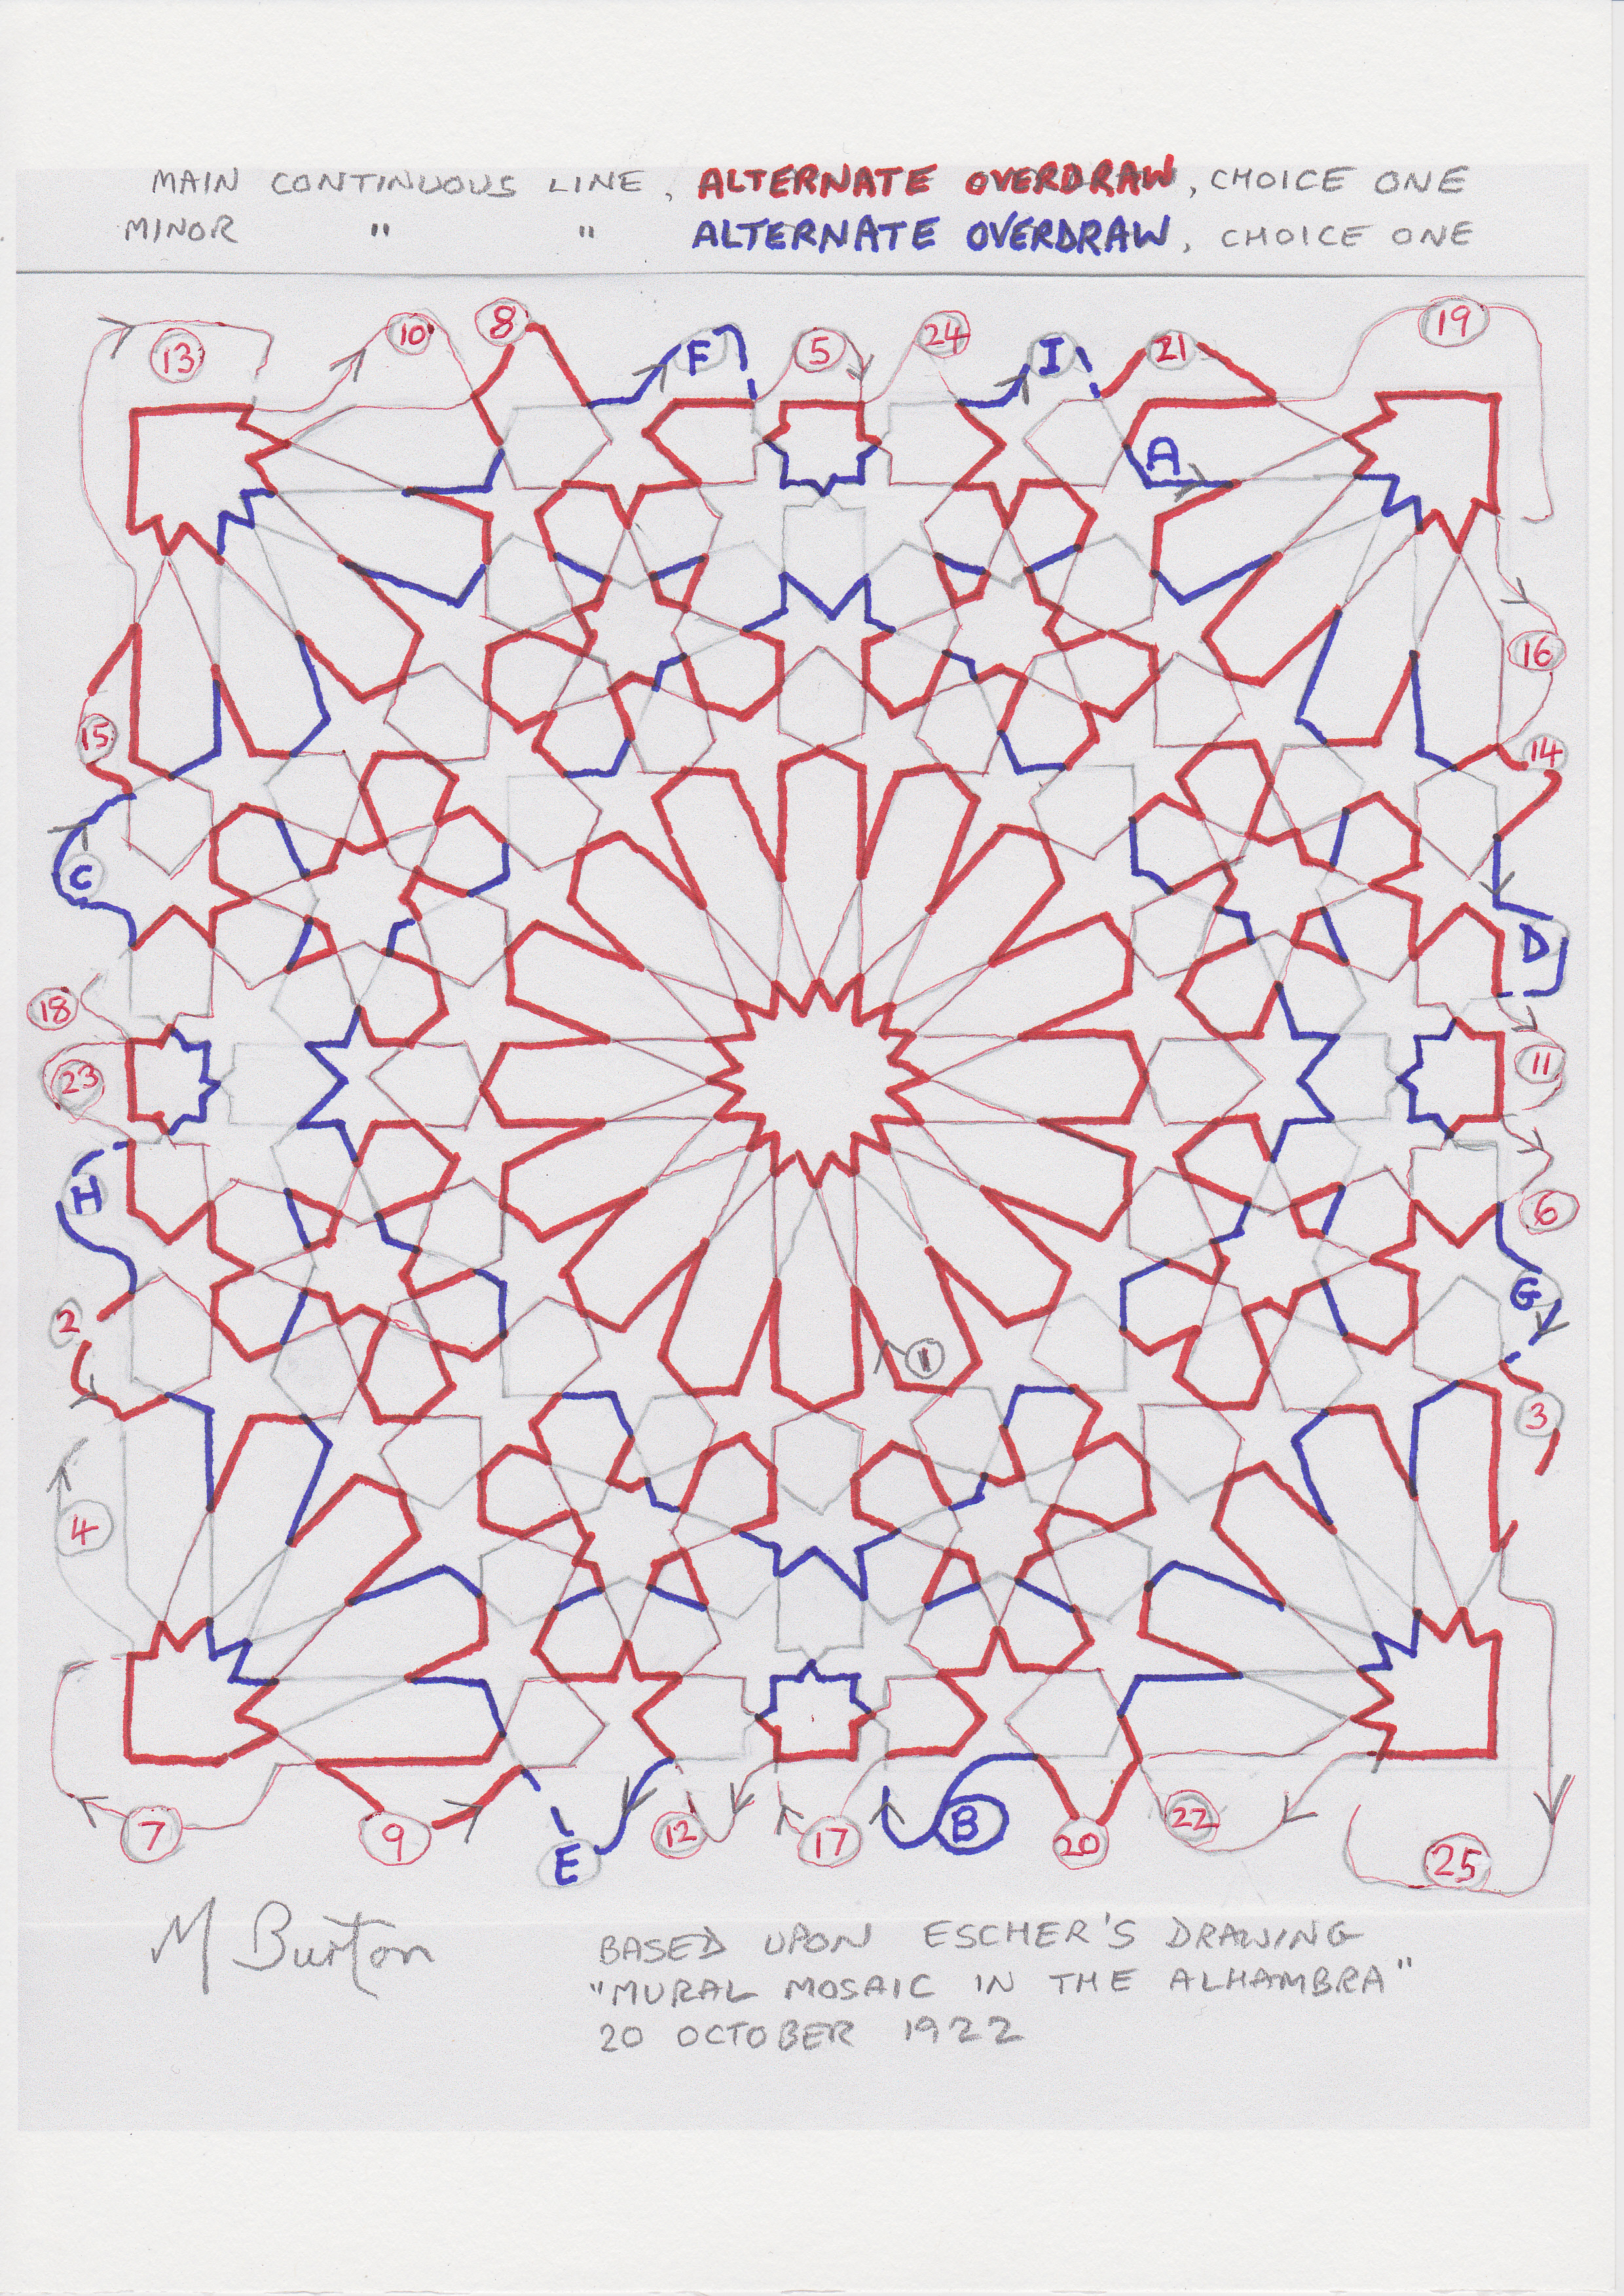
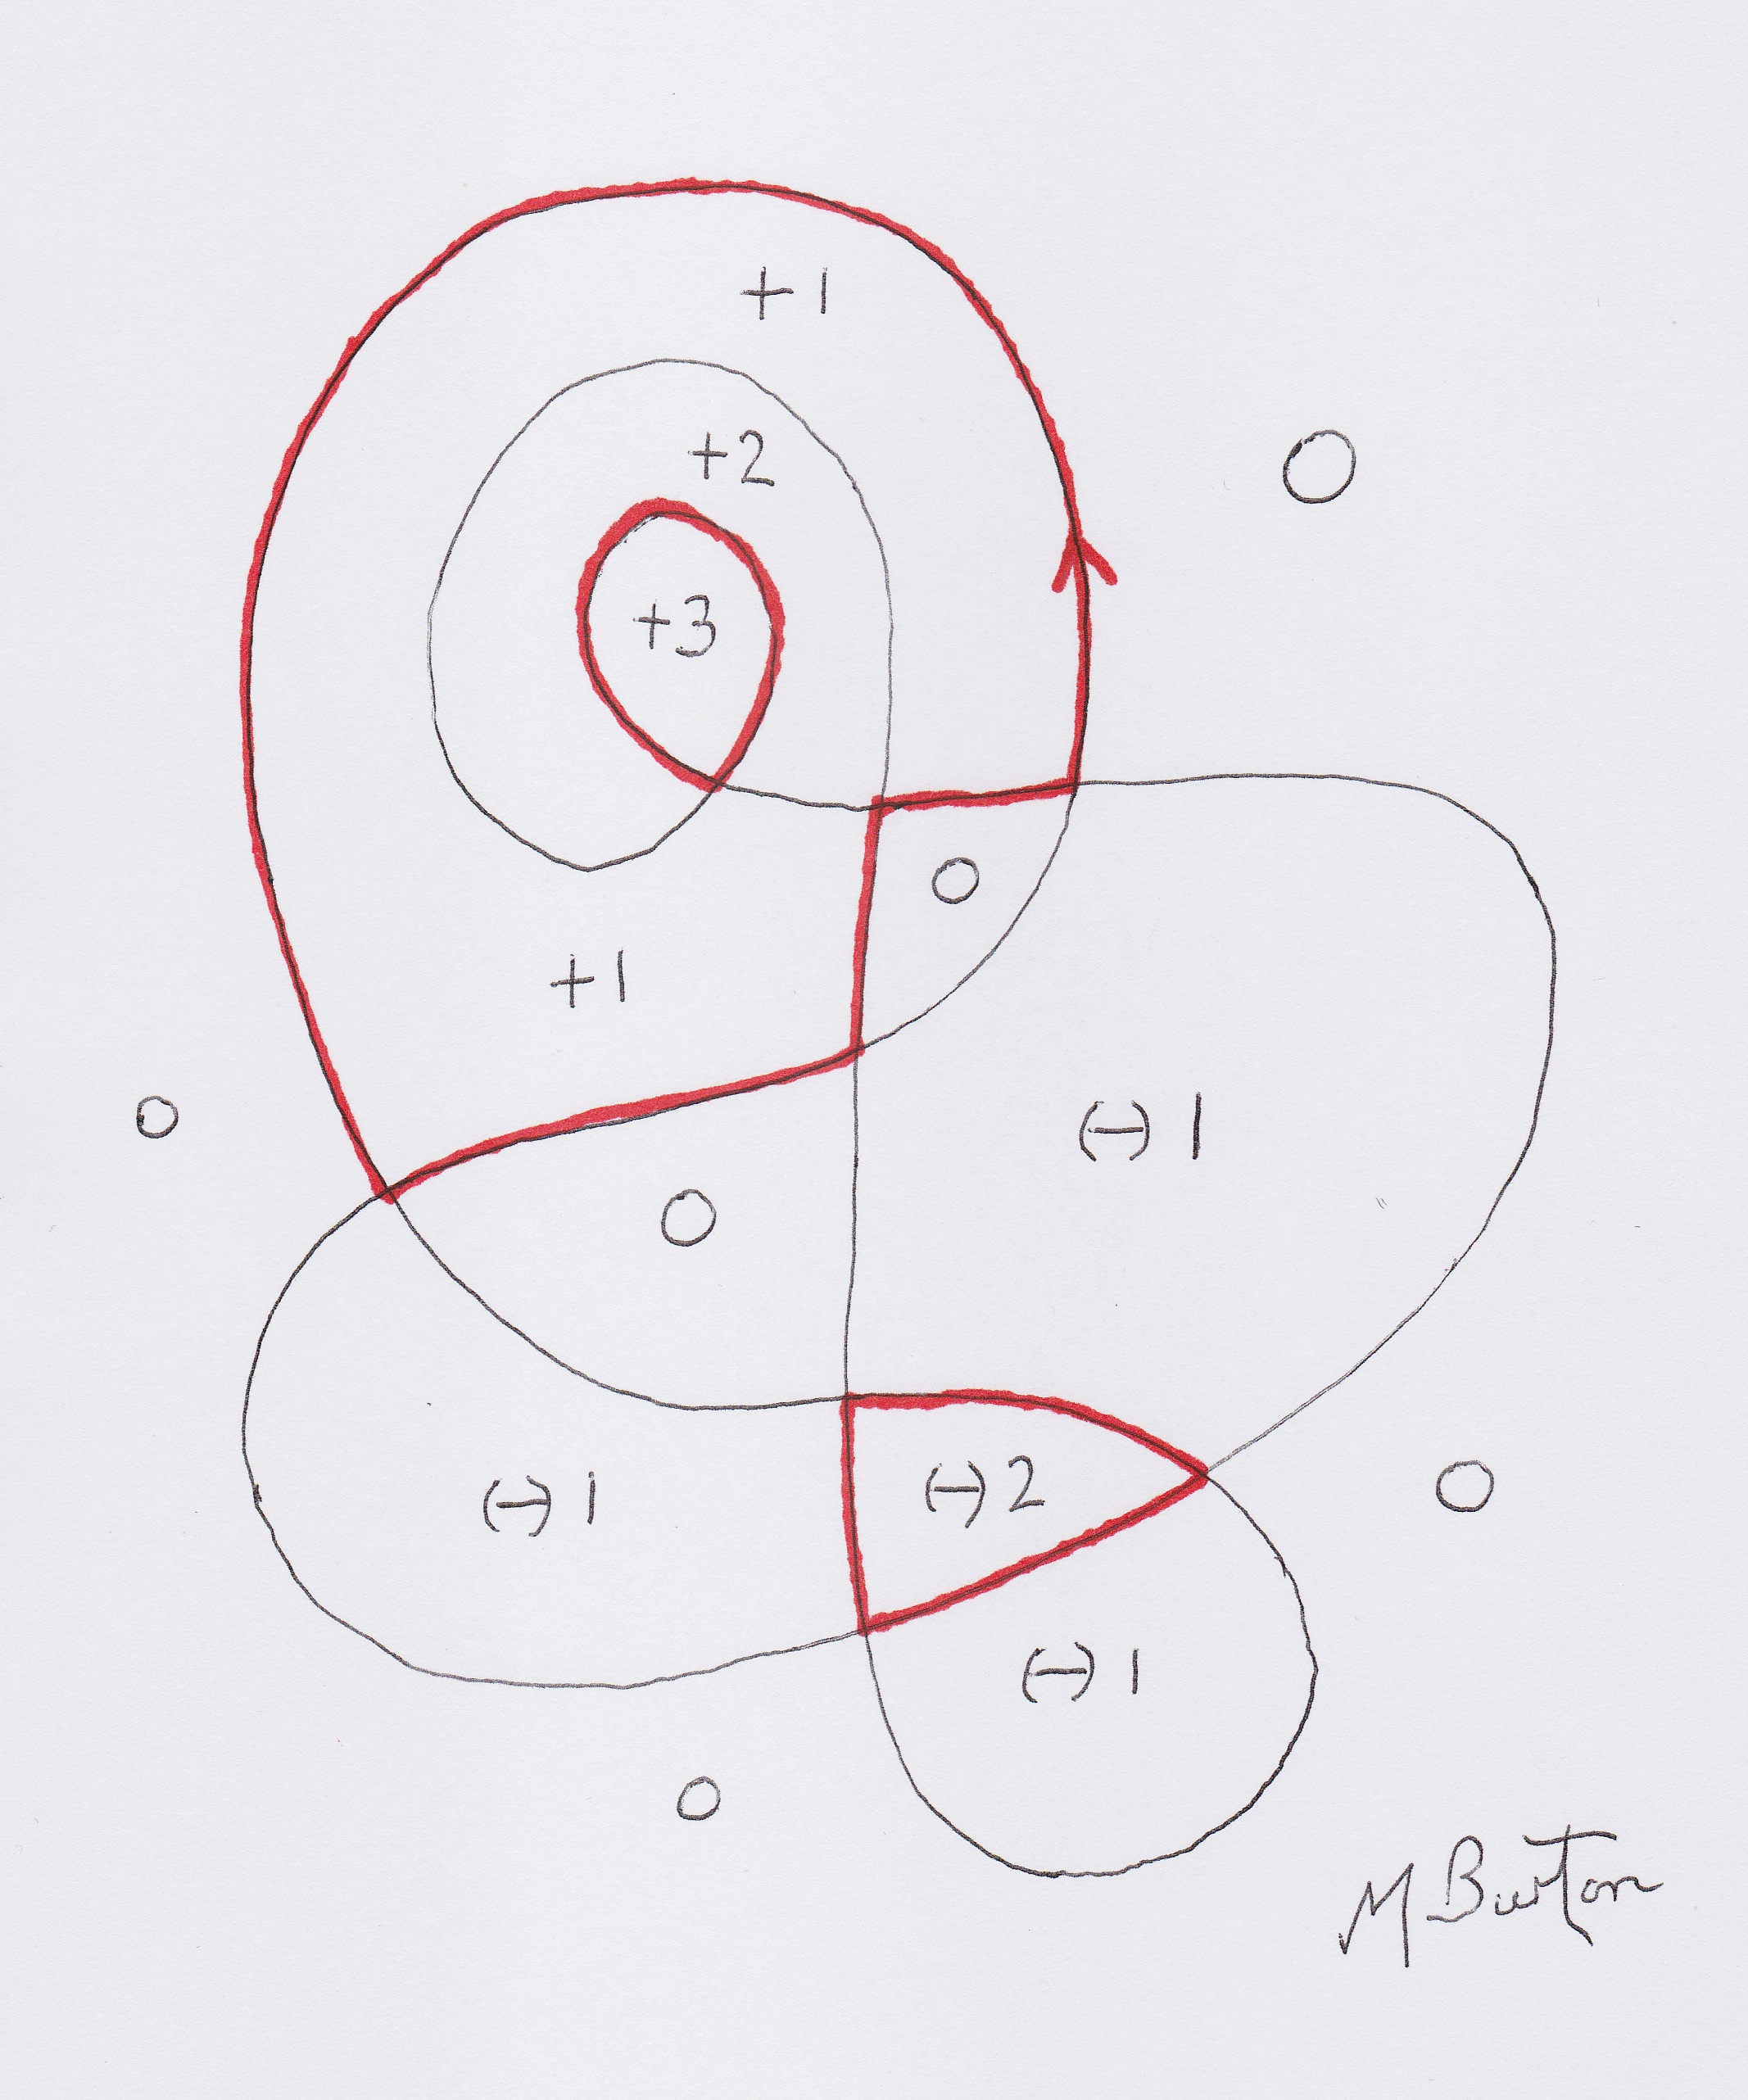
I show below the design with all the loose ends and Alternate Overdraws in Red. At this stage the artist would not know how many continuous lines would occur in the tile section on its own. He will have also needed to produce a straight edge on the corners and other parts of the perimeter to block unwanted lines which encroached from the outside pattern.

Section of larger pattern with Alternate Overdraws and loose ends showing whether overdrawn. Mick Burton study.
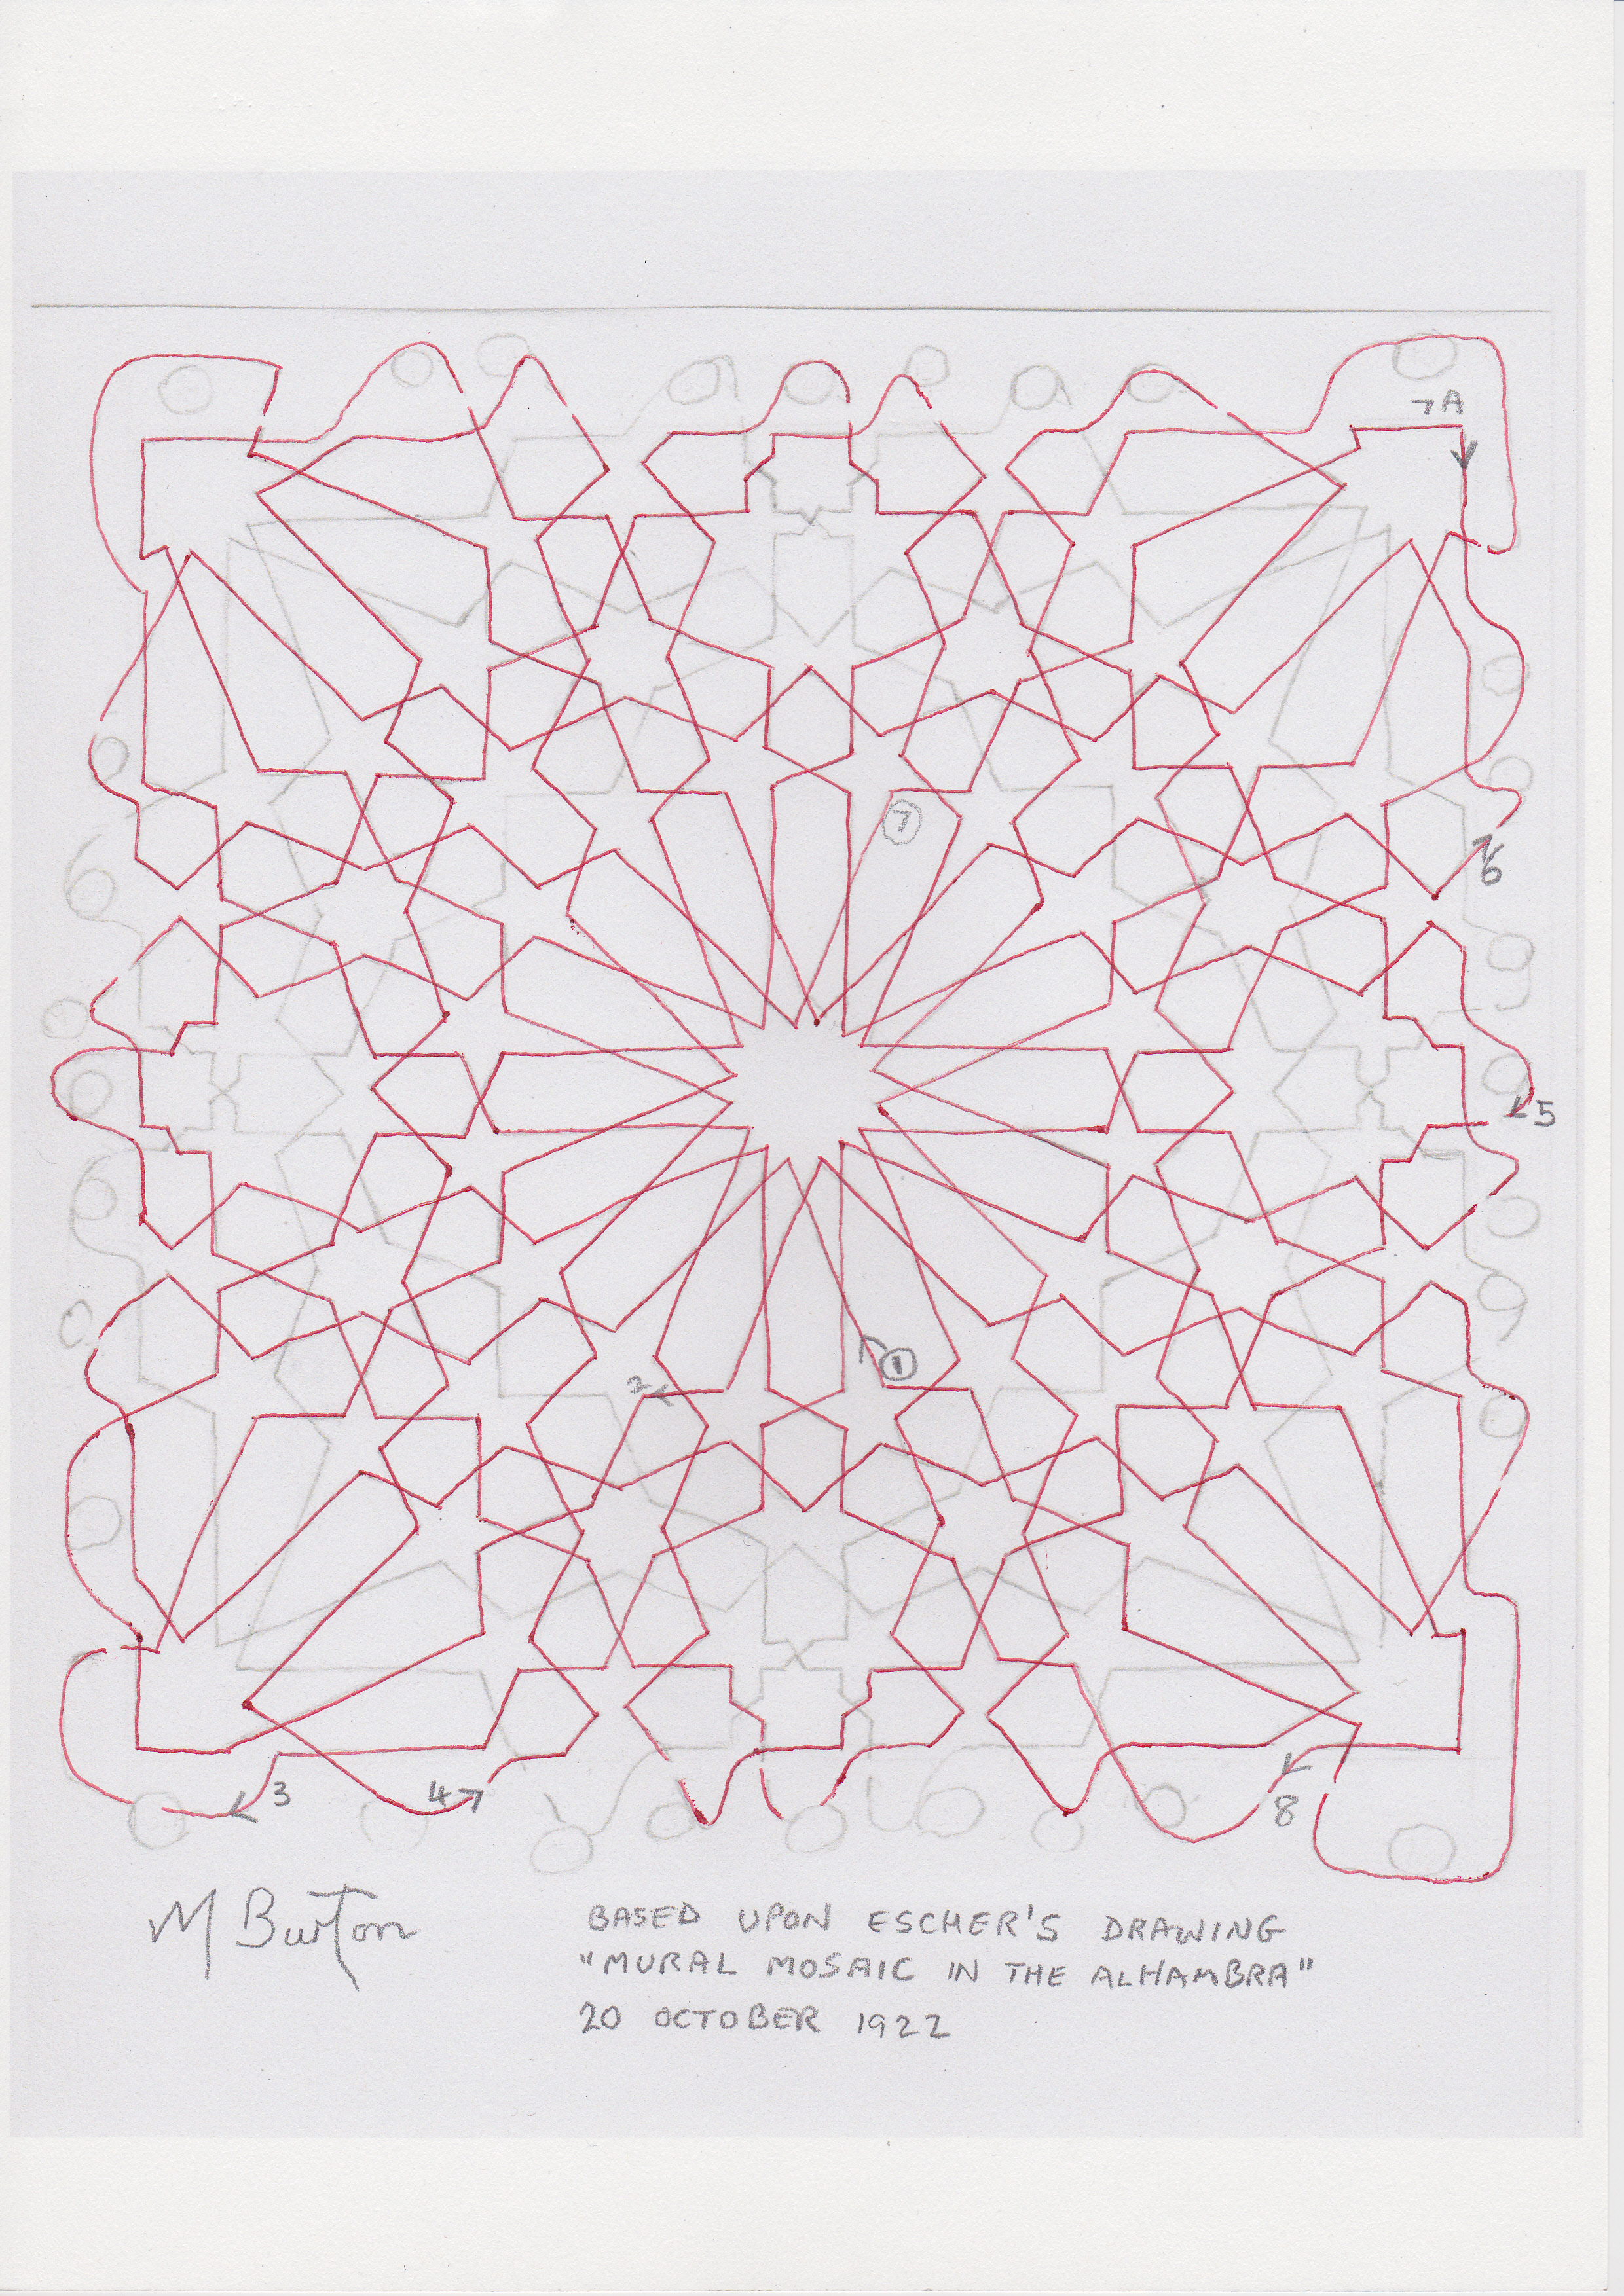
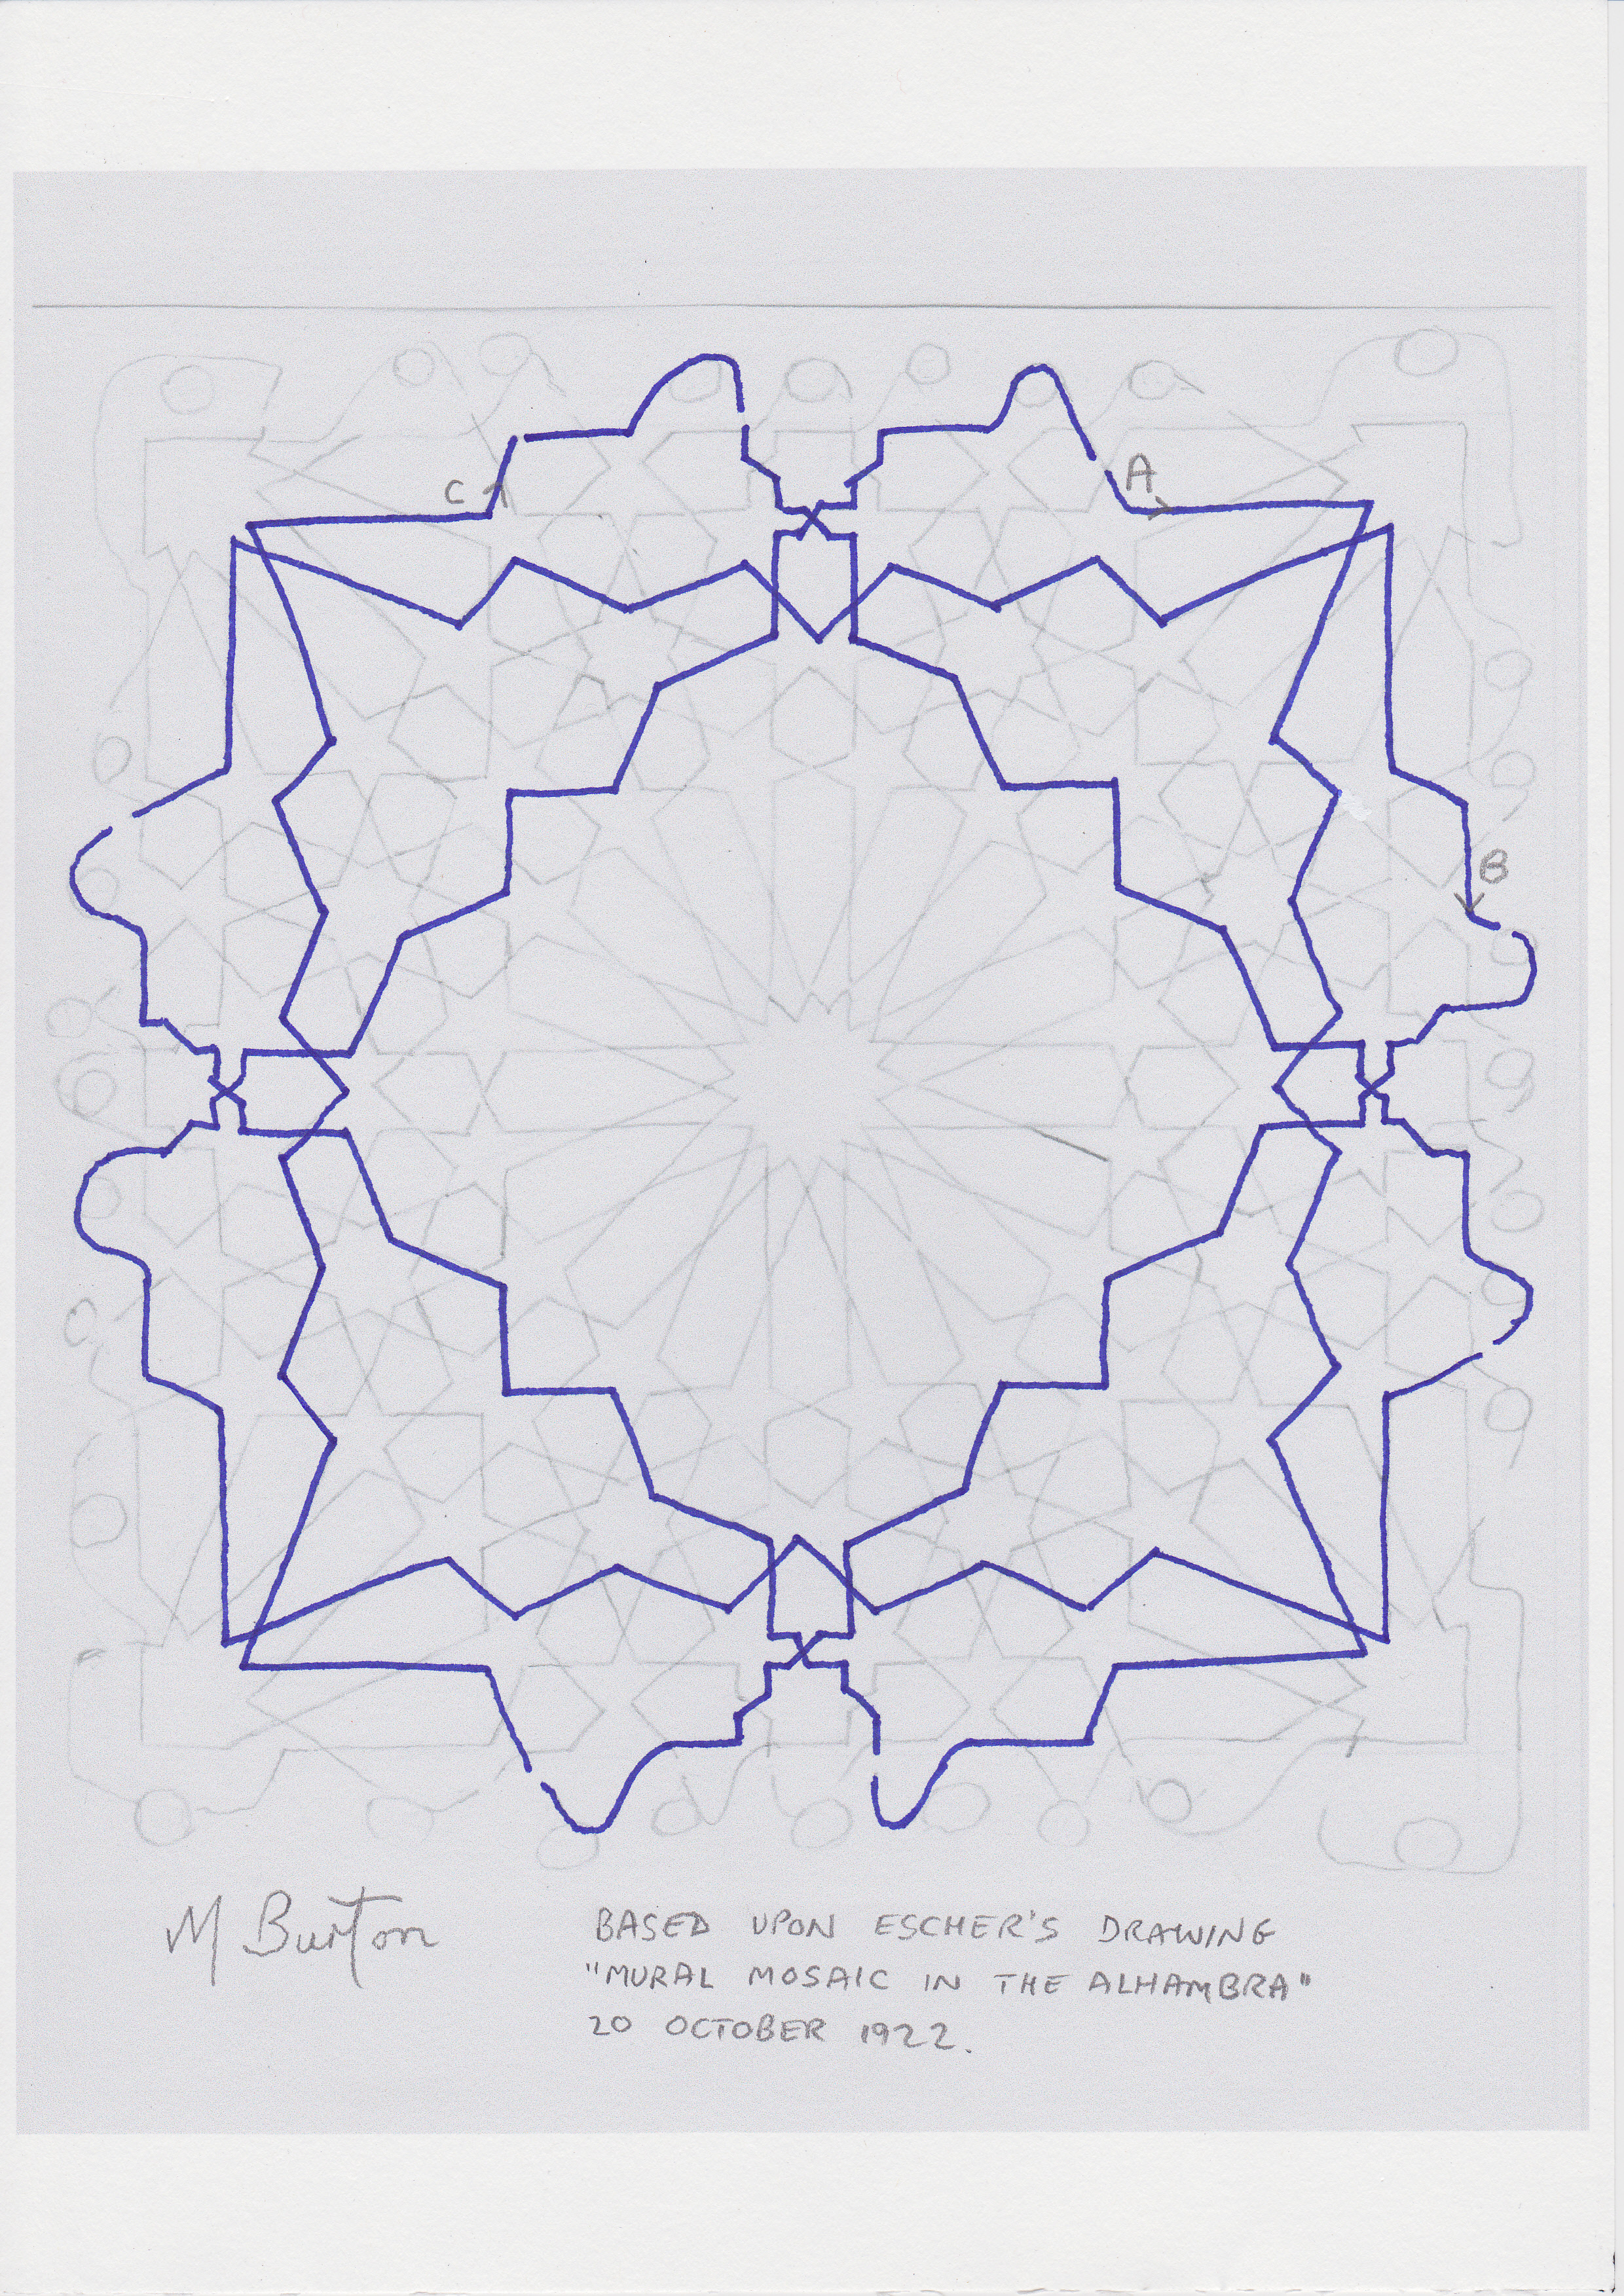
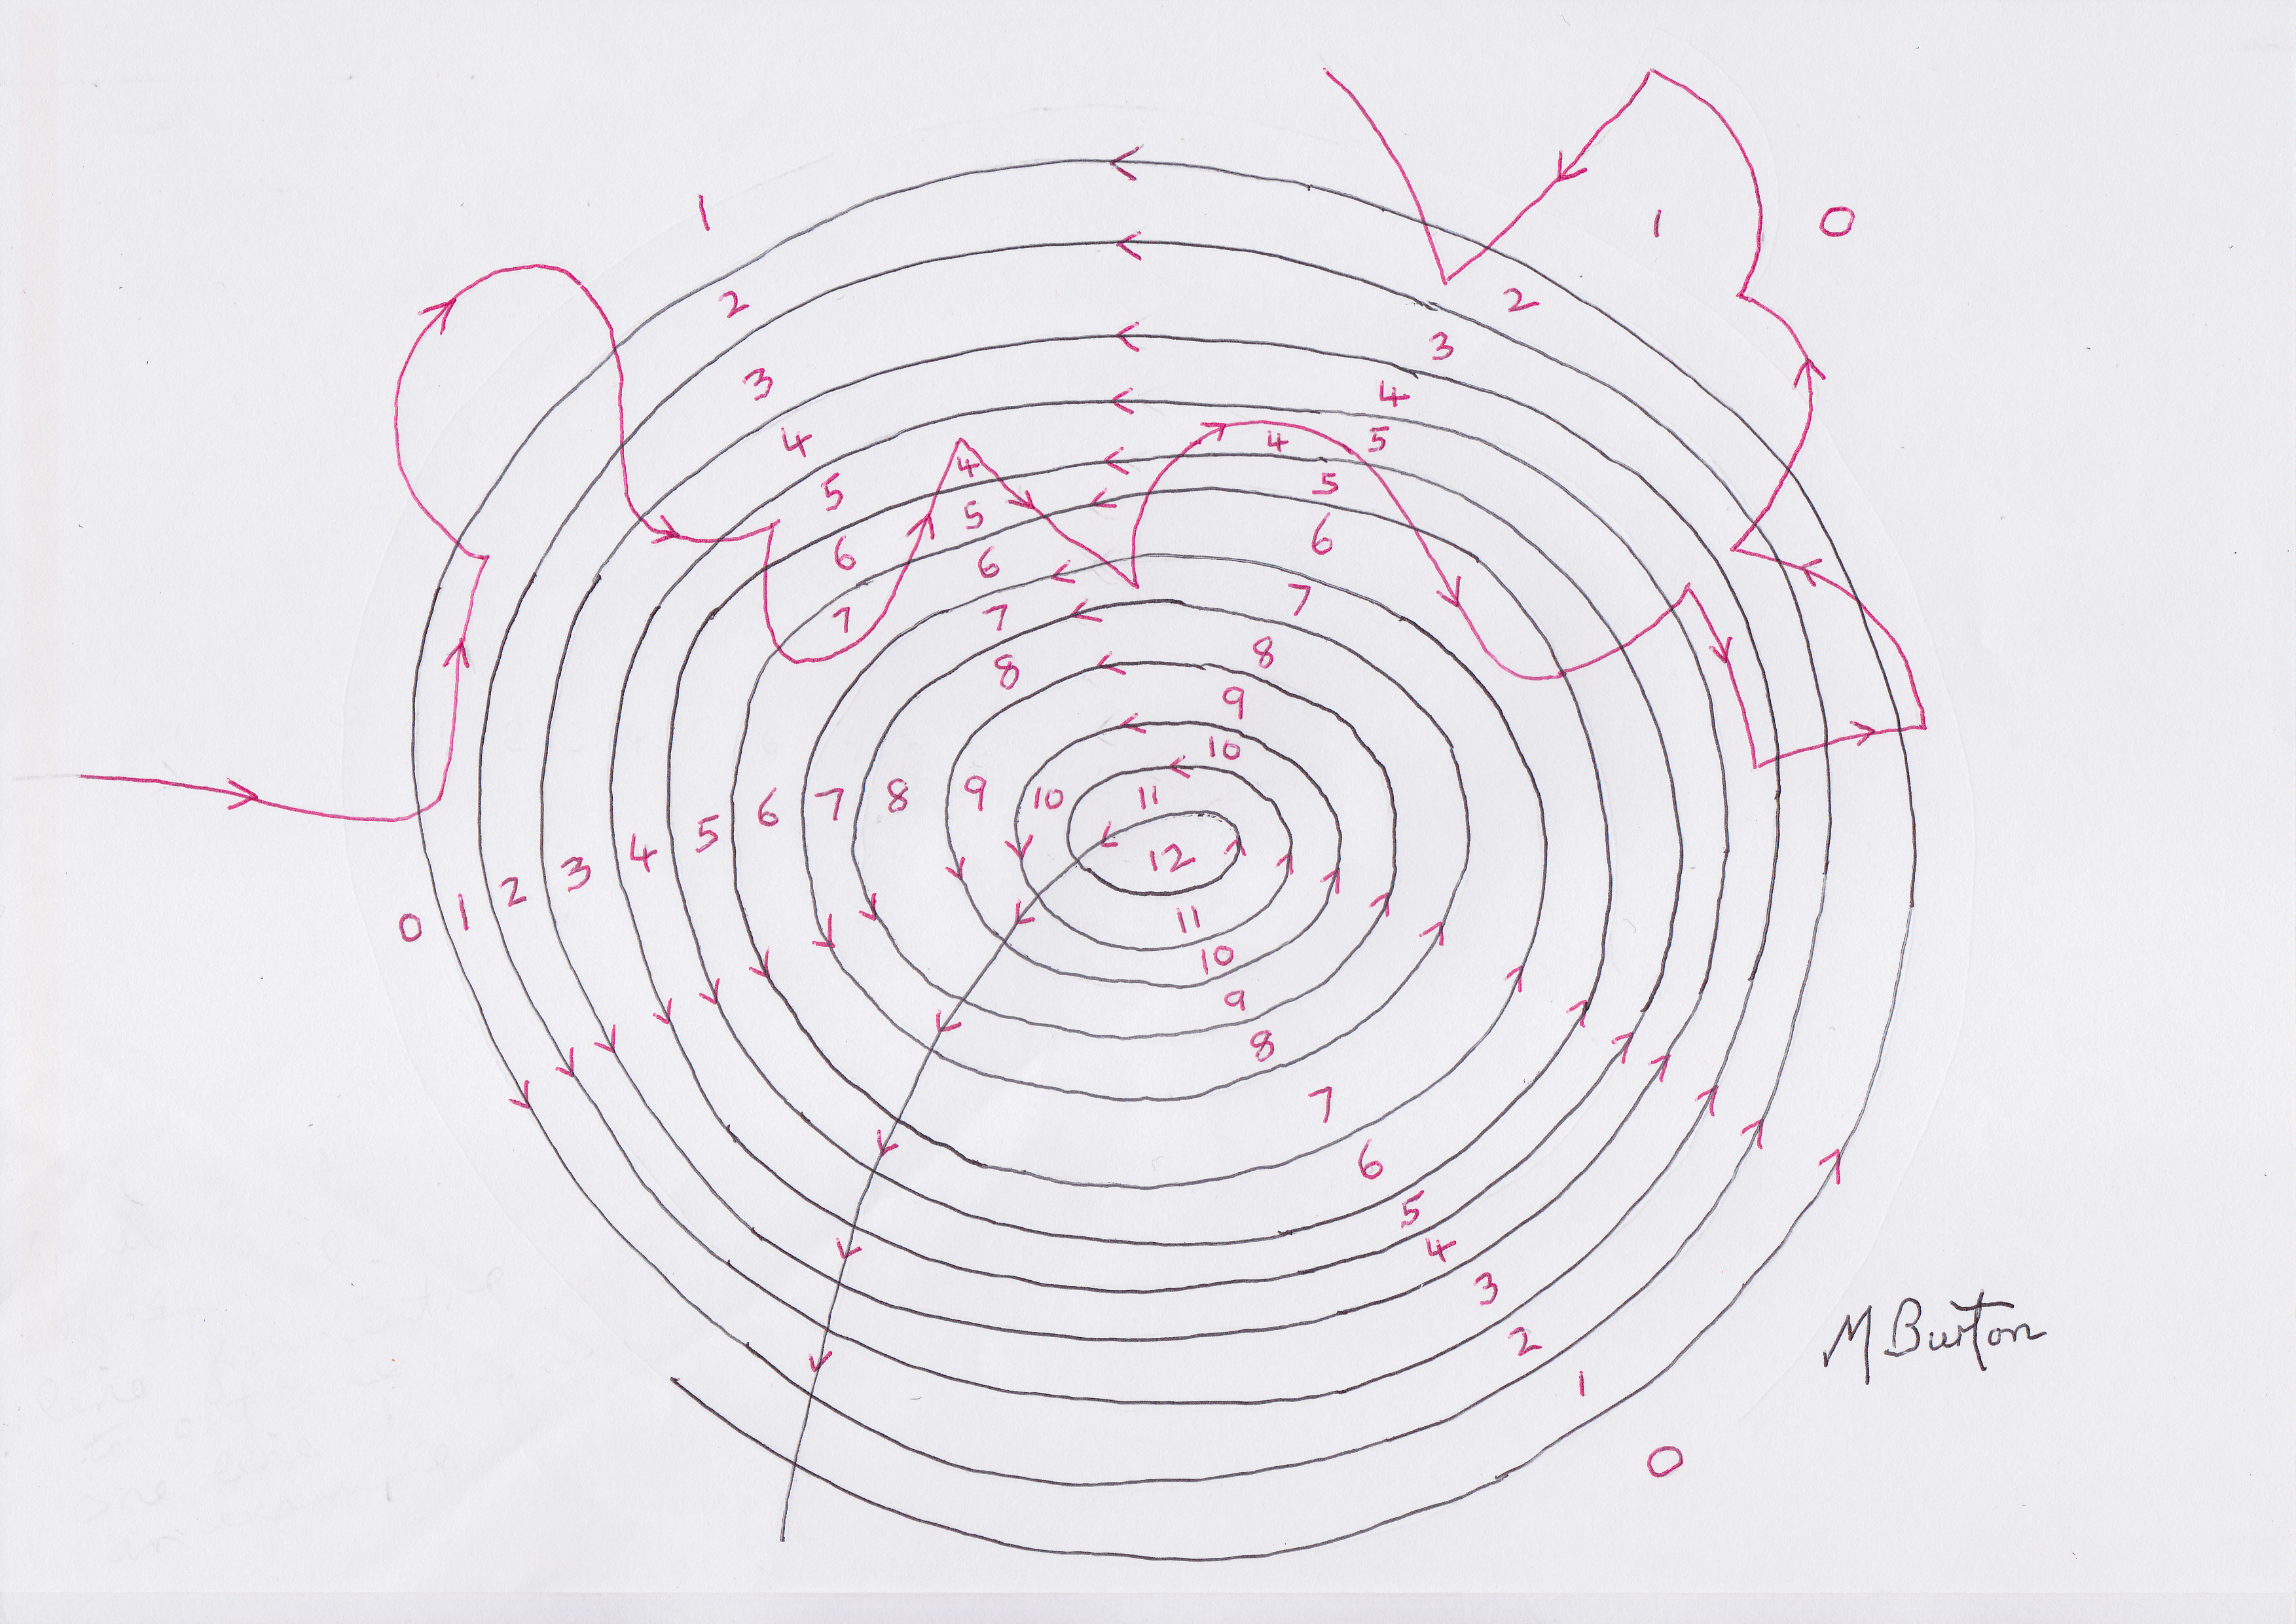
You will see from the loose ends that half of them are overdrawn in Red and half not. If you connect up pairs of the overdrawn, and pairs of the not overdrawn, loose ends then there will be continuous lines throughout the design and the Alternate Overdraw Template will be unaffected. If I connect up the not overdrawn pairs around each corner of the design, then working along the sides both overdrawn pairs and not overdrawn pairs work out consecutively. This matches the line direction message in the Border on the Mosaic design. Here is a chart (previously in STAGE 1) showing all the loose end connections. We know from STAGE 1 that there are two continuous lines, which makes the case strong regarding the artist using Alternate Overdraw, but it would not have mattered if there were more than two.

Escher Islamic Tile. Basic line structure, with border connections. Mick Burton continuous line study.
Having looked at Borders in detail, that prepares us for the final STAGE 5 where I show how we can turn this into a Single Continuous Line design.
I will also give you my opinion on what the original Artist thought about a Single Continuous Line and why I think he is definitely an Artist and not just a craftsman.
Mick Burton Continuous Line Blog.