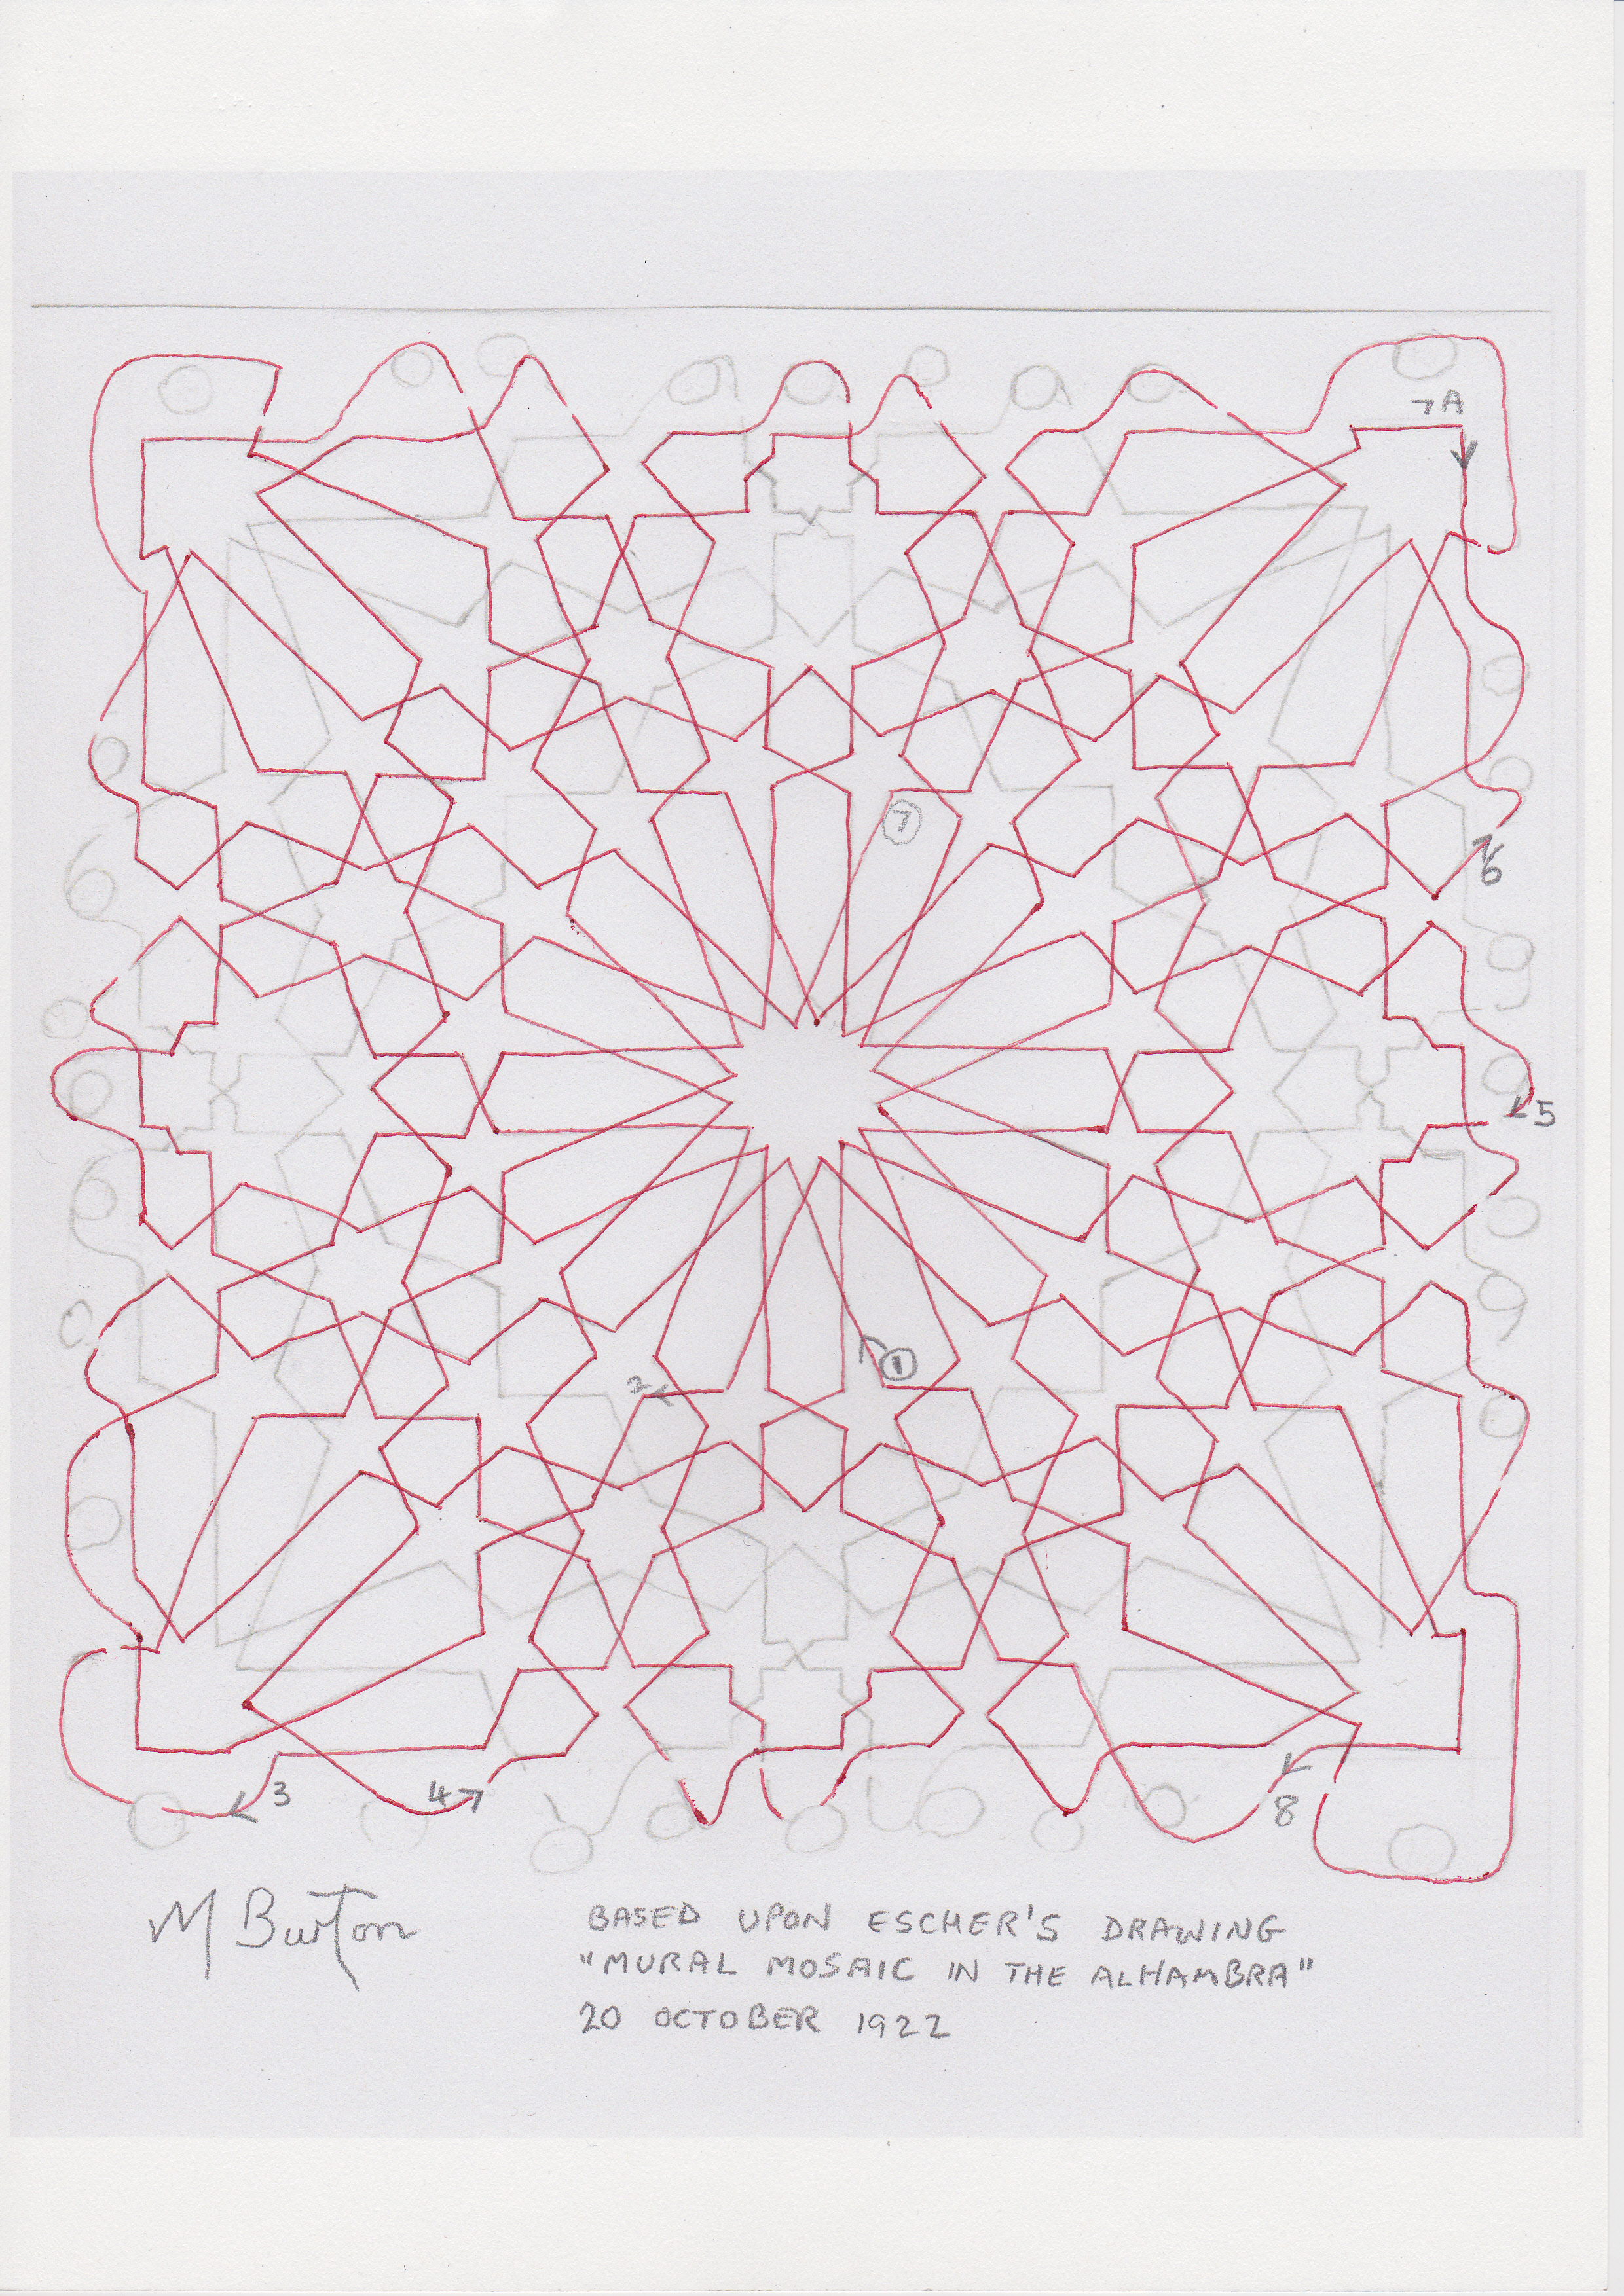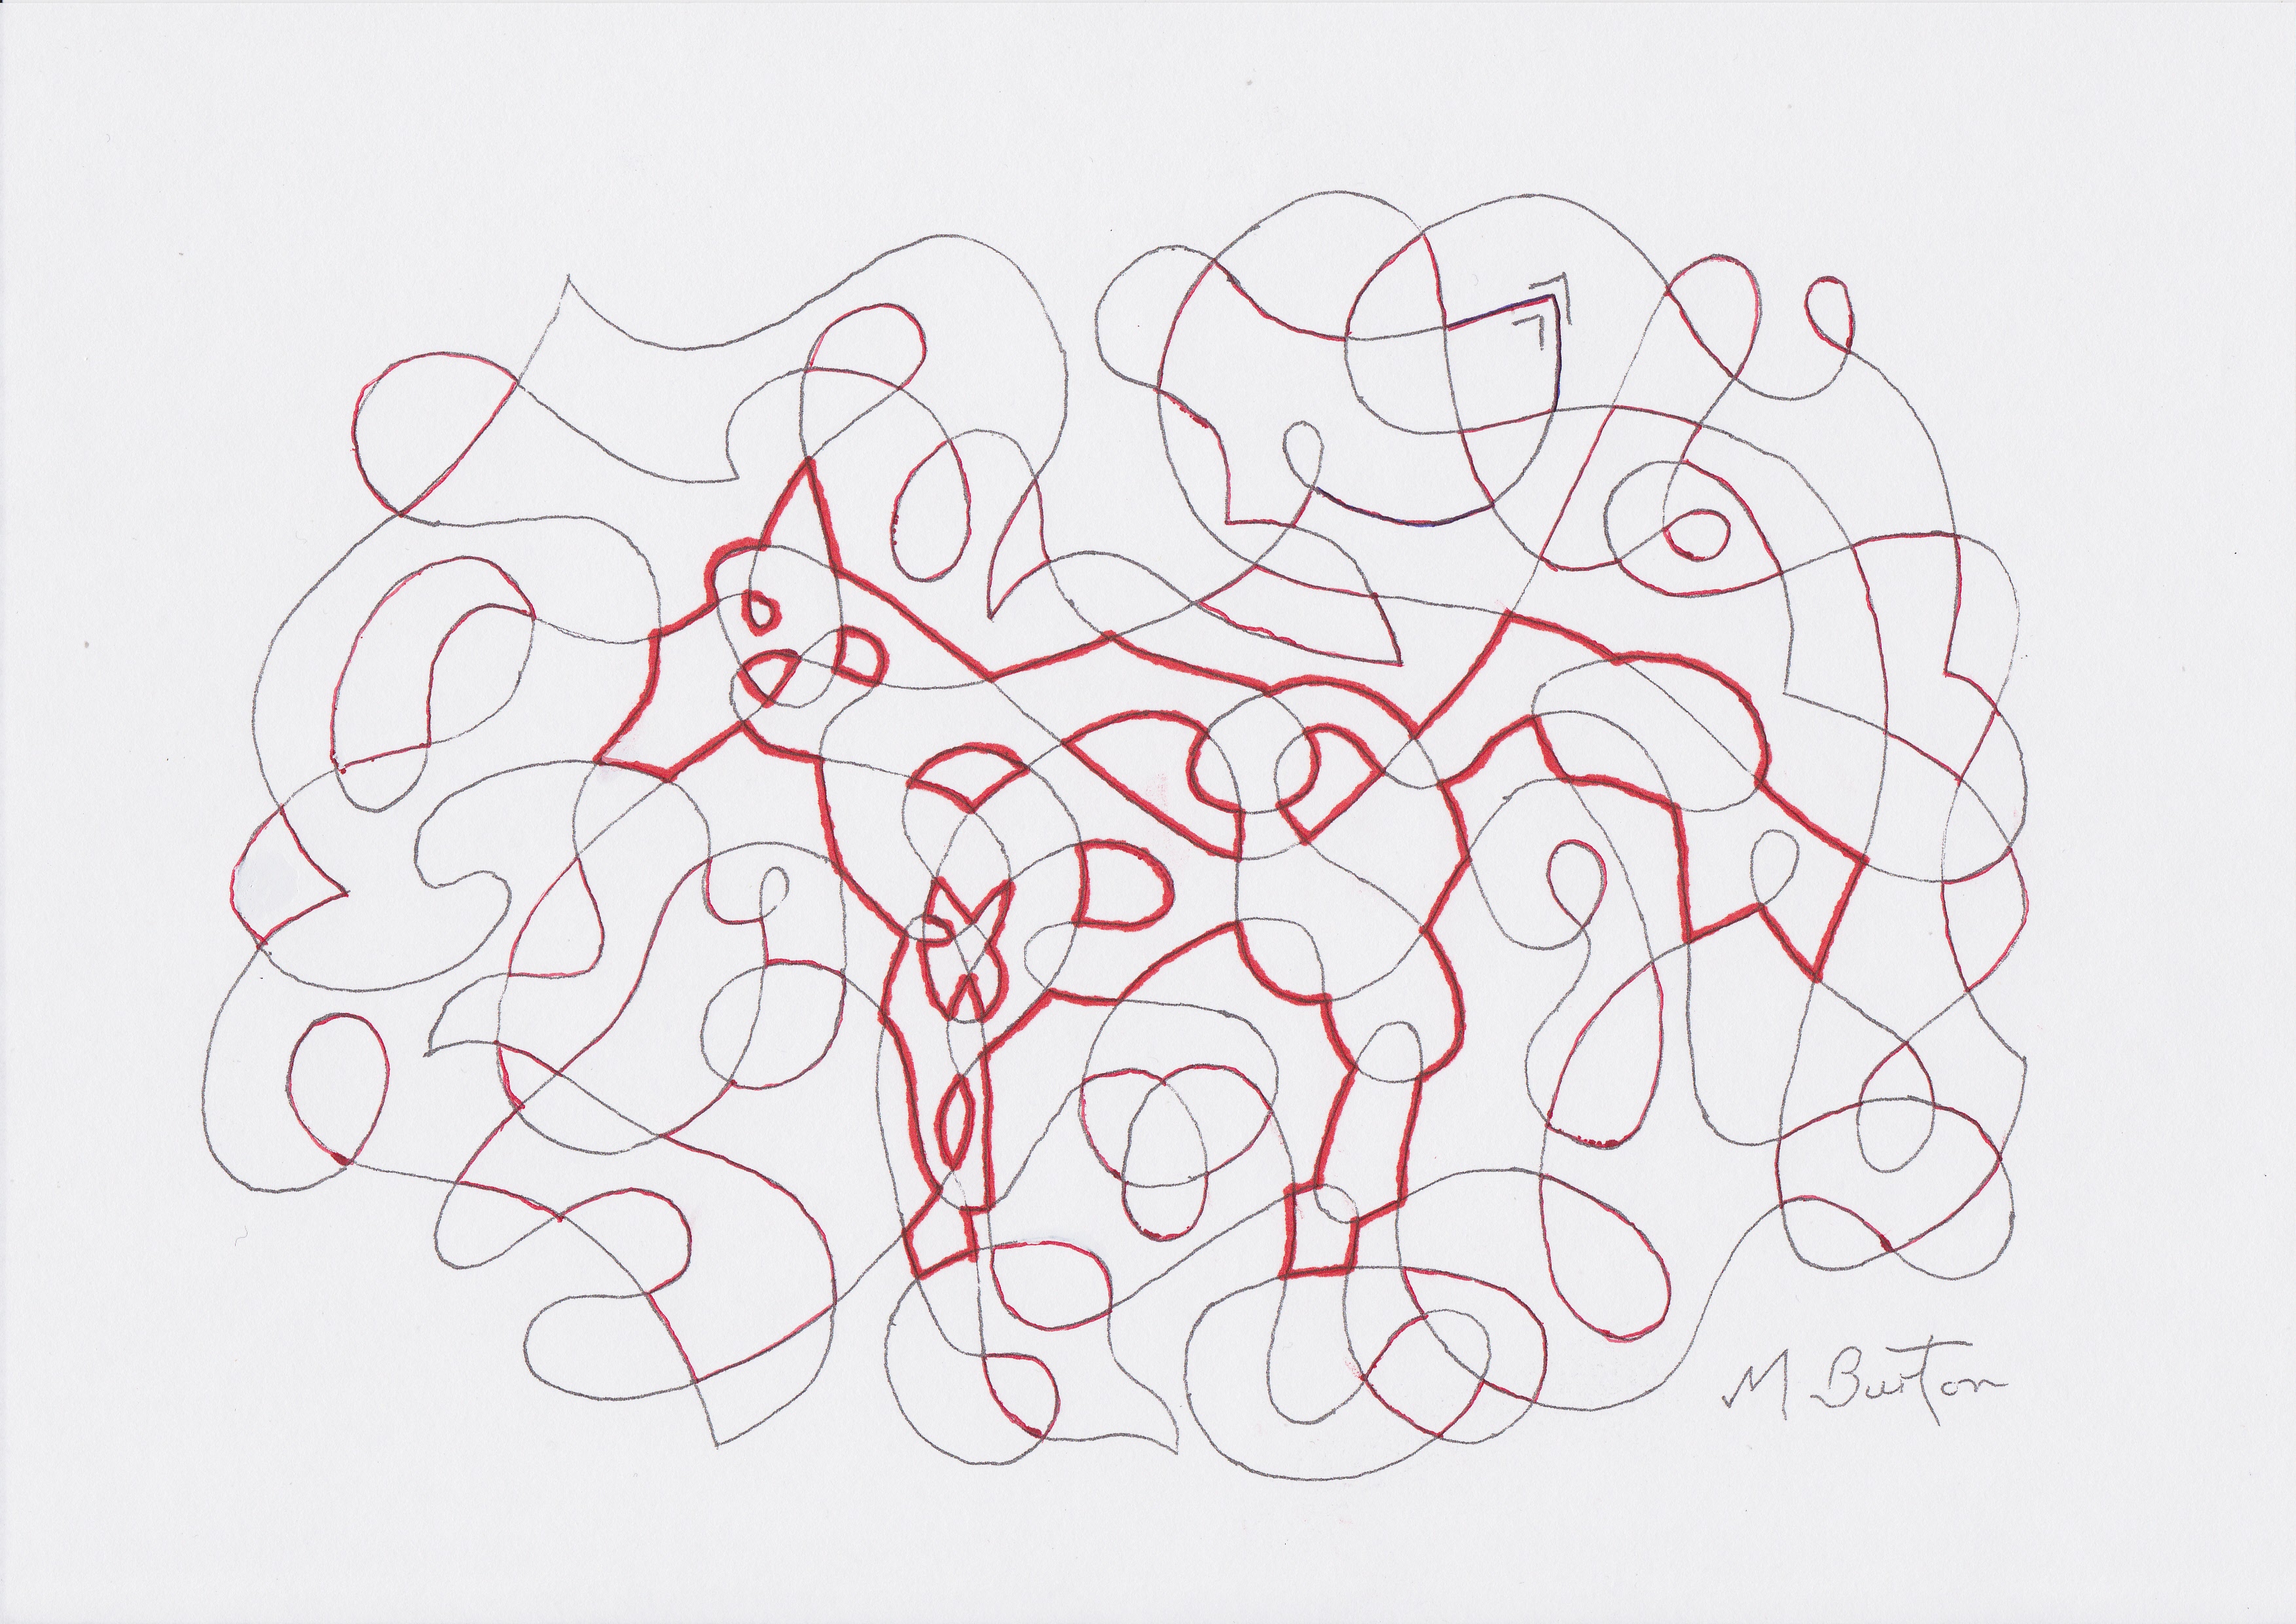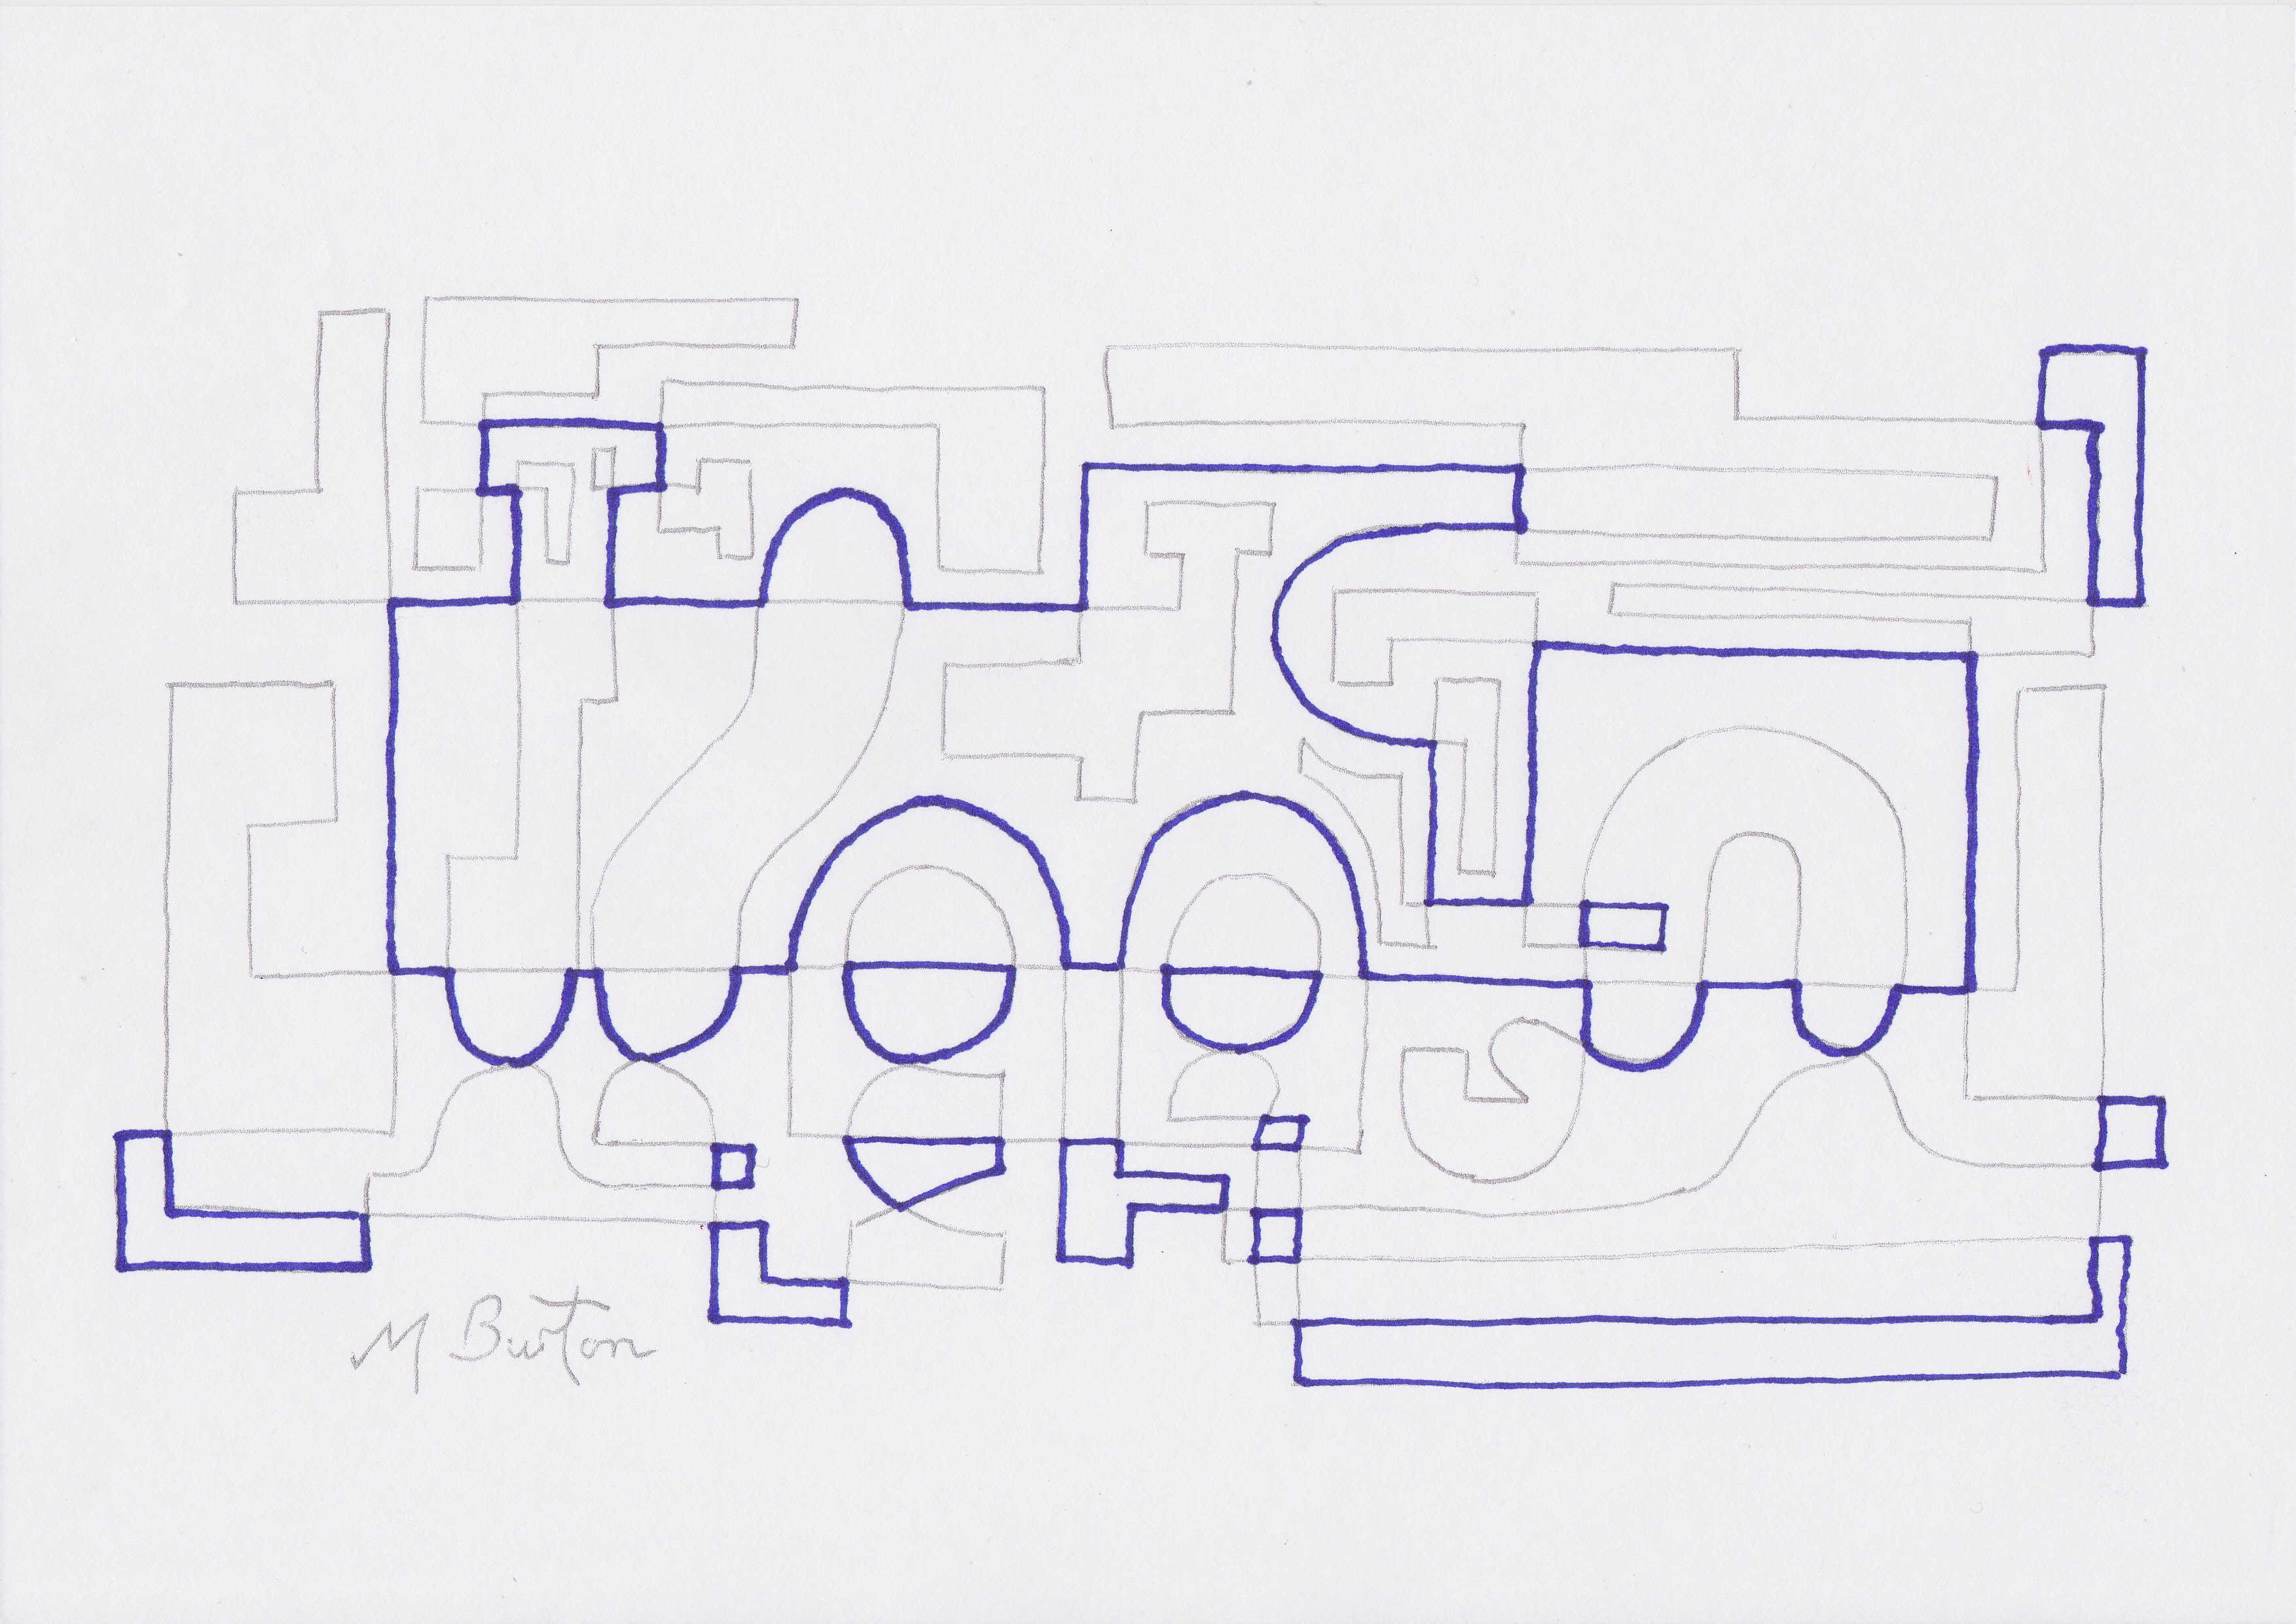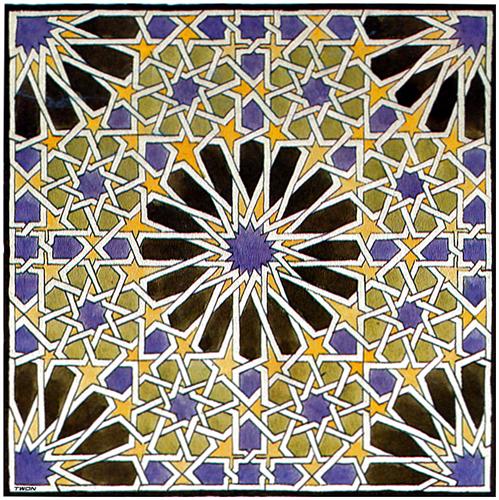
Escher painting 1922 of Islamic Mosaic tile at the Alhambra. WikiArt. Continuous line study by Mick Burton.
Before applying my Alternate Overdraw, which I use to allocate colours to Continuous Lines, I will give you my analysis of the colours in the original Mosaic and what I feel were the artist’s ideas behind the design.
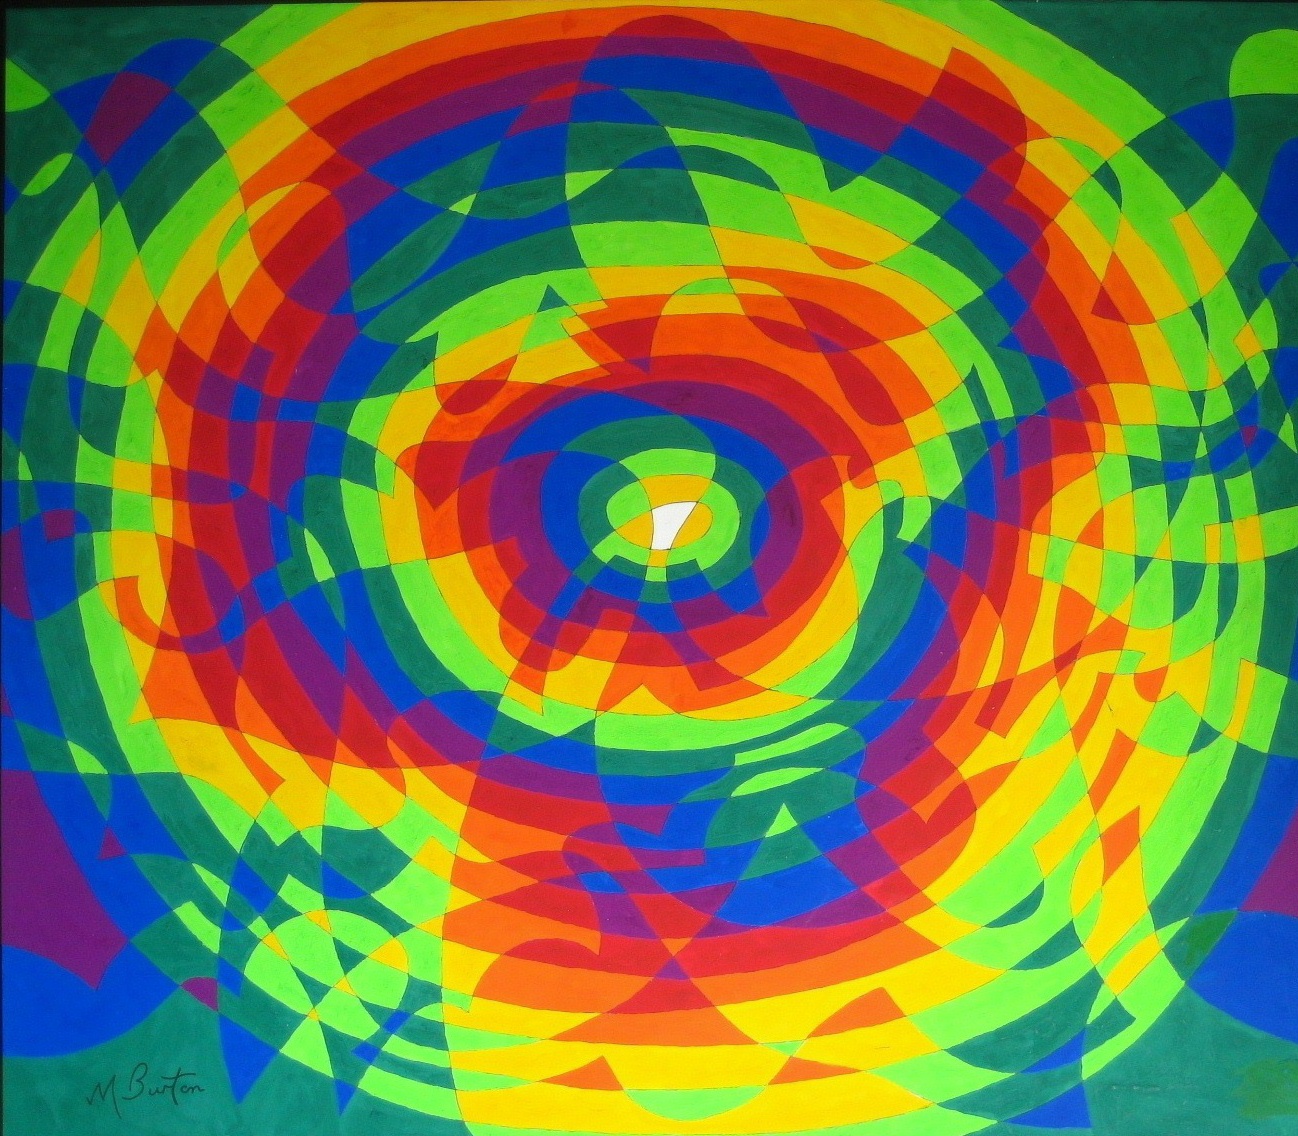
Eric Broug states, in his YouTube demonstration “How Grids and Patterns Work Together” that this is a 16 point star surrounded by 8 point stars. Geometrically you can produce stars with many different numbers of points. Having done many planetary paintings myself, I feel that the original artist has realised that in this case we have a central Sun and 8 planets surrounding it which can represent our solar system (we can ignore Pluto as a planet as it only featured as such for a part of the last century). The colours the artist uses reflect many aspects of this planetary situation –
a. YELLOW is used as the colour for the flaming surfaces of the central Sun and the corner Suns. All other yellow areas have star like shapes and represent distant stars peppering the background.
b. PURPLE is used for the centres of the Suns and the 8 Planets. Purple is also used for the lines of areas along the sides, vertically and horizontally from the centres of the sides and diagonally (the lines of purple areas may simply be decorative).
c. BLACK is used for the “fan blade” shapes emanating from the Suns. In my planetary paintings I often use black for the background outside a drawing and for the gaps through the drawing . The artist here could be using the same idea, so that the blades are in fact deep space seen beyond the Suns.
d. GREEN is used to surround each Planet and I interpret this as representing life on each Planet, not just ours.
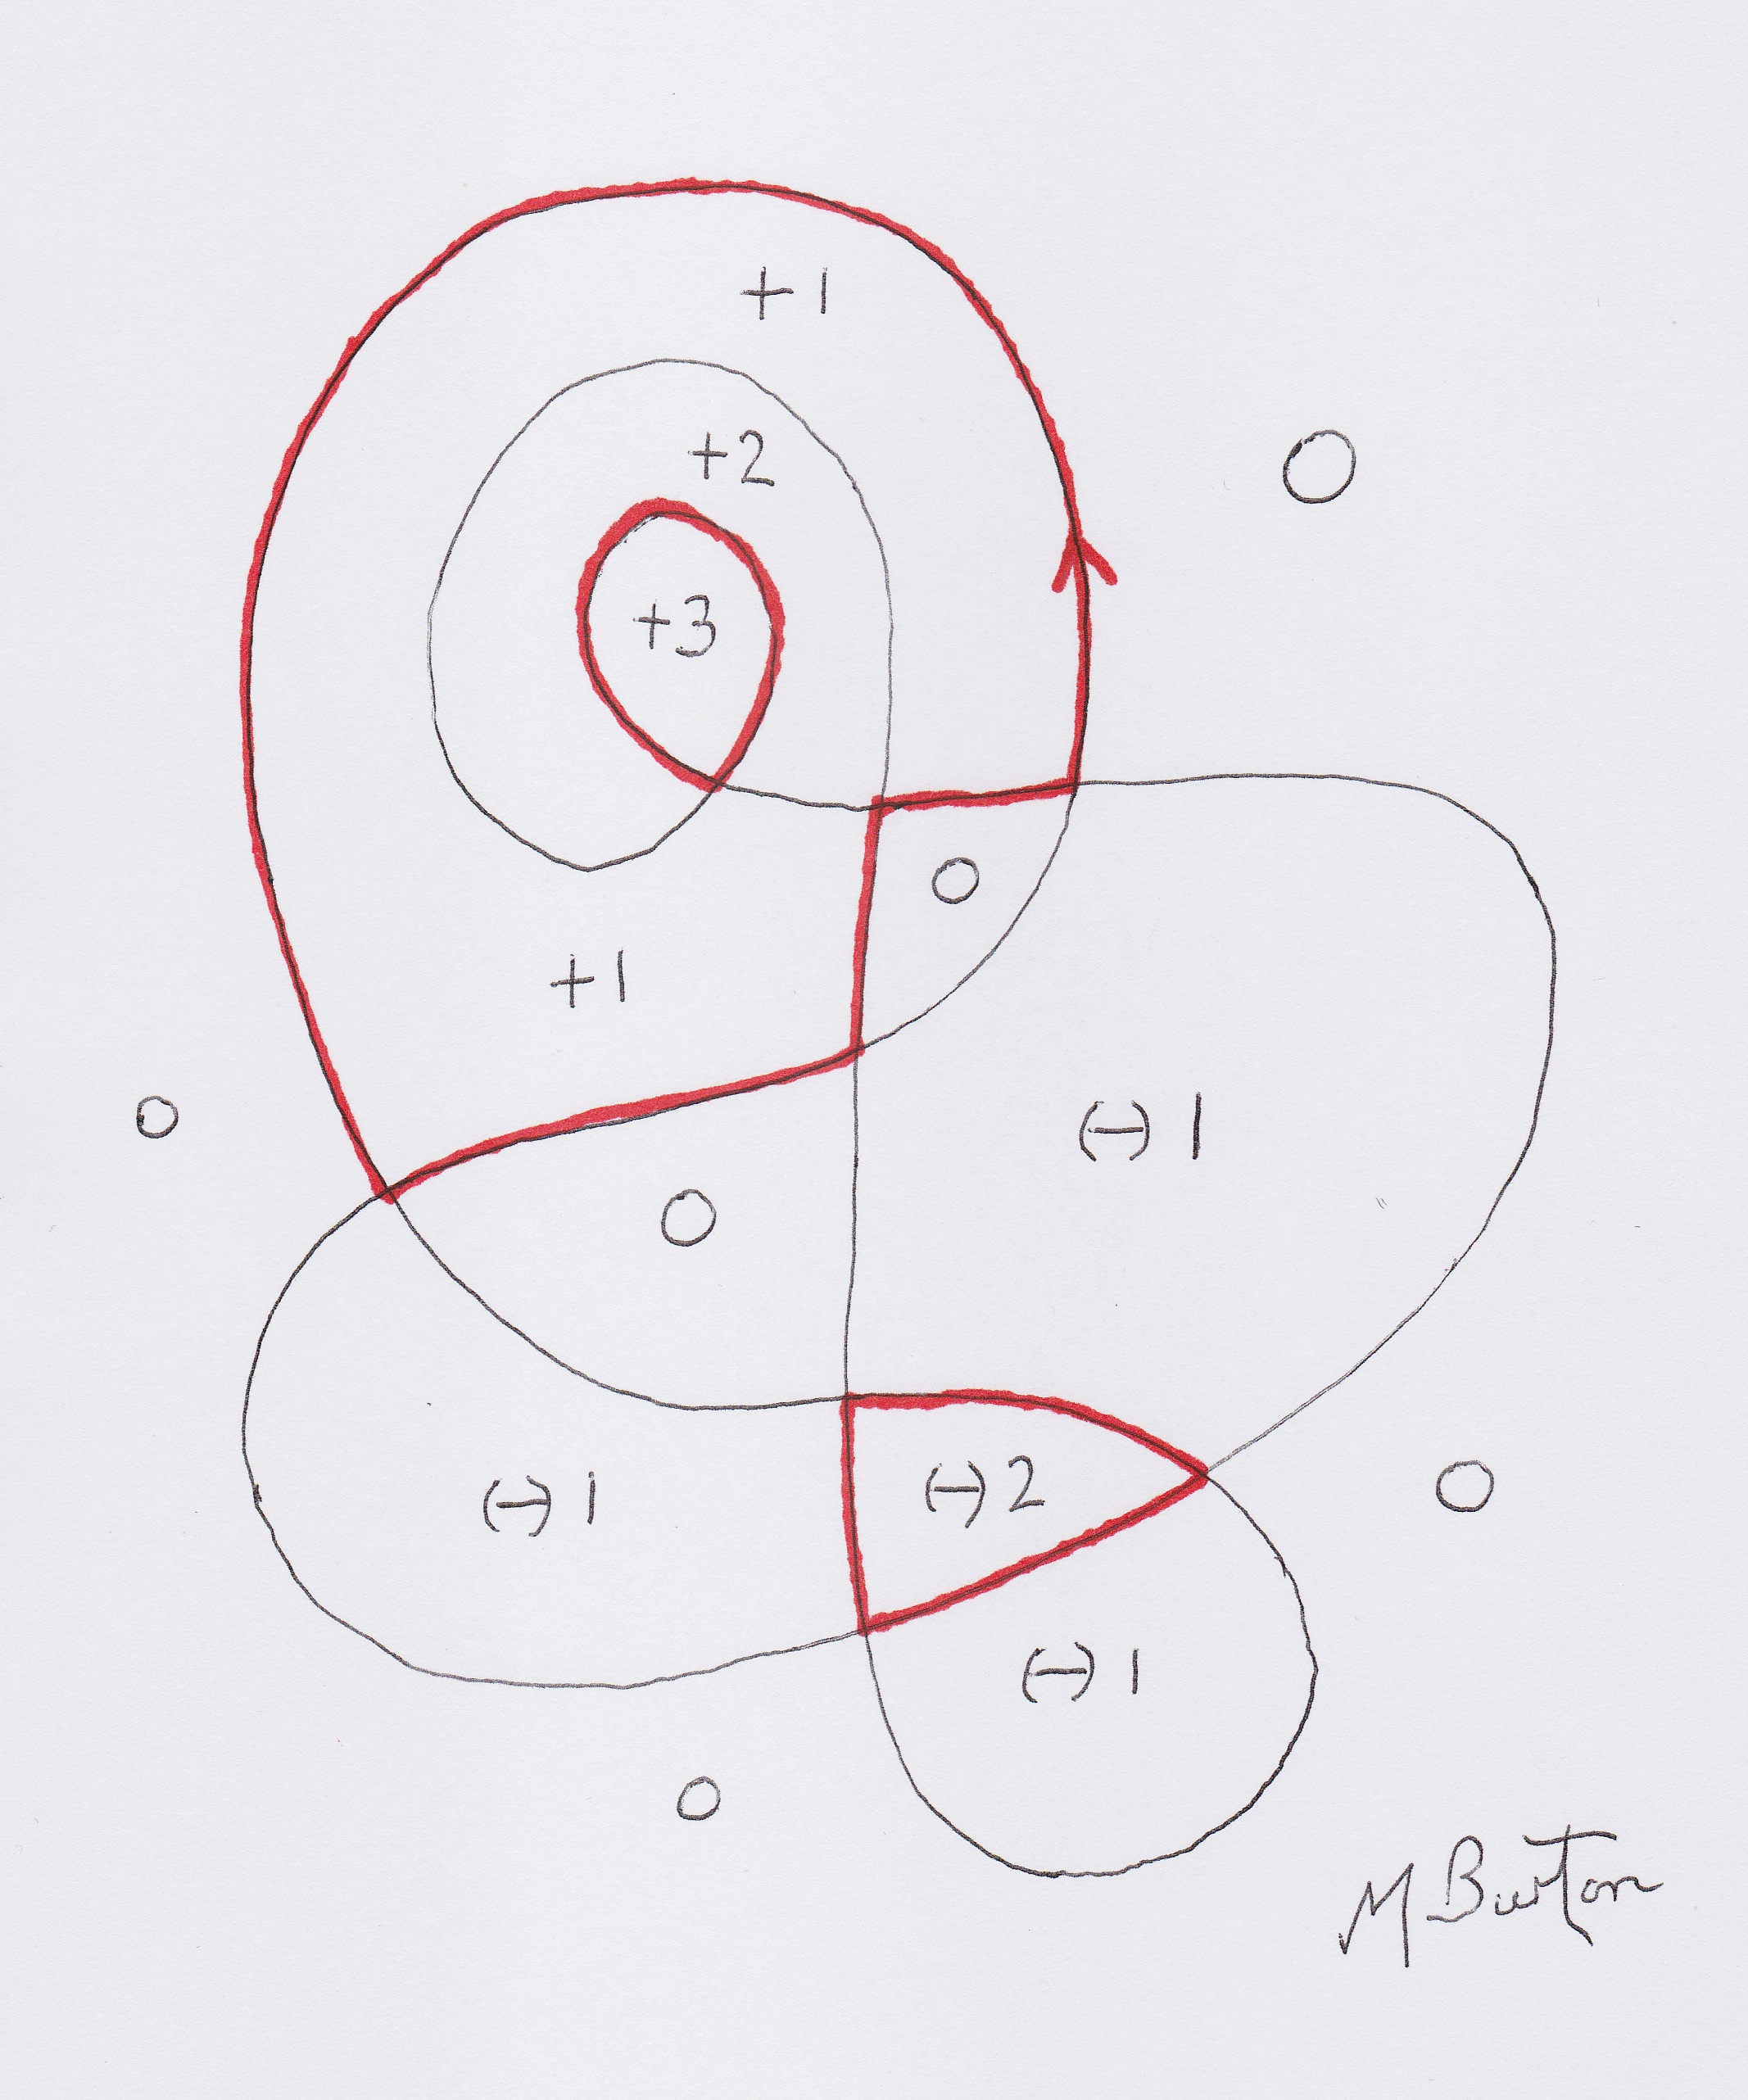
The process for completing an Alternate Overdraw is covered in my Post dated 10 September, 2014 (9/10/2014) entitled “Alternate Overdraw on Continuous Line Drawing”.
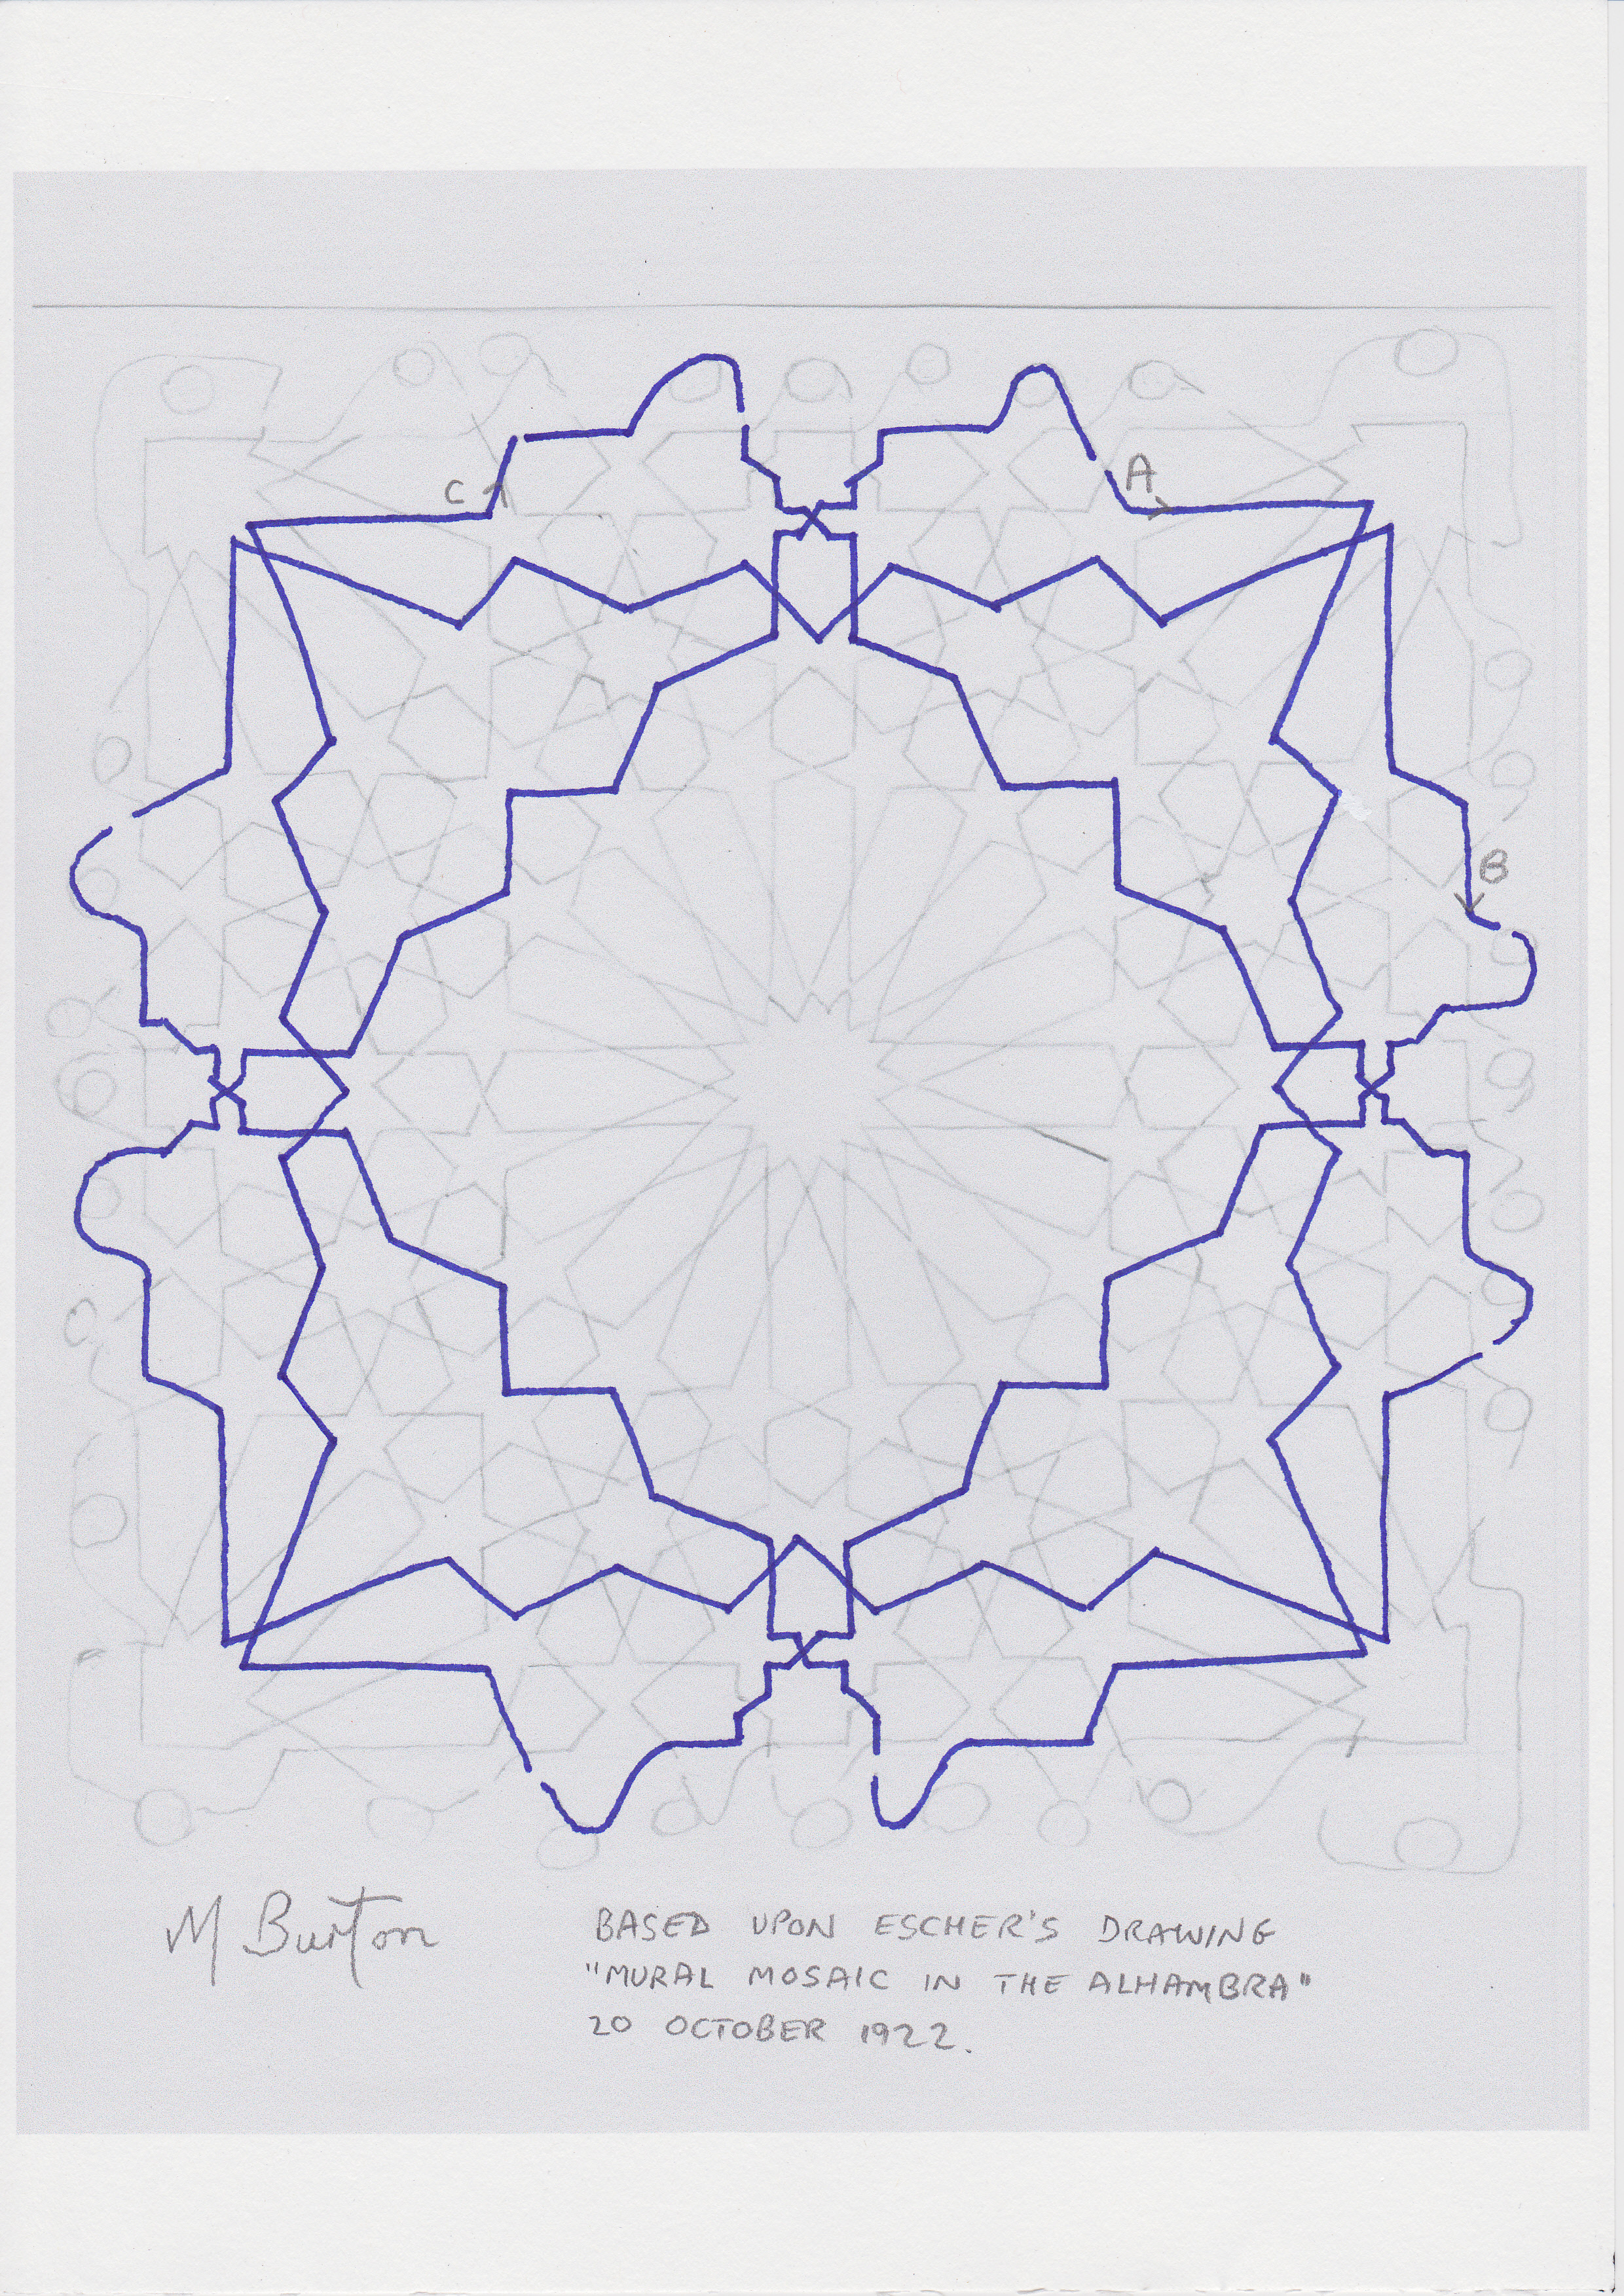
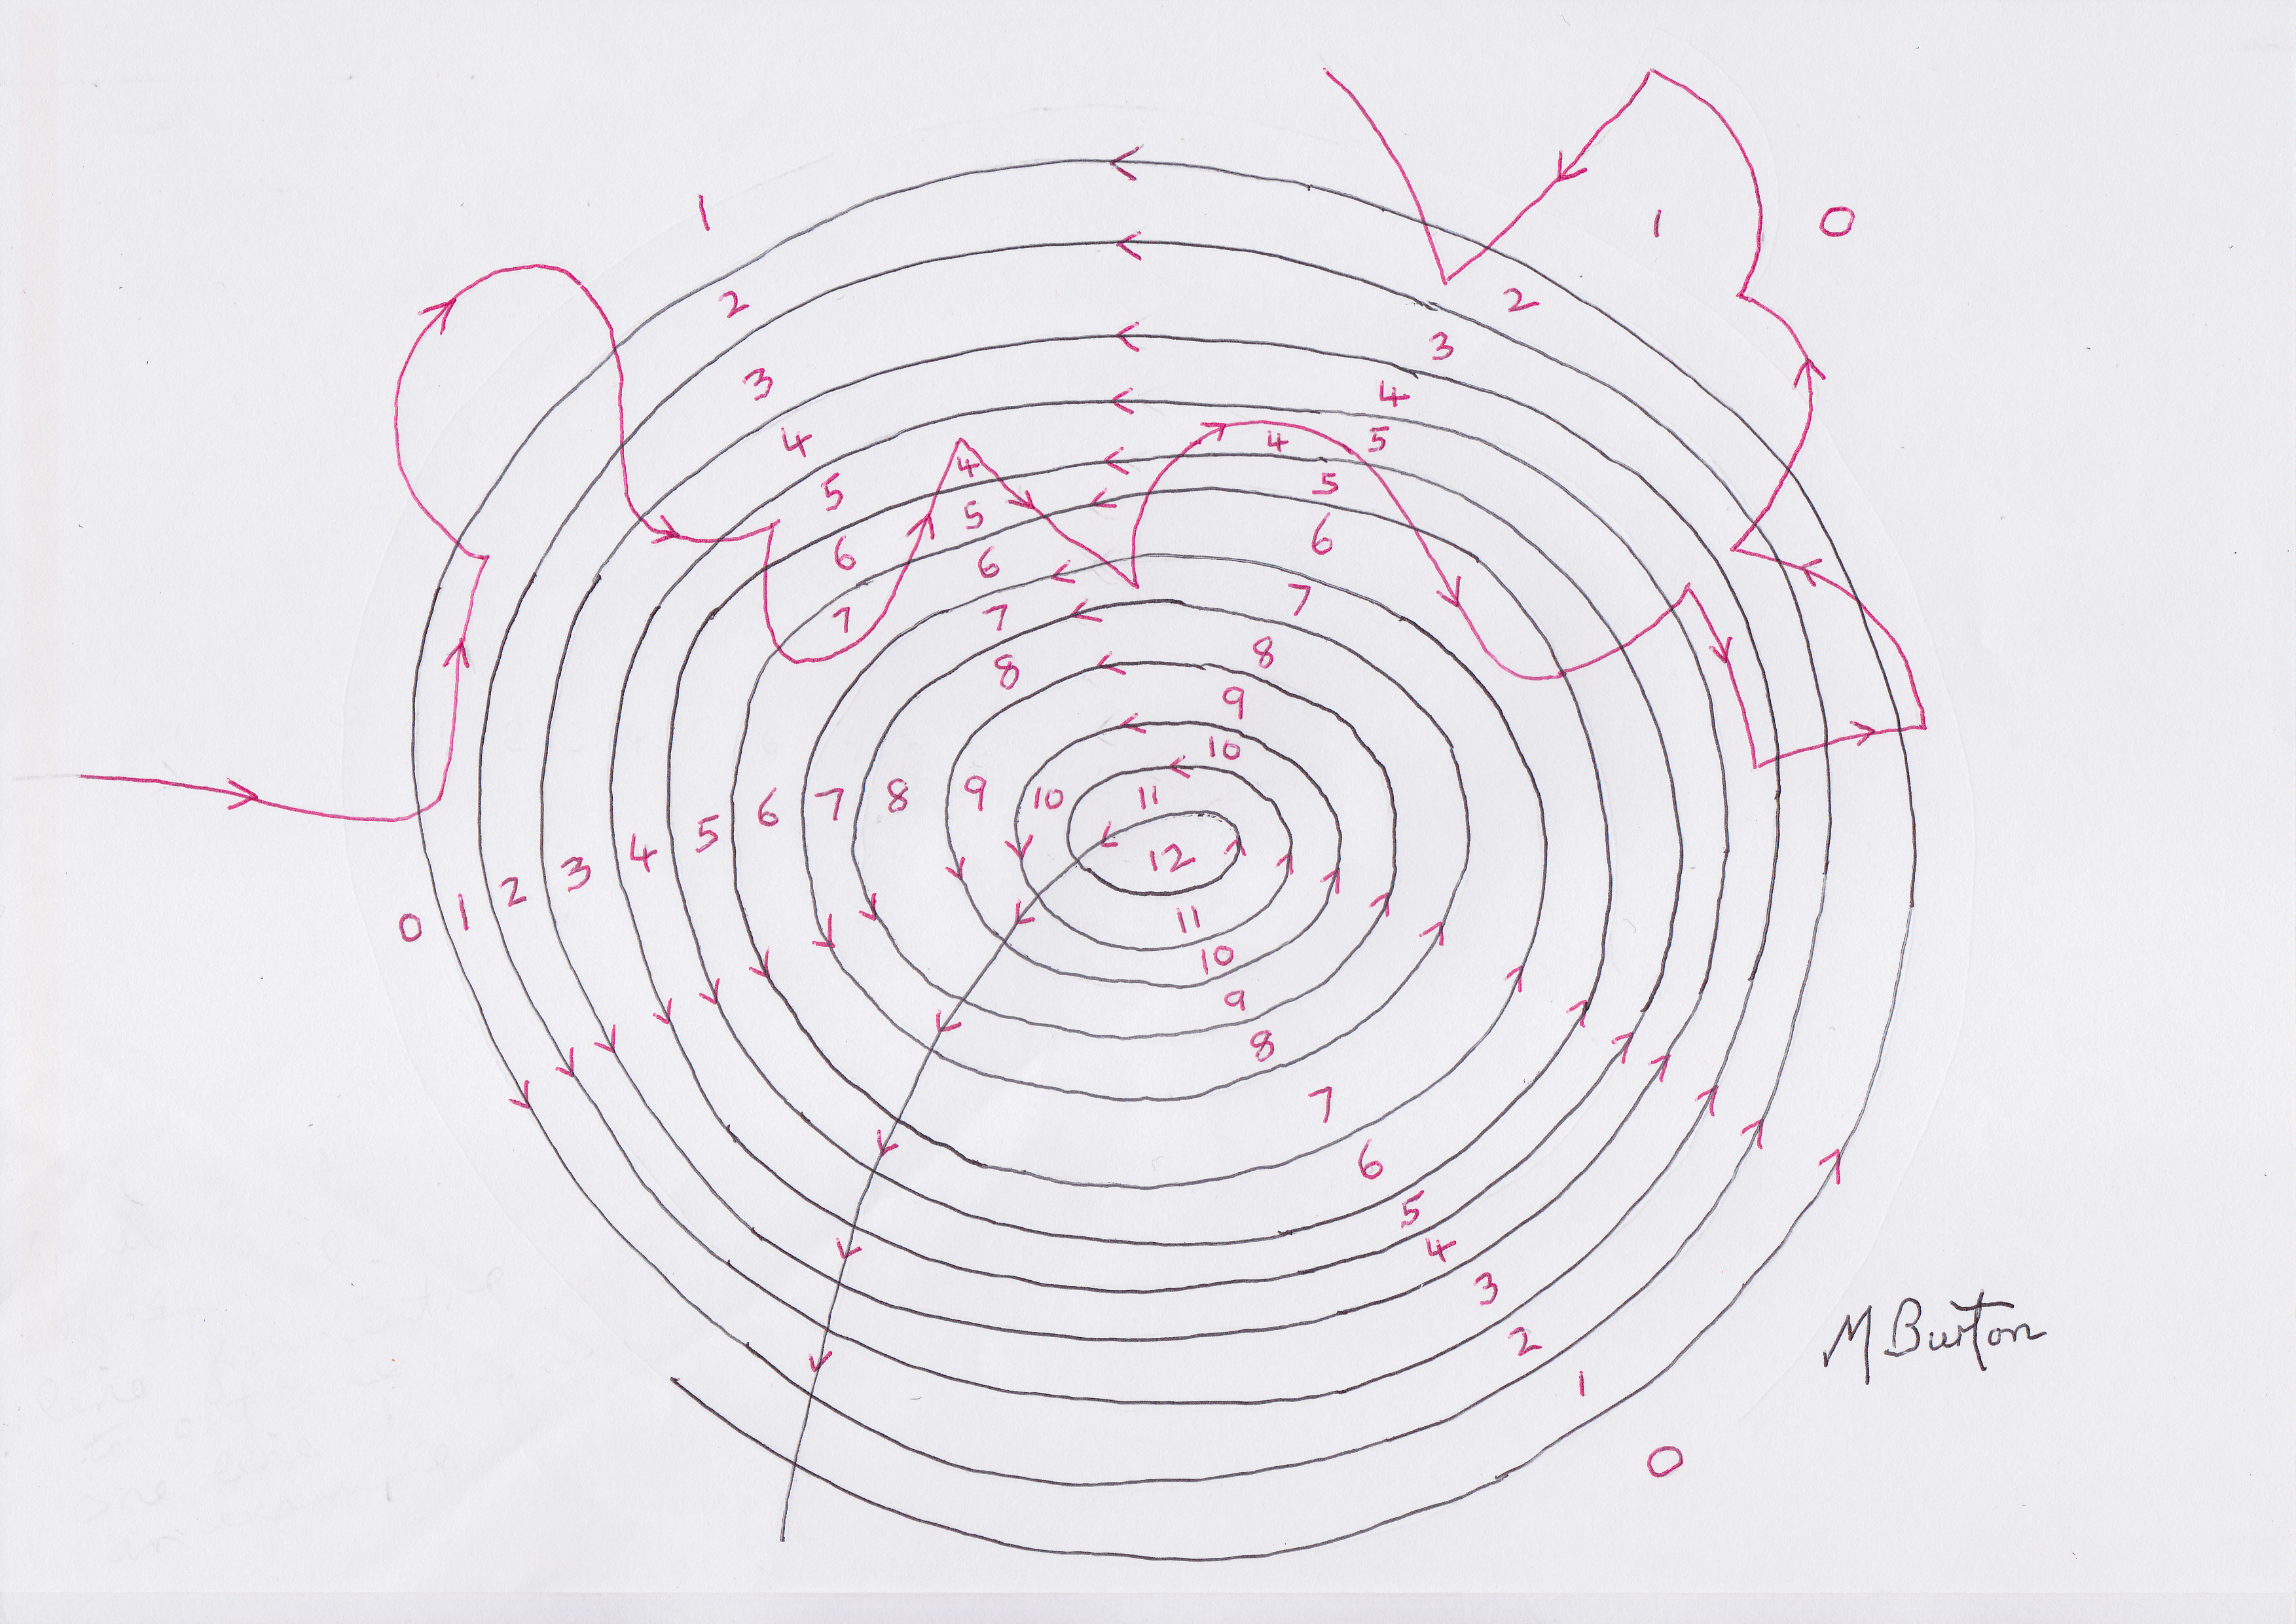
In the previous post, STAGE 1, I showed that there are two continuous lines in the Mosaic. I apply my Alternate Overdraw to produce a template for me to work with to allocate a colour sequence. I have to bear in mind that there are 2 Overdraw results and 1 colour sequence for a single continuous line and 4 Overdraw results and 2 colour sequences for two continuous lines.
My experience tells me that the Alternate Overdraw, which will produce a Template best representing this Planetary composition, will have –
a. An Overdraw for the Main continuous line commencing by overdrawing (in Red) a side of a fan blade of the central Sun, and
b. An Overdraw for the Minor continuous line commencing by overdrawing (in Blue) a side of a fan blade on a corner Sun.

Main continuous line, Alternate Overdraw, choice 1. Mick Burton, Escher Mosaic study.
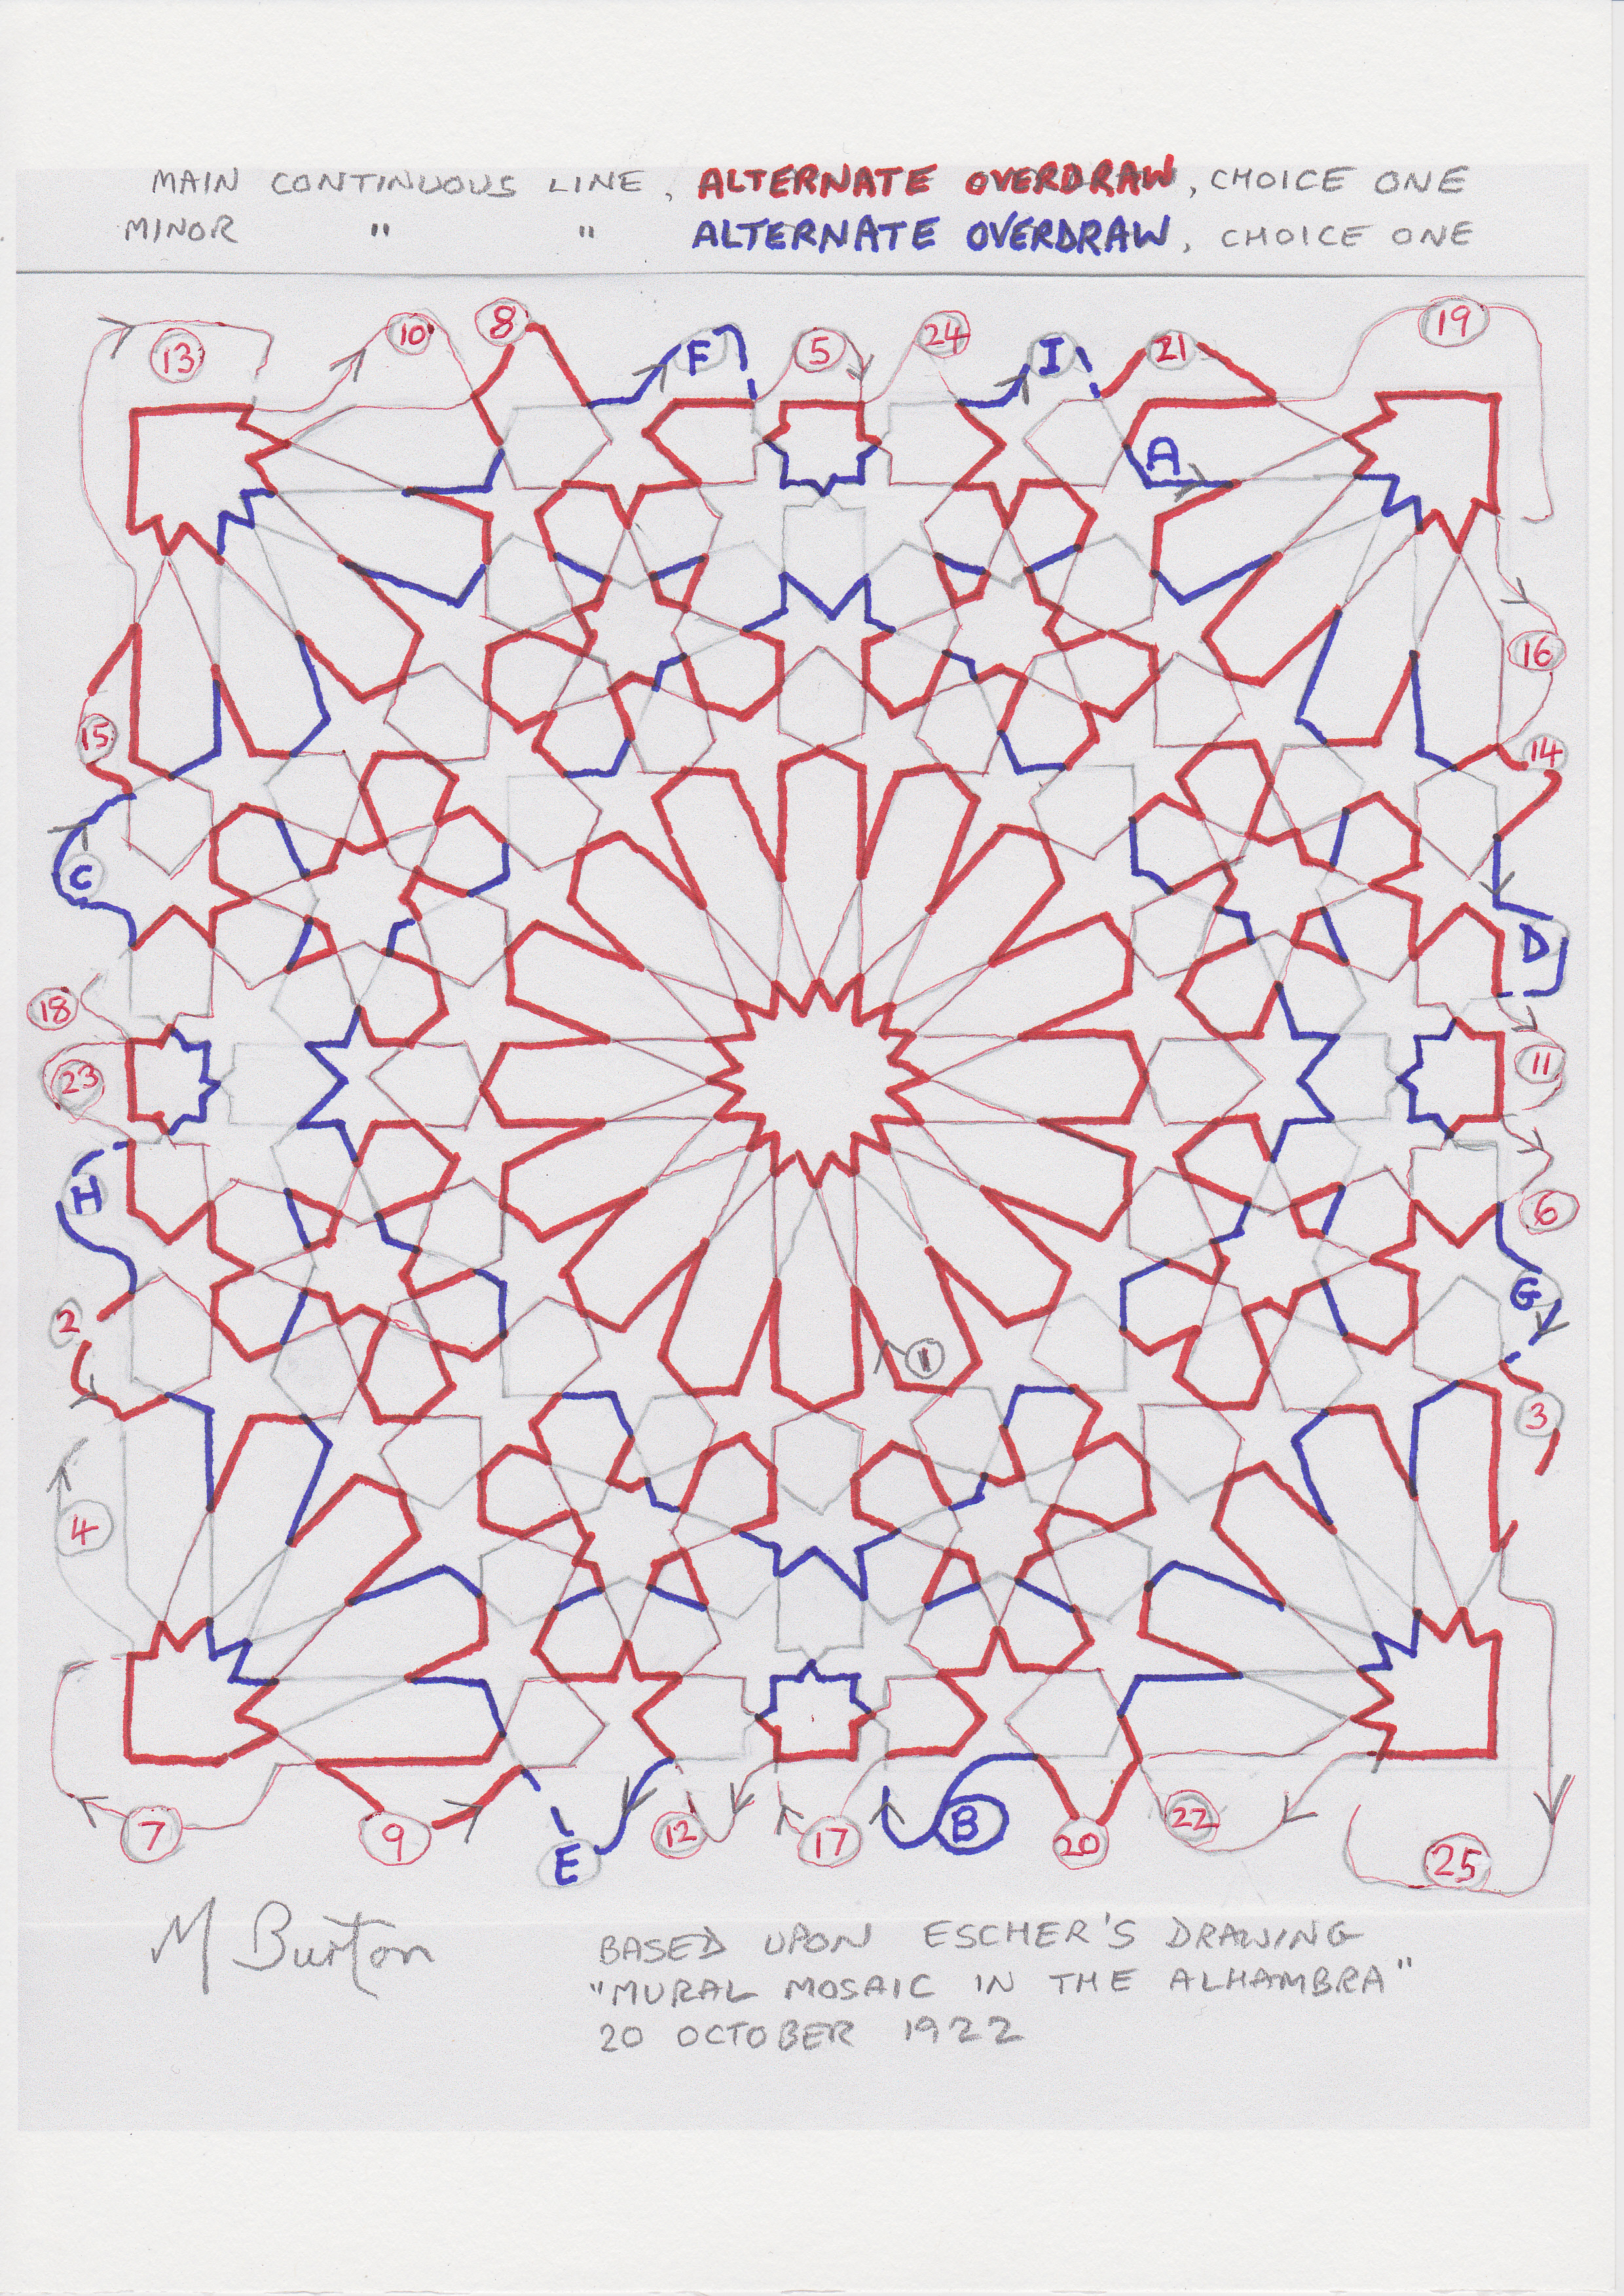
Minor Continuous Line, Alternate Overdraw in Blue, Choice 1. Mick Burton Escher Mosaic study.
The aim of the Alternate Overdraw is to create channels within the design where two colours can be allocated alternately within each channel and that adjacent channels have different pairs of colours. An overall sequence of colours then follows across channel boundaries.
My experience told me, at this stage, that my colour sequence was likely to match the original Mosaic in and around the five Suns, but less so elsewhere.
I will show my attempts at allocating corresponding colours in the NEXT POST. I will also explain why I feel that the original artist may have used the Alternate Overdraw or an equivalent method.
Mick Burton Continuous Line Blog.