Tag Archives: Continuous Line

Identikit and Key Features for Continuous Line Drawing


Identikit image of suspect for the murder of Elsie Batten, London, March 1961.

Identikit image of suspect for the murder of Elsie Batten, London, March 1961.

Edwin Bush, recognised and arrested as a result of the Identikit image for the murder of Elsie Batten.

Edwin Bush, recognised and arrested as a result of the Identikit image for the murder of Elsie Batten.

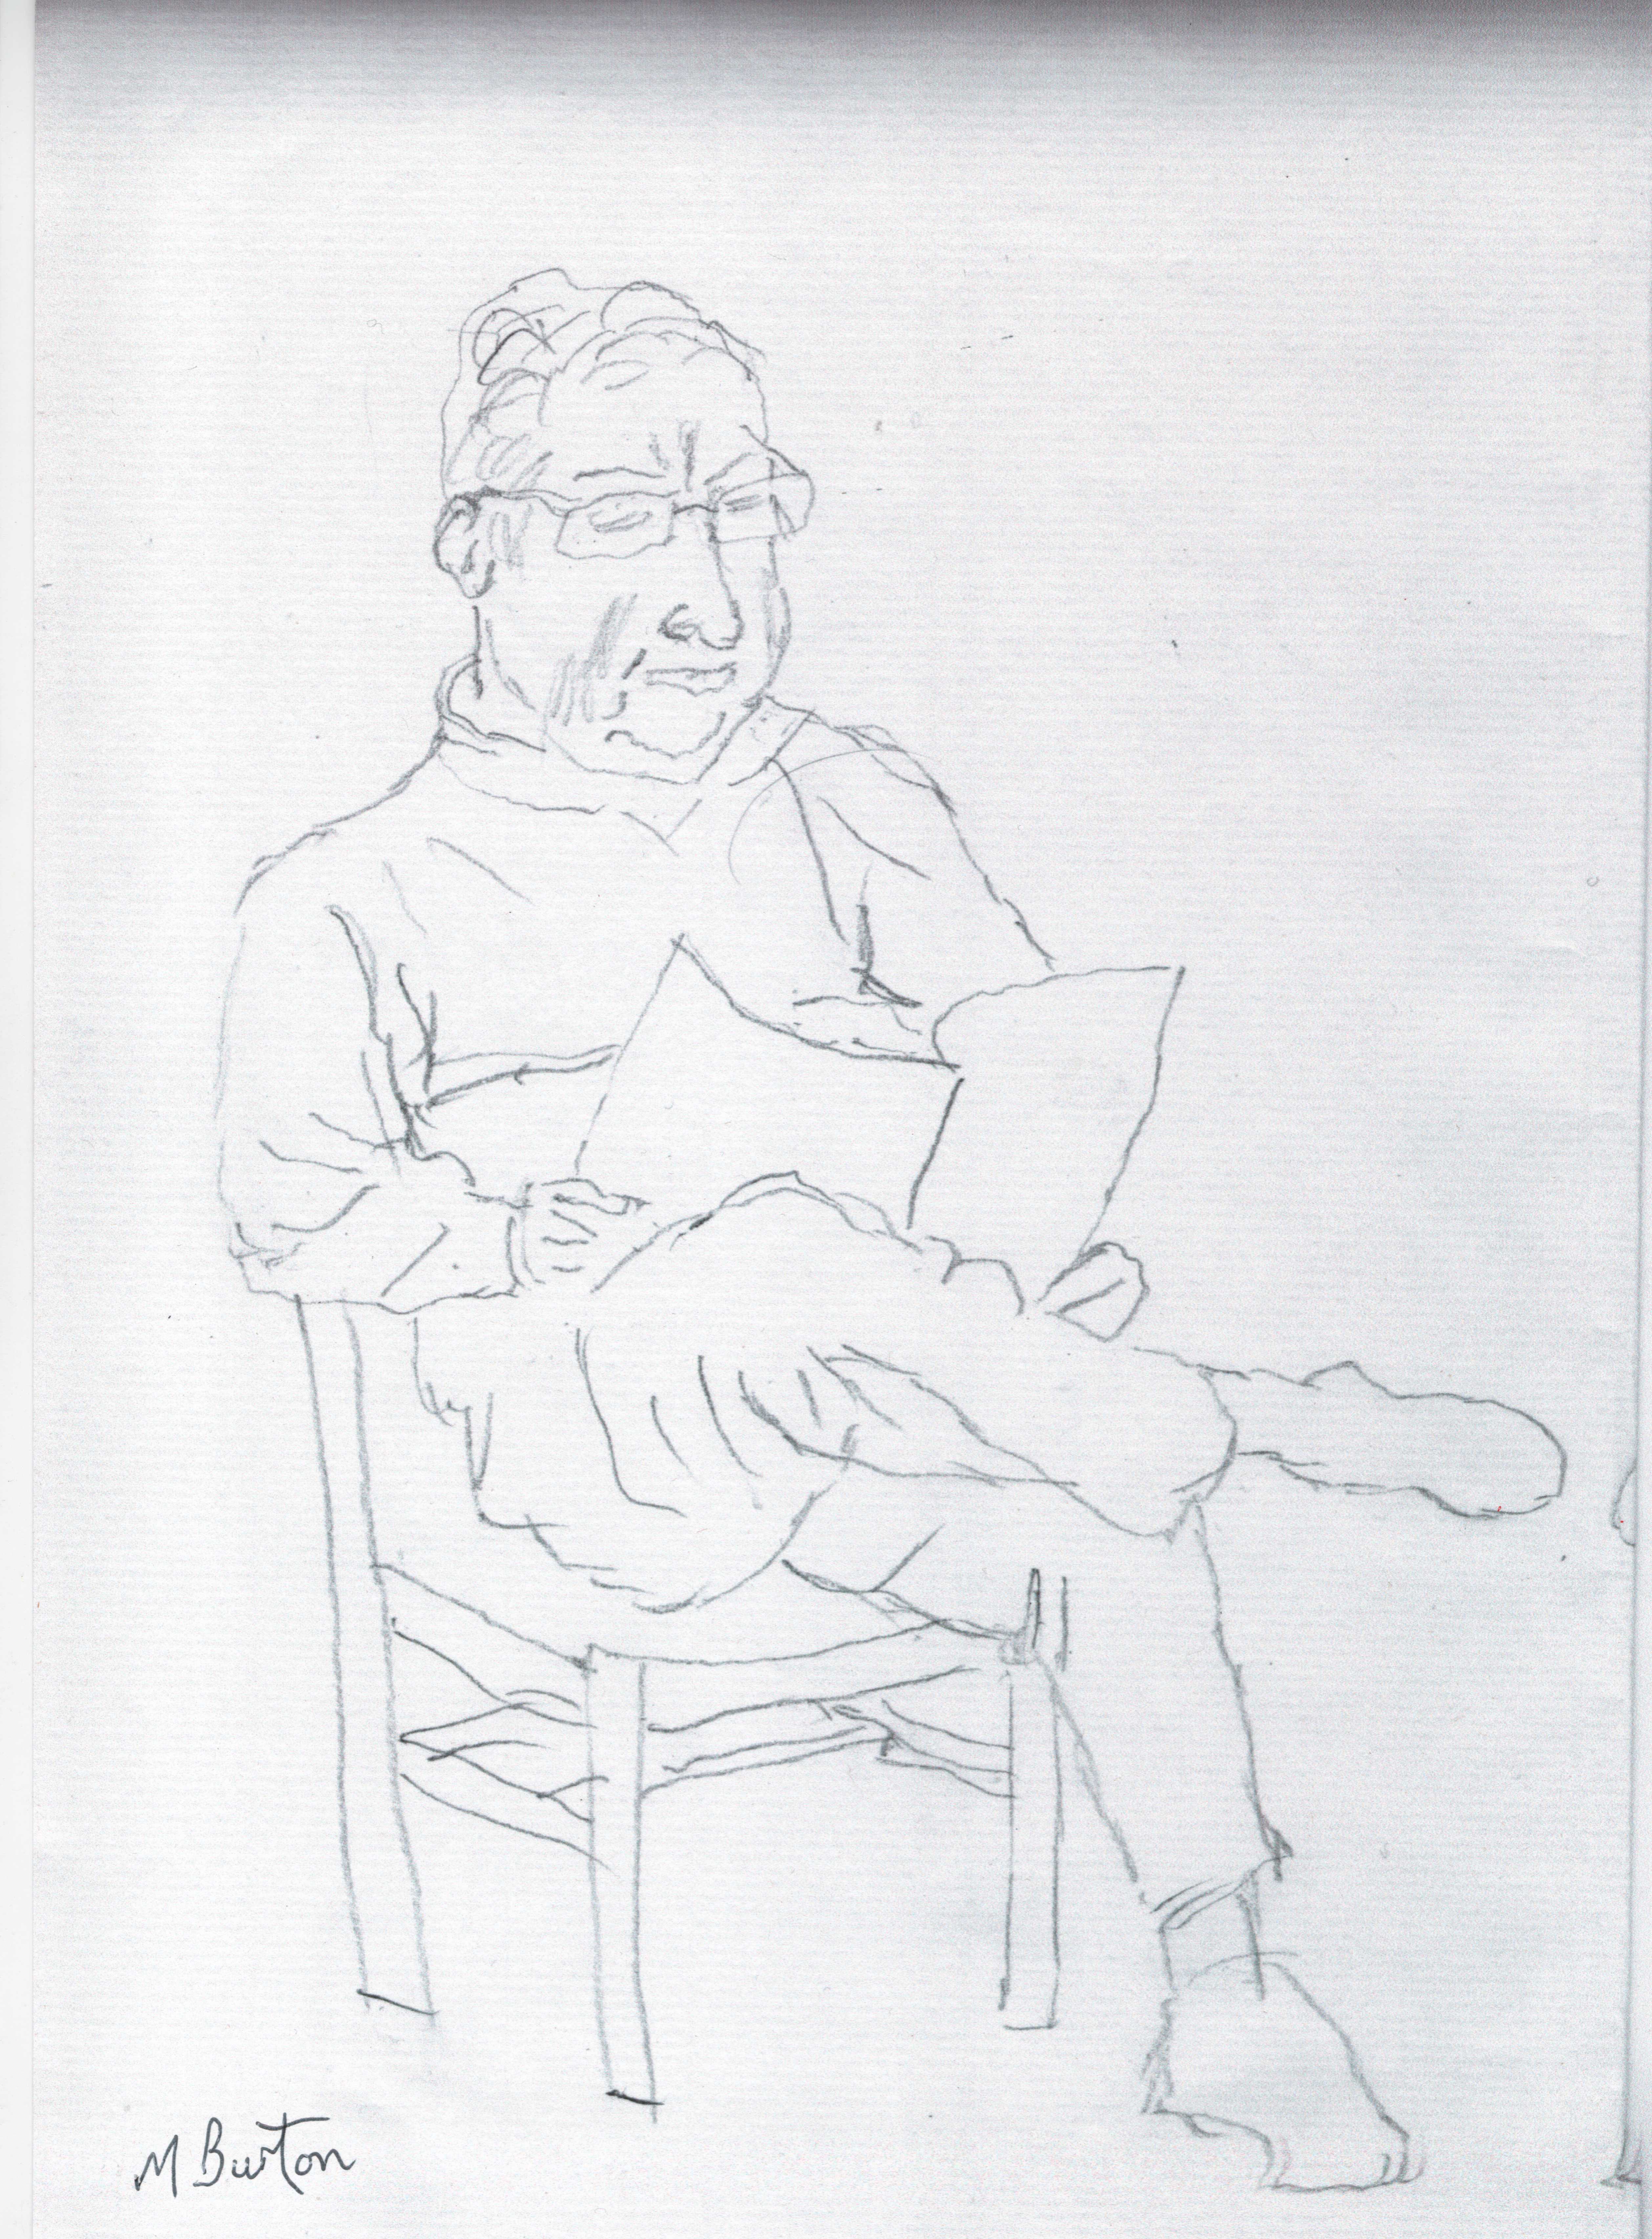
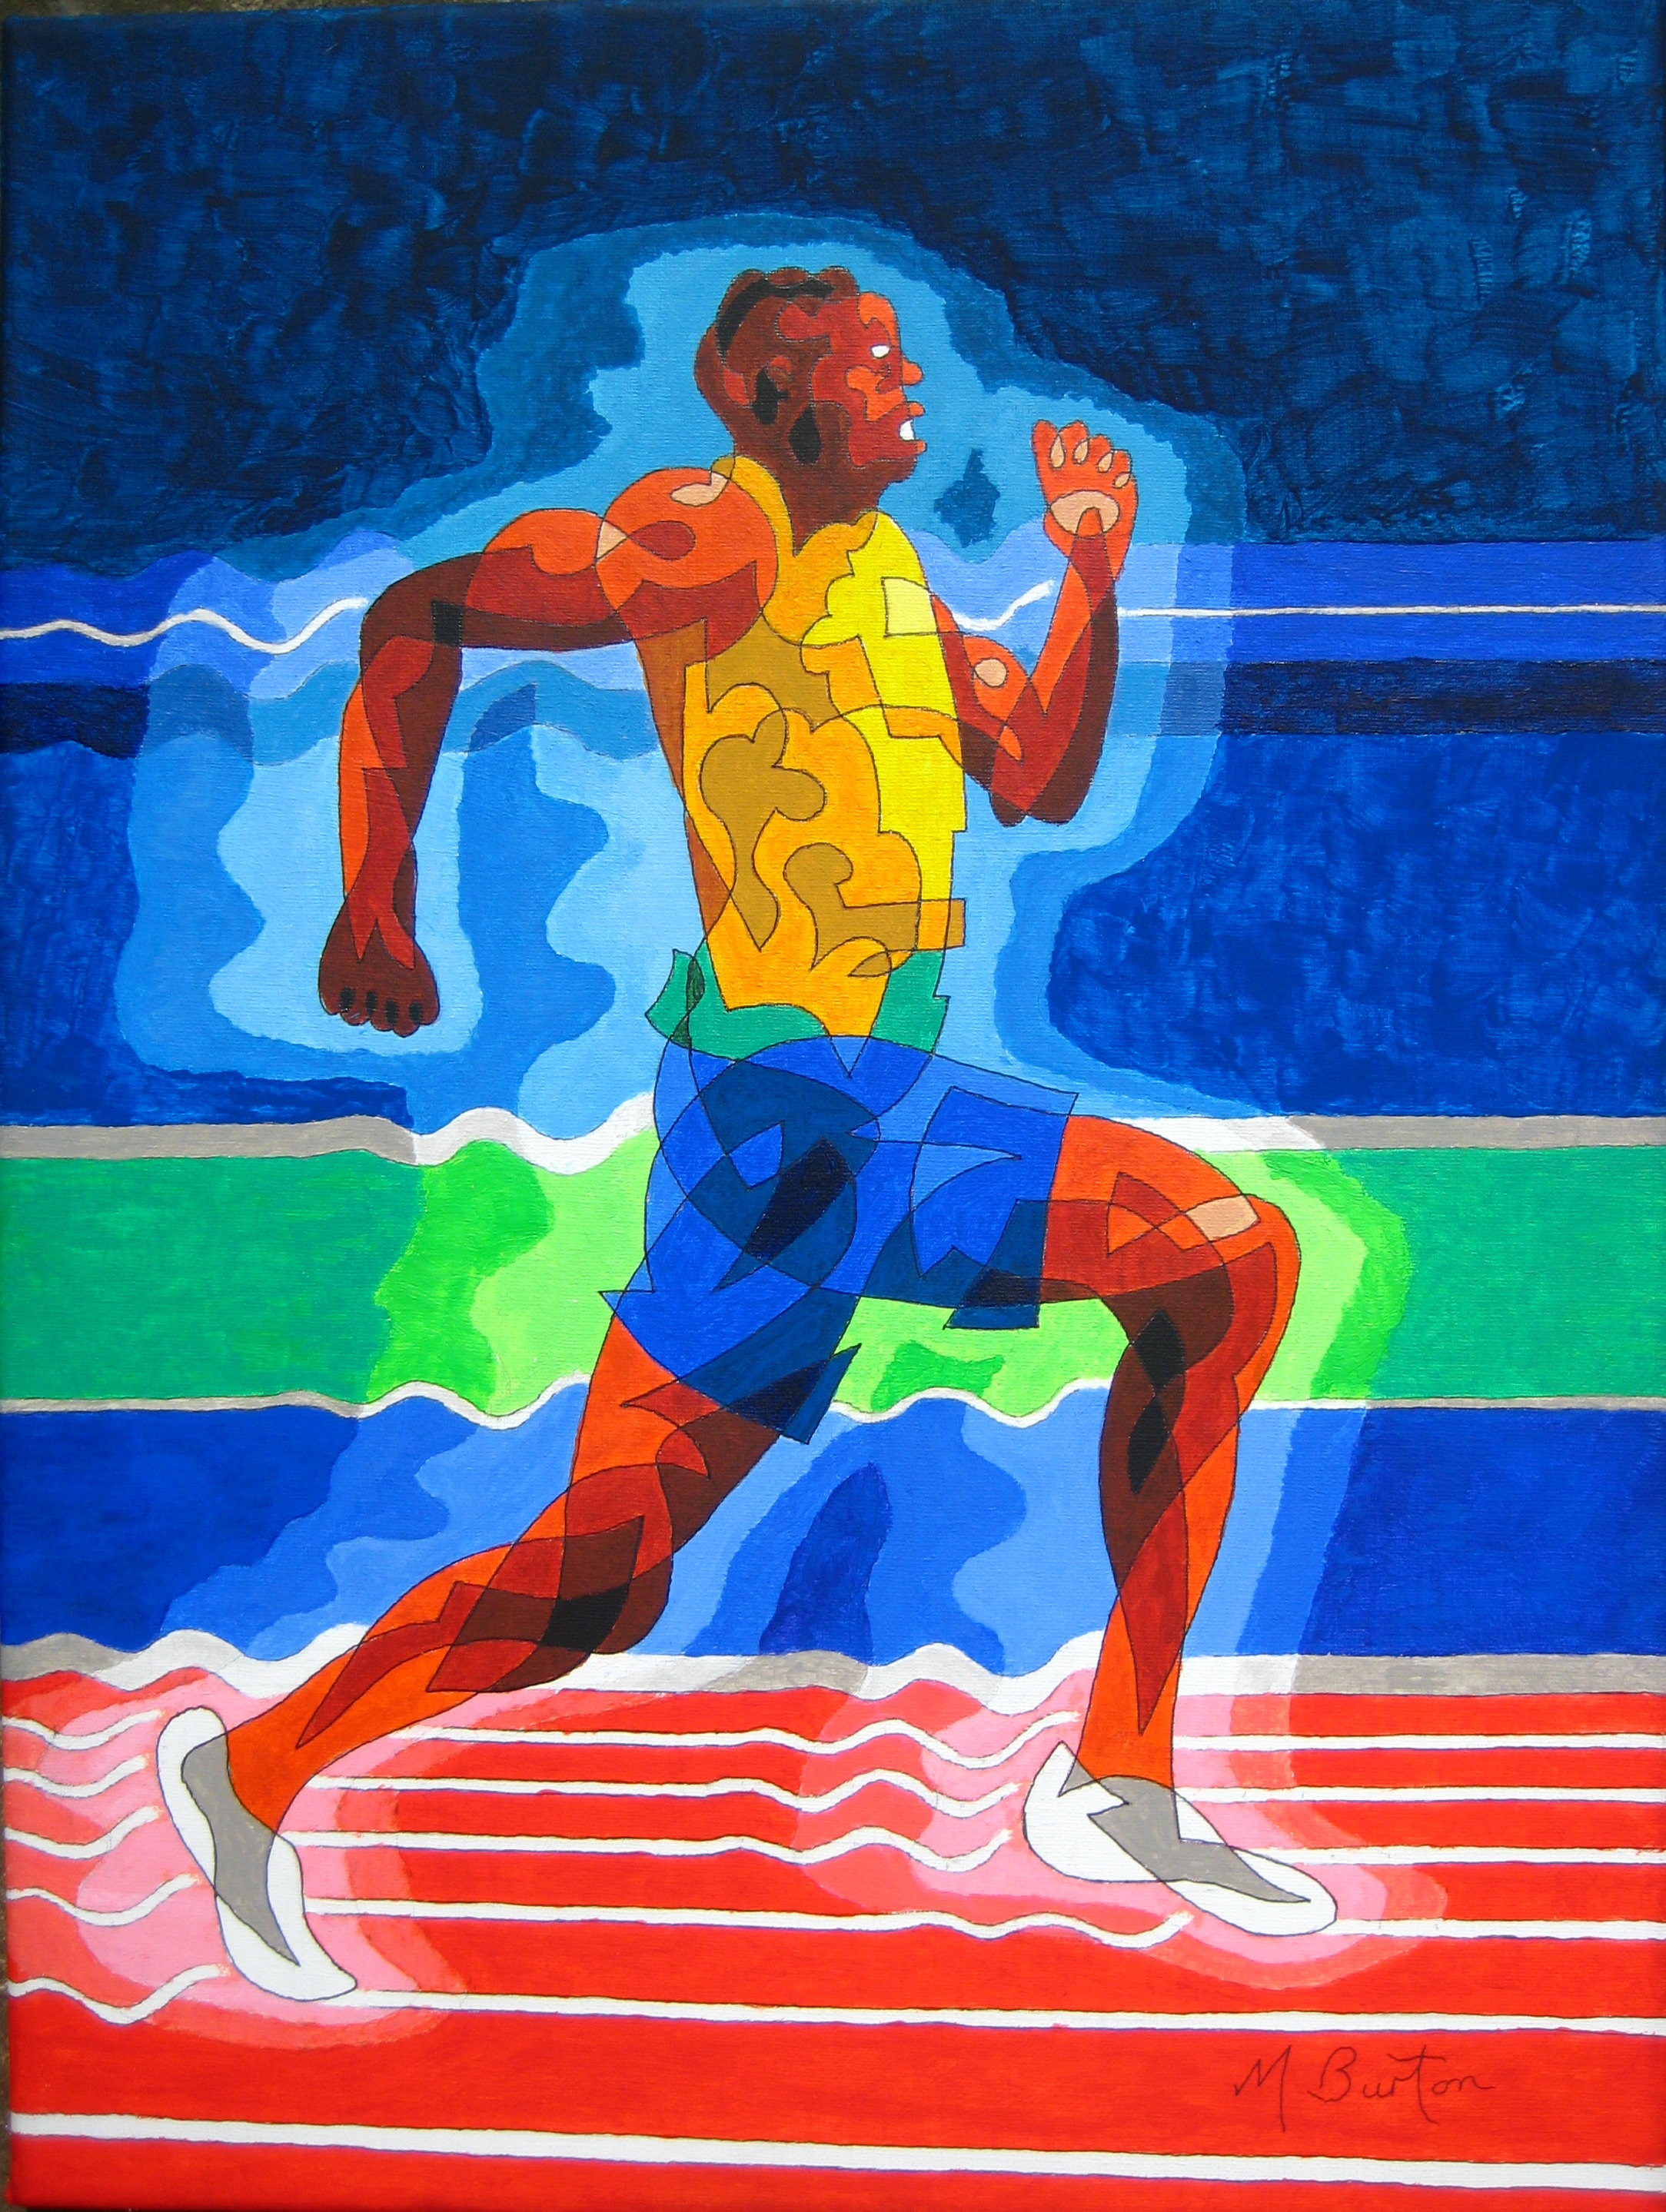
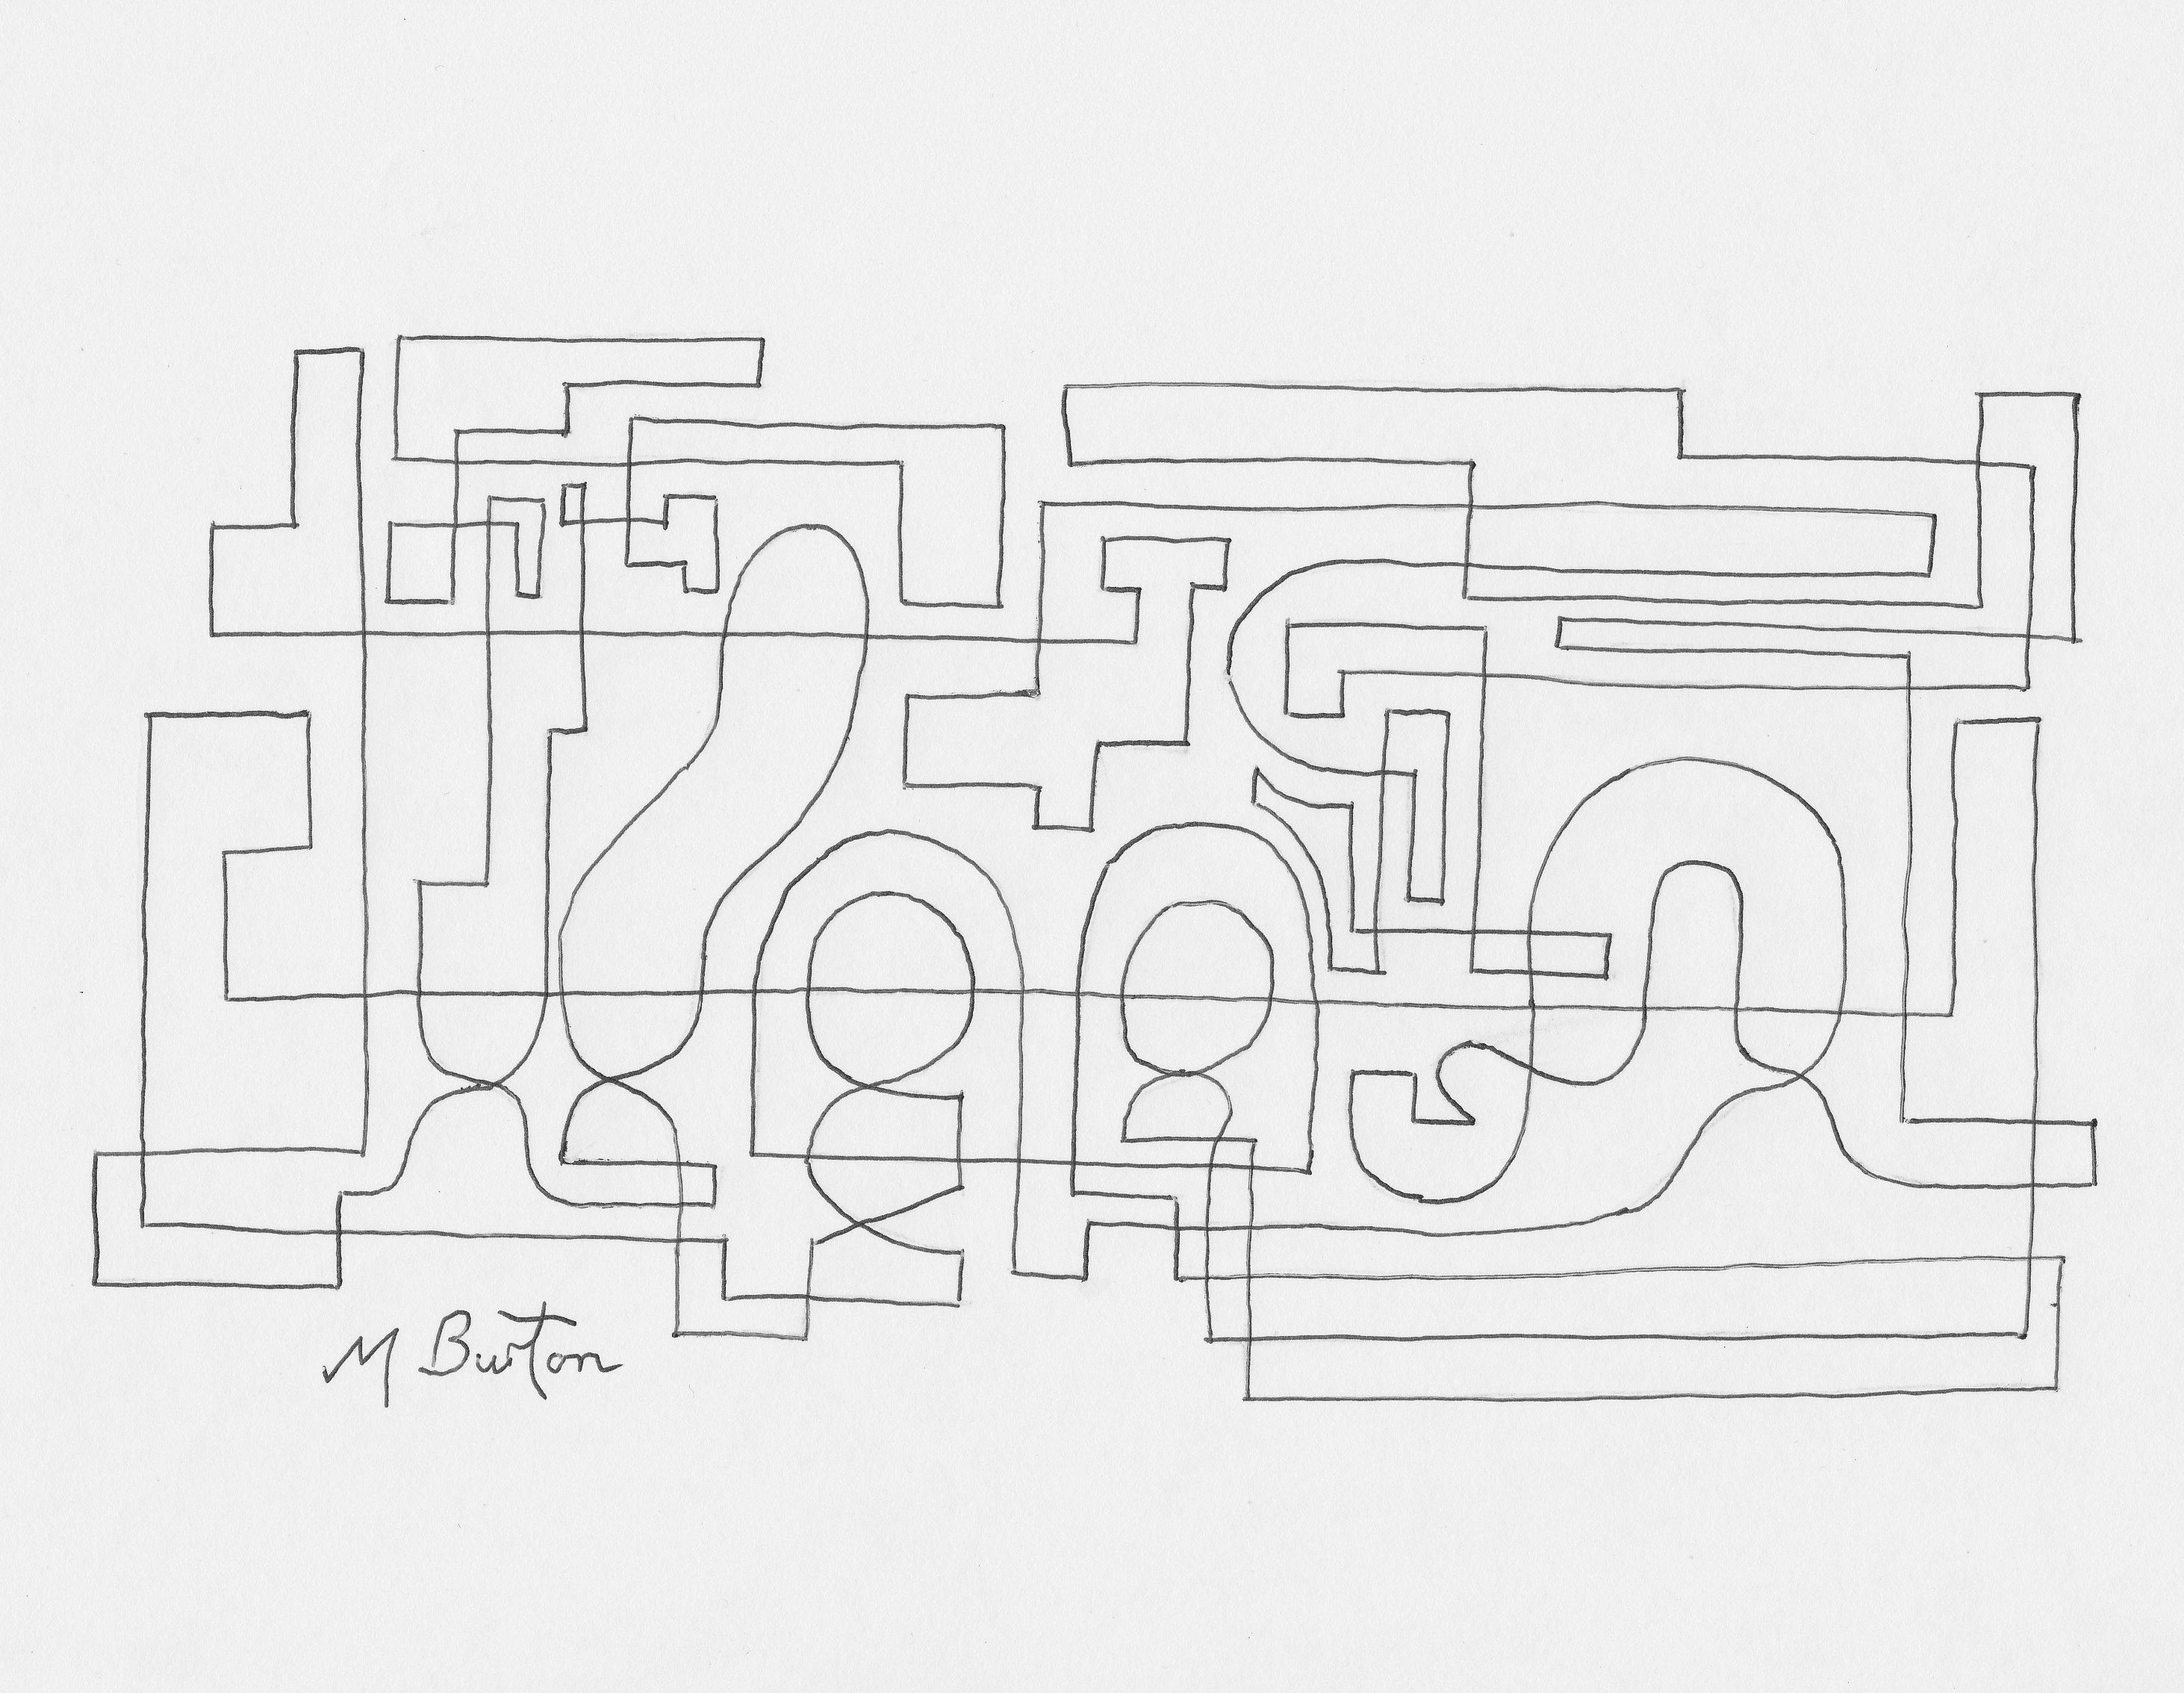
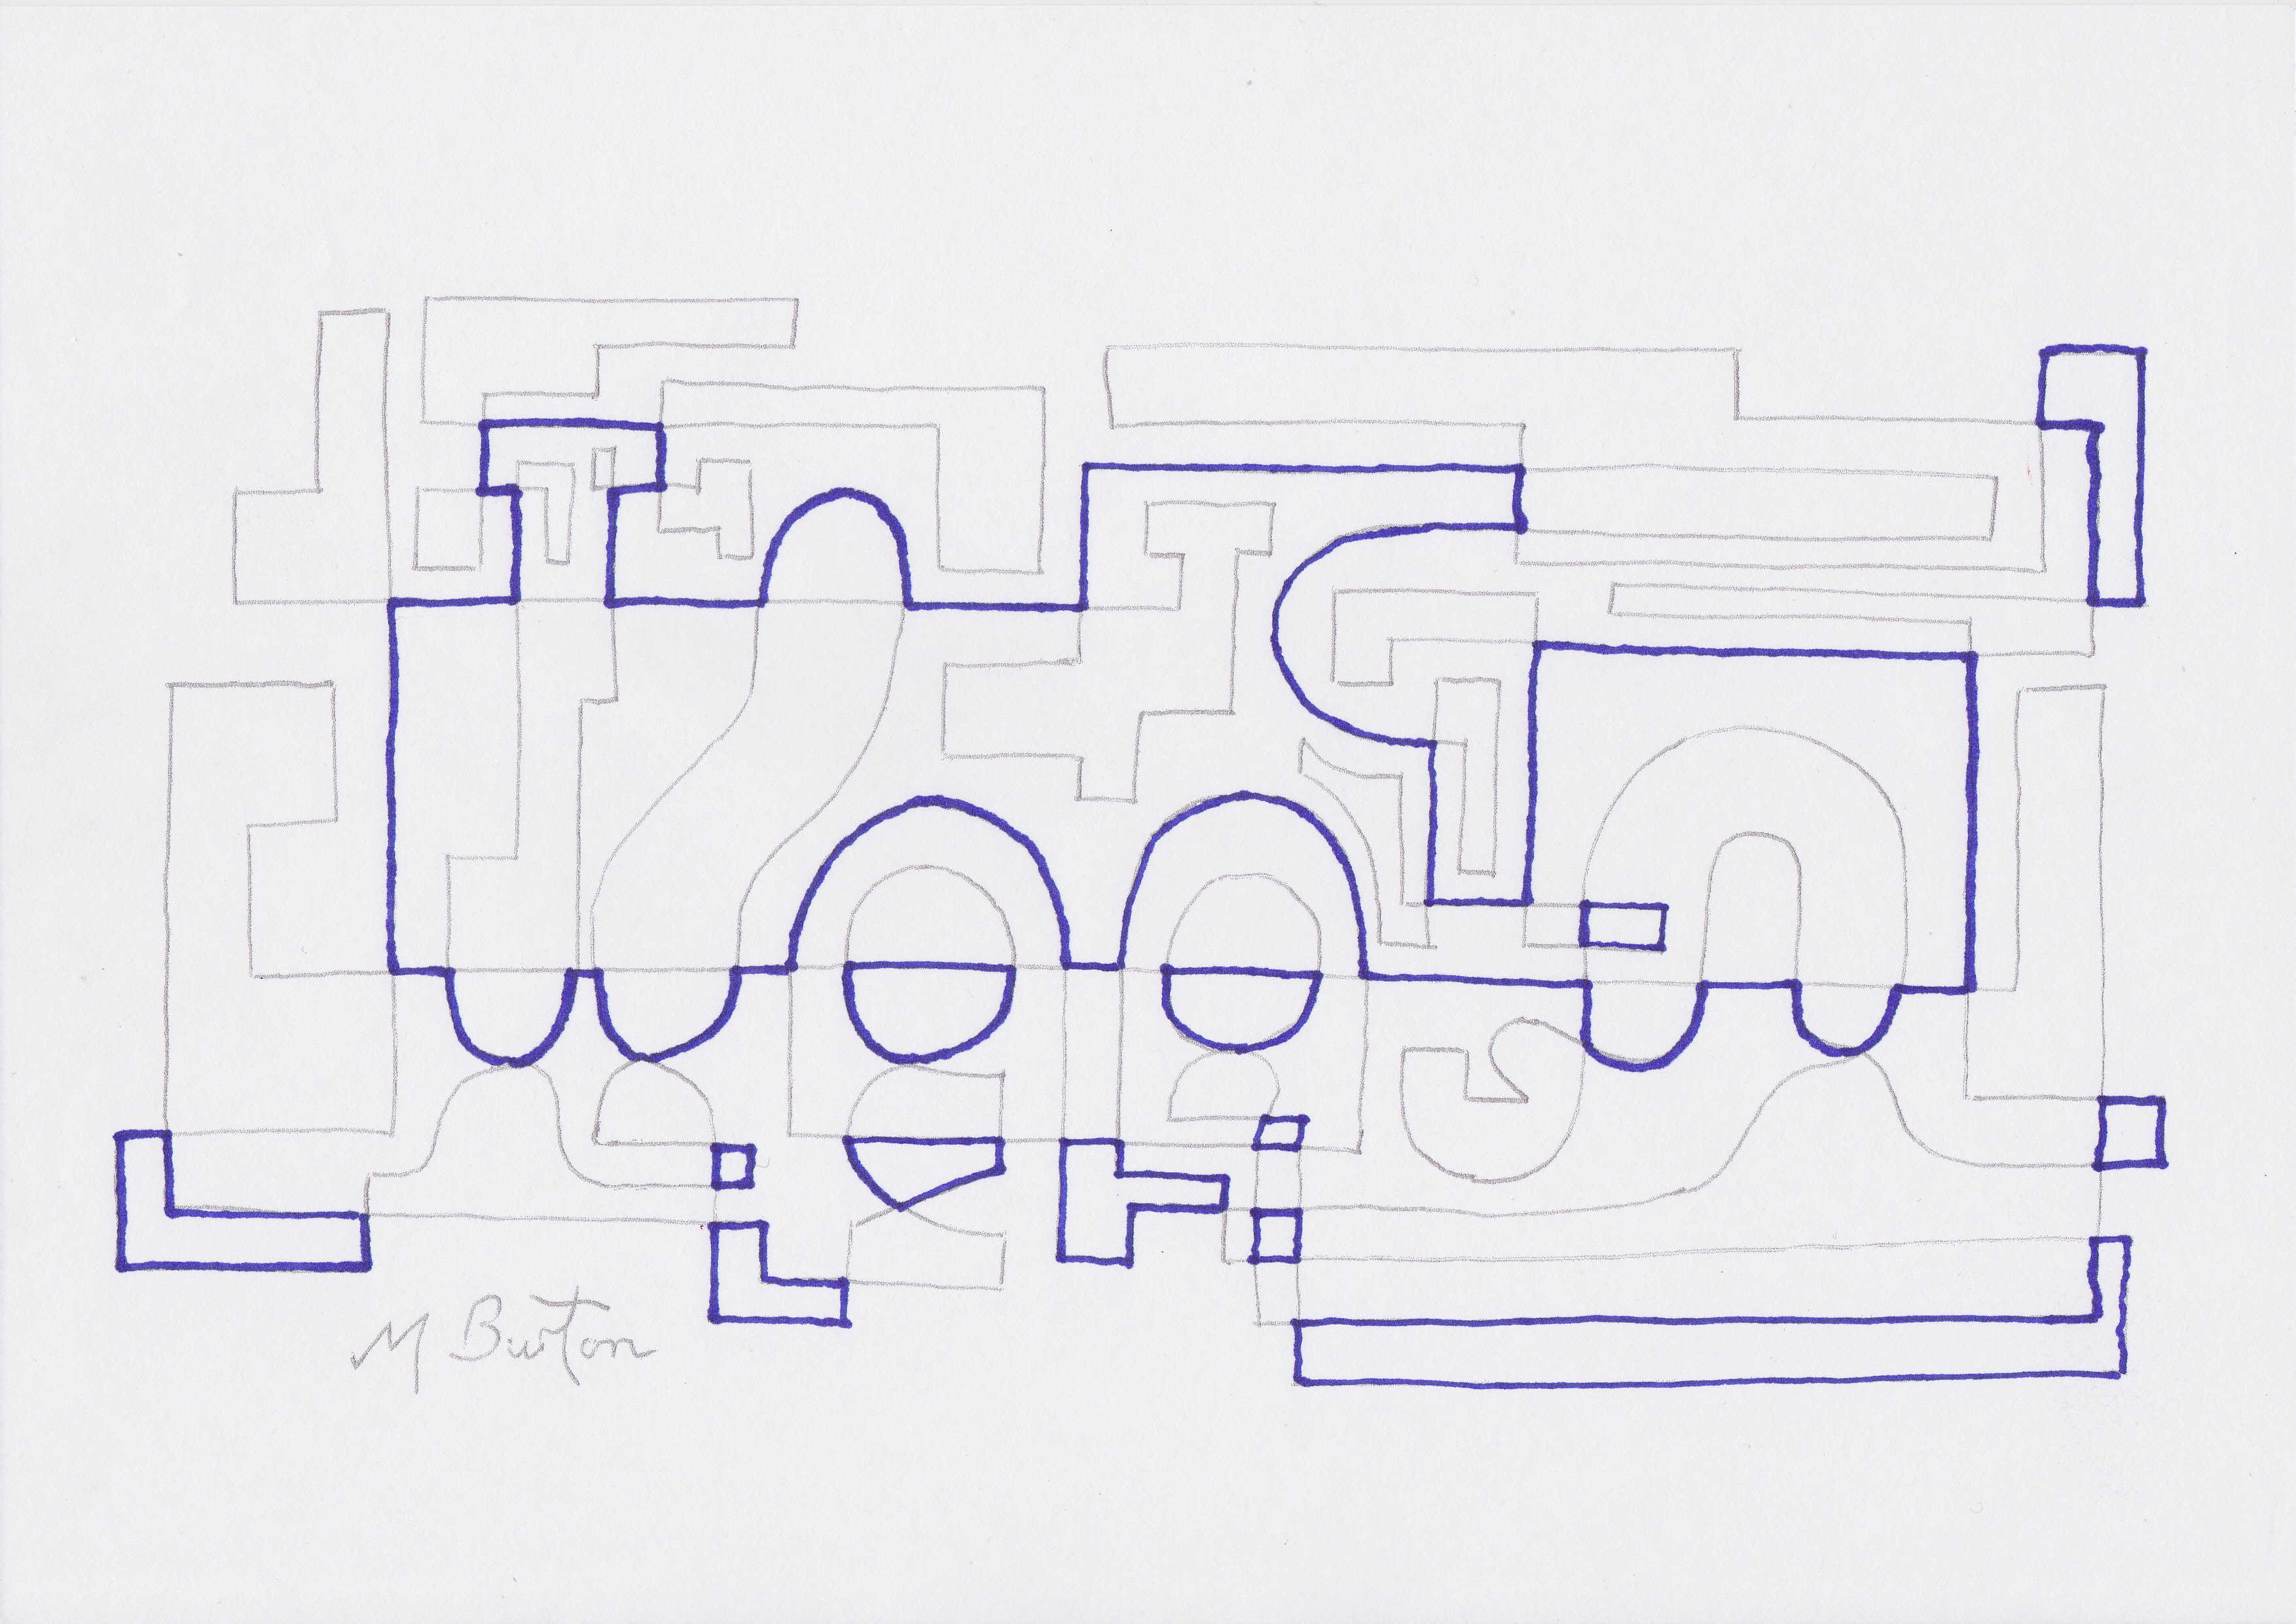
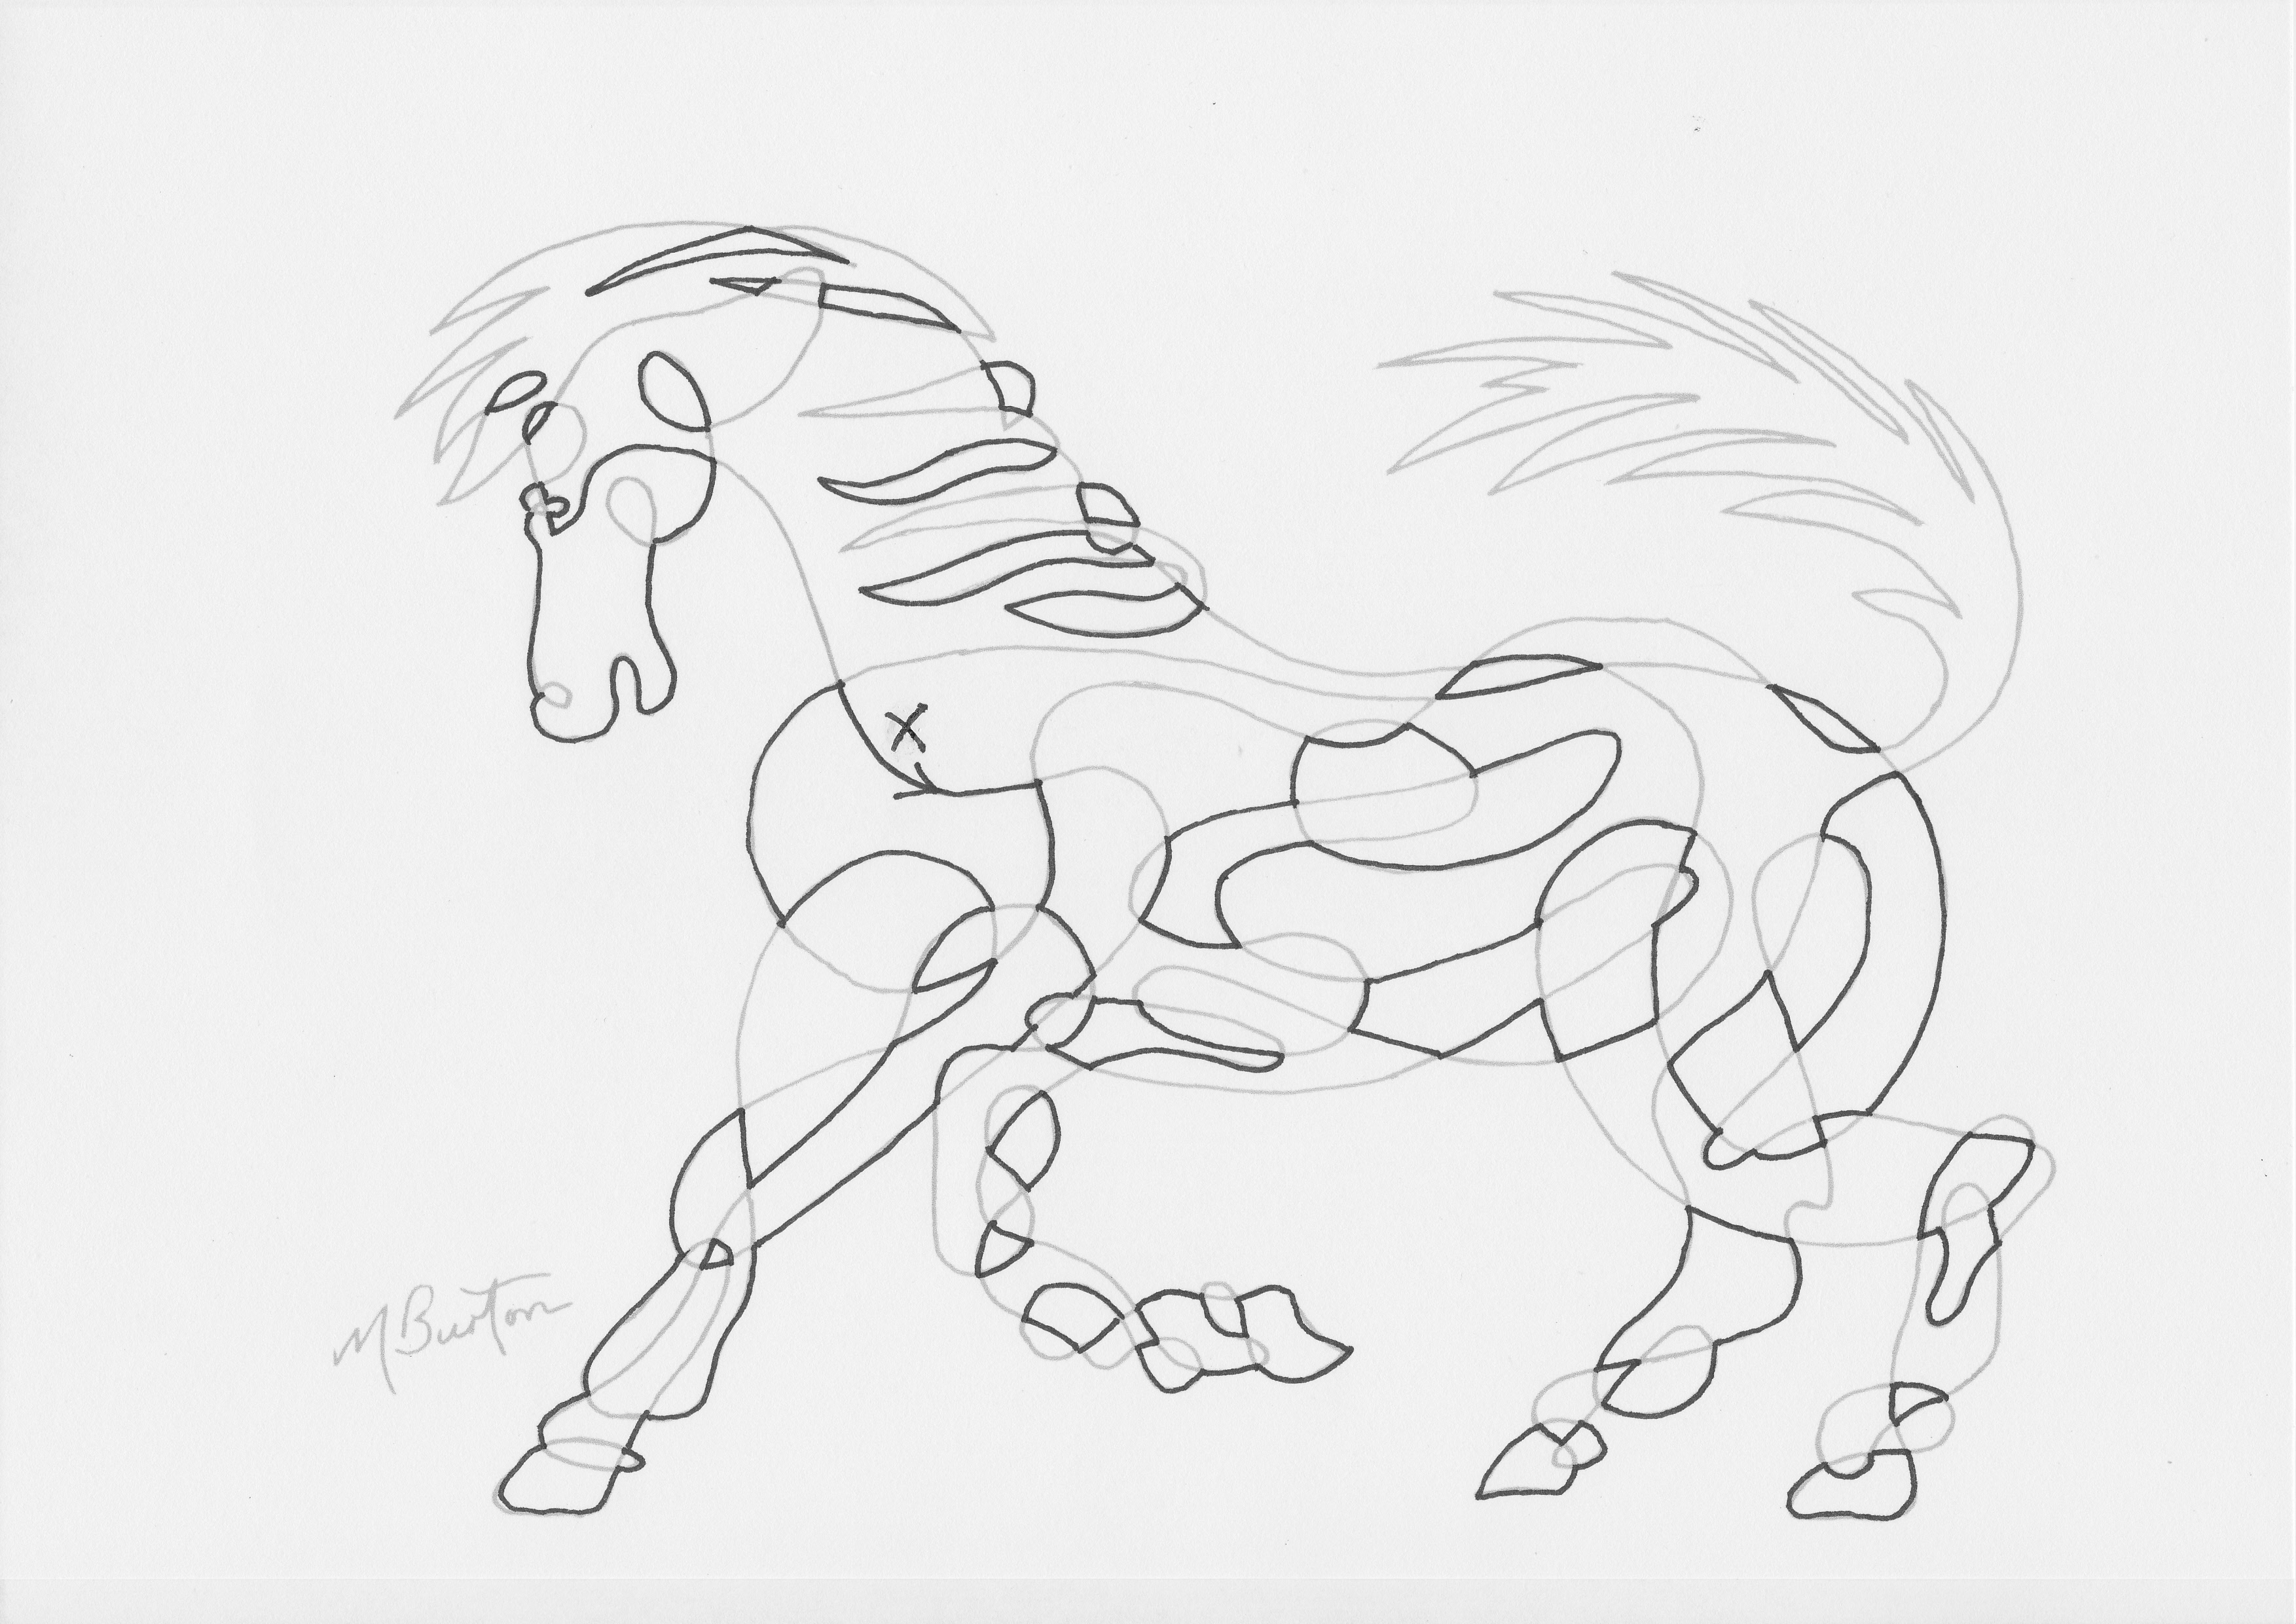
I use Key Features as part of my Continuous Line Drawing of Animals and People. Faces have always been of interest to me and when young I loved to do caricatures of people. I was in the police for a time and of course identification in its many forms was also fascinating.
In 1960 I left Harrogate Secondary Technical School and became a Police Cadet with the West Riding Police at the Wakefield Headquarters. My first post was in the Prosecutions Department, opening the mail (which required signing the Official Secrets Act) and making the tea. One of the officers preparing cases for Quarter Sessions and the Assizes was Inspector George Oldfield, who nearly 20 years later was Assistant Chief Constable Crime and in charge of the Yorkshire Ripper investigation.
My next posting in early 1971 was in “Modus Operandi” the Criminal Records Office for the North of England. Each criminal’s record sheet had at least one photograph of him attached, and in one case there were eight or nine photos ranging from a man’s early teens up to his seventies. Of course he had changed vastly over this time, but I noticed that his ears were identical in all the photos.
One day there was a bit of commotion in the large office with detectives collected in a corner arguing and laughing. I went to see what it was all about and they were looking a two images of suspects for a robbery. They explained to me that the images were produced by selecting parts of a face printed on cellophane sheets and placing them on top of each other to build up a face based on witness descriptions. It was called an Identikit set and was new in this country after being started in the USA. There were accompanying descriptions of a large man and a small man. The joke was that it was Laurel and Hardy. It was not given much chance of being successful by some of the crowd. A detective walking past peeped at what we were looking at and said, “Oh, I know them, but I think they are in prison”. Everyone laughed. Five minutes later he returned and said that he had looked up the two records and they had come out of prison a week before. They were not out for long!
I then found out about a recent case of murder in London which had been solved by the use of the Identikit. It was following the murder of Elsie Batten, an antique shop owner in London in March 1961. The detective investigating had two witness descriptions and produced two images on his new Identikit set. A constable saw a man resembling one of the images and arrested him. It was Edwin Bush, who admitted to the murder. He was executed at Pentonville Prison in July 1961. The image and a photo of Bush are shown above.
A few months later I was working at Horsforth Police station, near Leeds, when a detective I had worked with in the Records Office came in and said that he was going round all the police stations handing out Identikit sets and explaining how they should be used. So I had a go and it was great fun. Then the Inspector came in and he chatted to the detective for 20 minutes and said that he was not convinced that the Identikit would be much good. I had been watching as the detective had surreptitiously created an image of the Inspector whilst they were talking, and it was spot on, to everyone’s amusement!

.
Of course Identikit was not directly successful in all cases. In the late 1970’s The Yorkshire Ripper committed at least 13 murders and there were several Identikit images available to assist George Oldfield as he tried to solve them with his large team of officers. There were many complications and George was side tracked by the tape recordings from a man with a Geordie accent who said that he was the killer (most of my Geordie friends were interviewed). When Peter Sutcliffe was captured in Sheffield it was realised that several of the Identikit images were good likenesses to him.

Winding Number Theory and Continuous Line Drawing


Whirlpool in Space, or Petrol Poluted Puddle. Spherical continuous line with repeat colour sequence with Rainbow colours. Mick Burton, Continuous Line, 1971.

Whirlpool in Space, or Petrol polluted Puddle. Spherical single continuous line drawing with repeat colour sequence with Rainbow colours. Mick Burton, Continuous Line, 1971.

This painting was one of two pictures hung at the Chelsea Painters Open Exhibition, held at the Chenil Galleries, Chelsea,1971.  I walked along the Kings Road looking for the gallery (I had submitted through and agency) and it was great to see the Whirlpool first in a window by the entrance.

The design was triggered by a browse through mathematics books in the library and coming across Winding Number Theory.  This used a continuous line and every time the line was drawn winding in a counter-clockwise direction a level was added and if you wound back in a clockwise direction a level was taken off.

So far, in my colour sequence numbering based upon Alternate Overdraw, I had not had a sequence of colours greater than about nine.  If I used the Winding Number method and continued to wind around counter-clockwise many times I could have a long colour sequence.  I went a bit mad with the Whirlpool, which was done on a spherical basis (allowing drawing out of one side of the paper and back in at the opposite side), and has a sequence of 20.

I did not simply go from light to dark over the whole 20 (the steps in shade between each colour would have been too small), but oscillated up and down with a smaller range of colours similar to a rainbow.  I had seen the rainbow effect produced by sunlight on petrol spilt on a puddle.

Alternate overdraw with colour sequence numbers. Continuous Line, Mick Burton.

Alternate overdraw with colour sequence numbers. Continuous Line, Mick Burton.

To illustrate the difference between my Alternate Overdraw and the Winding Number, I start with the Alternate Overdraw in Red on the left.  As shown in earlier posts, each channel of areas between overdraws has two numbers alternately.  You move naturally up to a higher channel or down to a lower channel, through the red line and continue the numbering.

As before, you start with “0” on the outside and 0 can also appear within the drawing.


When we come to Winding Number allocation, we can use the same basic drawing with little arrows showing the direction it has been drawn.  It can be either direction of course, but I have chosen one which will match the result above.

Winding number allocation. Continuous Line, Mick Burton.

Winding number allocation. Continuous Line, Mick Burton.

Starting at “0” for the outside, if we cross to another area through a counter-clockwise border for that area, it will be a level higher.  If we cross through a clockwise line we reach a lower area.

Here the + areas are of course higher levels and the (-) areas are lower.

The numbering matches the Alternate Overdraw illustration above.


Now, just to show the initial thrust of the drawing for the Whirlpool, with many levels, the next illustration shows a line spiralling from the centre outwards and I have shown just 13 winds.

Part of initial Winding Number spiral for Whirlpool painting. Mick Burton, continuous line.

Part of initial Winding Number spiral for the Whirlpool in Space painting.    Mick Burton, single continuous line drawing.

Then I have drawn a line from the centre of the spiral directly back to the bottom of the picture as the first phase of breaking up the spiral so that lots more areas start to  appear.  The next such phase is a meandering line near the top of the picture. 

As I have said, this is a shorter version than the one usd for the main Whirlpool in Space picture above.

Next I have decided that the direction of  the line will be counter-clockwise starting from the bottom of the spiral, so that the levels go up towards the centre.  The numbers have then been added.

On the original painting, which is 24″ x 20″, I used alternate overdraw to allocate the colours.  This was because I was used to using that method and I think it is better for an artist anyway.  The Winding Number theory was simply the inspiration for producing a sequence of 20 or more.

Now, to go off at a tangent, I am interested in other artists in the family who keep coming to light.  As part of my research into my mother’s family, the Mace’s from Bedale (from 1825) and much earlier from Cambridge, I have come across a book by Thomas Mace called “Musick’s Monument” published originally in 1676.  It was published again about six years ago.  Amongst his own illustrations within the book is this one of a spiral depicting his idea of God’s world.


“Mysterious Centre of All Mysterie…” in Musick’s Monument, by Thomas Mace, 1676. Continuous Line, Mick Burton.


Thomas was a famous composer of the 17th century, and craftsman who made lutes and viols, whose main job was a chorister at Trinity College, Cambridge.

To add to this “sort of” co-incidence, my Uncle Harry Mace from Bedale, North Yorkshire, was a joiner and builder.  When he retired he started to make old style instruments, such as viols, and sold them to a music shop in Leeds.  I am sure he did not know about Thomas of Cambridge.

Thomas was not too impressed with a relatively new instrument in his time, the violin.


Continuous line drawing at St Gemma’s Leeds Art Exhibition 2014

St Gemma's Leeds Art Exhibition.  Mick Burton continuous line.

St Gemma’s Leeds Art Exhibition. Mick Burton continuous line.

I have entered seven paintings in St Gemma’s Leeds Art Exhibition, which starts on Thursday 23 October 2014 at Leeds Grammar School.  There are over 800 pictures for sale.  I felt I had to put this in my continuous line blog.

I have entered in the previous 2 years since I started painting again and managed to sell work each time.  Its well worth a visit.  And its in aid of St Gemma’s Hospice.

Here are three of my paintings as a taster.  All are in acrylic on canvas.


Usain Bolt continuous line drawing.  Several colour sequences.  100 metre Olympic final at night.  Mick Burton, 2013.

Usain Bolt single continuous line drawing. Several colour sequences. 100 metre Olympic final at night. Mick Burton, 2013.

I have been a big fan of Usain Bolt and wanted to use my style to try to capture the dynamic speed and flowing movement of this great athlete.

As the race took place under floodlights, I have used a shimmering effect against the dark background.


Skelldale is totally drawn with one continuous line and various colour sequences have been used. Mick Burton, 2013.

Skelldale is totally drawn with one continuous line and various colour sequences have been used. Mick Burton, single continuous line artist 2013.

I was brought up in Ripon, a North Yorkshire small market town.  There are three rivers which virtually surround the place – the Laver, the Skell and the Ure  in order of increasing size.

I lived near to the Skell, and we sometimes would walk along it upstream to Fountains Abbey.  One of the local myths was that there was an ancient  tunnel from Ripon Cathedral to Fountains Abbey and we would discuss where the route might be.

Red Kites at Harewood, continuous line and colour sequence. Mick Burton, 2013.

Red Kites at Harewood, single continuous line drawing and colour sequence. Mick Burton, 2013.

Yesterday, on the bus back from Harrogate to Leeds, we approached Harewood Bank and saw the herd of deer in the park and above there were six red kites circling.  I have never seen that many at once. 

Since they were re-introduced near Harewood they have spread many miles and sometimes float above our house in Gledhow Valley in Leeds.

I had to try to capture this amazing bird with my continuous line and colour sequence.


Continuous Line Drawing Alternate Overdraw embedded image.


Abstract before Alternate Overdraw  embedded Dog appears.  Mick Burton, Continuous Line.
Abstract before Alternate Overdraw embedded Dog appears. Mick Burton, Single Continuous Line Drawing.


Here is an abstract Continuous Line Drawing which conceals an image of a dog.  Possibly you can see some clues as to where the outline of the dog is.  The idea is to carry out an Alternate Overdraw along the line throughout the picture which will produce the image of the dog.  Start the overdraw with the arc marked with chevrons.

After I developed Alternate Overdraw in 1970, which enabled me to allocate my colour sequence to continuous line drawings, other possibilities started to occur to me.  The first was that you could hide an image of an animal within what looked like a totally abstract continuous line drawing.

See below how the dog finally appears.  In fact it looks a bit like Ben, who we have been looking after this week.

Alternate Overdraw embedded dog appears.  Mick Burton, Continuous Line Drawing.

Alternate Overdraw embedded dog appears. Mick Burton, Single Continuous Line Drawing.

The start of the process was to sketch a simple dog outline and then , knowing that the outline had to include many crossing lines, I broke the outline down into short lines or arcs which were at an angle to each other.

Next, I needed to run lines through the dog, from various directions, which used these arcs.  For it to work, there had to be an odd number of arcs in each line which went across the dog, between each two outer arcs.  This was so that, after completion, when you drew an alternate overdraw across the dog, both arcs on the outline were overdrawn.  This would result in all the arcs around the outline being overdrawn, thus forming one loop of overdraw. 

Within the body of the dog, several overdraw loops were also formed.  Similarly in the background a number of overdrawn loops and inner loops resulted. 

Of course, trial and error is involved in connecting up all the loose ends (of the lines running through the dog) to achieve a single continuous line through the whole drawing.

Finally, having completed a continuous line, I needed to check that there were no obvious sections which would indicate that an animal was in there. 

I did one more embedded image in 1970 before moving on to other things.  This time, instead of making the abstract continuous line from flowing curves with no straight lines, I decided to use mostly straight lines and right angles.

Abstract before Alternate Overdraw embedded steam engine appears.  Mick Burton, Continuous Line Drawing.

Abstract before Alternate Overdraw embedded steam engine appears. Mick Burton, Single Continuous Line Drawing.


This time I  was concealing a steam engine and the Alternate Overdraw result is shown below.

Alternate Overdraw embedded steam engine appears.  Mick Burton, Continuous Line Drawing.

Alternate Overdraw embedded steam engine appears. Mick Burton, Single Continuous Line Drawing.


As always with my various styles, I wonder who else may be using them  and whether they were in use long ago.

Colour Sequence on Continuous Line Drawing

Fig 1. Completed Colour Sequence on Continuous Line Drawing of horse. Mick Burton, Continuous Line Blog.

Fig 1. Completed Colour Sequence on Single Continuous Line Drawing of horse. Mick Burton, Continuous Line Blog.

How do I apply Colour Sequence to my Continuous Line Drawings, which I first developed in the late 1960,s ?  In my last blog post, about Alternate Overdraw of My Continuous Lines, I pointed out that Colour Sequence was the next stage and so here we go.  I will now show the stages involved in completing the colouring of this Horse.

Other Alternate Overdraw on Continuous Line of horse.

Fig 2. Alternate Overdraw on Single Continuous Line Drawing of the Horse, as the first stage of Colour Sequence. Mick Burton, Continuous Line Blog.

From the two Alternate Overdraw examples in the previous post, I have chosen Fig 2 commencing at point “X” for this example (either “A” or “X” would result in the same colour sequence).

We are going to number all areas of the drawing, commencing with the background which will be numbered “0”.  In this example the background will remain uncoloured but “0” will also occur within the drawing and have a colour. 

Fig 3. Initial numbering (0 and 1) of channels between Alternate Overdraws on the Continuous Line Horse.

Fig 3. Initial numbering (0 and 1) of channels between Alternate Overdraws on the Continuous Line Horse.

You will notice that between all the closed lines, formed by the Alternate Overdraws, there are channels of areas.  These can be completely numbered alternately by only two numbers, which in this case are 0 and 1.  So, starting with 0 on the background, work through all these linked channels, see Fig 3.  This also sets the direction of the number sequence throughout the drawing.


Fig 4. Colour Sequence numbers 2 and 3 on the Continuous Line Horse.

Fig 4. Colour Sequence numbers 2 and 3 on the Continuous Line Horse.


The numbering progresses both upwards through positive numbers and downwards through negative numbers.  We will start with the positive direction and allocate the next pair of numbers, 2 and 3.  By moving from an 0 area into a 1 area, and on through its Alternate Overdraw border, we will enter an un-allocated area we can mark 2.  Now deal with all the other areas in this new channel, marking alternate areas 3 and 2, to complete this allocation.  After this we need to check for any further Alternate Overdraw channel, or channels, at this level adjacent to 1 areas and then allocate 2 and 3 to them also, see Fig 4.

We then need to check for any further Alternate Overdraw channels enclosed within any of the 2 and 3 channels.  If we found one we would allocate 4 and 5 to the new channel or channels.  In this case there is no higher level channel. 

Fig 5. Colour Sequence numbers (-)1 and (-)2 on the Continuous Line Horse. Mick Burton, Continuous Line Blog.

Fig 5. Colour Sequence numbers (-)1 and (-)2 on the Single Continuous Line Horse. Mick Burton, Continuous Line Blog.

Having  completed the numbering of areas in the positive direction, we now go into the negative in Fig 5.  By looking at an area 1 and moving through a 0 area with an Alternate Overdraw border we can cross through that into a (-)1 and (-)2 channel.  Mark the initial one (-)1 and then allocate alternately through the channel with (-)2 and (-)1.  After completing that channel, look for other un-allocated channels adjacent to 0 areas and allocate (-)1 and (-)2 to them.  Now look for further channels in the negative direction enclosed within a (-)1 and (-)2 channel.  There is one such, a single area (enclosed by its own Overdraw) in the front leg of the horse, which I have left blank in Fig 5 , which will be (-)3.

Fig 6. Colour Sequence colour chart for Continuous Line Horse. Mick Burton, Continuous Line Blog.

Fig 6. Colour Sequence colour chart for Continuous Line Horse. Mick Burton, Continuous Line Blog.

I was inspired by Rainbows in deciding on the sort of Colour Sequences I wanted to use for my Continuous Lines.  For shorter sequences, I settled for “partial rainbows” involving two prime colours only with a progression of colour mix and tones from light to dark.  For the Elephant I used yellows, greens and blues and for the Horse it was yellows, orange, red and browns in Fig 6.

I have carefully selected colours which have a stepped progression, both in colour and tone, and where possible I apply them from the tube (poster colour in the late 1960’s or acrylic now) to achieve an even and solid result.  I avoid mixing if I can, to retain the pure consistency of colour application across the painting, but sometimes it is necessary.


Fig 7. Black and white photocopy of Colour Chart for Continuous Line Horse.

Fig 7. Black and white photocopy of Colour Chart for Continuous Line Horse.


To assess the accuracy of the progression steps of my Colour Sequence chart, I do a black and white (or grayscale) photocopy of my chart to check that the steps still work in monochrome, see Fig 7.

Having produced the Colour Sequence chart, we need to decide the direction of the colours matched to the numbers, ie. Light to dark in an upward or a downward direction.  Generally I see whether a scale would mostly coincide with where a natural highlight would be, or have more darks towards the lower parts in a drawing to infer shadow.  Usually it is fairly obvious, but you can always start again with the other direction of colours.  Note that my style may take advantage of natural hints of highlight or shadow on a subject, but generally these aspects (along with perspective) are absent.

I remember that when doing equations at school, which produced two answers (+ or (-) ), was a puzzle to me which no one could explain.  I understand the concept of a practical outcome from having two answers a bit better now.

Fig 8. Initial Colour Sequence pair of colours on Continuous Line Horse. Mick Burton, Continuous Line Blog.

Fig 8. Initial Colour Sequence pair of colours on Continuous Line Horse. Mick Burton, Continuous Line Blog.

Once we have decided on the colour match with the numbers, the initial two colours can be painted in, ie.  Vermillion = 0 and Orange = 1, see Fig 8.


Fig 9. Second Colour Sequence pair of colours on Continuous Line Horse.

Fig 9. Second Colour Sequence pair of colours on Continuous Line Horse.


We can then match numbers 2 and 3 in areas to the colours required in the next channels up, or simply apply Golden Yellow to areas across the overdraw from Orange and then its alternate colour Permanent Yellow, in Fig 9.


Fig 10. Third Colour Sequence pair of colours, in the negative direction, on the Continuous Line Horse. Mick Burton, Continuous Line Blog.

Fig 10. Third Colour Sequence pair of colours, in the negative direction, on the Single Continuous Line  Drawing of Horse. Mick Burton, Continuous Line Blog.

Now we can match numbers (-)1 and (-)2 in the negative direction, or simply apply Light Brown to areas across the Overdraws from Vermillion.  When these Light Brown and Burnt Sienna channels have been completed the last channel colour is (-)3 which is Burnt Umber.  In Fig 10 I have left this final area blank  (on the front left leg of the Horse).

So you have seen my Colour Sequence method, using Alternate Overdraw, for Continuous Line Drawings.  Sorry if it has been a long explanation (particularly if you grasped it quickly or had already come across parts of it), but I have tried to pitch it as helpfully as I can, based on my demonstration sessions.    

A couple a years after I started Colour Sequence I came across the Winding Number Theory.  There is a connection and I did pick up one or two ideas from it.  I will talk about this in a later post, but as always I am not a trained mathematician and so I will keep talking in pictures. 

 I hope that you will give it a try and I am sure you will enjoy the ride, as I have for so long.

If you display or publish your results, it would be great if you could specifically acknowledge me and my ideas.

Alternate Overdraw on Continuous Line Drawing

After my early attempts at continuous line drawing, and then alternate shading, I tried Alternate Overdraw on top of my continuous line drawings.  This produced some fascinating results which led to developments throughout my art.

Alternative Overdraw on Continuous Line of the Horse, start A to B.

Draw from A to B to start Alternate Overdraw on Single Continuous Line Drawing of the Horse.

Lets use the Horse as an example.  Here is a lightly drawn Continuous Line (sorry if you have to tilt your lap top to see it all).  Start at point A and use a thicker pen or marker and draw over the first section of line, in the direction of the arrow, between the two crossovers.  Then miss a section before overdrawing the next section of line.  Keep going overdrawing alternate sections to point B.  You will see that already some overdraw sections are forming closed lines.


Alternate Overdraw of continuous line of horse.

Complete Alternate Overdraw of Continuous Line Drawing of horse from point A.


The next illustration shows the complete Alternate Overdraw and all these new darker lines form closed lines.


Naturally, if we start the Alternate Overdraw in a section which was not overdrawn in the above example (eg at X below), then this produces a result where a completely different set of closed lines appear.


Other Alternate Overdraw on Continuous Line of horse.

Other Alternate Overdraw on Single Continuous Line Drawing of horse, starting at X.


From the above findings I first developed my Colour Sequence ideas, which I will expand upon in the next post.

Later I used the closed lines to help in the construction of large models of my continuous line drawings as well as to devise hidden drawings within continuous lines.  More later on those.

The Alternate Overdraw method also led to a way to find a path through Four Colour Theory maps as part of my attempt to prove that theory nearly 40 years ago.

So, watch this space !!

Variable grid single lines

In 1969 when I was selling prints in the Merrion Centre art exhibition in Leeds, some one asked “Are your drawings done by computer ? ”   At the time computers were rubbish regarding any form of drawing, so I eventually made my own “drawing machine”. 

In 1973 I built a box with 8 perspex rulers lying in one direction and 8 more perspex rulers lying on top at 90 degrees to the lower ones.  Each ruler had alternate inches marked (or not marked)  with a thickish black line.  Any ruler could be pushed in or out one inch to change the whole pattern of single lines displayed by looking down through the rulers (the box could be lit from underneath). 

I could keep altering various rulers until an interesting pattern of lines appeared.  I call these “variable grid single lines”.  One seemed to represent a church and I applied a colour sequence to the picture.  Recently I have modified some of the sky colours and stretched the picture to a rectangle on canvas and here is the result.

Church with Red Sky. Variable grid single line drawing. Mick Burton, 2014

Church with Red Sky. Variable grid single continuous line drawing. Mick Burton, 2014


I did many larger drawings on large square graph paper but found that you can’t vary the lines without a lot of rubbing out.  What you can do is look for smaller areas within the grid which provides a good picture in its own right and replicate that.  The single lines can go out at the sides of the picture, but it is possible to create a continuous line within the picture and then any lines within that are all closed lines as well. 

Both these methods are,  of course, stepping off points for putting these sorts of designs onto a modern computer and generating loads of possibilities in the twinkle of an eye.  I try not to cross that line and feel that it is important for me to keep in the pre-computer art sphere, so that any of my drawings can be created using the mind and the hand with minimal use of technology.   Some latitude is allowed, for as  David Hockney has said, “a pencil is technology”.

I am interested in what computers produce, even though I do not want to use their creative expertise myself,  and was amused when I read about an artist who programmed his computer to generate hundreds of his pictures overnight, whilst he was asleep, and then in the morning he would wade through the results and pick out a few good ones.

The brick wall, as far as my interest in computer pictures or animation is concerned, is when I cannot tell whether what I am seeing is a photograph or film sequence of the real world or a clever computer animation.  That is where art dies.


Why “Continuous Line” ? What is the point of it ?

You may ask why I am so bothered about the line being “Continuous”.  Well here we go –    Skelldale. Continuous line drawing.

The Continuous Line gives the drawing an enclosed flexible structure, or environment, which in turn means that all parts are related to some degree.  If I modify sections of a drawing there can be ramifications elsewhere, which may be small or extensive.  “Skelldale” was one of my earliest continuous line drawings.

When I compose a drawing I have to bear in mind that the line must return to the start point.  This is a lot of fun when I do an abstract, but for a figurative drawing it is more difficult as I am aware that the drawing will constantly change.  However, I have learned that this difficulty can help to trigger the creative force that often lies within the drawing.

This discipline of having to make choices on the route of the line, or modifying the route, can produce an extra structural effect or dynamic of movement which I may not have foreseen.  This creation of a result beyond my intention is similar to what happens in nature, where the practical necessity of combining all the elements needed in an animal or a plant often evolve into a tremendous design.

        Lizard. Continuous line with colour sequence. Mick Burton, 1971

A further result of the Continuous Line is its creative effect on colours applied.  I worked out a method of applying colour sequences which can further enhance the natural structure and dynamic effect.  A colour only occurring once can be in a key area, eg. the eye of the Iguana.  I used a special repeat pattern for the scale effect.


Flame on the Sun. Spherical continuous line. Mick Burton, 1972My “spherical” drawings, where the line goes out of one side of the page and in at the opposite side, also produce a special arrangement of colours which can apply to a sphere.  The “Flame on the Sun” has coloured areas which match if the picture has its sides pulled around to meet in a cylinder.  However, there is no such match top to bottom, where a “bunching” effect would form the “poles” to complete a sphere. 

Africa. Four colour map theorem. Continuous line. Mick Burton, 1974.

My knowledge of Continuous Lines also lead to my creating them within natural structures when I researched the Four Colour Map Theorem 40 years ago.  This single line along boundaries of the countries of Africa (from my 1950’s school atlas), goes through every boundary junction once only.  I could connect up the two loose ends to make it “Continuous” !  You can use two alternate colours for countries inside the line and another two alternate colours for countries (and the sea) outside the line and you have your Four colours.  Proving that you only need four colours for any map is a different matter !

 So there we are, my fascination with my lines continues.  I will cover all these types of line further subsequently.


Animals in My Art – How I Started.

My first Animal drawn with a continuous line was the Horse, which was based upon a painting by George Stubbs, where a horse is savaged by a lion. I used the general image of the horse, but with a calm and flowing style (rather than it appearing to be scared witless).003. 1966-5. Horse. Cont line.
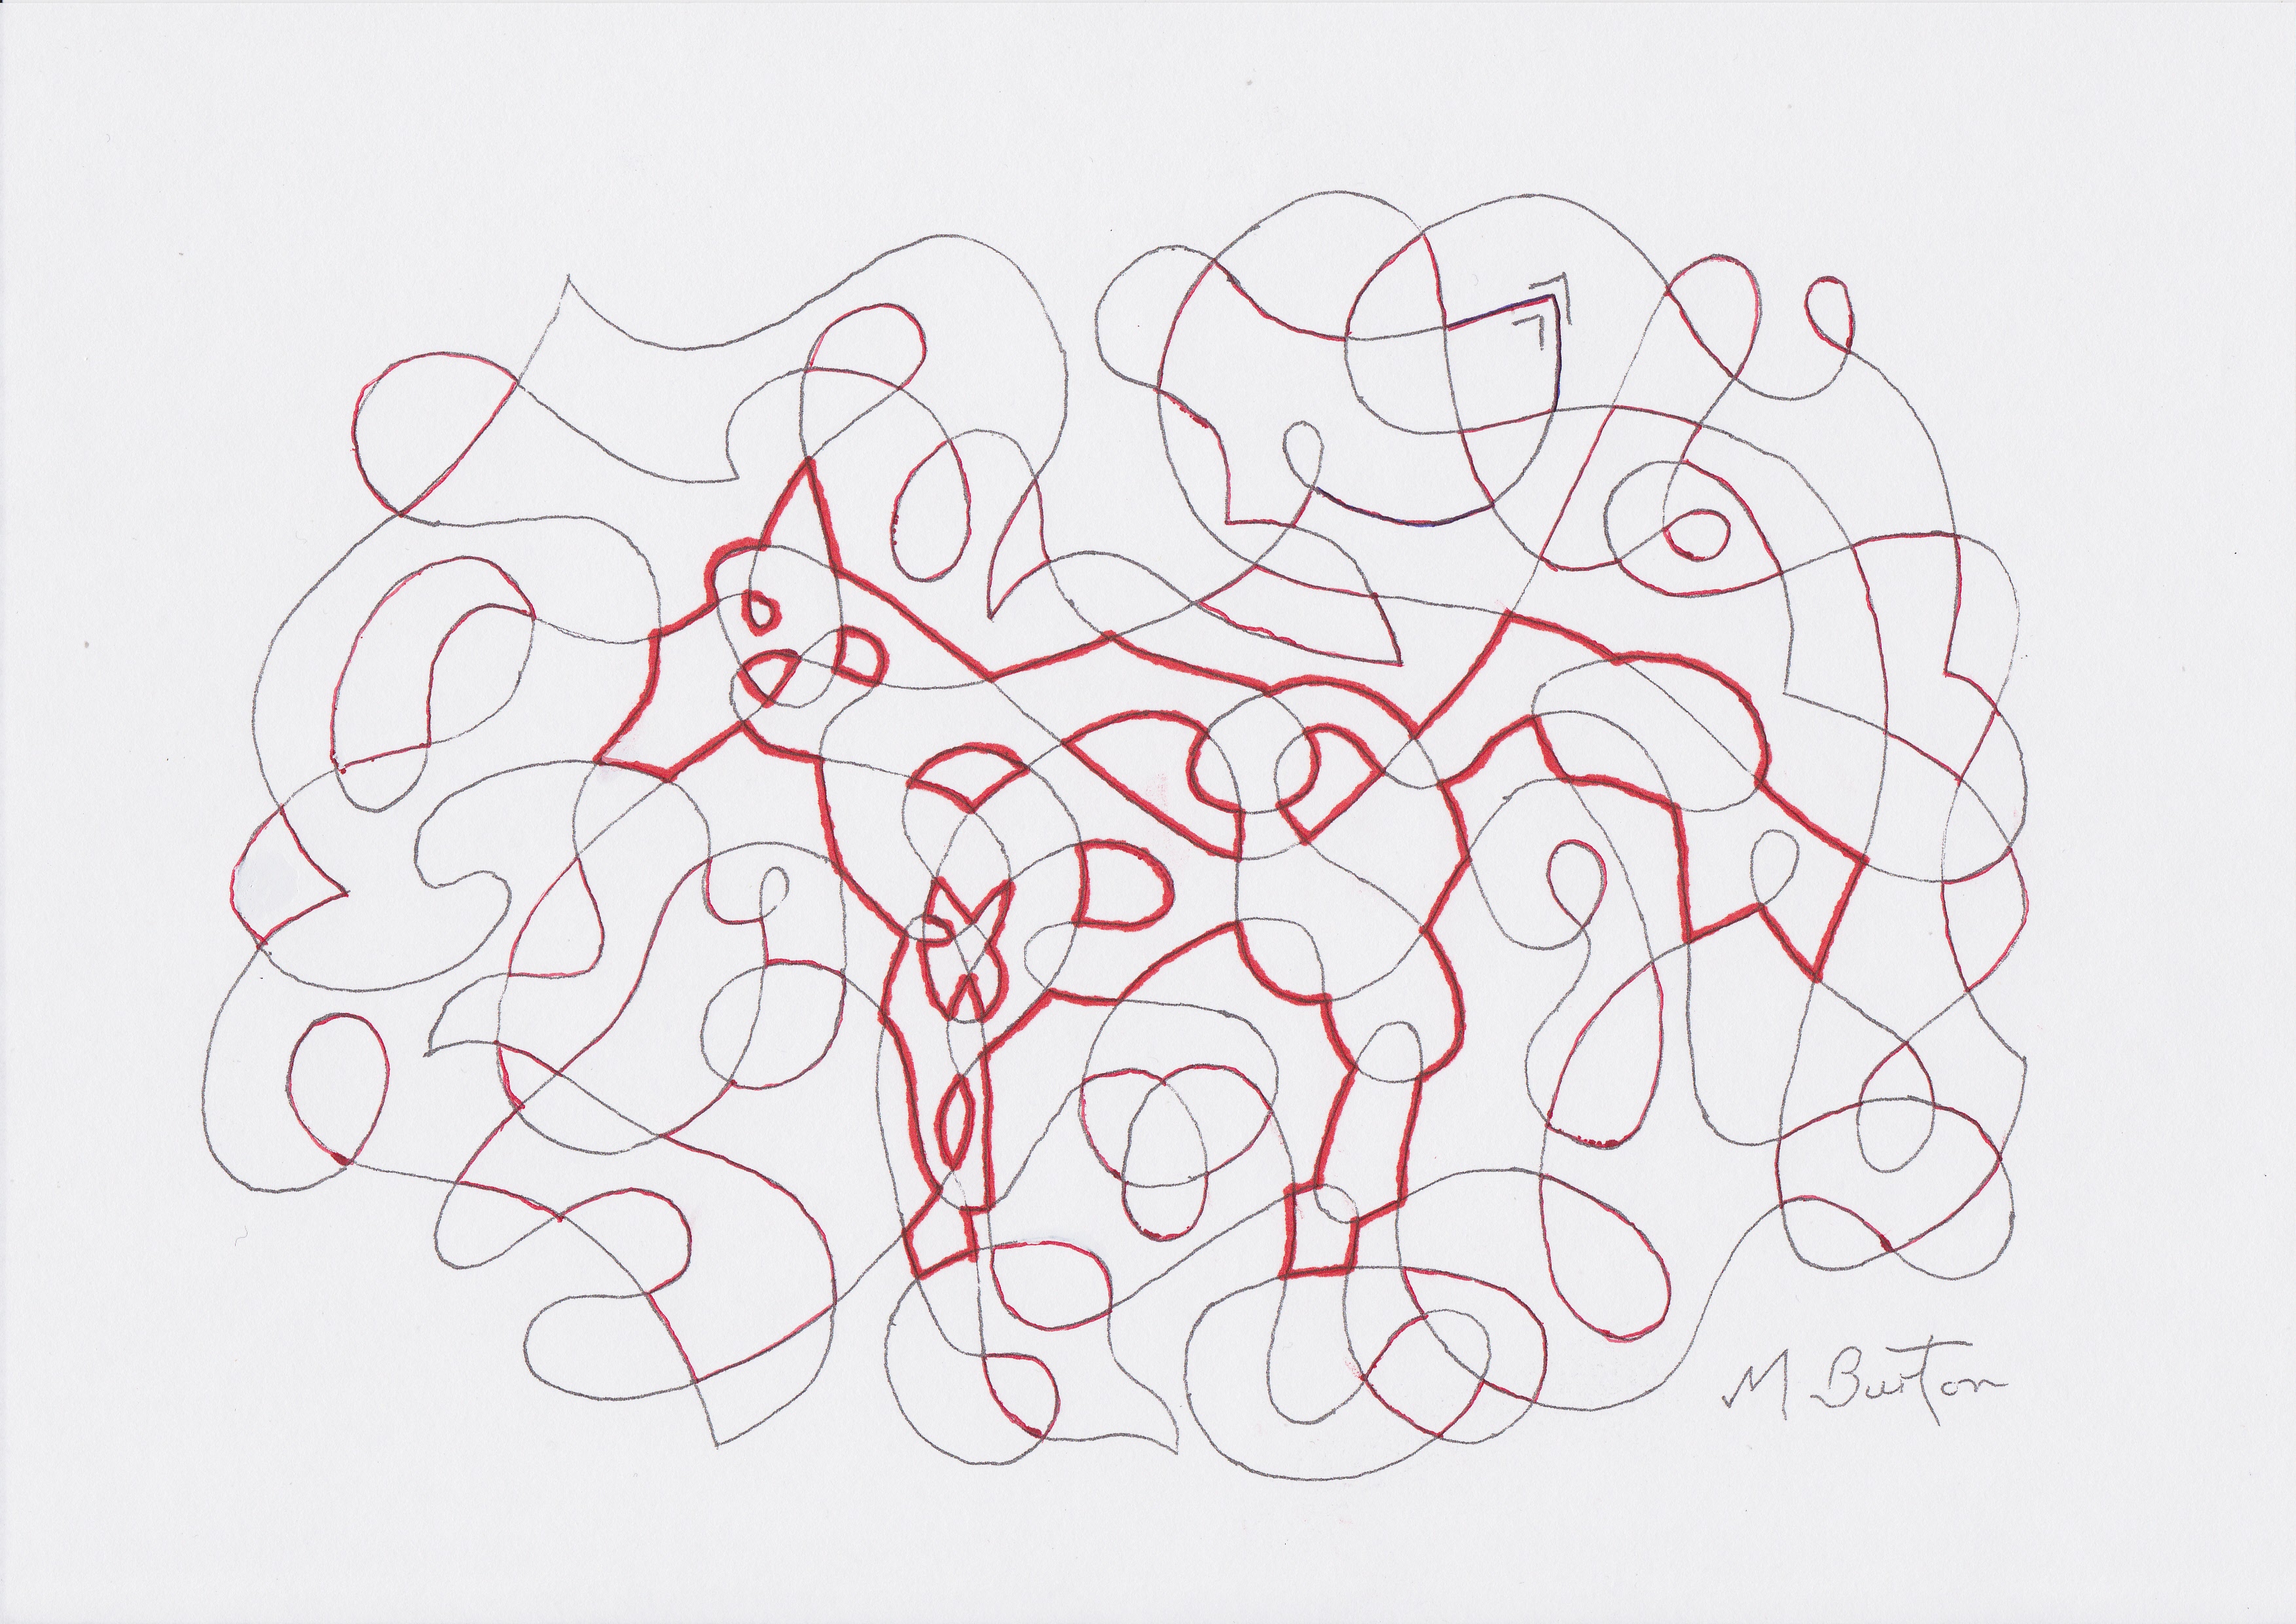
The Cat was drawn quickly, in about 15 minutes, without reference to any picture. My main memories of cats in my childhood were at my Dad’s work, a market garden in Ripon where he was the foreman. There were always several cats around, which were kept to control the mice and rats in the gardens. Dad called every one “Tib”. The downside was the periodic drowning of kittens to keep the numbers in check. I particularly liked one cat which always appeared to have been in a fight, and so I drew a dislocated tail on my cat. This sort of tail became a trademark in some later animals.
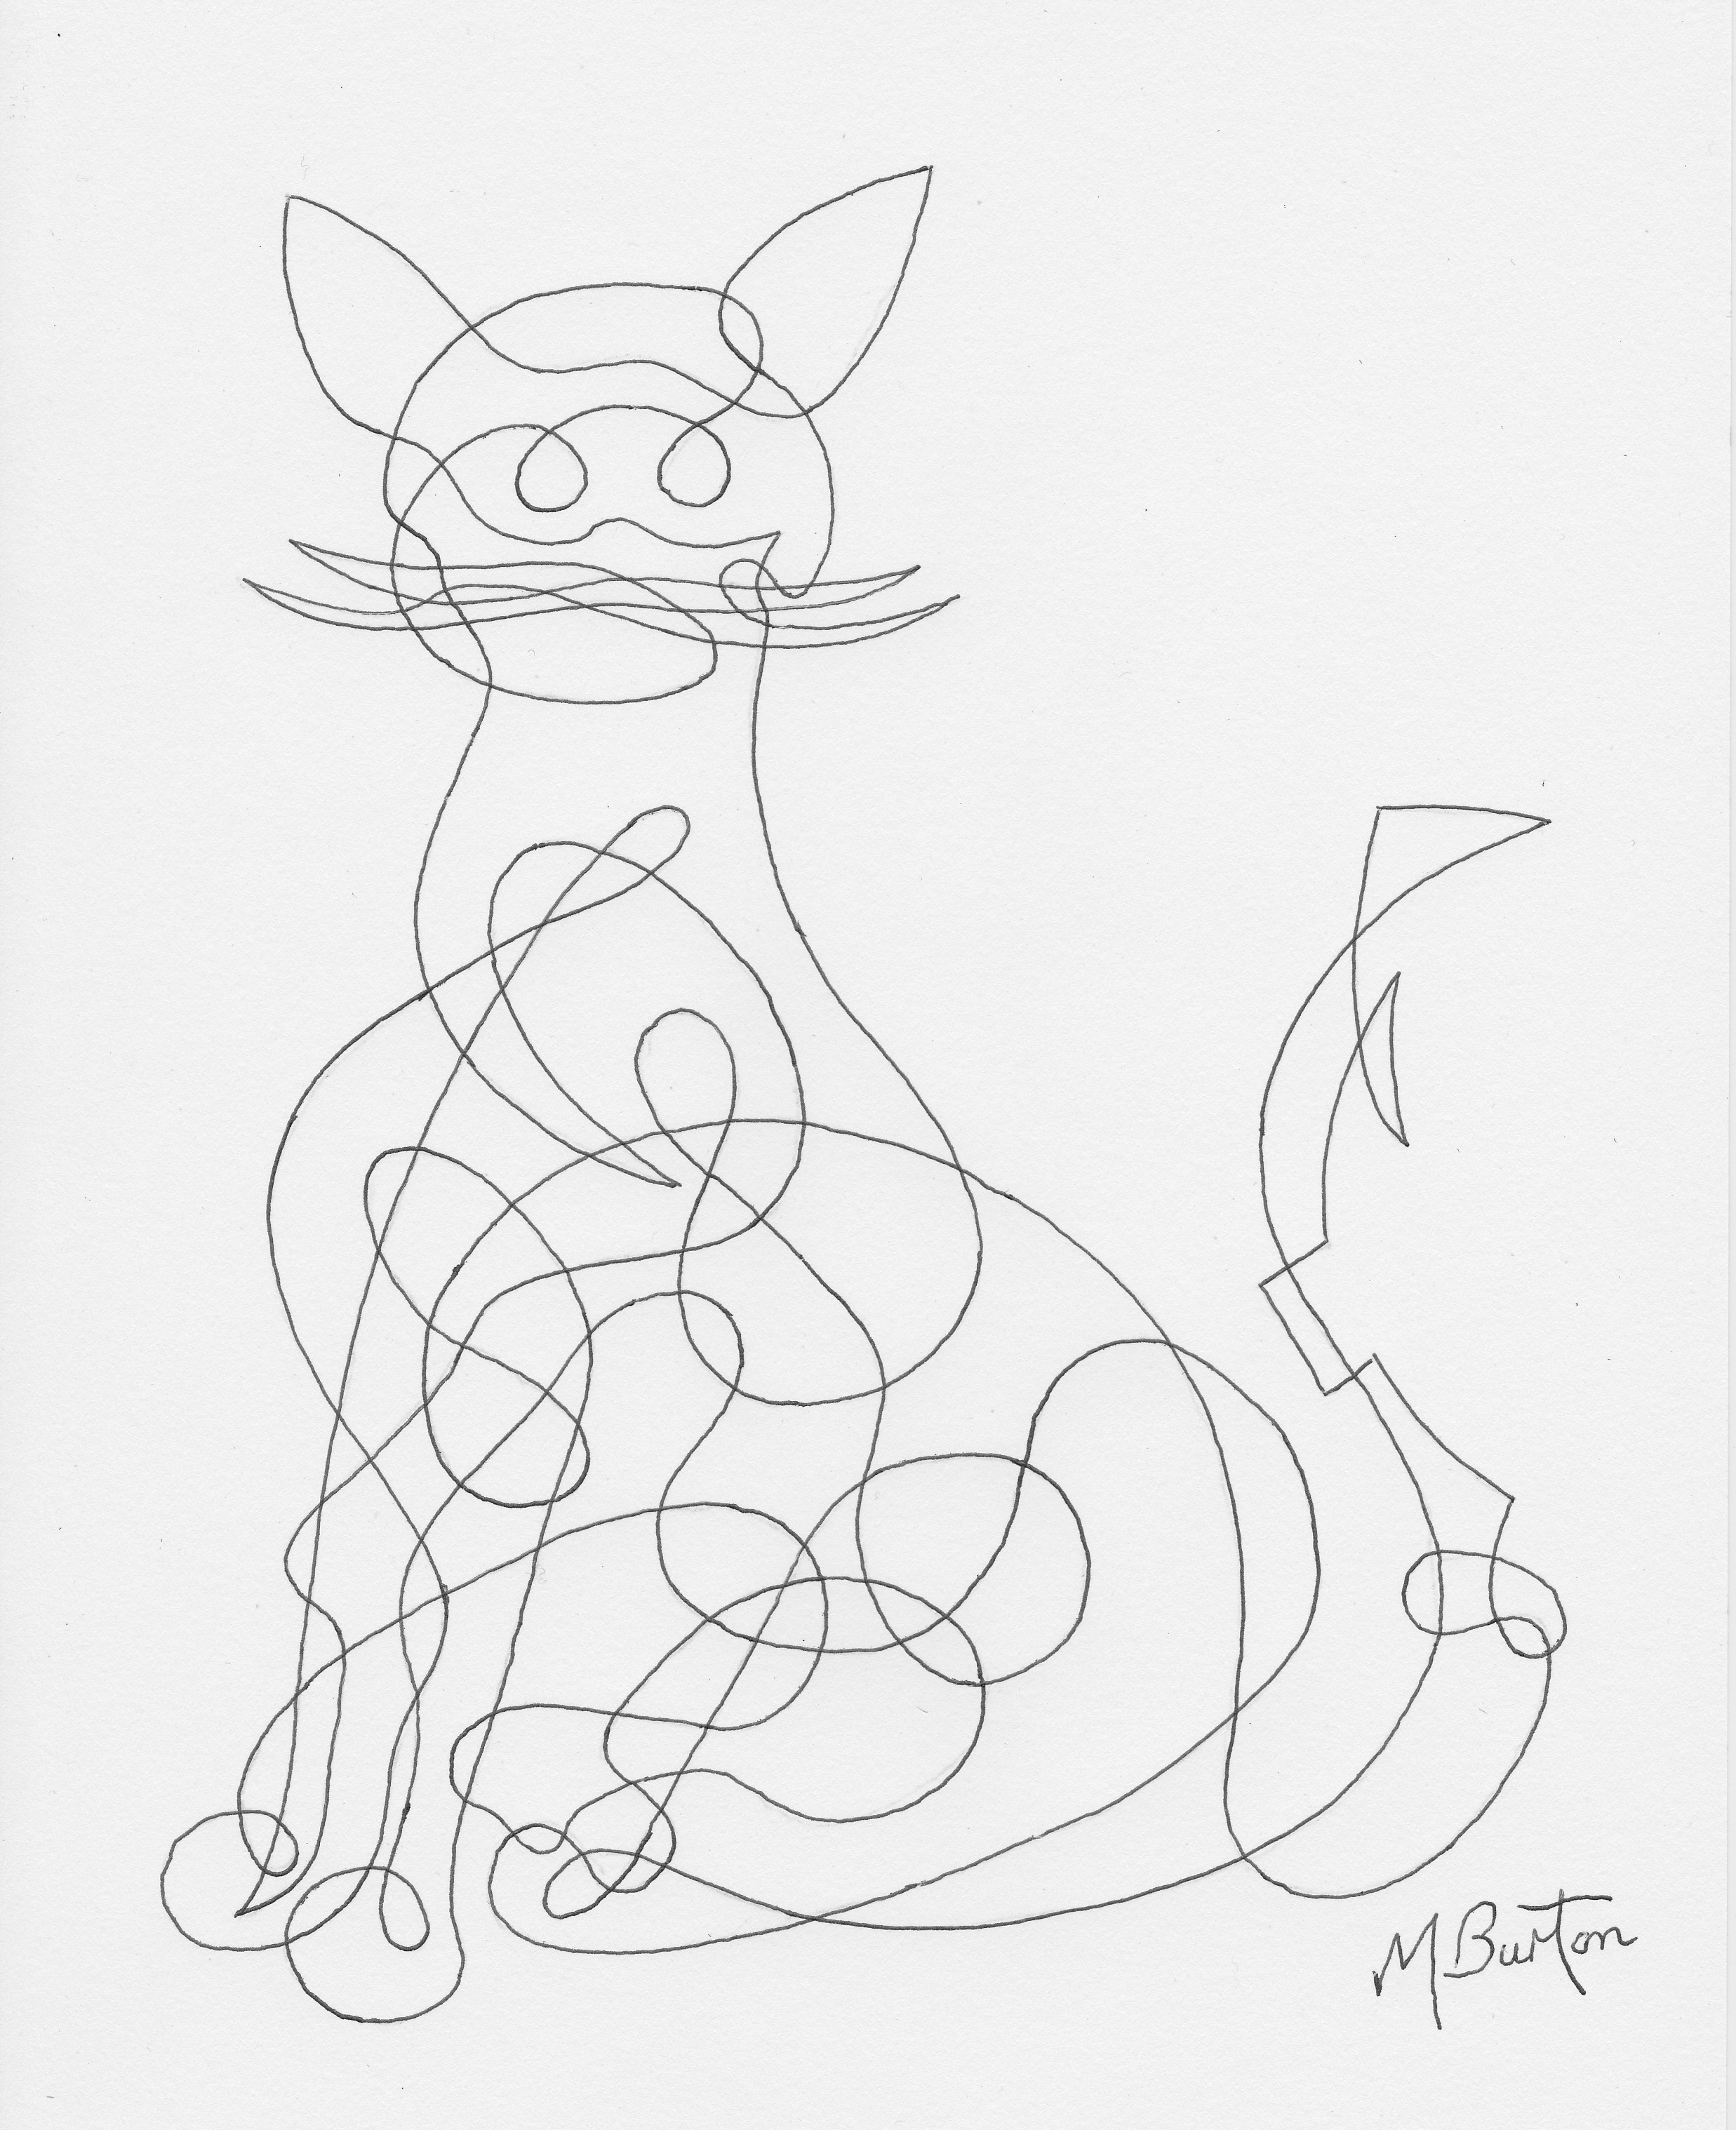
Cat, continuous line.

Following our April Fools Day party on 1 April 1966 (the day after the General Election) when I did my Harold Wilson continuous line, our next venture was a Pink Elephant party.  So I was asked to do another picture.  This elephant was based upon a drawing in a book of animals.  I added a dislocated tail and appropriate colour.012. 1967-3. Pink Elephant. Alternate shading.People said that the flowing lines on the Horse and the Elephant gave an appearance of elegance, whereas some animals were a bit more aggressive.  So I decided that I would draw a Lion in a seated position, with the lower part of its body at ease and relaxed, but with the head suddenly giving out a great roar.  The roar was based upon the opening sequence of Metro Goldwyn Mayer films, where the lion roars through a gap in the logo.

I have a strong memory of sitting with a blank piece of paper in front of me and thinking that I had done the Horse, Cat and Elephant and they had all turned out well.  I had not yet failed to create a picture better than I had anticipated.  Would the Lion work out ?  You just have to start and see what happens.             015. 1967-8. Lion, or Mayer. Cont line.

On the Internet, a couple of years ago, I saw a feature which allowed you to put your own face in the Metro Goldwyn Mayer logo.  Of course I chose to put my Lion’s head in there. Their Lion was called Leo, but I prefer Mayer.pixiz_4f02e0881fb14[1]


My sort of Continuous Line Drawing

Welcome to my Website and Blog.

My style has generated all sorts of reactions, often surprise and delight, and there have been many questions as to how I do my pictures.

There are many definitions of Continuous Line Drawing, and I will look at several of these in future blogs, but I will start with my own basic style.  I developed this style between 1965 and 1974 and then had a break for nearly 40 years.

Here is a sketch I did in 2012 when first attending Stainbeck Arts Club in Leeds.  It was one of several 10 minute sketches that we did, taking it in turn to be the “model”.  This sitter, Barrie, did all the composition for me and I was fortunate with the viewpoint.  I did very little shading and no shadow, but was not considering a continuous line follow up at the time. 

Stainbeck Artist. One of several 10 minute sketches from one afternoon. Mick Burton, 2012.

Stainbeck Artist. One of several 10 minute sketches from one afternoon. Mick Burton, 2012.

At home later, Joan particularly liked this sketch out of the several I had done. She suggested that I do a Continuous Line of it as she had not seen a new one since we had met. In fact I had not done a Continuous line portrait of a person since 1966 when I drew Harold Wilson.

So, on a copy of the sketch, I have penned in Red the marks which I used as a start point for developing the key features and overall structure.

Marks for single line on Artist sketch.

Then the key identifying features were done with groups of continuous lines.

Connecting up the initial feature areas was by using lines matching the structure and texture of the subject where possible. Some changes had to be made to make it work.

A general “tuning up” completed the whole Continuous Line Drawing effect.

Stainbeck Artist, a Continuous Line Drawing from a 10 minute sketch. Mick Burton, 2012.

Stainbeck Artist, a Continuous Line Drawing from a 10 minute sketch. Mick Burton, 2012.

I have always enjoyed the final stage, which includes the flowing decorative effect of the line, which has entranced me since I first saw Art Nouveau pictures when I was 9 years old.

I also show the picture after I have applied colours. My style of colours will be explained later, but this picture helps to demonstrate why I prefer to do a complete continuous line rather than starting at one place and finishing at another. The colours only work naturally if there is a complete continuous line where each crossing of lines is a clear junction.

Stainbeck Artist in continuous line and colour sequence. Mick Burton, 2012.

Stainbeck Artist, single continuous line drawing and colour sequence. Mick Burton, 2012.

This is my basic style. I have many related styles which have grown out of this, mostly related to my observations of how nature operates.

I hope that you found this first post to be useful and are looking forward to more from me.  Any comments, observations, questions or requests will be very welcome.