Tag Archives: Continuous line drawing

Hot Cross Bunny and the psychology of colour

IMG_3425 Hot Cross Bunny

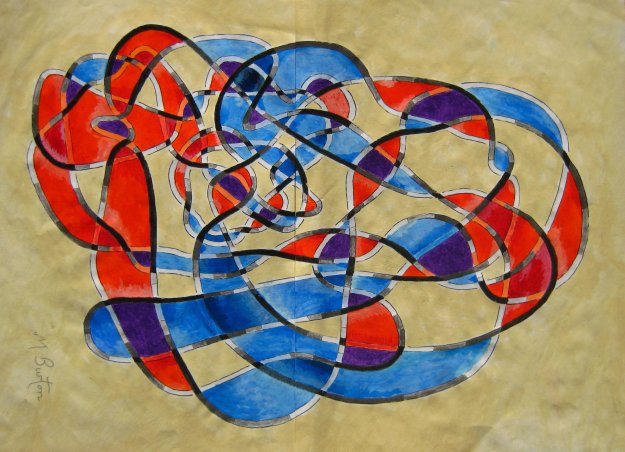
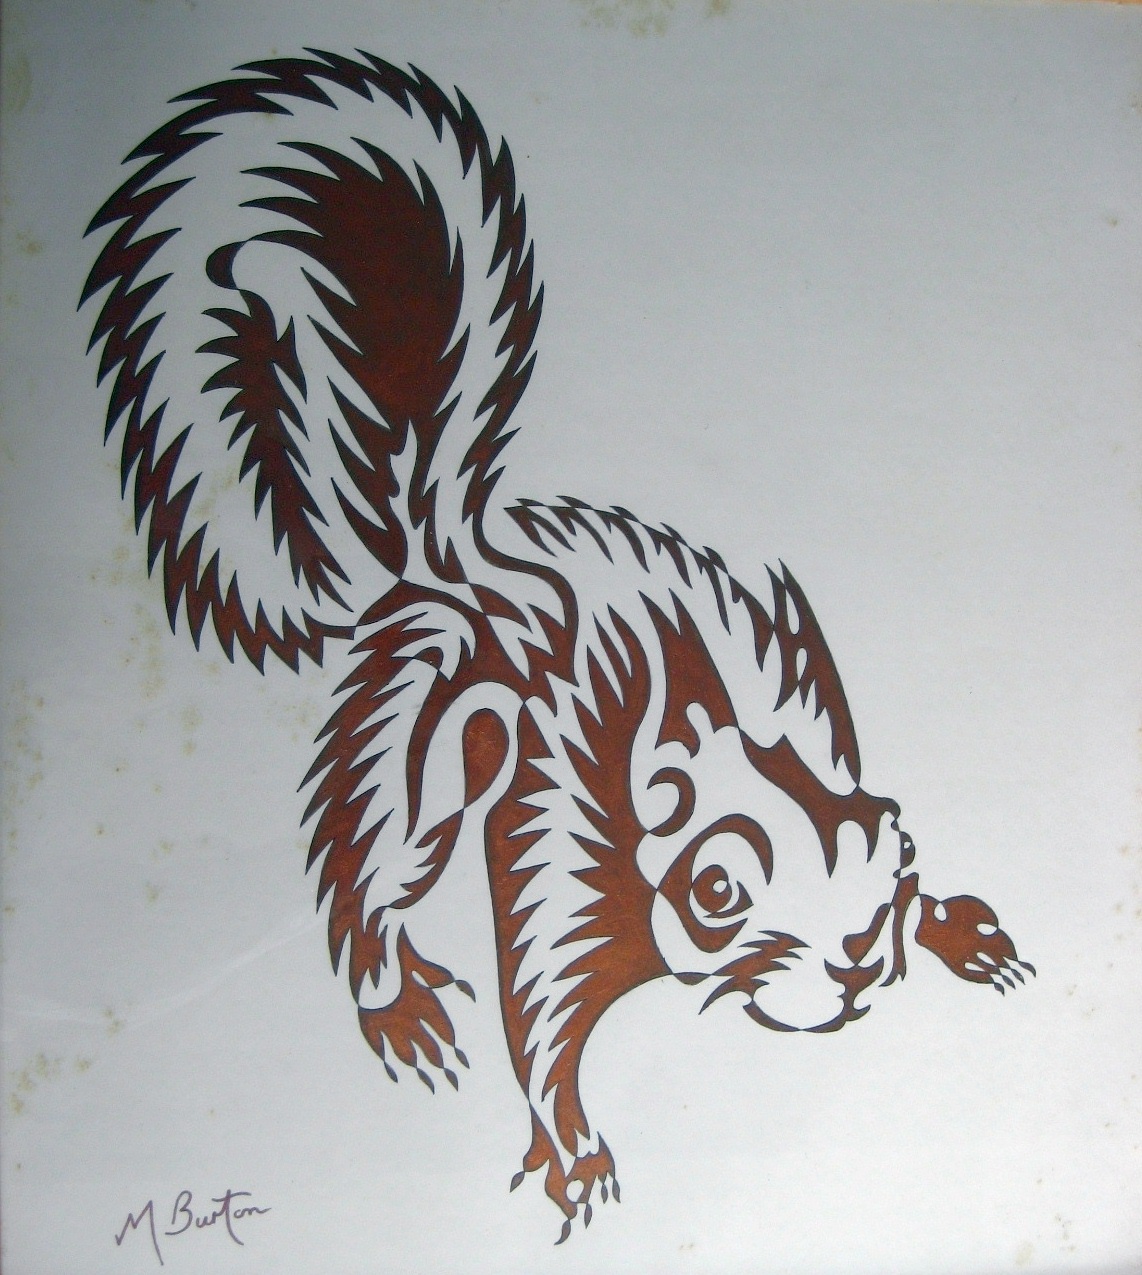
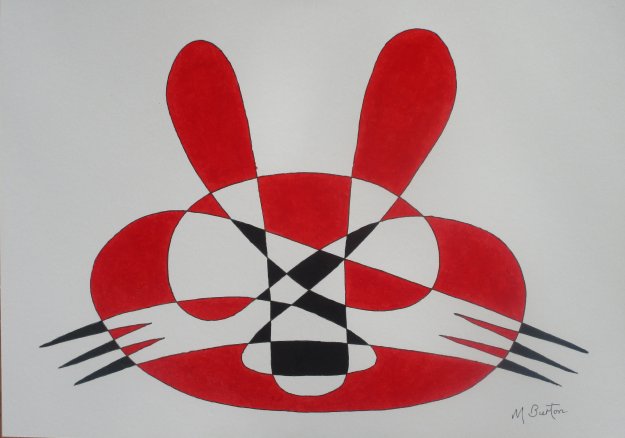
“Hot Cross Bunny”, single continuous line drawing painted in psychological colours. Mick Burton, continuous line artist.

In my posts I have said a lot about colour sequence and, along the way, talked about selecting appropriate ranges of colours for my drawings.  Here are some more colour comments, leading to the one about the bunny above.

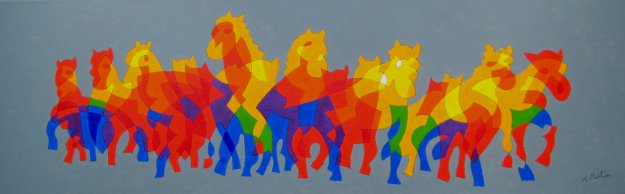
I might consider that a yellow, red and brown range would be good for my horse. These have a similarity to its actual colours and give a warm and friendly feel which reflect the horse’s nature and temperament.

Fig 1.  Copy of IMG_5869 Horse complete, furst sequ

Colour Sequence on Single Continuous Line Drawing of horse. Mick Burton, Continuous Line Blog.

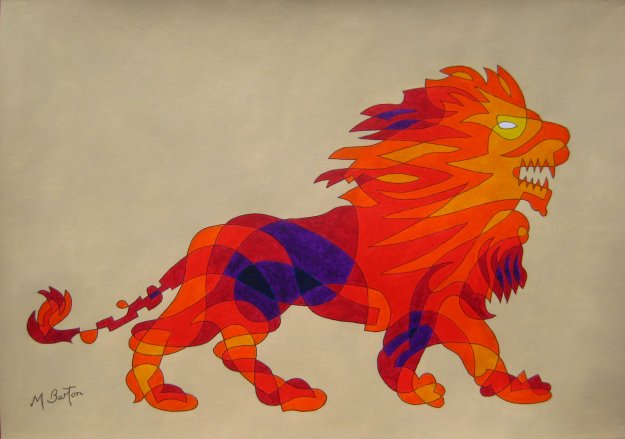
A strong harsh colour seemed to be best for my roaring lion and simple black and white achieved this.  In the mid 1960’s when I drew the lion, Bridget Riley had been doing many black and white hard edge pictures, and I did several of my animals in this colouring.  I feel that this worked best for the lion amongst my drawings.

016. 1967-9. Lion. Alternate shading, black.

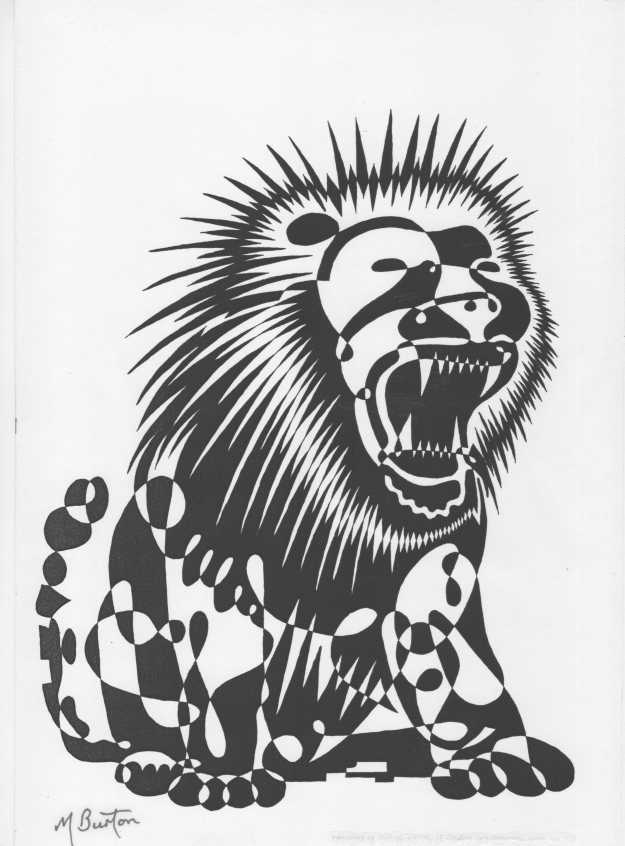
Lion, single continuous line drawing with alternate shading in black and white. Mick Burton, continuous line Artist.

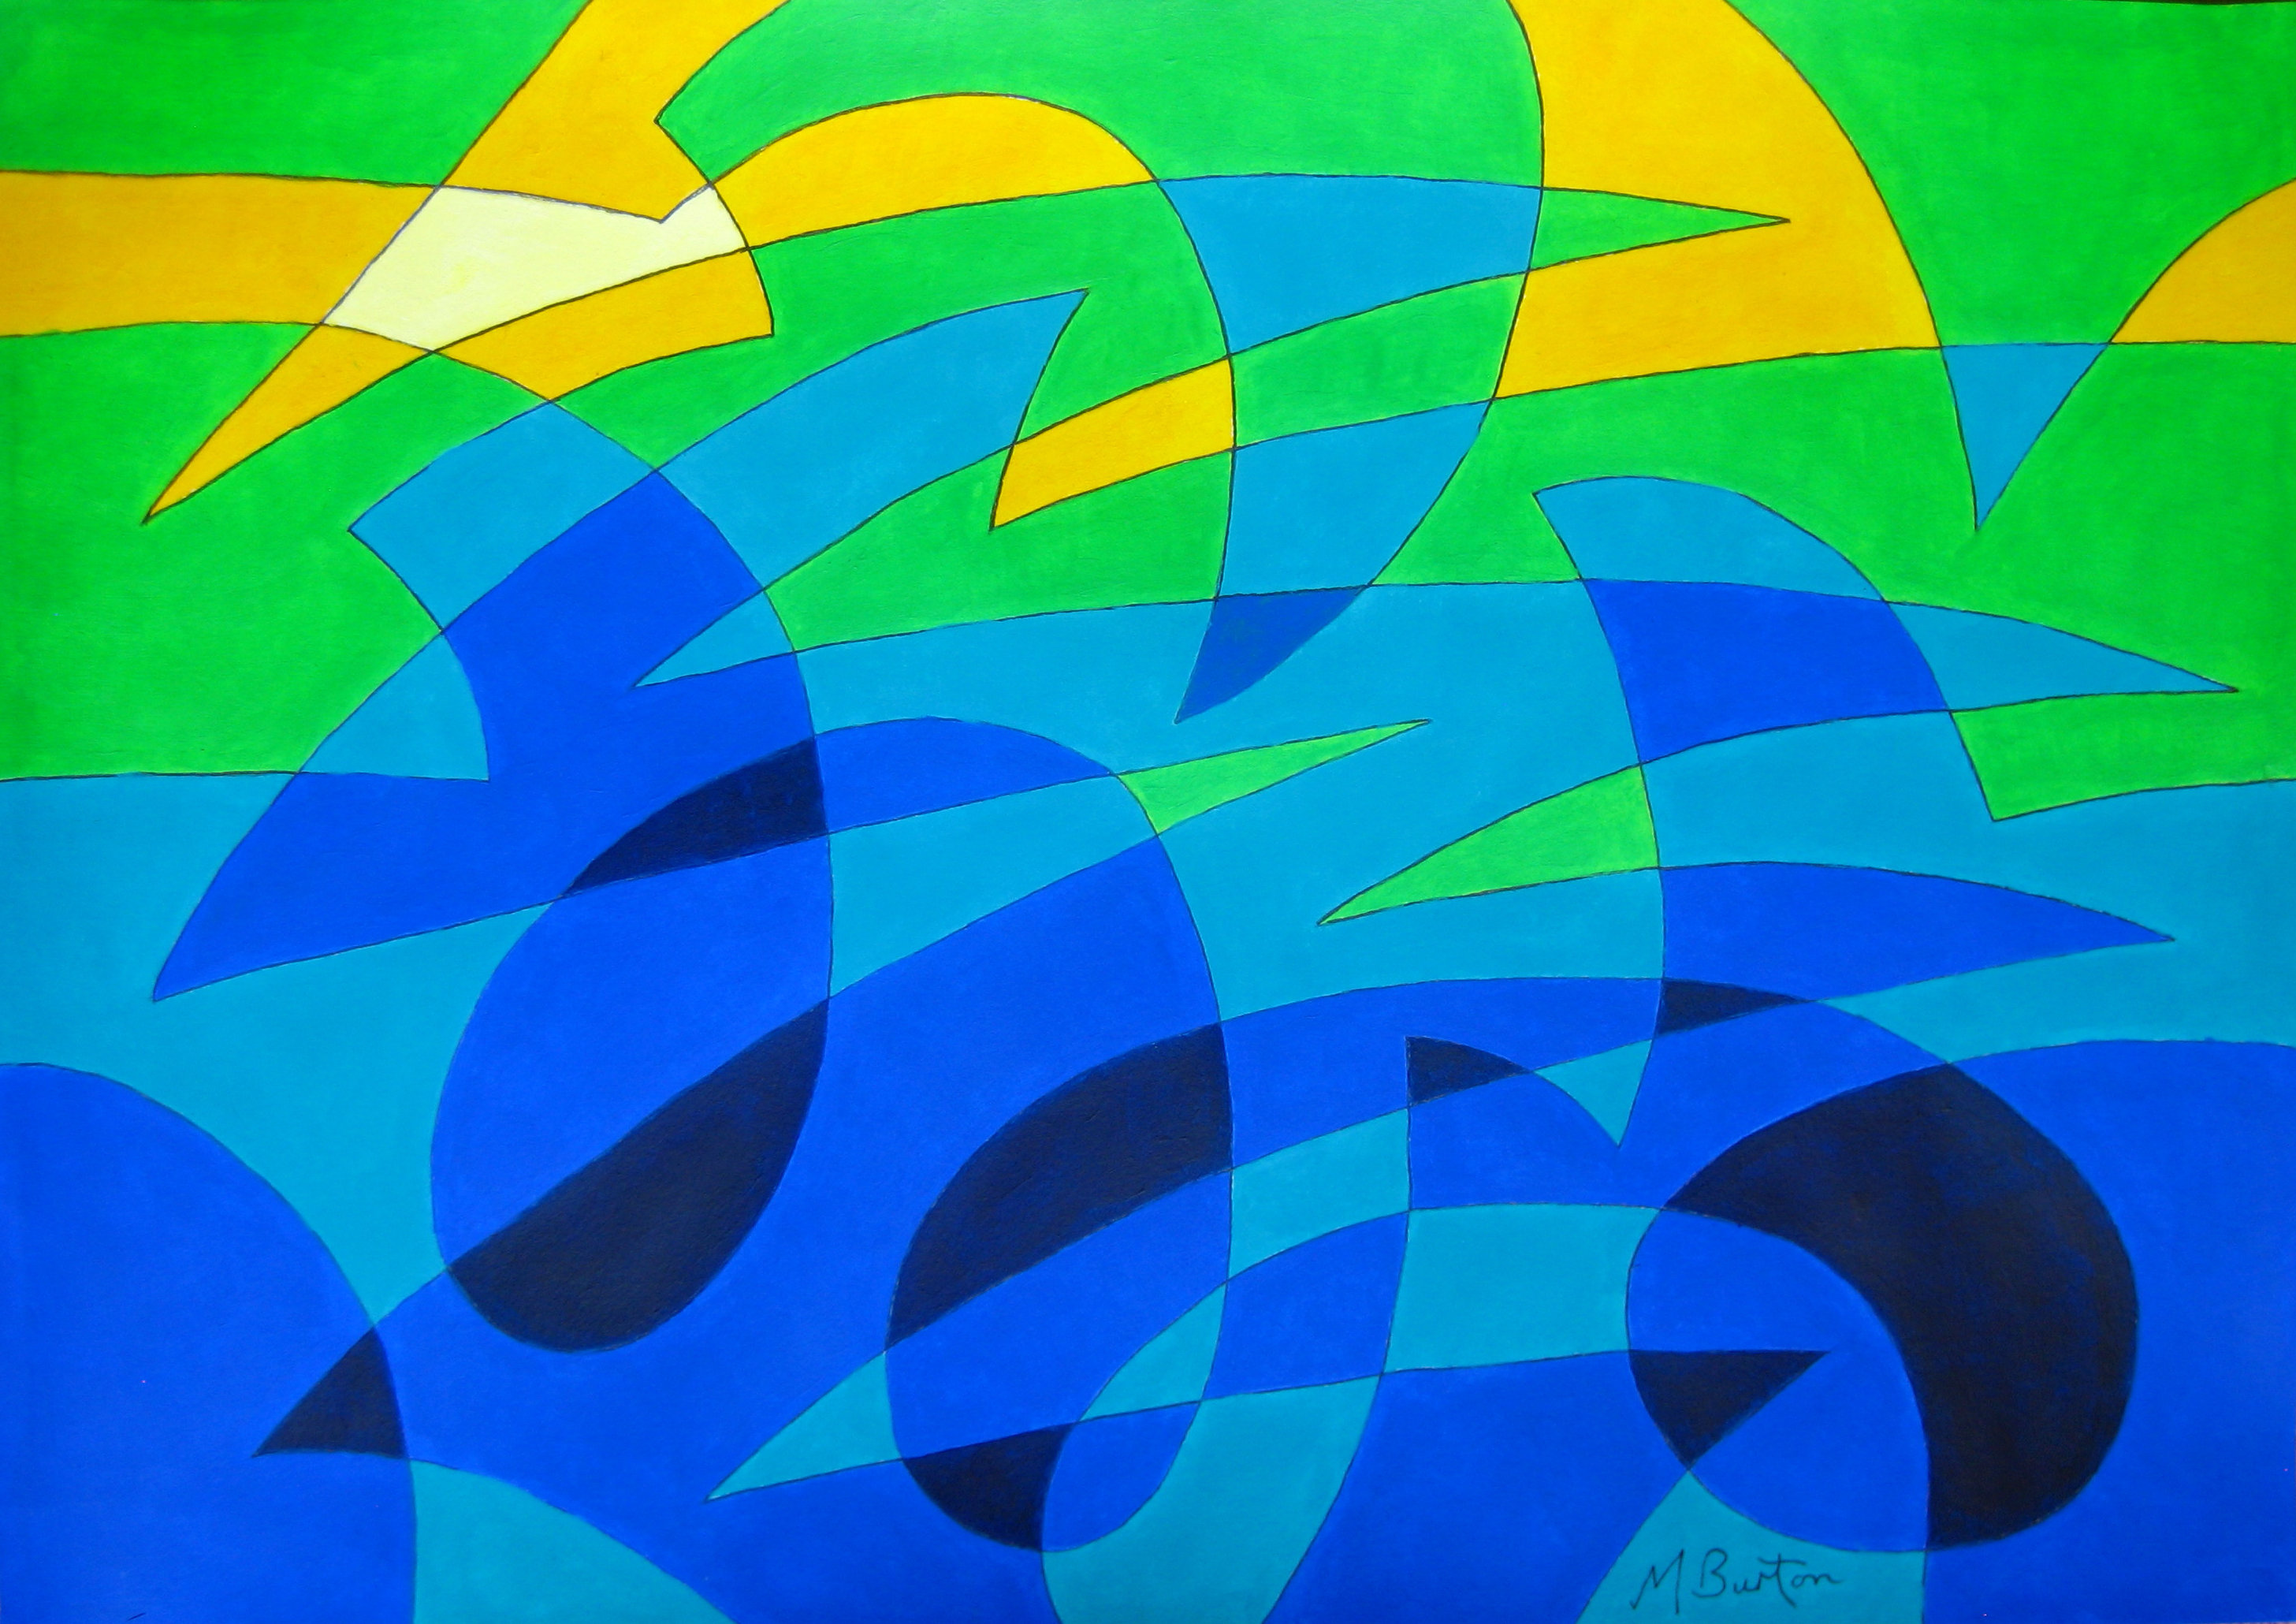
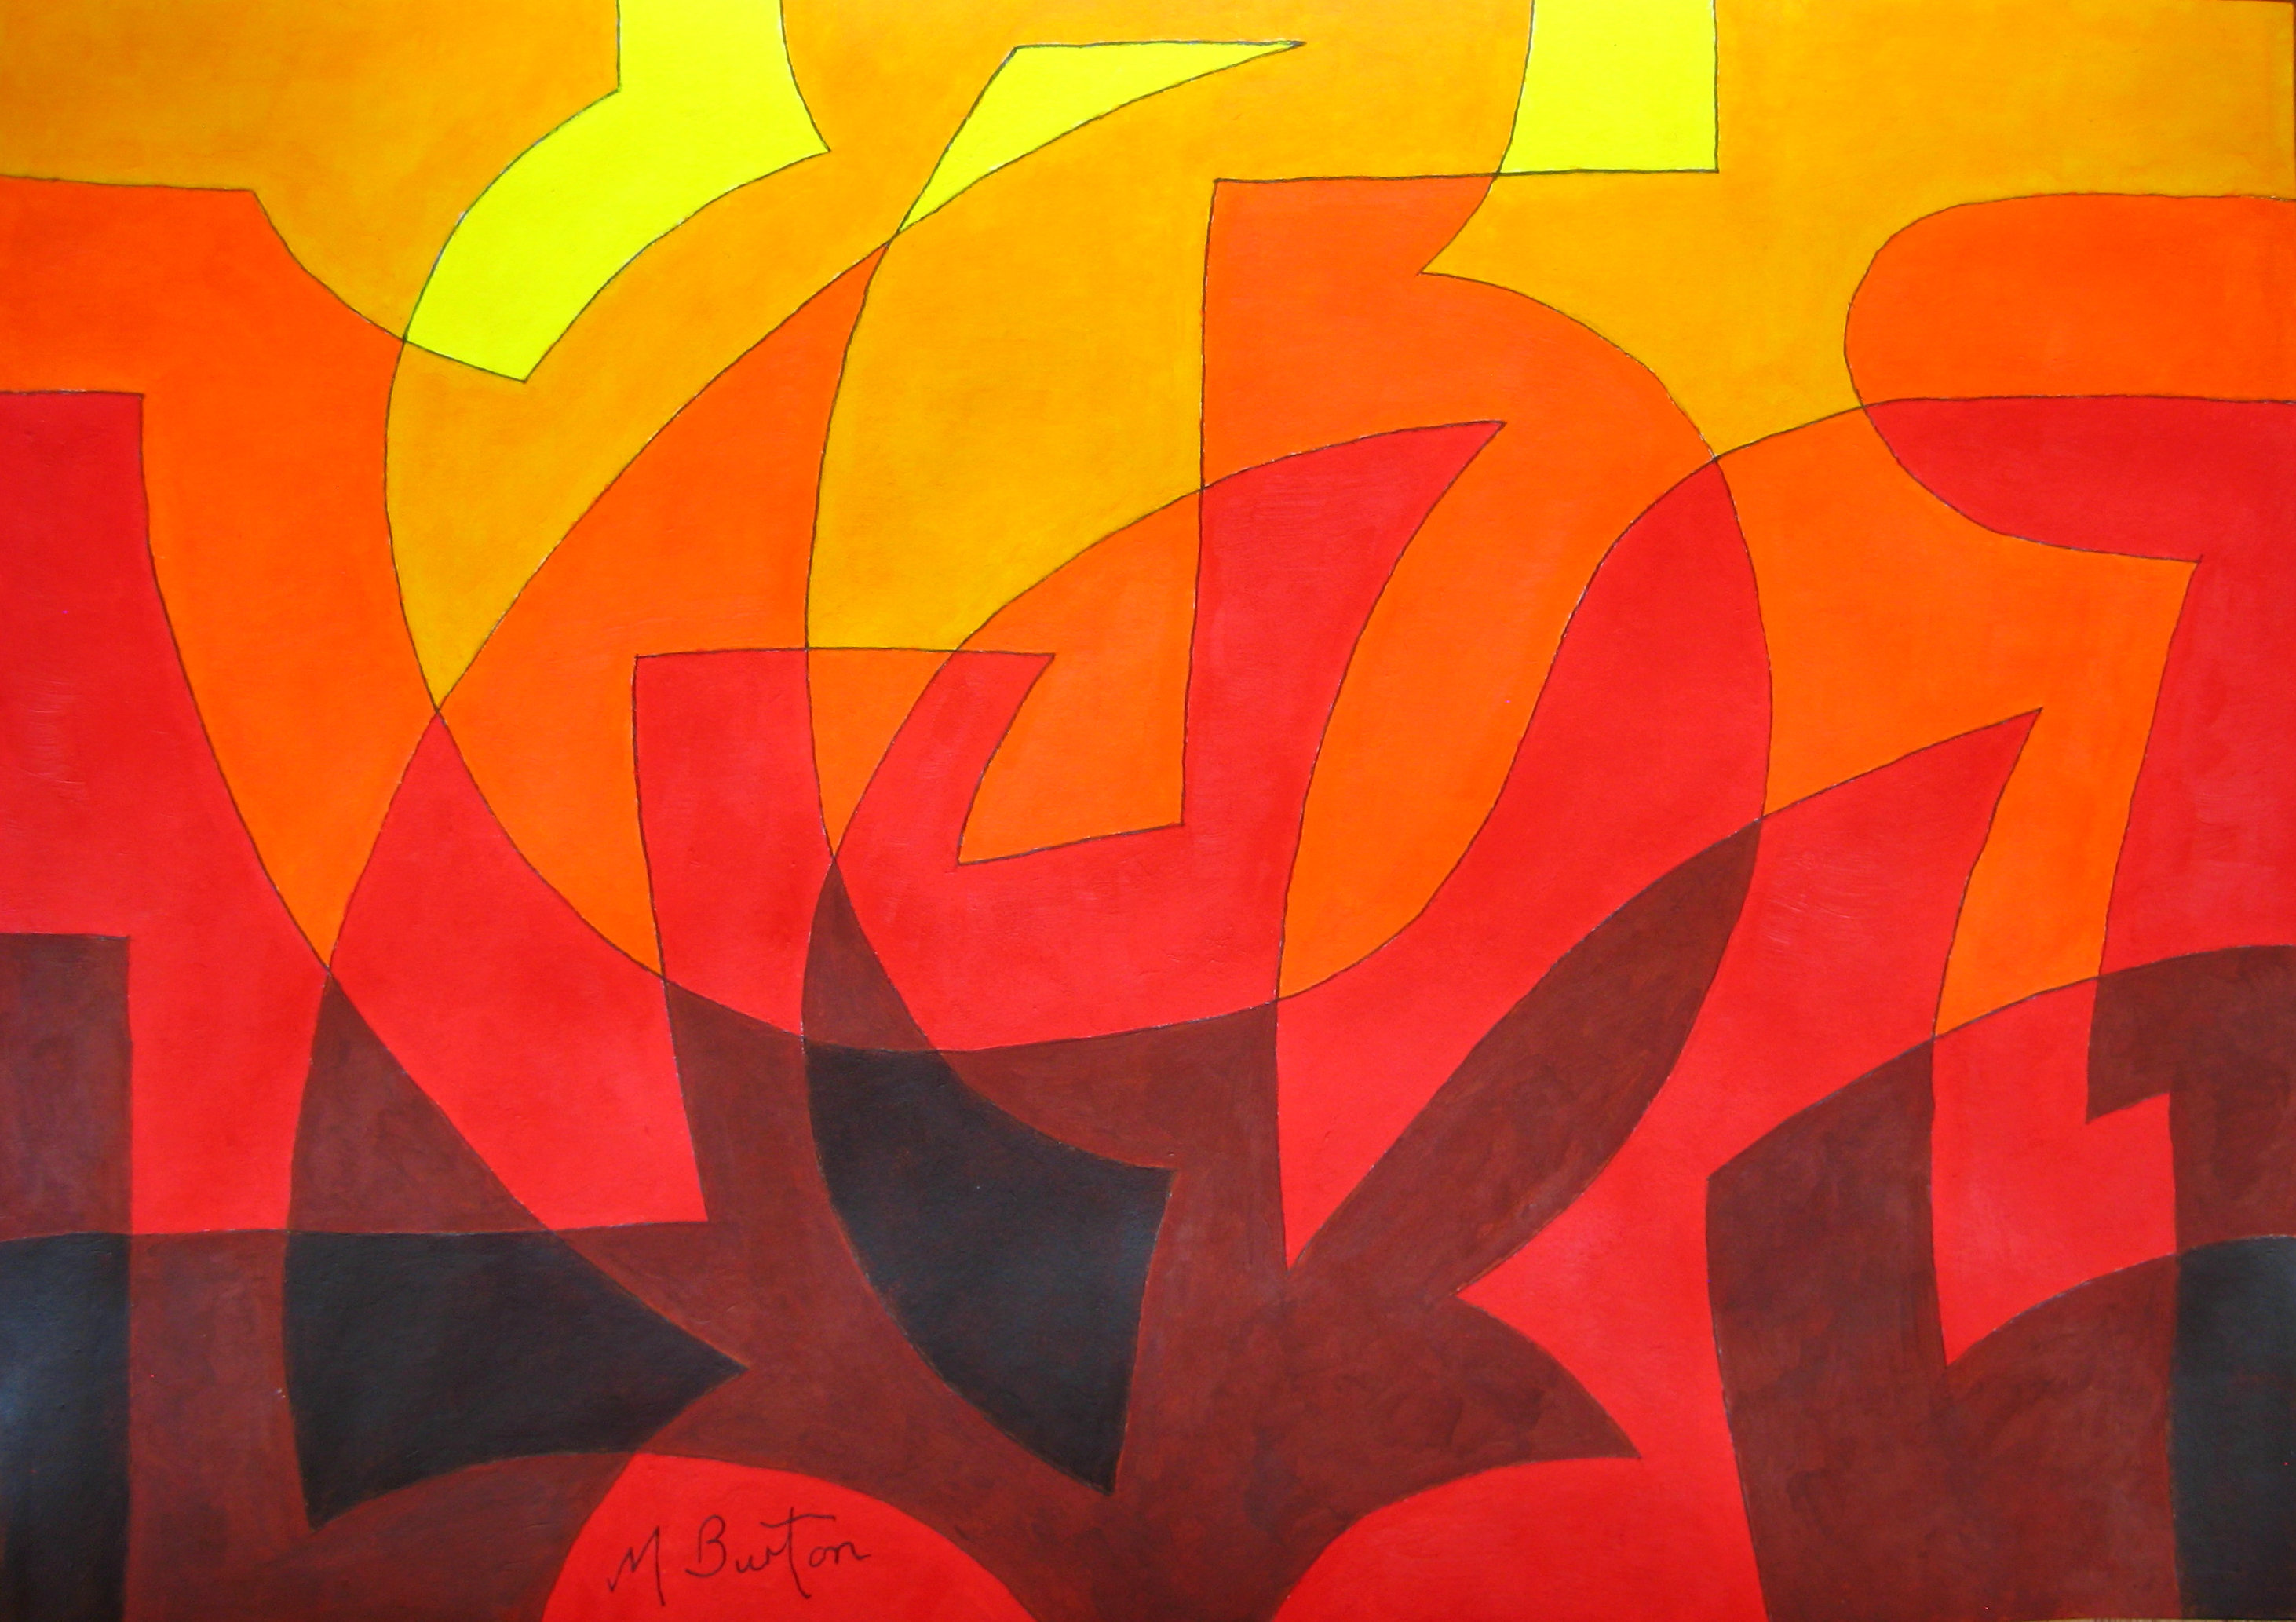
With my “Flame on the Sun” painting, the sort of anti magnetism represented by complementary red and green hopefully reflect the explosive violence required.

Flame on the Sun. Spherical continuous line. Mick Burton, 1972

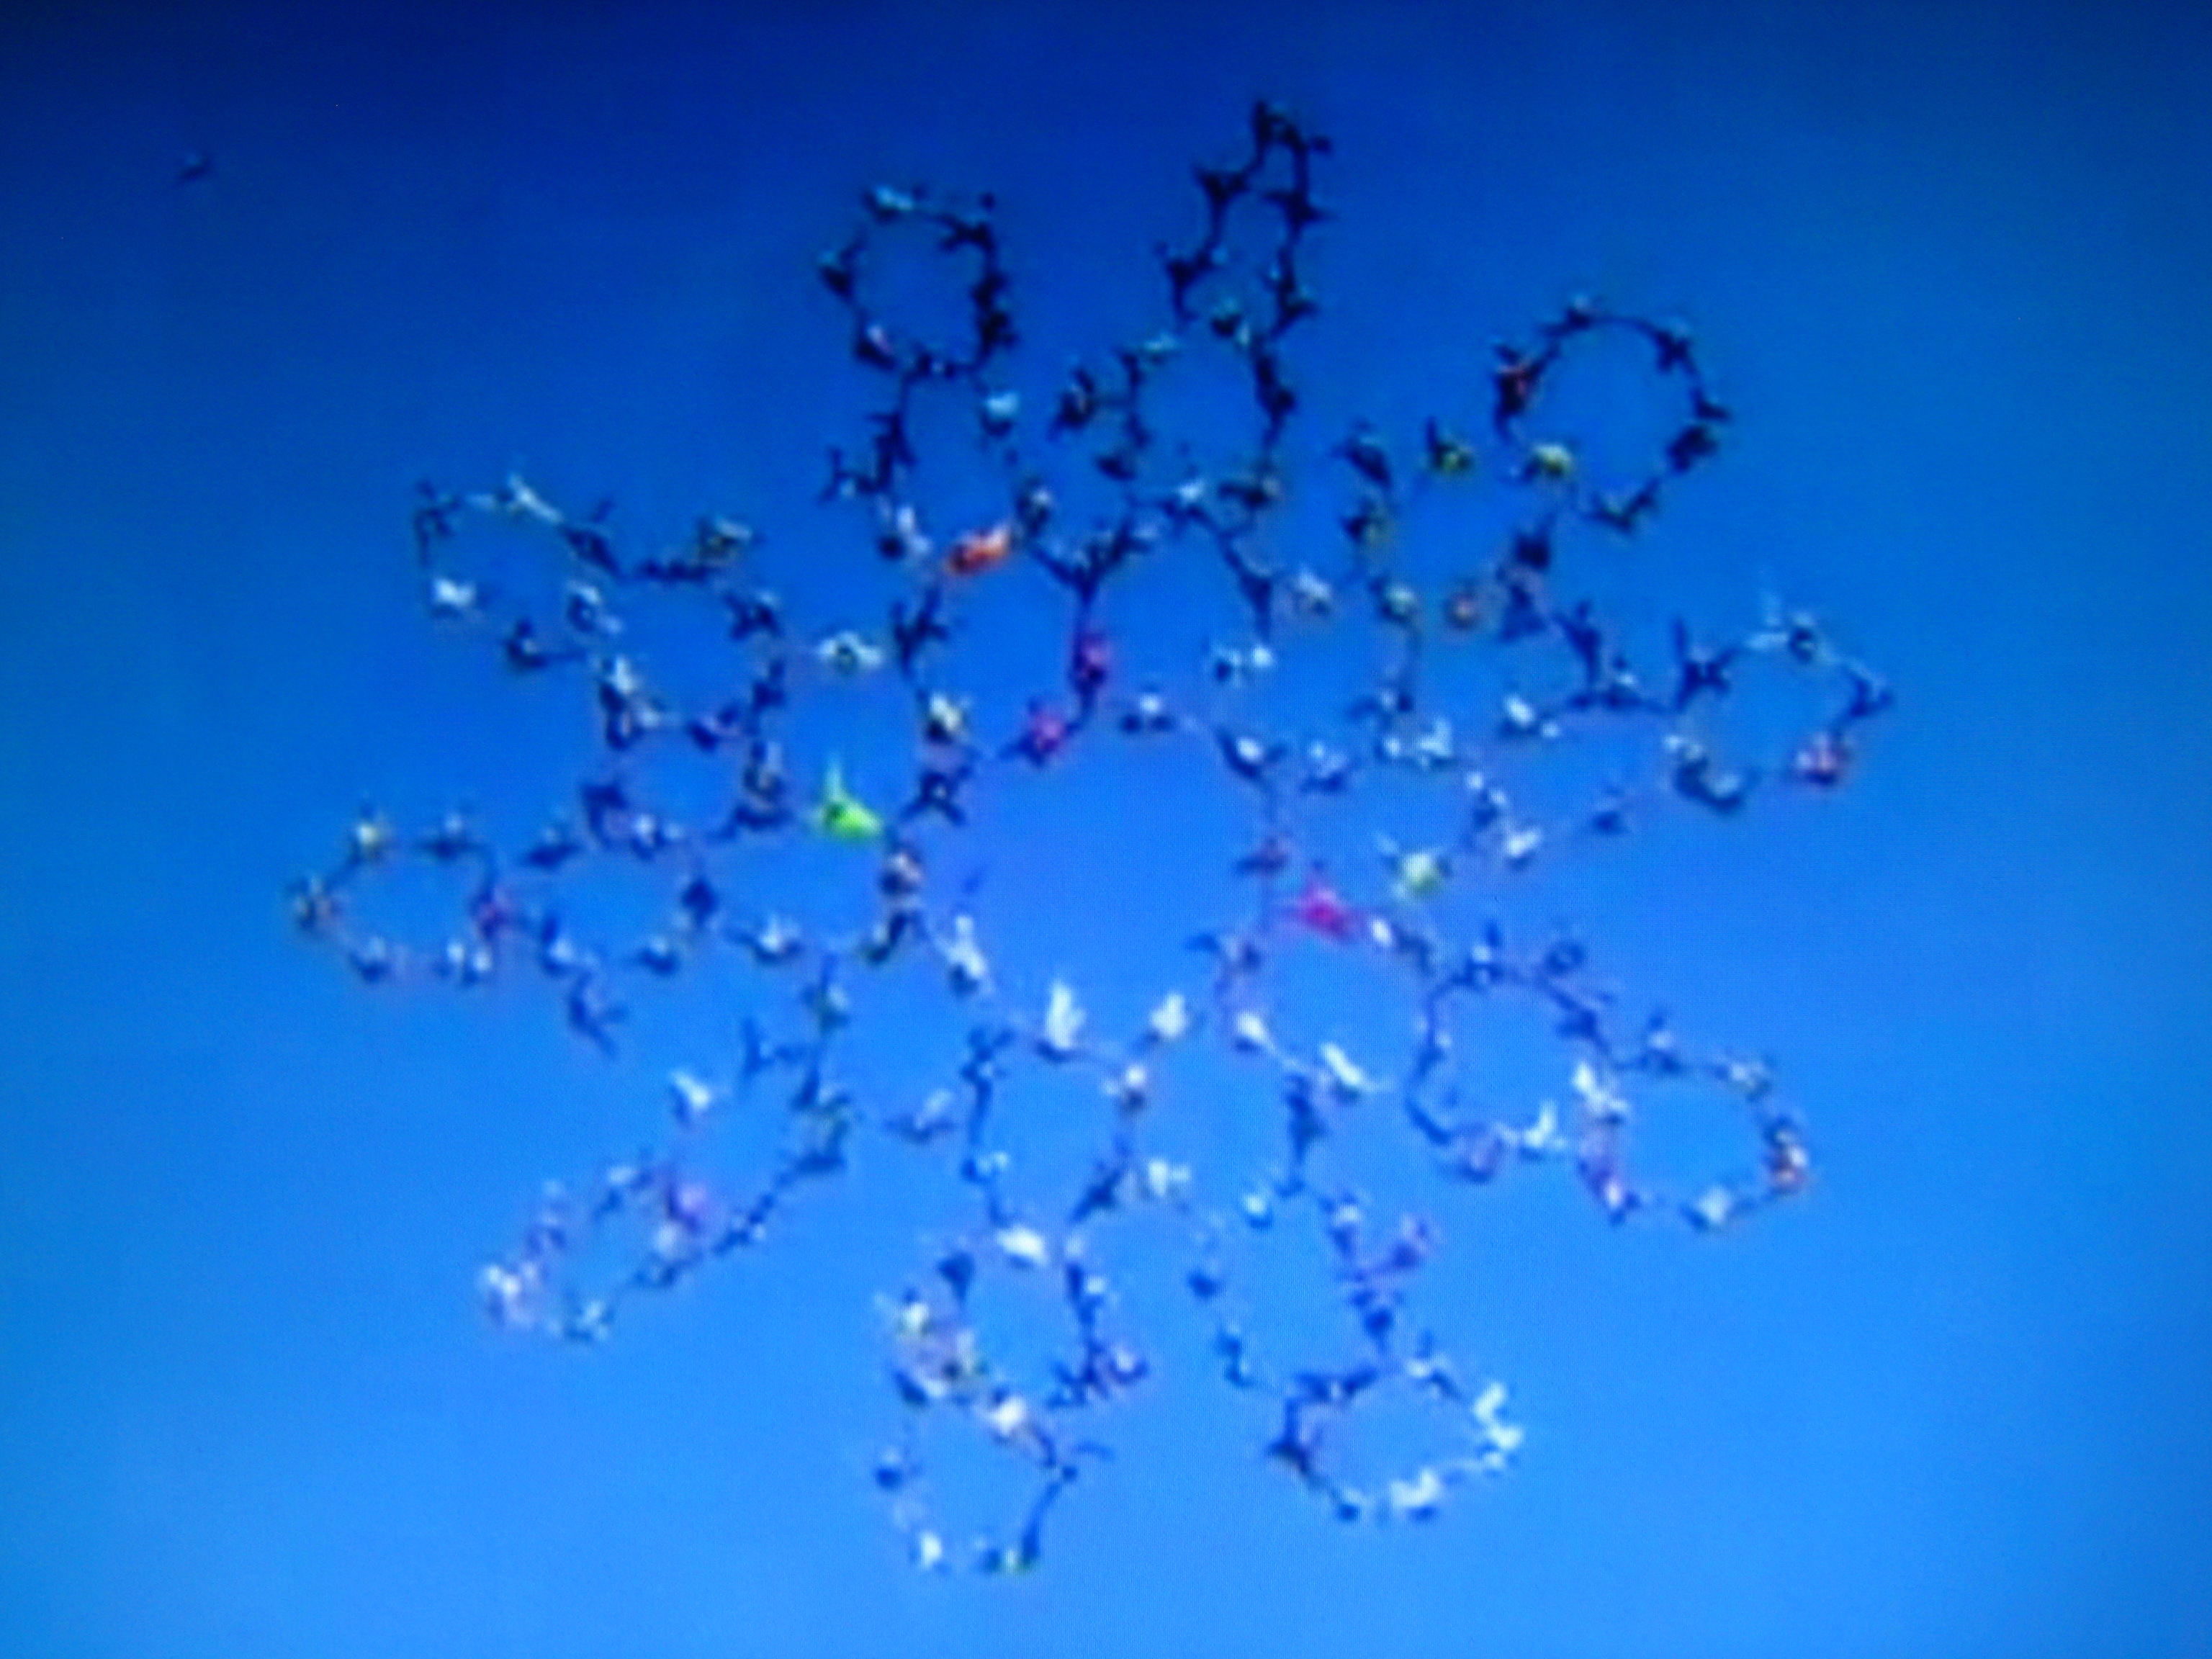
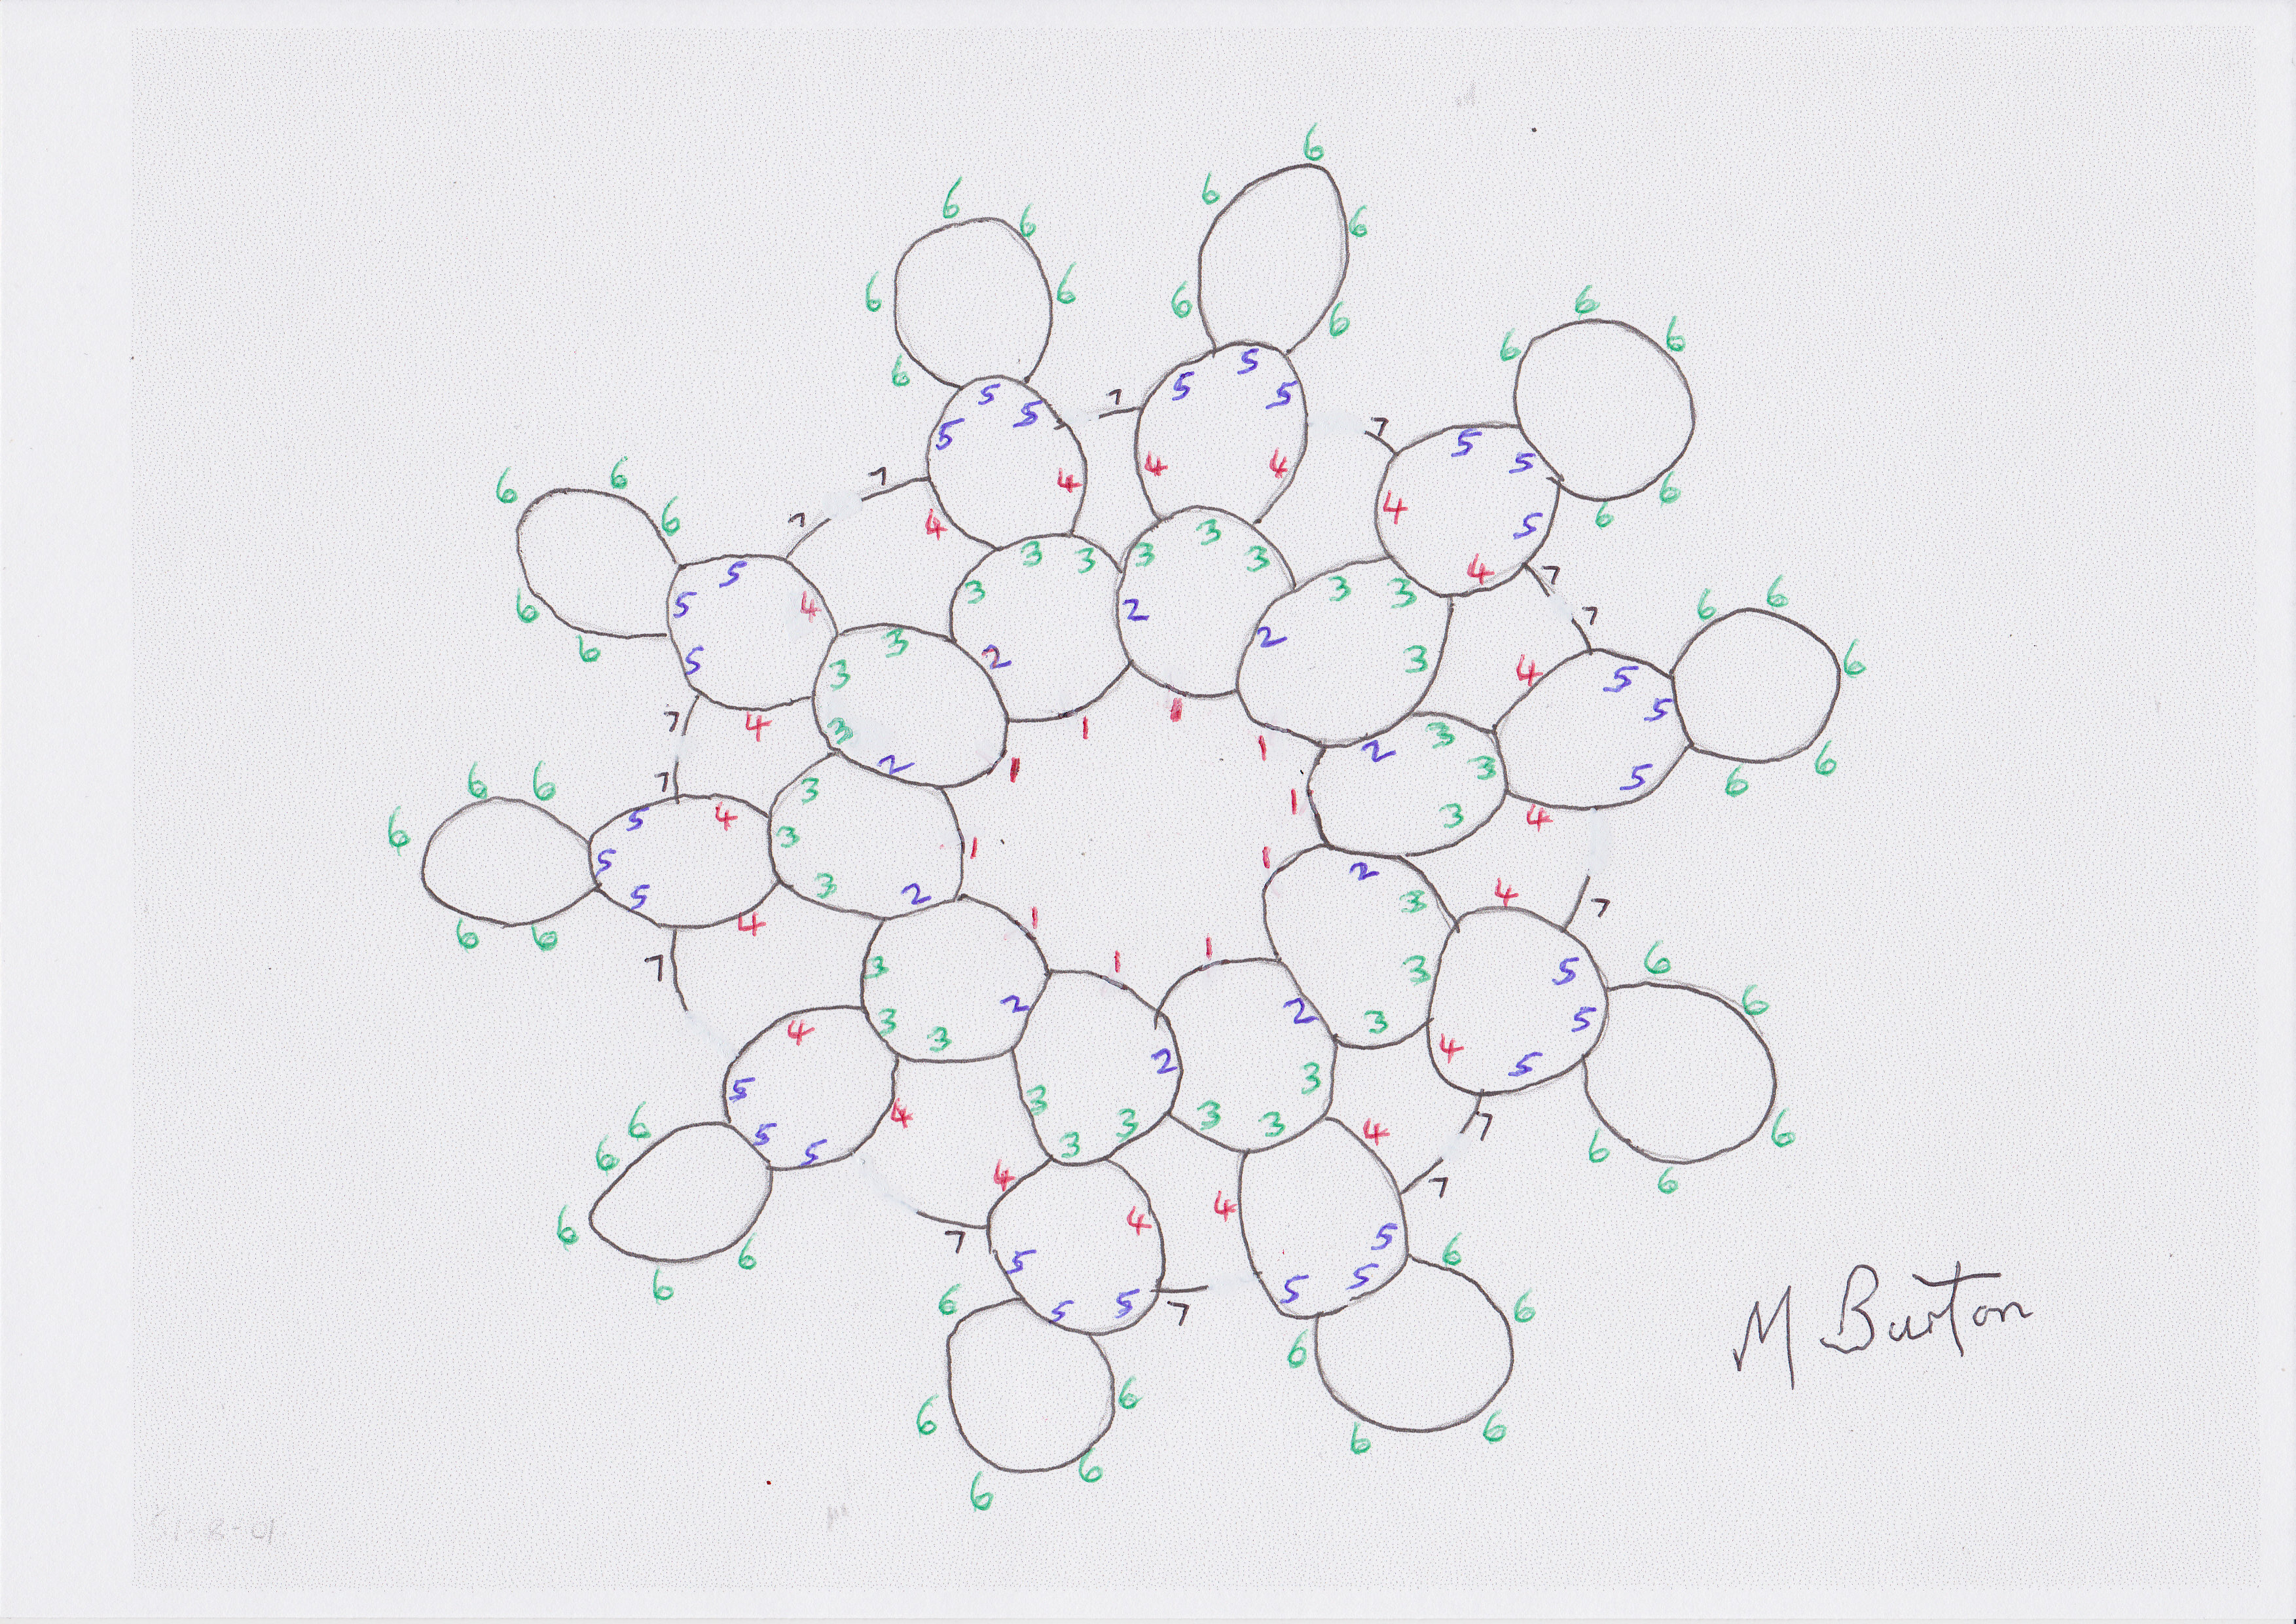
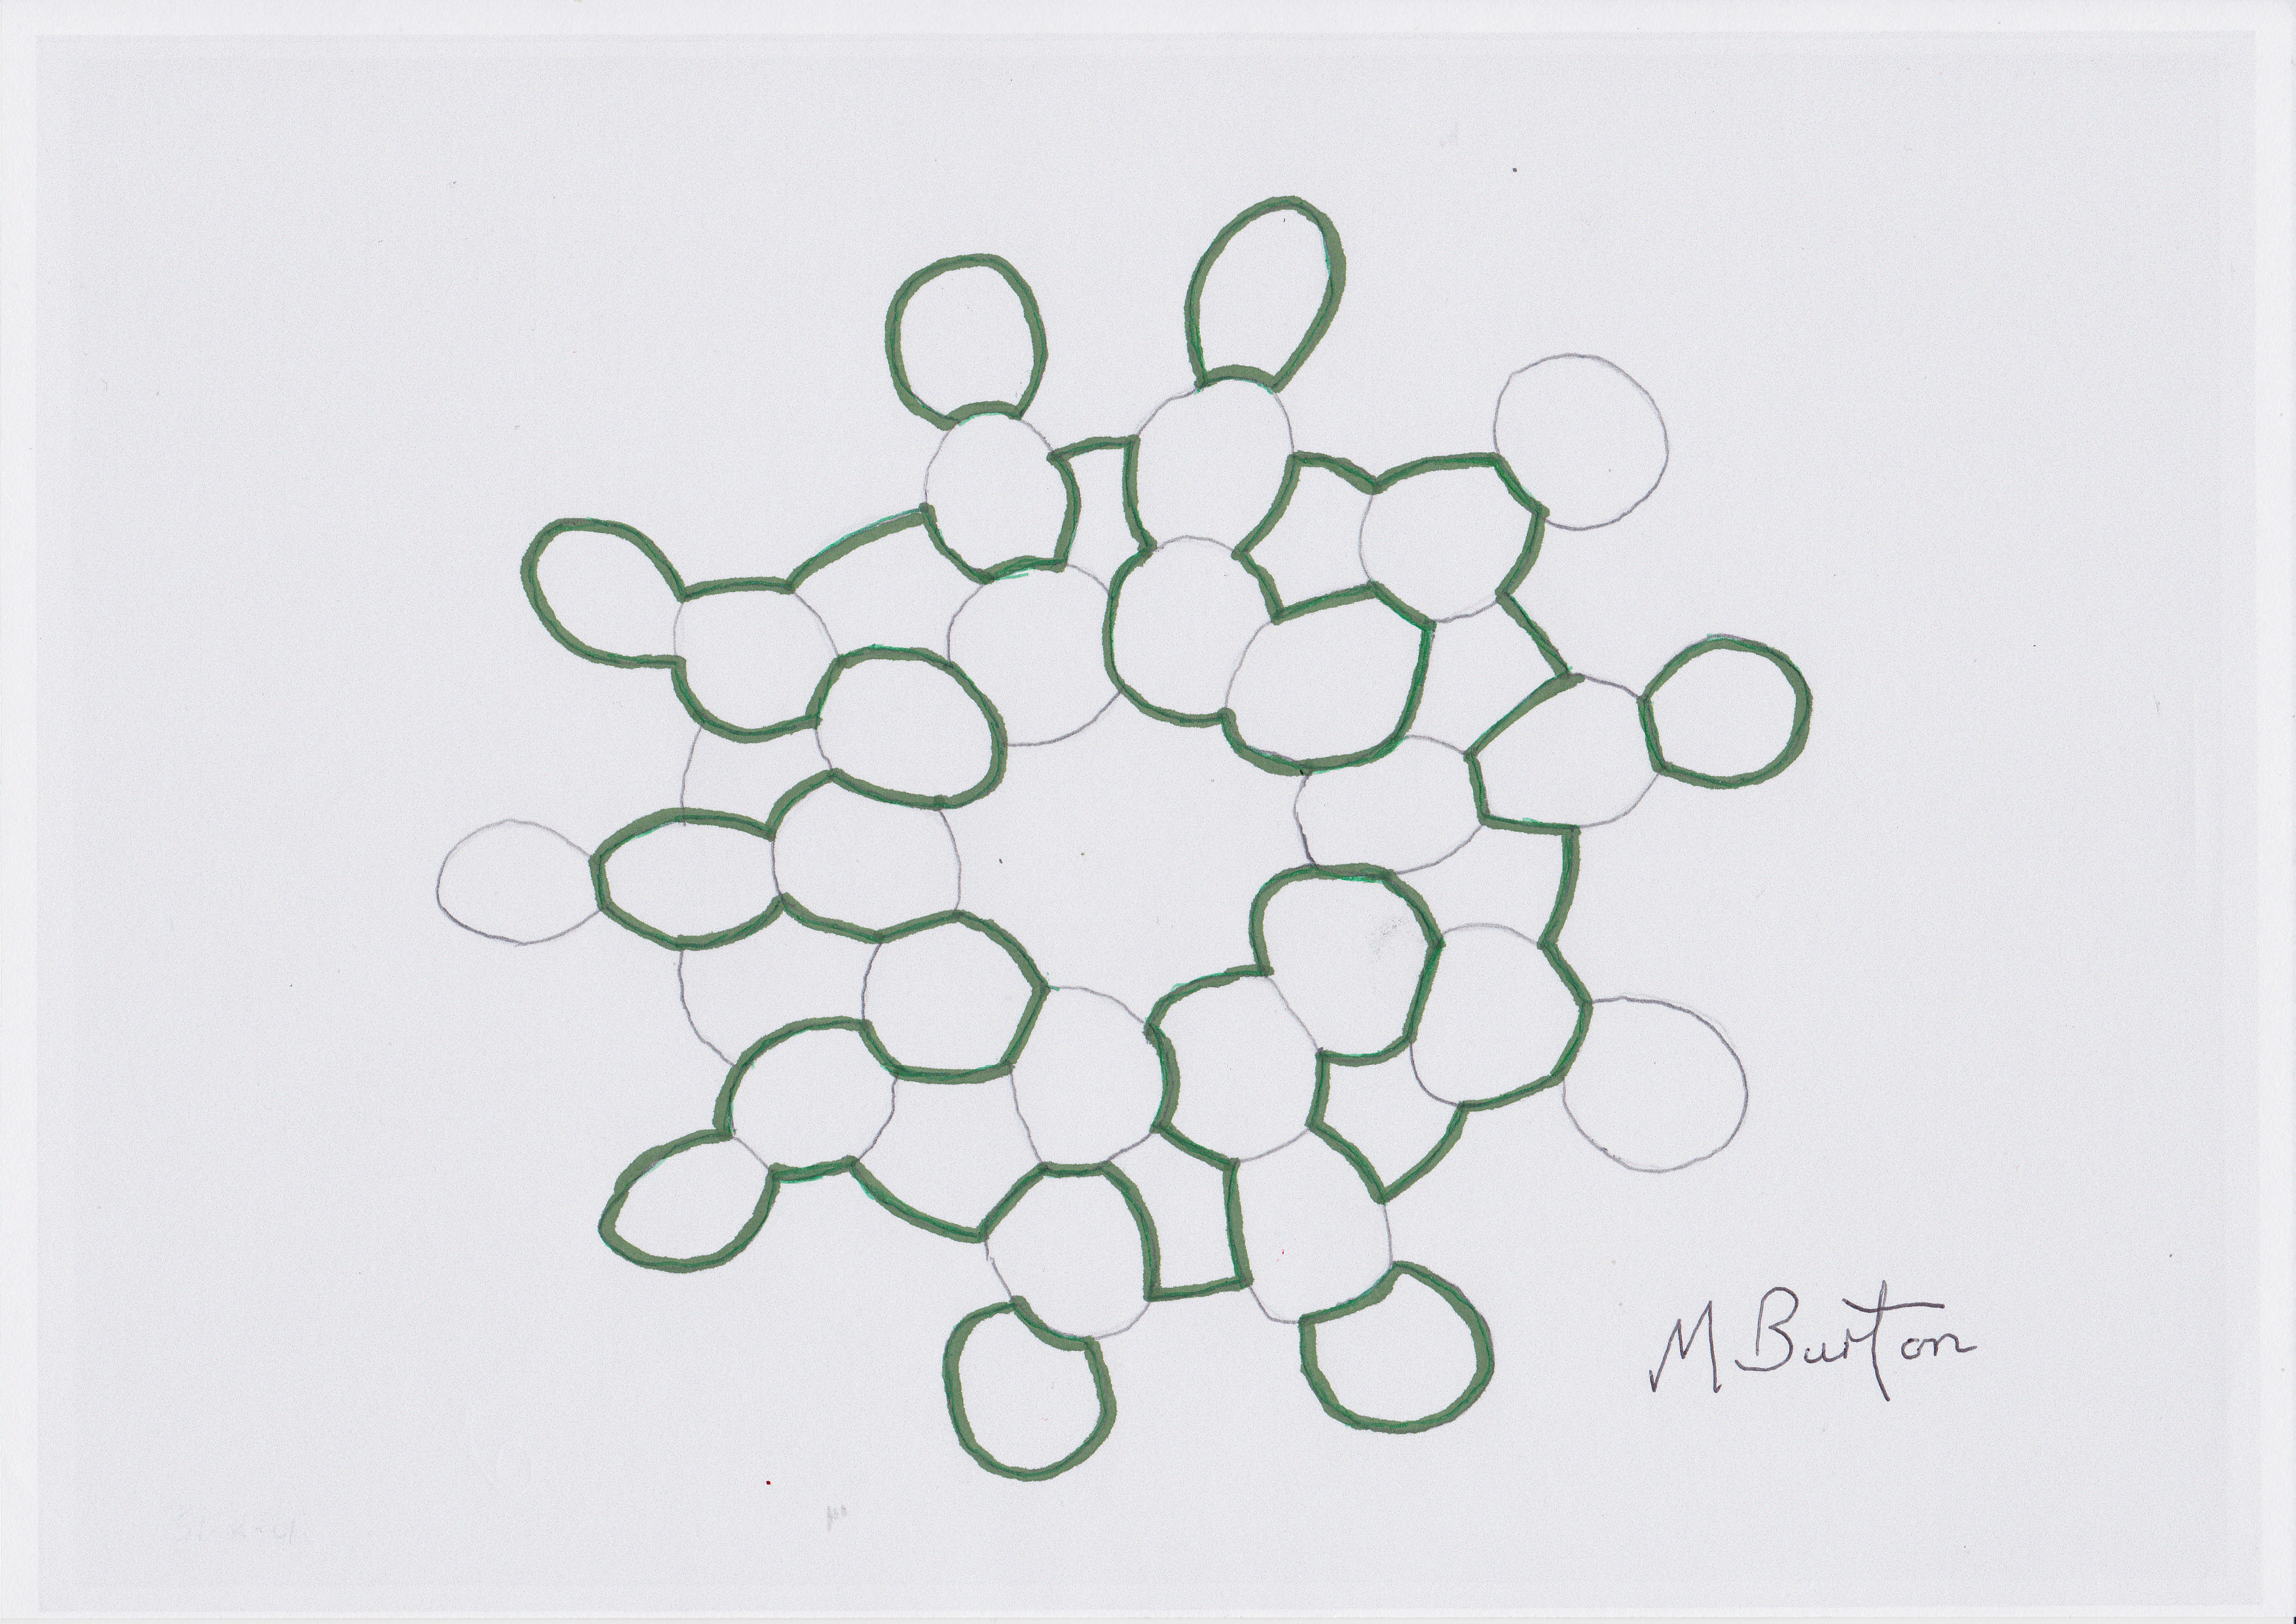
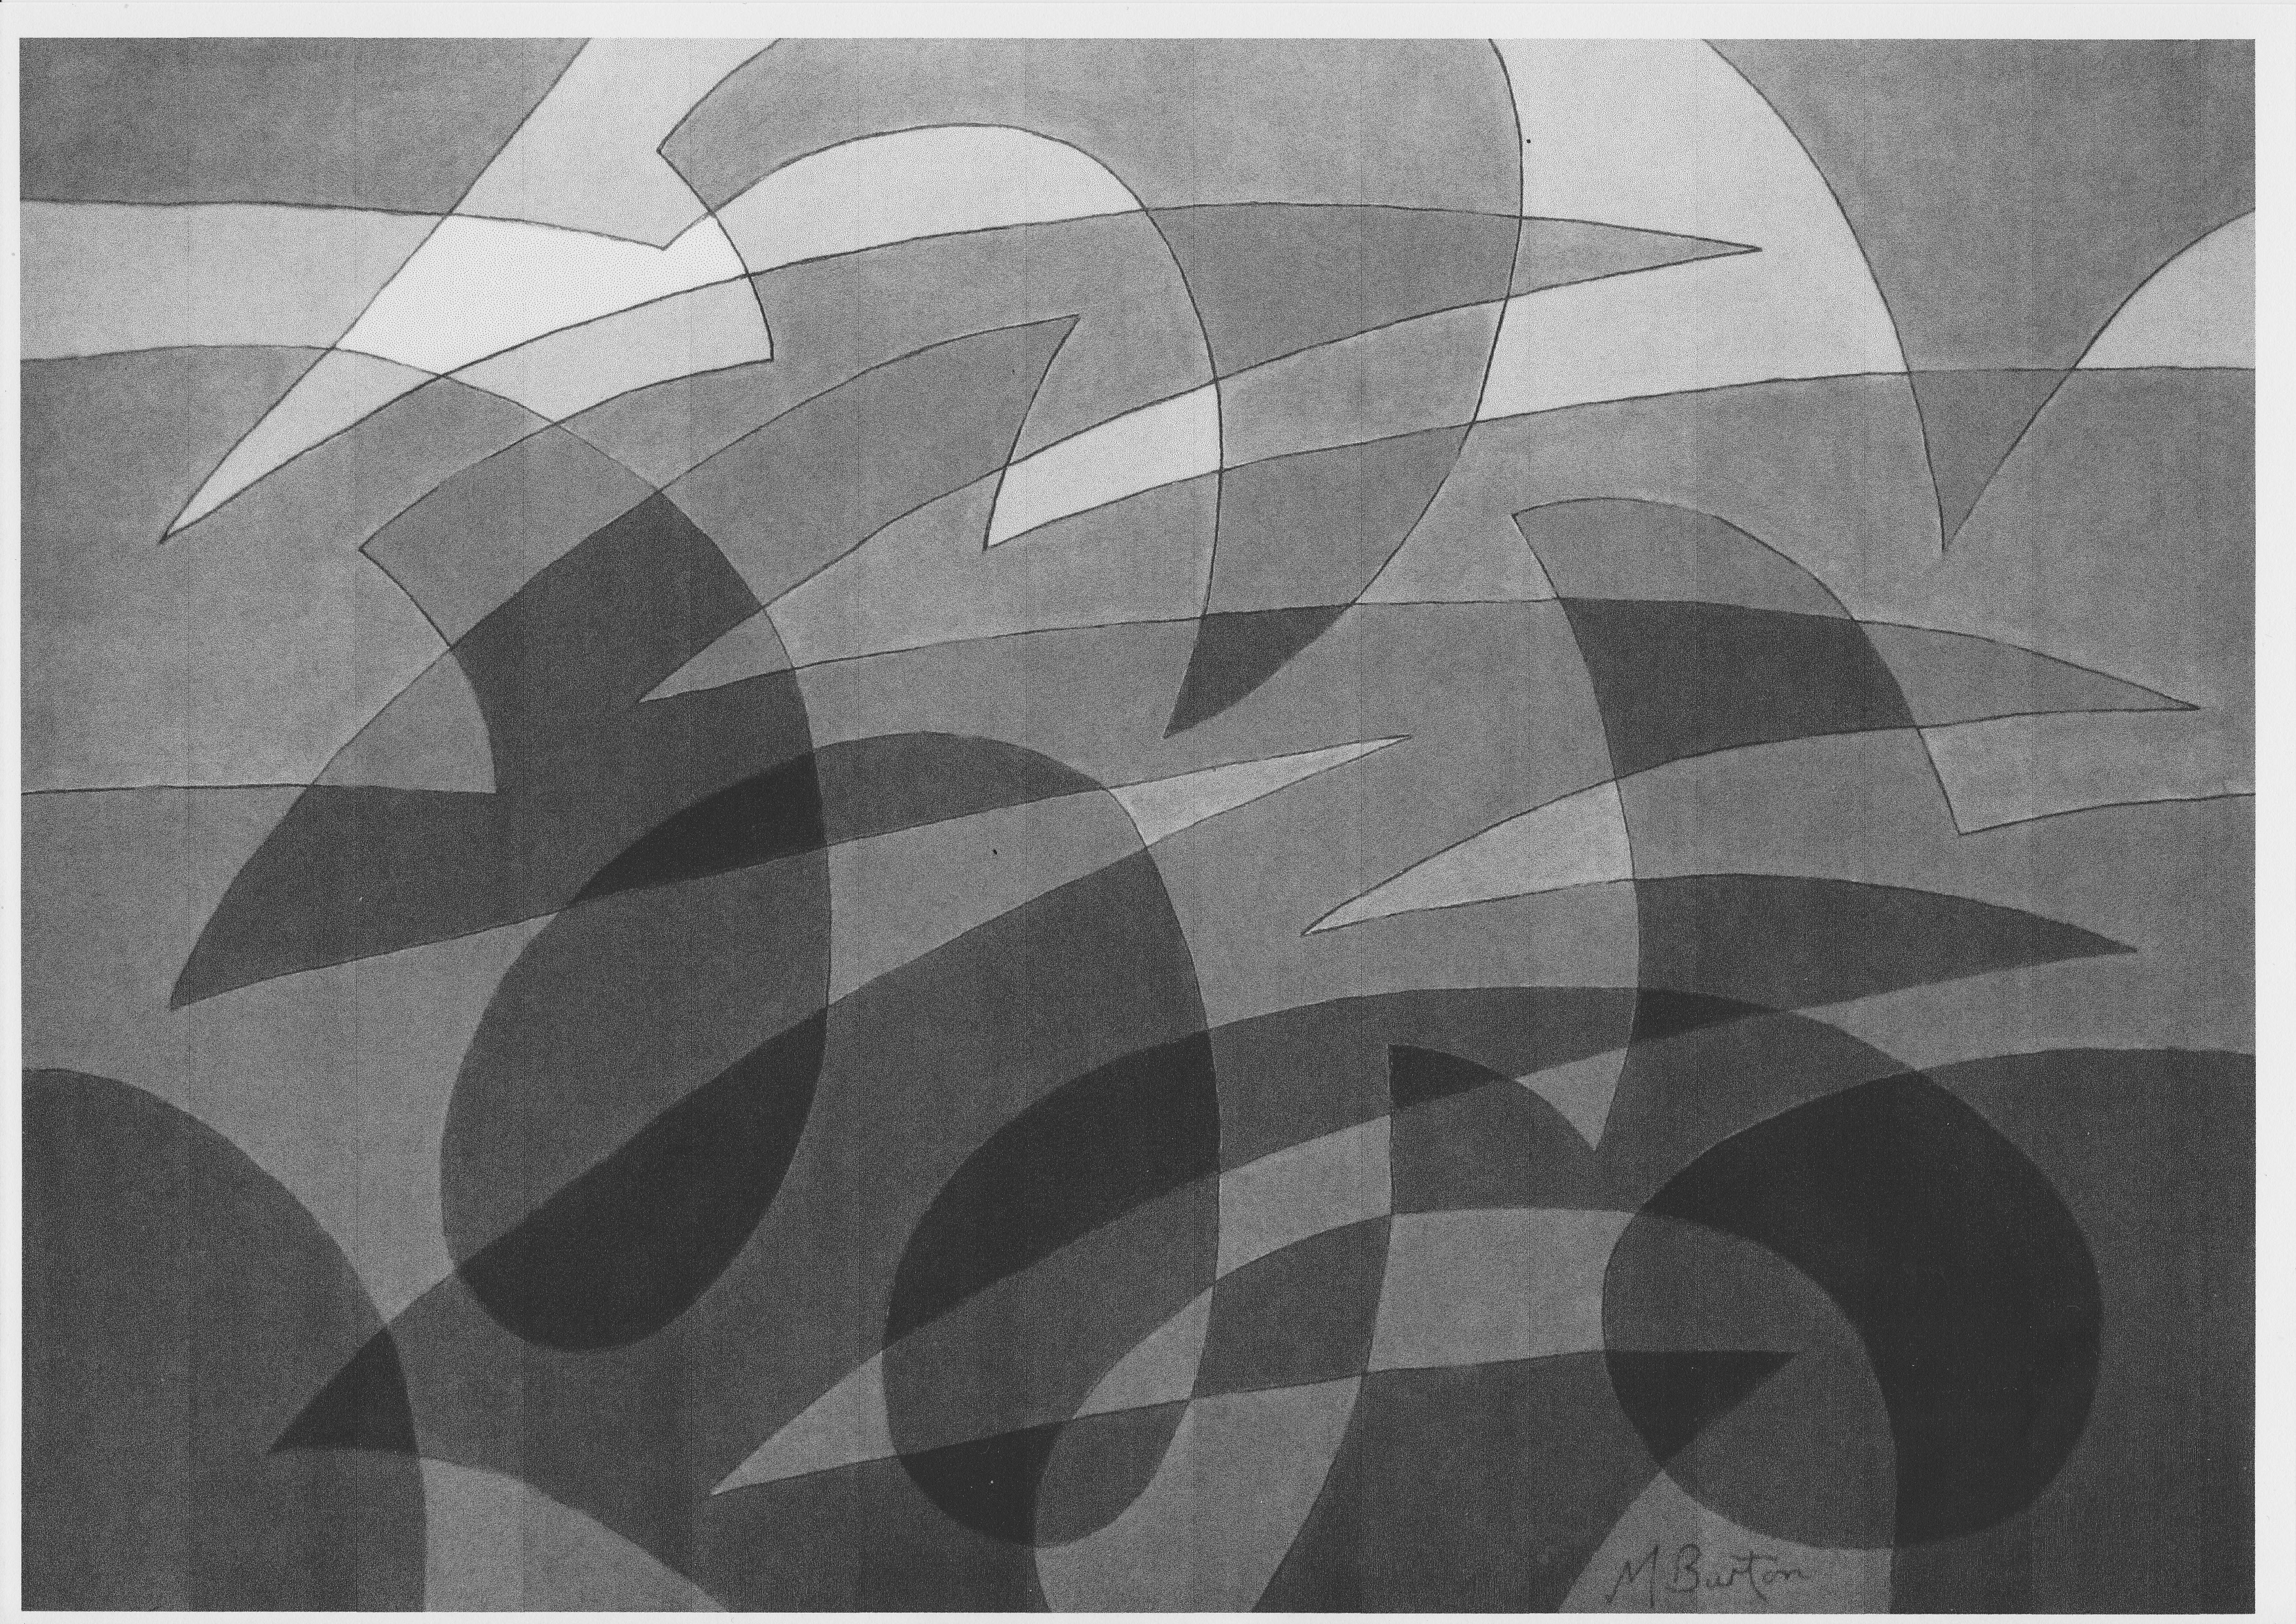
Flame on the Sun. Spherical single continuous line drawing, with complementary reds and greens expressing explosive violence.  Mick Burton, continuous line artist.

For a more subtle result – my still life of a radish, apple, mushroom and flower heads – I used water colours to help to show the floppy translucent nature of the radish leaves.

IMG_20180510_Raddish

Radish, apple, mushroom and flower heads still life. Water colour used to show floppy, translucent nature of radish leaves. Mick Burton, continuous line artist.

Sometimes I find that I can use almost actual colours.  Here is a commission drawing, with the continuous line running through both robins and the branch.  I  was asked to do only a hint of pink on the Robins’ chests.  This is fine.  However, I had to have a go at a full colour result for myself.  The perky nature of robins is reflected pretty well, I think, by these “near” natural colours.

IMG_3417 (1) Best. Pair of Robins.

Pair of Robins, single continuous line drawing. Full near natural colour. Mick Burton, continuous line artist.

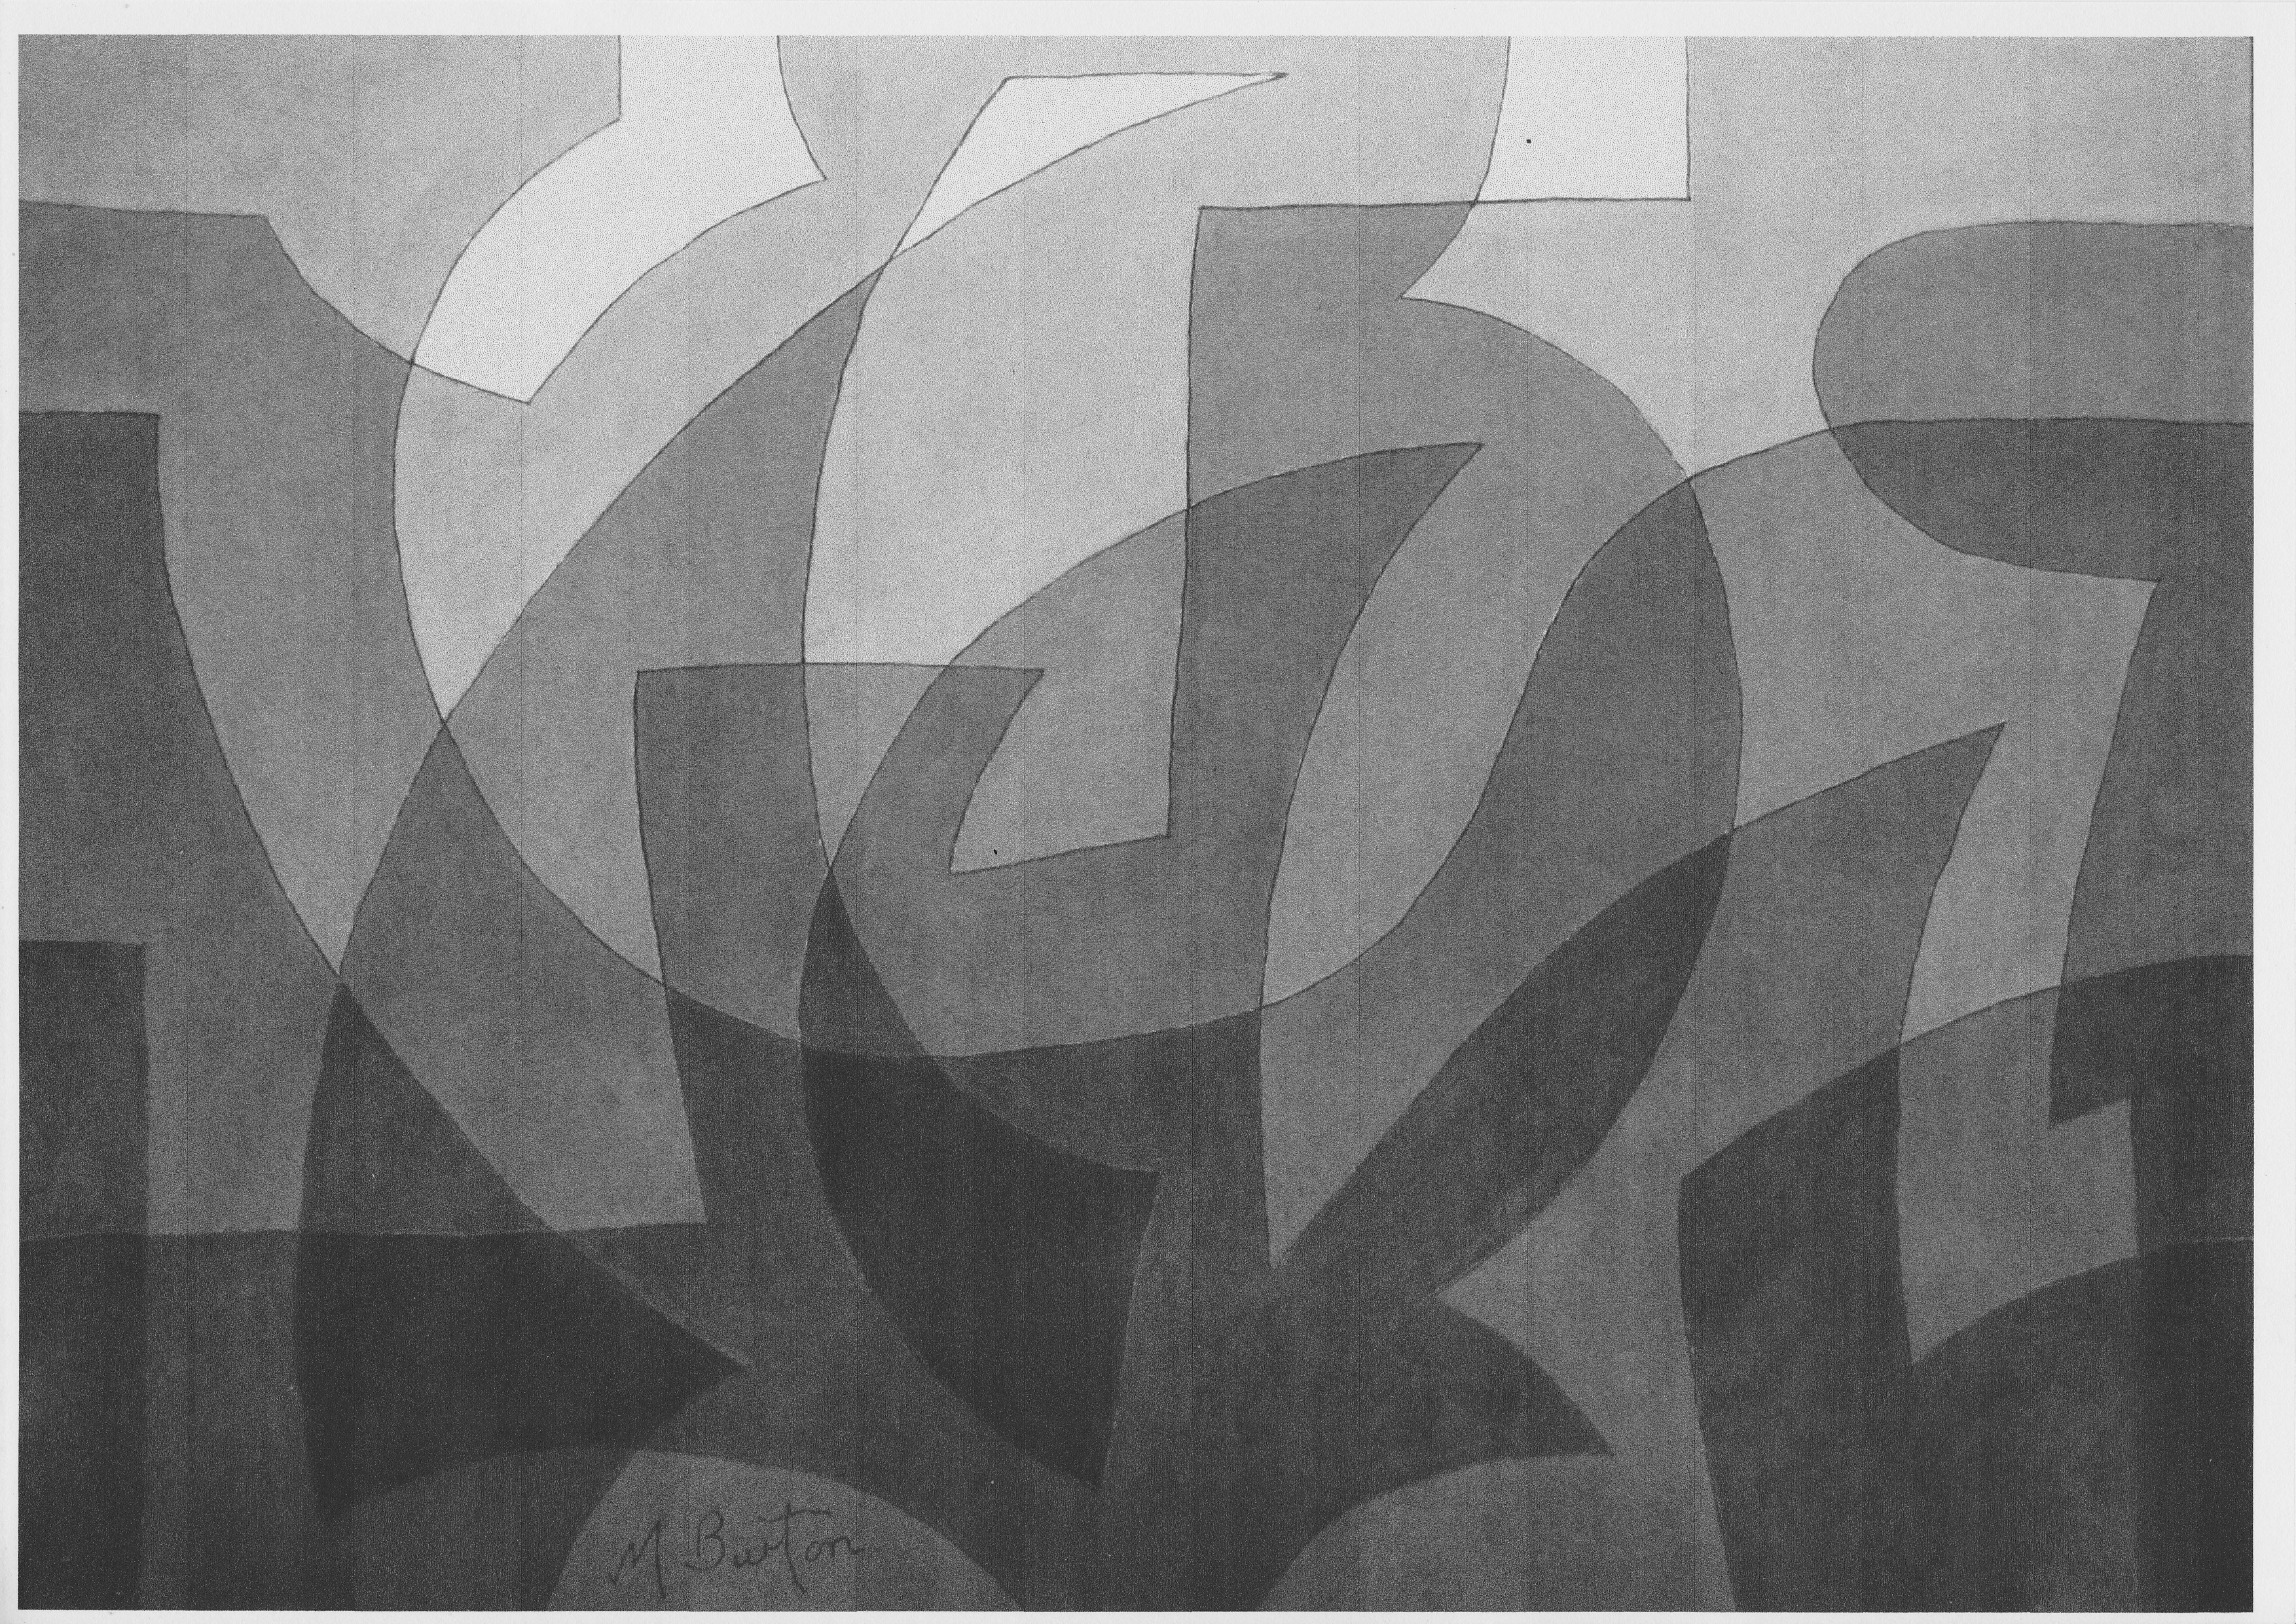
My yellow, green and blue sequence of colours fits well for “Nibbles”, a friendly rabbit who likes nothing more than eating her greens.

IMG_3498 Nibbles

“Nibbles”, single continuous line drawing.  The rabbit has a suitable range of colours to reflect contentment just eating her greens. Mick Burton, continuous line artist.

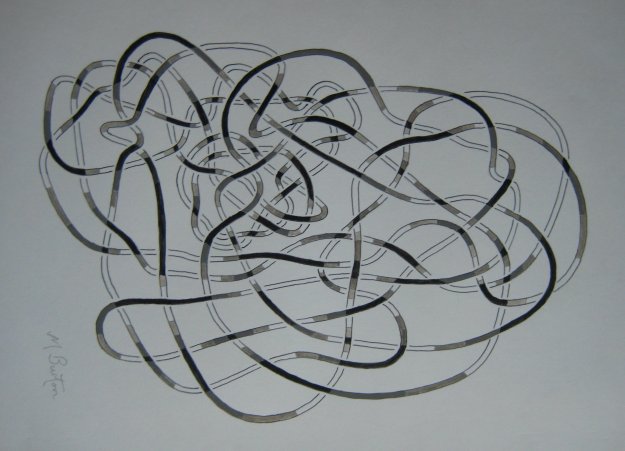
However, for a rabbit drawn with exactly the same single continuous line as for Nibbles, but who has a completely different temperament  –  RED, BLACK and WHITE fits the bill.

This is, of course, “Hot Cross Bunny” who lurks at the top of this post.  A real, full on, “Psycho”.

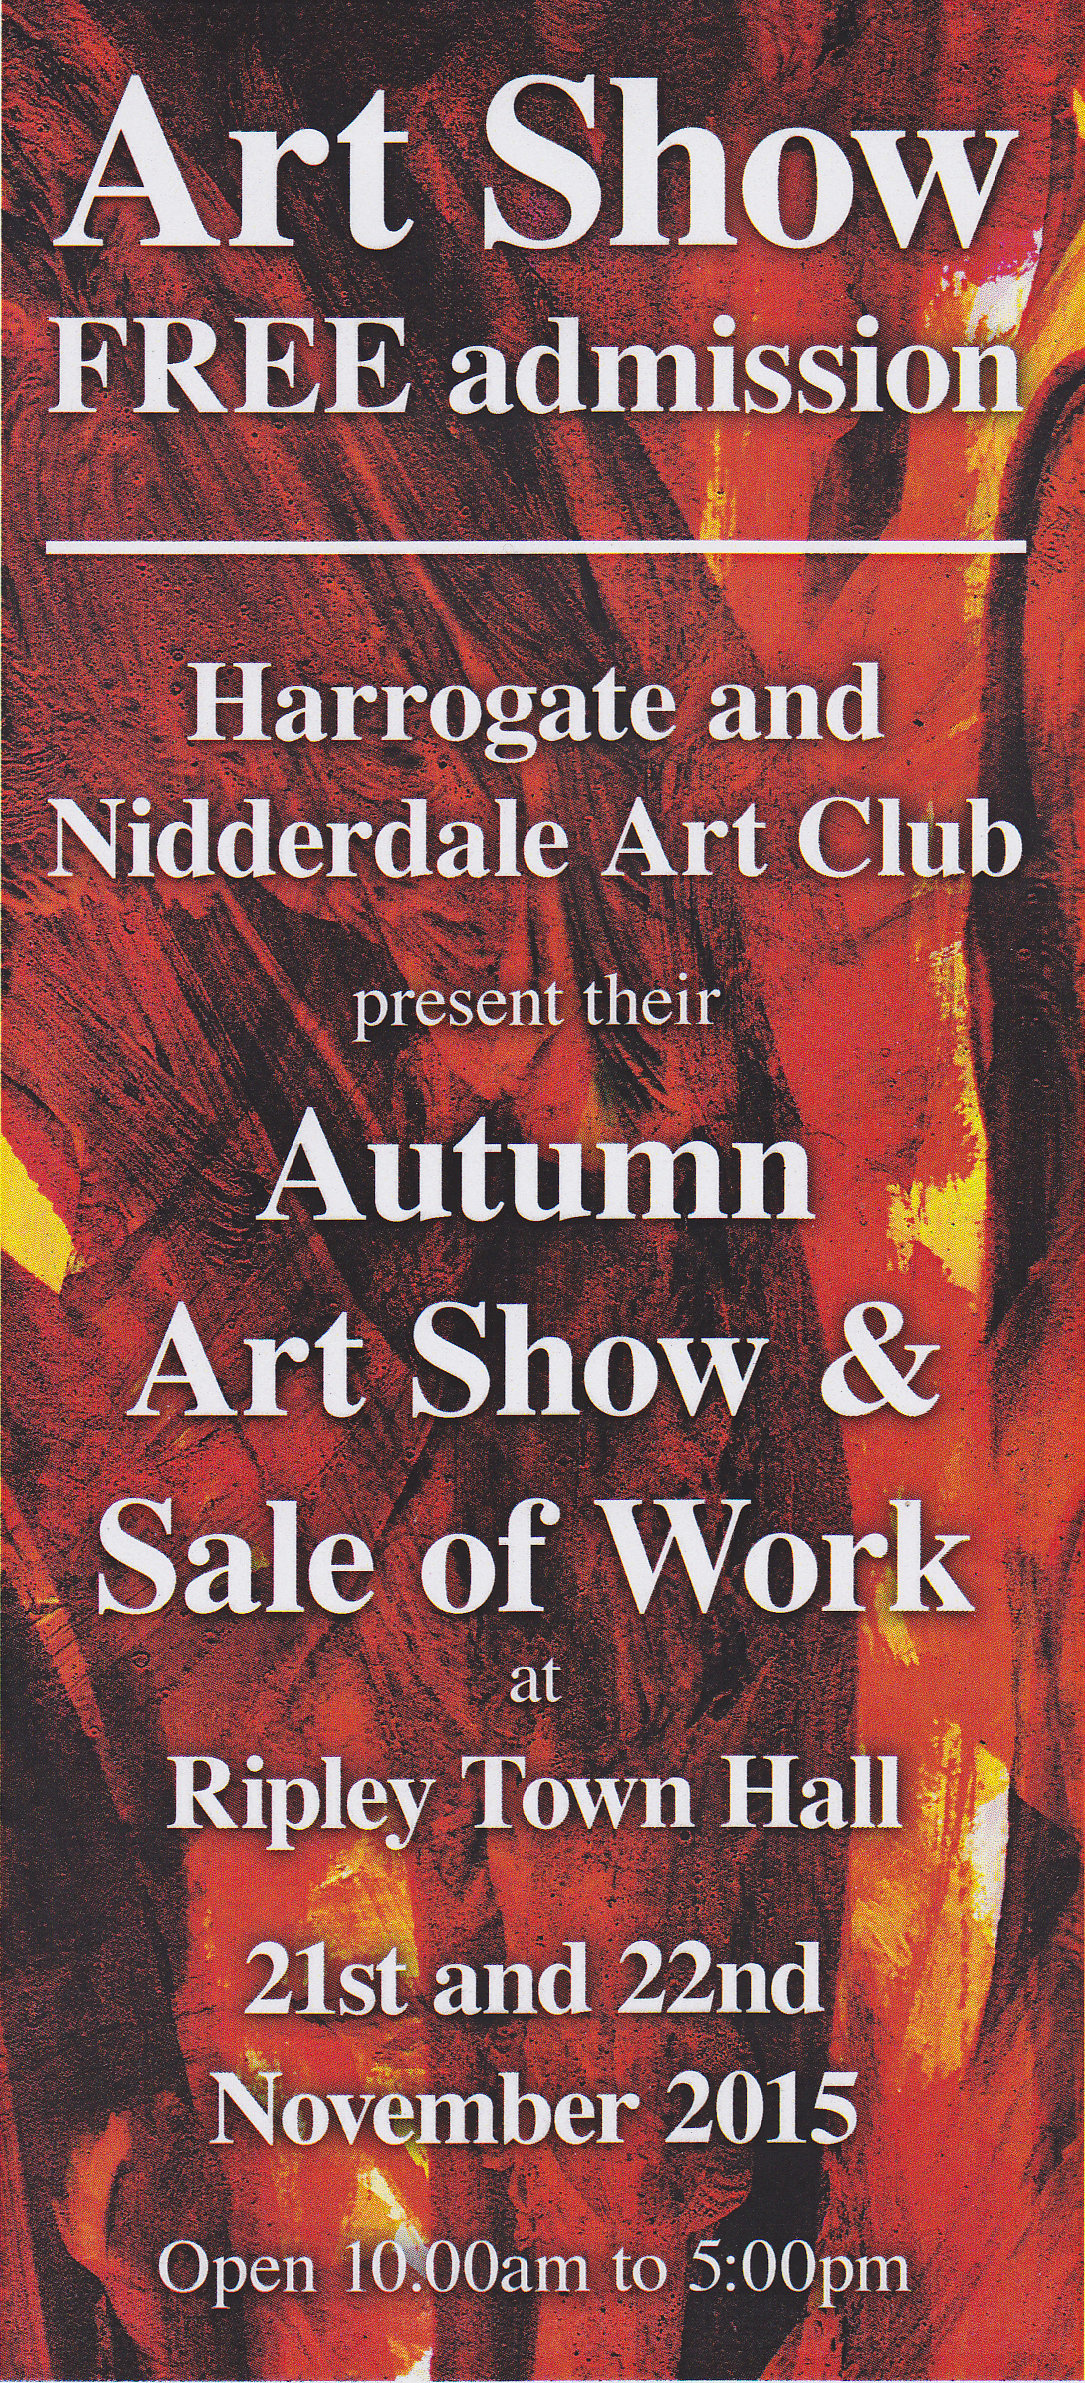
The two Rabbit paintings and the Pair of Robins accompanied several other of my pictures at the Harrogate and Nidderdale Art Club exhibition a week ago at Ripley Town Hall.

At the Preview Evening various prizes are awarded.  One was the annual prize presented at the Spring Exhibition by Sir Thomas Ingleby, the club’s patron, for his own personal choice for the best picture on show.  This was won by Julie Buckley for her “Black Labrador”.  

Sir Thomas also mentioned other pictures which caught his eye.  He said that he liked all the paintings by Mick Burton, but never thought that he would ever consider buying one called “Hot Cross Bunny”.

Here is a bit of background to the Rabbit paintings.  Nibbles and Hot Cross Bunny are based upon my daughter Kate’s rabbits, Harriet and Clover.

Harriet was friendly and cuddly and Clover might have been better named “Cleaver”.  We kept them both in the garage – in separate cages.

When we bought Clover, a lop eared rabbit, the breeder was saying how friendly and harmless the baby rabbit was.  I asked if it was related to an adult lop eared which had just tried to bite my finger off and the answer was “Yes, it’s the granny”.  We still bought Clover!

She was alright at first but later became very aggressive.  Every time we opened her cage for any reason, she would bite viciously.  We also realised that some one else would have to take care of the rabbits when we were on holiday.

Strangely, I found that if I put a hand on Clover’s head as soon as I opened the door she would stay still and relaxed as long as I kept the hand there.  With the other hand I could top up food and water or clean out the cage.  This worked for all of us.  Fortunately, our neighbour was delighted to be able to do this too and things were fine when we were away.

After Clover died and I had buried her in the garden, Kate prepared a wooden plaque and nailed it to the fence “Here lies Clover Burton the rabbit”.

An interesting consequence of keeping the rabbits was that straw from the bale became piled on the floor of the garage.  One day the straw was seen to be moving and we feared that we had rats and so I was deputed to check it out.  I found a nest of baby hedgehogs.


Continuous Line Artist view of Haken’s Gordian Knot.

Depth of lines in black and white on Haken Gordian   Knot.  Mick Burton, continuous line.

Depth of lines in black and white, in Haken’s Gordian Knot. Mick Burton, single continuous line drawing 2015.

Here is an update on posts which I did in May and June 2015 regarding the above Knot and the interest these posts have since generated.

As a Continuous Line Artist I have looked at many angles of what my lines may mean and what they can do.  

One such examination was triggered by Haken’s Gordian Knot, a complicated looking knot which is really an unknot in disguise – a simple circle of string (ends glued together) making a closed line, which I saw in a book called “Professor Stewart’s Cabinet of Mathematical Curiosities”.   The drawing above is my version of Ian Agol’s illustration of the Haken Knot (see it in my post of 31 May 2015).  I used dark and light shades to emphasize the Overs and Unders shown for the line. 

The reason that I was so interested was that it reminded me of my “Twisting, Overlapping, Envelope Elephant” (see below).

Twisting, overlapping, envelope elephant. Continuous line.

This single continuous line drawing is coloured to represent a “Twisting, Overlapping, Envelope Elephant”, which is Blue on one side and Red on the other. Mick Burton, 2013.

How this elephant line works is explained in my post of 31 May 2015.  In essence, you need to imagine that the composition is made up of a flexible plastic sheet which is Blue on the front and Red on the back.  Each time there is a twist, on an outer edge in the drawing, you see the other colour.

In the Gordian Knot, I spotted that there is a narrow loop starting on the outside (lower left on first illustration above)  which seemed to lead into the structure, with its two strands twisting as it went, each time in a clockwise direction.  I followed the two twisting lines throughout the drawing until they ended in a final loop on the outside (left higher).  I counted 36 clockwise twists and one anticlockwise.  My thoughts are explained in full in my post of 2 June 2015.

To aid the explanation I completed a painted version, where I used the same Blue and Red colours, as for the above elephant, to emphasize the twists.

Twisting, overlapping colouring of Haken Gordian Knot.  Mick Burton, continuous line.

Twisting, overlapping colouring of Haken’s Gordian Knot. Mick Burton, single continuous line drawing painting 2015.

Note that the colours in the Elephant define two sides of a surface, but in the Unknot the colours are illustrating the twist of two lines travelling together.  The twin lines go through other loops continually so there are no real surfaces.

After completing the above two posts, I decided that I would try and find out more about the Knot and came across a question posed by mathematician Timothy Gowers, in January 2011, on the MathOverflow website.  He had asked for examples of very hard unknots and after many answers he had arrived at Haken’s “Gordian Knot”.  He described the difficulties he was having.  Timothy said that he would love to put a picture of the process on the website and asked for suggestions.

As I had already done two pictures before I read his post I decided to respond.  The work that I did on this is detailed in my post of 5 June 2015 entitled “How do you construct Haken’s Gordian Knot?”.

My response duly appeared on the MathOverflow website in early 2015, but within a day or two it had been taken down and a notice appeared stating that only mathematicians of a certain status should post on the site.

That’s fine as my only maths qualification is General Certificate of Education at school.  At Harrogate Technical College I was thrown out of Shorthand and, with only three months to go to GCE exams they put me in for Maths and Art.  I owe many thanks to the Shorthand teacher, who thought my only skill was picking locks when someone forgot their locker key.  Also I have never had any discussion face to face with a mathematician about my art or my maths.

Following this setback I decided to set it all down in my Blog, in the three posts up to 5 June 2015.

Although I have not actually talked directly to a mathematician, I did correspond with Robin Wilson and Fred Holroyd at the Open University in the mid 1970’s about my ideas on the Four Colour Map Theorem.  I set out my ideas briefly in my post of 18 August 2015 “Four Colour Theorem continuous line overdraw”.

When Fred Holroyd responded to my write up, he used my own expressions and definitions which was very impressive.  He said that I had proved a connected problem, only proved in the world as recently as 16 years previously.   When I asked Robin Wilson about the announcement from a mathematician who said that he had proved the Four Colour Theorem, Robin said not to worry as he thought that this one was unlikely to be validated.  He said that he would prefer that my theory could be proved as it was elegant and also that they could use it.

The theorem was proven in 1976 by Kenneth Appel and Wolfgang Haken, involving running one of the biggest computers for over 1000 hours.  After this I decided to go onto other things, leaving my art and maths behind for almost 40 years.

Yes, its the very same Wolfgang Haken, who devised the Gordian Knot!

Ok, lets move on.  In February 2016 I received an e-mail from Noboru Ito, a mathematician in Japan, saying that he had read my article of 5 June 2015 “How do you construct Haken’s Gordian Knot?” and it was very helpful.  He would like to add it to the reference of his new book “Knot Projections”.

Of course I agreed and he later confirmed that he had referenced my work to the preface of his book.

Here is a picture of my copy of his book which was published in December 2016.

Knot Projections

“Knot Projections” by Noboru Ito, published December 2016 by CRC Press, a Chapman & Hall Book.


Additionally, in November 2017 I received an e-mail from Tomasz Mrowka, a mathematician at the Massachusetts Institute of Technology.  He said that he was interested in acquiring a copy of my Twisting, Overlapping colouring of Haken’s unknot.  “It’s really quite striking and I would love to hang it in my office”.

I was delighted to send him a photo which he could enlarge and frame.


Kaleidoscopic Wild Horses, continuous line drawing with colour sequence.

Wild Horses, June 2017

Kaleidoscopic Wild Horses. Single Continuous Line Drawing with colour sequence in acrylic on canvas.  I happened to have a canvas 36″ x 10″ previously intended for an upright picture idea.  Mick Burton continuous line artist 2017.

This painting originated from a continuous line drawing which I produced for a demonstration at Stainbeck Arts Club, Chapel Allerton in Leeds in May 2017.  

IMG_0883 -Horses line.

Wild Horses,  single continuous line drawing. Demonstration at Stainbeck Arts Club. Mick Burton, continuous line artist 2017.

When I was thinking about a subject for the demonstration I saw an advert on the TV for the Cheltenham Festival which just showed loads of horses running – why there were no riders or jumps I do not know.  This also reminded me of one of my favourite paintings – “Scotland Forever” by Lady Butler in Leeds Art Gallery, painted in 1881.  A bit like “Charge of the Light Brigade” but straight at you, with the horses wild eyed and seeming to leap out of the painting.

See it at   http://www.leedsartgallery.co.uk/gallery/listings/l0081.php

Lady Butler painted a lot of war scenes and of course she had no military experience.  She was, however, married to a General and she persuaded him to let her watch manoeuvres.  In preparation for this picture she asked that the cavalry ride straight towards her so that she could get the feel for facing a charge.

When I had finished the demonstration, which was a result considerably rougher than the above, the members asked about colours.  I had not intended to talk much about colours, as I thought that my approach to drawing the lines would be enough at this session, but we had a solid half hour talking about my method and ideas about colour.  They said that they looked forward to seeing the image in full colour, so here it is.

My original intention was to do a black and white alternate shading version only, and this is shown below.  The tweaking which I did on the horses heads to achieve a better result in black and white was essential both to improve the continuous line and later to enhance the colouring.

IMG_0888 - Horses black & white

Wild Horses, single continuous line drawing with black and white alternate shading.  Mick Burton, continuous line artist 2017

Initially I did my normal approach to colour sequence, where I devised a 6 colour range (white, lemon, golden yellow, orange, vermilion red and crimson alizarin) to fit my alternate overdraw template for this image.  

This resulted in gold and vermilion appearing on all outer areas and I thought that I needed a darker effect in the lower half of the image.  So I substituted cobalt blue for gold along the bottom legs of the horses and finished up also substituting, on an ad hoc basis, some dark blue, violet and green to try and naturally leach colour balance upwards to meet existing vermilion and gold.

A fellow artist who likes my alternate overdraw and colour sequence method has told me that I should always apply it fully to get the natural result.  Generally I would agree, but thought that I needed to break some rules on this occasion.  I try and mirror nature in my art and of course nature evolves by breaking a few rules. 

Joan and I visited my Aunty Ann a couple of weeks ago.  She is 99 years old and still as bright as a bobbin.  She is a good artist and only gave up painting relatively recently, and always wants to see my latest stuff.  i took the Wild Horses along.  It took up the length of the settee and she was delighted with the colours.  I then realised that the painting’s reflection in the shiny metal fire surround made the composition even more abstract.

Aunty Ann’s shiny metal fire surround reflecting Wild Horses. Mick Burton, continuous line artist, 2017.

Two different Reflections of Wild Horses on metal fireplace surround, detail strips. Mick Burton, continuous line artist.

Leeds Olympic Lion, a new single continuous line painting by Mick Burton.

Leeds Olympic Lion.   Mick Burton

Leeds Olympic Lion, coloured in many shades of red, white and blue to commemorate all the Leeds based athletes and swimmers who brought back medals from the Rio Olympics, 2016.  Mick Burton single continuous line drawing with colour sequence.

I did a demonstration at Farsley Art Group on 12 July 2016 and the continuous line drawing I used as an example was the basis for the above painting. The Group showed a lot of interest and produced many fine attempts at continuous line during my workshop. The club kindly featured me on their website, showing some of my drawings as well as work by members.  I gave them a free hand to put their own stamp on their continuous lines so we had some great variations.

Joan, my partner, watched many swimming and diving events on the TV during the Olympics broadcasts.  She worked at the Leeds International Pool and the new John Charles Centre, in various swimming organising roles, before she retired in 2012 and was delighted with the results of the Leeds members of the Great Britain team and their coaches.

As the athletes all had the red, white and blue lion on their track suits I felt I had to colour my Lion in a range of similar colours and call it the Leeds Olympic Lion.  The painting will be exhibited in the Stainbeck Arts Club Annual Exhibition on Saturday 3 September 2016.  The exhibition is part of the Chapel Allerton Arts Festival taking place in north Leeds this week.Stainbeck Arts Club Poster

Joan’s daughter, Helen Frank, represented Great Britain in the 100 metres breast stroke in the Seoul Olympics in 1988 and was one of five swimmers from Leeds.  Adrian Moorhouse won a swimming gold medal, in the 100 metres breastroke, in 1988.  A gold by a British swimmer was not achieved again by a  British swimmer until 2016.

Leeds Olympic Swimmers at Seoul 1988

Helen brought back a commemorative plate from Seoul, which is part of Joan’s collection of Olympic Plates.

Seoul 1988 Olympics plate


Barn Owl continuous line drawing at Harrogate and Nidderdale Art Exhibition

Continuous line drawing of Barn Owl onto Wet on Wet watercolour. Mick Burton.

Single continuous line drawing of Barn Owl onto Wet on Wet watercolour. Mick Burton continuous line artist, 2015.

This Barn Owl painting will be one of my eight pictures on display at  the Harrogate and Nidderdale Art Club Autumn Exhibition in Ripley Town Hall, near Harrogate, on 21 & 22 November 2015.  I then intend to submit it to the next Association of Animal Artists Exhibition.

Harrogate and Nidderdale Art Club exhibition at Ripley Town Hall, near Harrogate, 21 & 22 November 2015.

Harrogate and Nidderdale Art Club exhibition at Ripley Town Hall, near Harrogate, 21 & 22 November 2015.

Visiting demonstrators at art clubs are amazingly varied and it is usually useful to attempt whatever they ask the club members to do.  I have done some workshops myself and appreciate the efforts of club members who really have a go at continuous line drawings, and associated things I show, even though to is unlikely that any of them will take up my technique as a main style.  Hopefully people can pick up things which can apply to other styles, such as building abstract patterns, using colour sequences, drawing key identifying parts of a subject and trying to manage a picture which sometimes appears to be drawing itself !

Charles Kelly from Bradford, who I have seen doing demonstrations before, came to Stainbeck Arts Club a couple of months ago and said he was doing a workshop this time.  Watercolour tends to be the most popular topic at art clubs, but Charles has a spectacular approach to “wet on wet” and this time we were doing it too.  Here is an example of his work from a demonstration to Alwoodley Art Group in 2013.

A Pair of Geese, painted by Charles Kelly in a demonstration at Alwoodley Art Group in 2013.

A Pair of Geese, painted by Charles Kelly in a demonstration at Alwoodley Art Group in 2013.

My usual style of strong lines and flat colours (acrylic or poster colour) are poles apart from watercolour but I always learn something.  I have to say that using a big brush to coat large proportions of the paper with water in advance (up to selected boundaries of course) and then squeezing brush loads of watercolour in dollops all over is a bit “hairy”.  Then picking up the paper and waving it about so that the colour swishes around, like tides on a beach, reminds me of relatives of mine “panning” for gold in Victoria in the 1850’s.

Charles had brought many reference pictures which we could use and I chose one of a barn owl.  I thought that I could do washes up to the outline of the owl and also within the owl and later put a continuous line on top which more or less matched the washes.  Here is a copy of the wash I did initially, helped by some tips from Charles along the way.

Copy of Wet on Wet watercolour of Barn Owl, before I attempted the continuous line drawing. Mick Burton.

Copy of Wet on Wet watercolour of Barn Owl, before I attempted the continuous line drawing. Mick Burton.

Later, at home, I worked on the continuous line on top of the above copy.  I started by putting key lines along the outline of the owl, feathering and other features – to match the borders of colours as far as I could.  Then I added more connecting pattern and finally joined everything up and made sure I had a continuous line.

Once I was satisfied with this I traced the continuous line down onto my watercolour painting and drew over the lines in acrylic pen making final changes as I saw how the firm line was developing.

I think that the translucent effect of the feathering has worked well, although this view may not be appreciated by a victim mouse in its last moments.

Red Squirrel continuous line and Grey Squirrel photographs

Red Squirrel, continuous line with colour sequence. Mick Burton, Leeds artist.

Red Squirrel, single continuous line drawing with colour sequence. Mick Burton, Leeds continuous line artist.

This continuous line Red Squirrel, completed with colour sequence, is one of my pictures to be hung at the Leeds Art Exhibition and Sale put on for the 15th year by St Gemma’s Hospice.

St Gemma's Leeds Art Exhibition. 29 - 31 October 2015

St Gemma’s Leeds Art Exhibition. 29 – 31 October 2015

This colour sequence squirrel is the last of a series which began with my attempt to produce a continuous line drawing with a shimmering fur effect for the squirrel.

Continuous line squirrel from 1970, with shimmering effect of fur. Mick Burton, Leeds artist.

Single continuous line drawing of squirrel from 1970, with shimmering effect of fur. Mick Burton, Leeds continuous line artist.

I have a treasured memory of seeing a Red Squirrel, when I was four, sitting on a wall next to our cottage at Arncliffe Hall, in the North Riding, where my Dad was Head Gardener to Sir Hugh Bell just after the War.  I thought that completing alternate shading with copper paint would best reflect this colour in this picture from 1970.  My daughter Kate said on the phone today that she remembered this picture being in the hall when she was young.

Red Squirrel with copper alternate shading from 1970. Mick Burton, Leeds artist.

Red Squirrel, single continuous line drawing with copper alternate shading from 1970. Mick Burton, Leeds continuous line artist.

I have many clear memories of living at Ingleby Arncliffe from the age of nearly two, to four and a half when we left.

Falling out of my pram outside the local shop and crawling up the step was the earliest. There was a three legged cat, then at Sunday School one of the stamps I collected was “The Light of the World” by William Holman Hunt (my first taste of the Pre-Raphaelites) and I won the child’s sprint on sports day on the cricket ground.

In the famous terrible winter of 1947, I remember Dad helping to dig a trench in the snow drifts down to the village.  It was amazing to walk along the trench and not be able to see out.

 I once watched a pig being killed in the yard by the cottage and the workman laughed as he squirted me with the pig’s bladder.  This memory came back years later when, as a young police constable, I attended my first post mortem (of a coal miner who had been in an underground tunnel collapse).  My sergeant stood with me and assured me that it would be just like a newly killed pig being cut up, if I had ever seen one.  I said “Yes, I saw one when I was four ! “

I only see grey squirrels now, mainly helping themselves to the bird seed Joan puts out.  With Gledhow Valley Woods at the end of the garden we can have five of them at a time.  Yesterday, a young squirrel was chased by a cat and ended up on the trellis a few feet from our dining room window.  Joan chased the cat away and called to me as the squirrel was too scared to move.

I took some quick photographs whist it was still there, but it became apparent that it was not going to move and was looking at me pleadingly.  So I went out and shepherded it into the bushes.  Here are some photos of a shimmering fur tail.

Young Grey Squirrel from Gledhow Valley Woods. Three feet from my window after being chased by a cat. Mick Burton, Leeds artist.

Young Grey Squirrel from Gledhow Valley Woods. Three feet from my window after being chased by a cat. Mick Burton, Leeds artist.

Young Grey Squirrel not daring to move, even though Joan had chased the cat away. Mick Burton, Leeds artist.

Young Grey Squirrel not daring to move, even though Joan had chased the cat away. Mick Burton, Leeds artist.

Young Grey Squirrel, imploring me to stop taking photos and do something about the cat. So I went out and shepherded it to the bushes. Mick Burton, Leeds artist.

Young Grey Squirrel, imploring me to stop taking photos and do something about the cat. So I went out and shepherded it to the bushes. Mick Burton, Leeds artist.

Gledhow Valley amazing cobwebs.

I must apologise for a silly thing that I did yesterday.  I photographed a spider using the sun to obtain glistening images of the spiders web.  Only when I had set it all up and published it did I remember that one of my main supporters does not like looking at spiders and may never, ever, look at my web site again if I left them up.

So I have removed them all and I hope that I have not upset search engines too much.  It should be alright to leave images of cobwebs only so here are some images from 2009.

Previously I have had the assistance of red brick dust when our kitchen was extended in 2009.  A total of eight cobwebs on three separate dining room window panes. 

Four cobwebs on dining room windows covered in red brick during work on kitchen extension in 2009. Mick Burton, continuous line artist.

Four cobwebs on dining room windows covered in red brick during work on kitchen extension in 2009. Mick Burton, continuous line artist.

Three cobwebs, on another dining room window, covered in red brick dust in 2009. Mick Burton, continuous line artist.

Three cobwebs, on another dining room window, covered in red brick dust in 2009. Mick Burton, continuous line artist.

Large cobweb, on third dining room window, covered in red brick dust after work on kitchen extension in 2009. Mick Burton, continuous line artist.

Large cobweb, on third dining room window, covered in red brick dust after work on kitchen extension in 2009. Mick Burton, continuous line artist.

Eventually the window cleaner came and sorted all the cobwebs out.

Skydivers in Ten Petal Flower Formation, link to Four Colour Theory continuous line.

164 Skydivers head down record in Illinois, 31 July 2015.

164 Skydivers head down record in Illinois, 31 July 2015.

Two weeks ago 164 skydivers, flying at 20,000 feet and falling at 240 miles an hour, set the “head-down” world record in Illinois. The international jump team joined hands for a few seconds, in a pre-designed formation resembling a giant flower, before they broke away and deployed their parachutes.

I was intrigued by the design of the formation. I have found many qualities in ten petal (or star) designs and, of course, I look for continuous lines in all sorts of designs that I find and in particular the possibility of a Single Continuous Line.

Here is my sketch of the skydivers formation.  It is made up of many linked circles, starting with a central ring of ten circles which radiate out to ten “petals”.  The plan seemed to involve six skydivers forming each circle by holding hands.  Some extra skydivers started links between petals.  I checked to see if I had included all the skydivers, which made my sketch look like a prickly cactus.

Cactus Count, 164 Skydivers all Present and Correct. Mick Burton, continuous line artist, August 2015

Cactus Count, 164 Skydivers all Present and Correct. Mick Burton, continuous line artist, August 2015

This was such a tremendous achievement by very brave men and women.  My only experience of heights is abseiling 150 feet down a cliff in the Lake District.  I realise that the jump would have been very carefully planned using the latest science and involved a lot of training, etc. but I am particularly interested in the part that the formation design played.

The hexagon appears to be an essential element so that hands can be joined at 3 way junctions.  A core circle of hexagons would naturally be 6, but more would be required for this jump.  The next highest near fit would be 10, which is fine given the variations in human proportions.  This also naturally allows linking between middle circles in the petals to complete a second ring of circles, which was partly done in this jump.

Every participant would need to know exactly where their place would be in the design and yet it is so symmetrical that I struggle to get my sketch the right way up.  Also with the short time involved co-ordination of planned stages would be difficult.  This made me think of a flock (or murmuration) of starlings performing their remarkable patterns in the sky and how they manage to co-ordinate. Apparently each bird relates and reacts to the nearest birds around it.  Absolute simplicity and ruthless efficiency with no critical path.

If the skydivers have adopted a similar approach then the design is ideal. The design is basically 30 circles in sets of 3 in a row making up 10 petals. The process is fluid and adaptable, building outwards from the centre. Think 10 individuals linking hands to start off with, which then recognisably evolves into 10 petals, and think 6 individuals in each of the 30 circles.  Everyone is dropped (there were 7 aircraft I think) in an order which anticipates being able to take up a place a certain distance from the centre of the structure and within a specific circle. As they approach they can recognise the progress and assess whether they can link in as expected or whether a modified position may need to be taken up (and being guided by the people already in place). The last individuals to be dropped will not have  a planned position in any circle but will form the start of the links between the central of the 3 circles in the petals. They need to be prepared to become part of an outer circle which has not been completed.

I have done a sketch of how this may work, with the numbers indicating my thoughts on the expected order of arrival in the building of the formation.

Skydiver formation with possible roles and order of arrival of individuals. Mick Burton, continuous line artist.

Skydiver formation with possible roles and order of arrival of individuals. Mick Burton, continuous line artist.

I hope this was a useful exercise, in trying to work out how the formation worked, and not total tosh (if so my apologies to all concerned).

To help my attempt to apply my continuous lines to the design I have completed the links between middle circles, which was partially done this time and I suppose will be considered for the next larger attempt at the record (say 180 skydivers).  The Continuous Lines are intended to pass through every three handed junction once only (I normally would say three legged ! ).

The method I use to complete the overdraw was developed in the early 1970’s when I was working on trying to prove the Four Colour Theorem.   A single continuous overdraw throughout a map would split it into two chains of alternate colours which would demonstrate that only four colours were needed.  I will explain how this is done in a future post.

Continuous lines overdrawn on Skydiver formation design, using Four Colour Theory method. Mick Burton

Continuous lines overdrawn on Skydiver formation design, using Four Colour Theory method. Mick Burton

This overdraw has resulted in several continuous lines and no alternative would produce a Single Continuous Line. This is due to the lack of width going around the structure.

Consequently, I have extended the design further by adding linking lines between all outer petals and succeeded in drawing a Single Continuous Line on that. A future Skydiver jump completely assembling this design would require about 220 participants (I am not suggesting that this be attempted) !

Skydiver formation design with links between out petals completed, overdrawn with a Single Continuous Line using Four Colour Theorem method. Mick Burton.

Skydiver formation design with links between out petals completed, overdrawn with a Single Continuous Line using Four Colour Theorem method. Mick Burton.

Spherical Continuous Line Abstract with Colour Sequence.

Spherical continuous line with colour sequence. Flypast Over Rolling Hills. Mick Burton 2015.

Spherical single continuous line drawing with colour sequence. Flypast Over Rolling Hills. Mick Burton, continuous line artist 2015.

I have modified my Spherical approach to continuous line from the method I described in my Continuous Line Blog post of 9 July 2014, which did not quite reflect the reality I was seeking.

I have kept the idea that when you draw out of one SIDE of the paper you need to return at the opposite SIDE at the corresponding point, so that the pattern matches vertically and after colour sequence the colours also match if you pull the paper round into a tube shape.  This is similar to the equator on a globe of the world matching.

Previously I had said that when going out of the top of the drawing you also need to return at the corresponding place at the bottom.  I was correct to say that the colours would not match, which would be equivalent to the poles on the globe of the world not meeting, but the treatment of the lines needed to be modified.

I realised that the bunching effect of the top being pulled together totally separately to the bottom being pulled together was fine regarding separate sets of colours but matching the line patterns from top to bottom was the wrong approach.

So, when I go out at the TOP now I need to come BACK IN AT THE TOP at the corresponding distance from the other end of the top.   Similarly if I go out at the bottom I come back in at the bottom.  You could then imagine that folding the picture vertically down the middle would mean that both pattern and colour sequence would now match at the top and bottom respectively (don’t actual fold it and spoil the picture ! ).

I recently drew the following for a demonstration/workshop at Stainbeck Arts Club in Leeds.  I started drawing the line a couple of inches in from the top left side and did a few rolling curves diagonally down from left to right, followed by several exits and returns to the picture – initially out at the lower right side and back in at the lower left side, then down and out at the bottom left and back in at the bottom right.

Spherical continuous line drawing with rolling and jagged lines. Mick Burton 2015.

Spherical single continuous line drawing with rolling and jagged lines. Mick Burton, continuous line artist 2015.

I later tried some “shark fin” curves and a couple of large jagged sequences.

All the time I tried to draw the line cleanly through existing shapes (avoiding going near previous junctions) and being aware of areas I had not visited much.  Finally I needed to work out how to get back to my start point without spoiling the composition too much (here going out and back in can be handy).

I hope you can check the route of the line through the whole picture fairly easily.  I then applied my Colour Sequence to produce the picture at the top of this post.

The first stage is my usual alternate overdraw of the line (if you are overdrawing a section as you go out of the picture you need to continue to overdraw as you re-enter, or if not overdrawing going out it’s not overdrawing when you re-enter).  See my post of 10 September 2014 for the full ALTERNATE OVERDRAW process and my post of 27 September 2014 for the COLOUR SEQUENCE process.

I have used a series of 6 colours from Pale Yellow through greens to Prussian Blue which I have tried to work out in steps of tone.  This is partly to highlight the overlap effect of continuous lines and the natural depth of the abstract.  As always, there is choice of direction of colours – light to dark or dark to light.  Here it seemed best to have the single lightest area at the top and several darker areas across the lower part of the picture.  The picture also has an Optical Art look about it.

Printing the picture in Monotone is usually a good way of checking the steps of colour and light to dark.  So here it is.

Monotone of Spherical Continuous Line

Monotone of Spherical Single Continuous Line Drawing “Flypast Over Rolling Hills”. Mick Burton 2015.

I also produced another similar abstract for the Demonstration at Stainbeck Arts Club to show the Spherical approach with a different flow of lines and colours.  I had coloured the drawing with a sequence from Yellow through Reds to dark Brown.

Spherical Continuous Line with Colour Sequence. Forest Fire. Mick Burton 2015.

Spherical Single Continuous Line Drawing with Colour Sequence. Forest Fire. Mick Burton 2015.

Here is the Monotone of this picture.

Monotone of Spherical Continuous Line

Monotone of Spherical single continuous line drawing “Forest Fire”. Mick Burton 2015.

Haken’s Gordian Knot and the Twisting, Overlapping, Envelope Elephant.

I constantly look for Continuous Lines in many fields of art, history, mathematics – anywhere, as I just do not know where they are going to crop up.  Currently I am casting an eye on Islamic Art and Celtic art and am developing ideas on those.

Recently I glanced through a book called “Professor Stewart’s Cabinet of Mathematical Curiosities” and came across Haken’s Gordian Knot, a really complicated looking knot which is really an unknot in disguise – a simple circle of string (ends glued together) making a closed line. Here it is.

Haken's Gordian Knot, from Ian Agol. A simple circle of string (an Unknot) formed into a complicated continuous line.

Haken’s Gordian Knot, from Ian Agol. A simple circle of string (an Unknot) formed into a complicated continuous line.

When I looked at the Knot, it reminded me of my “Twisting, Overlapping, Envelope Elephant” continuous line in that it has a lot of twists. I realised straight away that a narrow loop on the outside (left lower) seemed to lead into the structure with its two strands twisting as it went, each time in a clockwise direction.  I followed the two twisting lines throughout the drawing until they ended in a loop on the outside (left higher).

I wanted to draw and paint this knot. My first drawing was of the line on its own. The depth of some of the lines reminded me of one of my earliest paintings “Leeds Inner Ring Road Starts Here”, which was based upon a sign board which appeared near Miles Bookshop in 1967 informing us of the route the new road would carve through the City. This was several years before Spagetti Junction was built near Birmingham. My picture had lines swirling all over at various heights in one continuous line.

Leeds Inner Ring Road Starts Here. Use of varying thickness of continuous line, overs and unders. Pre dates Spagetty Junction near Birmingham. Mick Burton, 1967.

Leeds Inner Ring Road Starts Here. Use of varying thickness of single continuous line drawing, overs and unders. Pre dates Spagetty Junction near Birmingham. Mick Burton, 1967.

My first picture of the Gordian Knot, in black and white, concentrated on the heights of the lines following the overs and unders shown by Haken.

Depth of lines in black and white, in Haken's Gordian Knot. Mick Burton, continuous line drawing.

Depth of lines in black and white, in Haken’s Gordian Knot. Mick Burton, single continuous line drawing.

But my main aim now was to use blue and red to show the twisting nature of the pair of lines running between the starting loop and the end loop.  This was intended to allow the viewer to more easily follow the loop and the twists throughout the structure.

Twisting, overlapping colouring of Haken's Gordian Knot. Mick Burton continuous line.

Twisting, overlapping colouring of Haken’s Gordian Knot. Mick Burton single continuous line drawing.

Just like viewing my “Twisting, Overlapping, Envelope Elephant”, from my previous post, imagine that you have a strip of plastic which is blue on the front and when you twist it over it is painted red on the back.  Where blues cross each other you have darker blues, and correspondingly with reds.  Where blue crosses red you have violet.  I show the strips feeding through each other, like ghosts through a wall.  There are some darks and lights in there as well.  Most usefully, the background shines through to help make the strips stand out.

You can now get more of a feel for what is going on.  I counted 35 clockwise twists and two anti-clockwise (numbers 19 and 26).  Continued twists in the same direction tie in the ongoing loop, when it feeds through the two strands of its earlier route at least 12 times.  

This is a preparatory painting, in acrylic but on two sheets of copy paper sellotaped together.  When I exhibit these pictures they will be hung as portrait, rather than the landscape shown here for comparison with Haken (as you will note from where my signature is).  I think they look a bit like the head of the Queen in portrait mode !

Having got this far, I realised that I should find out more about the Haken knot (or unknot), beyond Professor Stewart’s brief introduction.  How did Haken construct the knot and why?

Please see my next post, on this continuous line blog, to see how I got on.