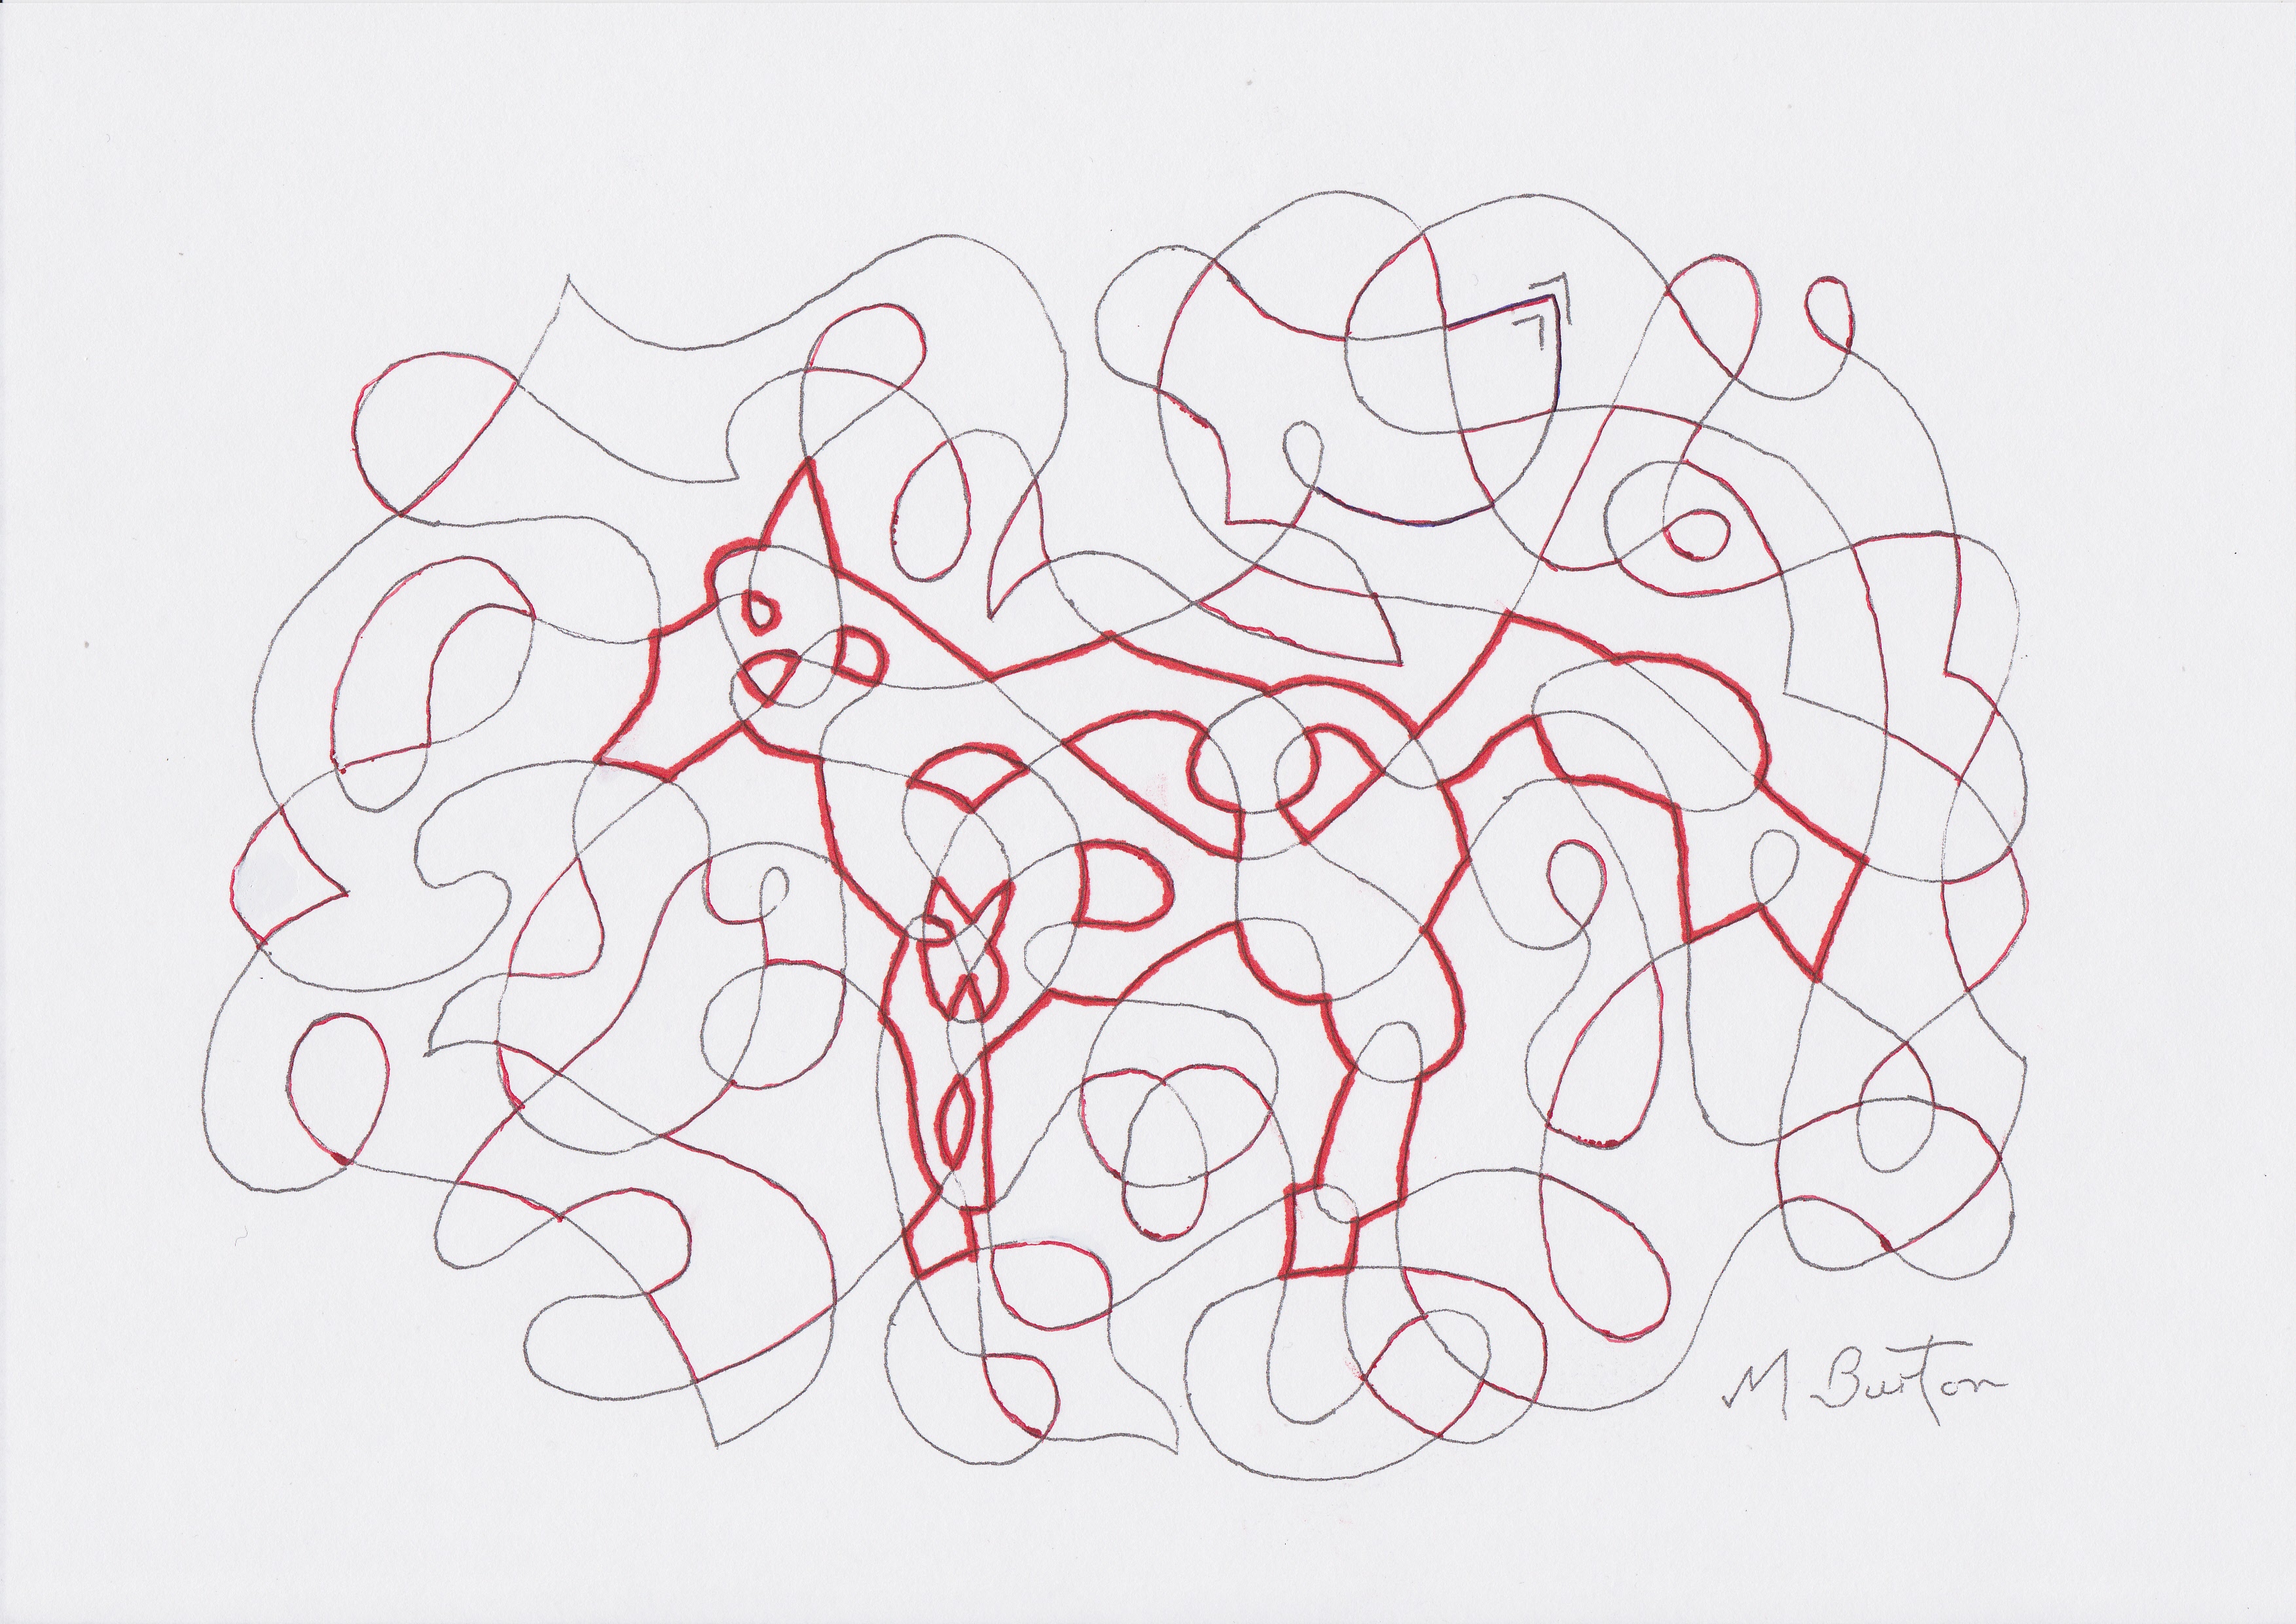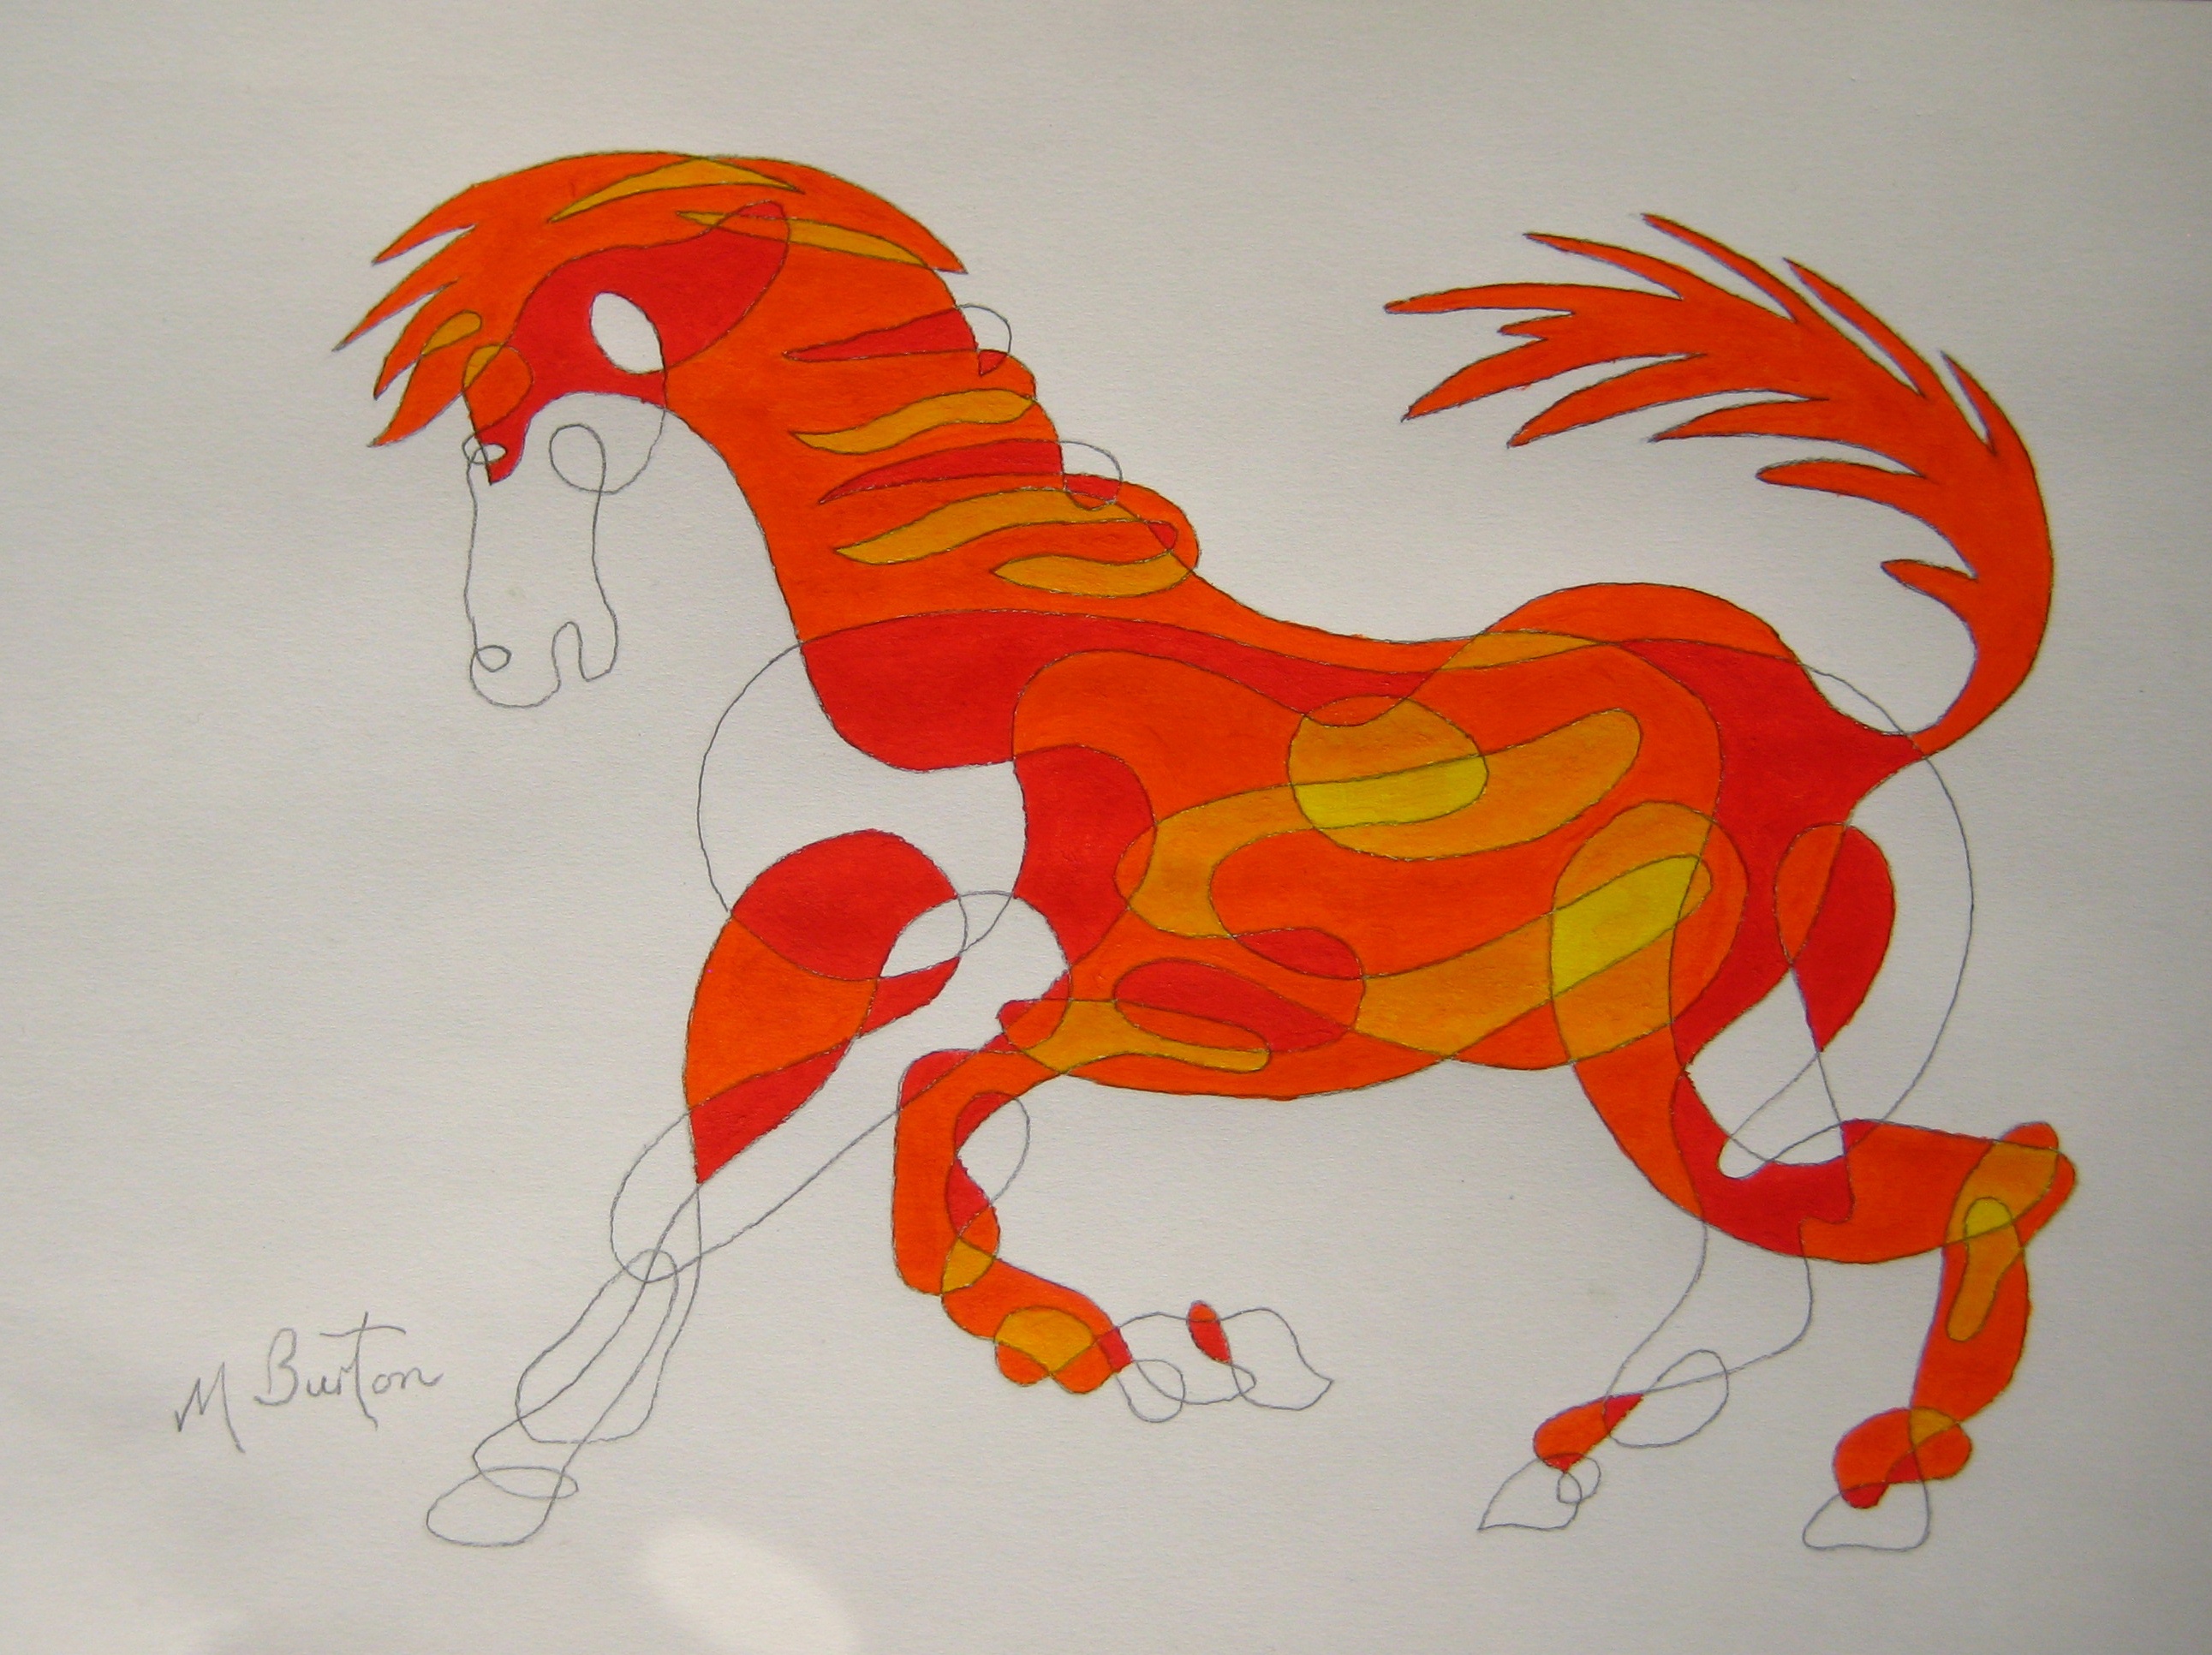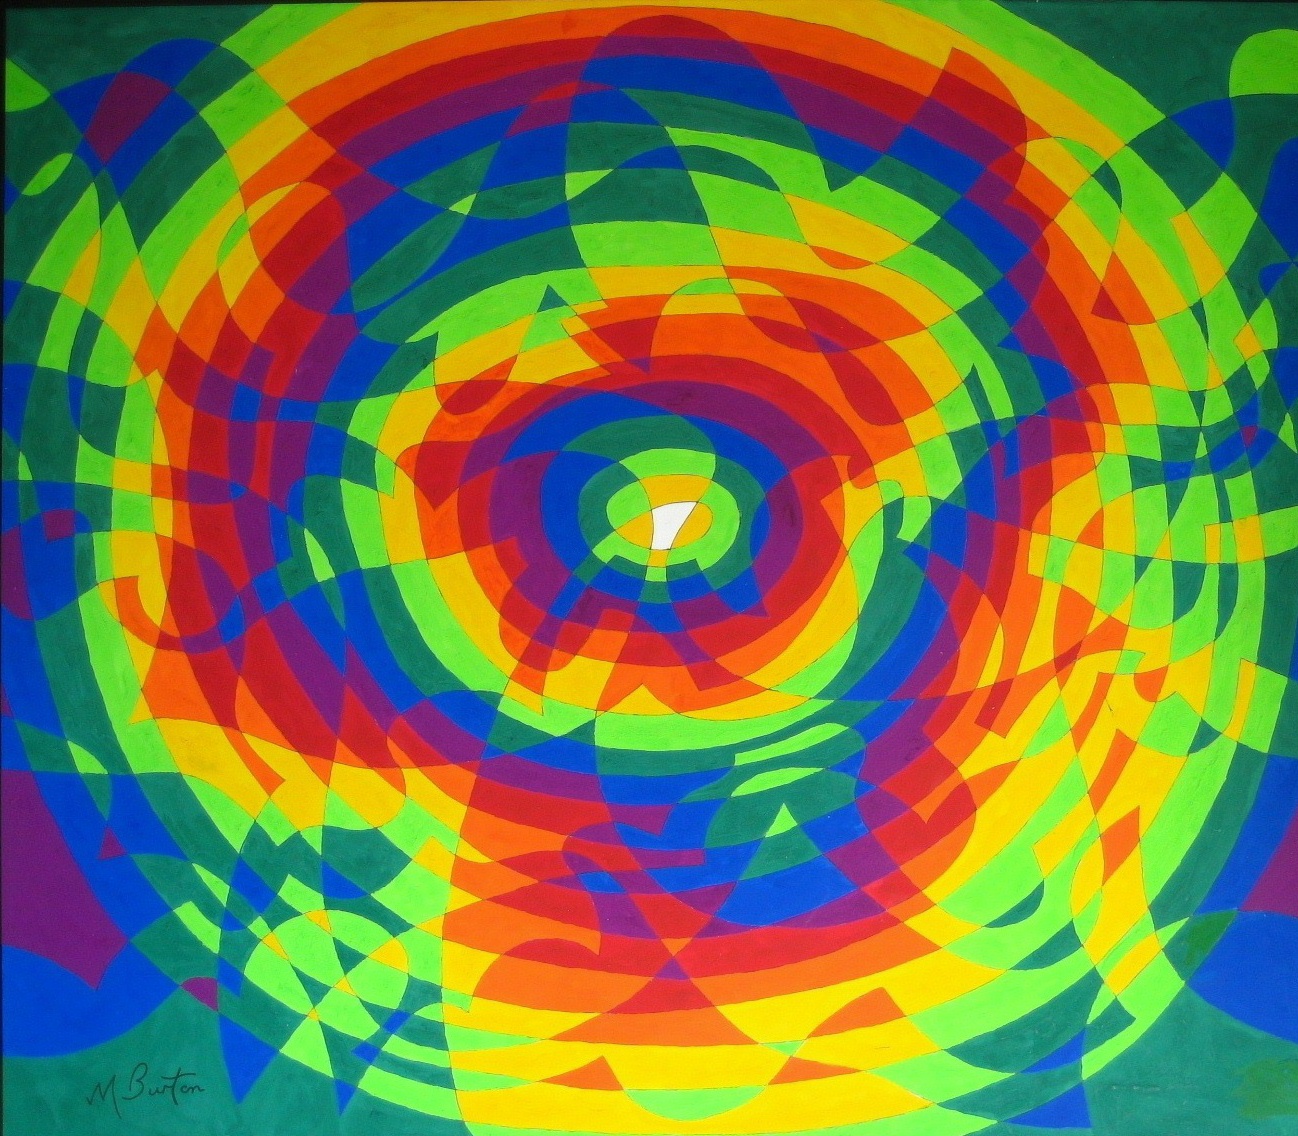
Whirlpool in Space, or Petrol polluted Puddle. Spherical single continuous line drawing with repeat colour sequence with Rainbow colours. Mick Burton, Continuous Line, 1971.
This painting was one of two pictures hung at the Chelsea Painters Open Exhibition, held at the Chenil Galleries, Chelsea,1971. I walked along the Kings Road looking for the gallery (I had submitted through and agency) and it was great to see the Whirlpool first in a window by the entrance.
The design was triggered by a browse through mathematics books in the library and coming across Winding Number Theory. This used a continuous line and every time the line was drawn winding in a counter-clockwise direction a level was added and if you wound back in a clockwise direction a level was taken off.
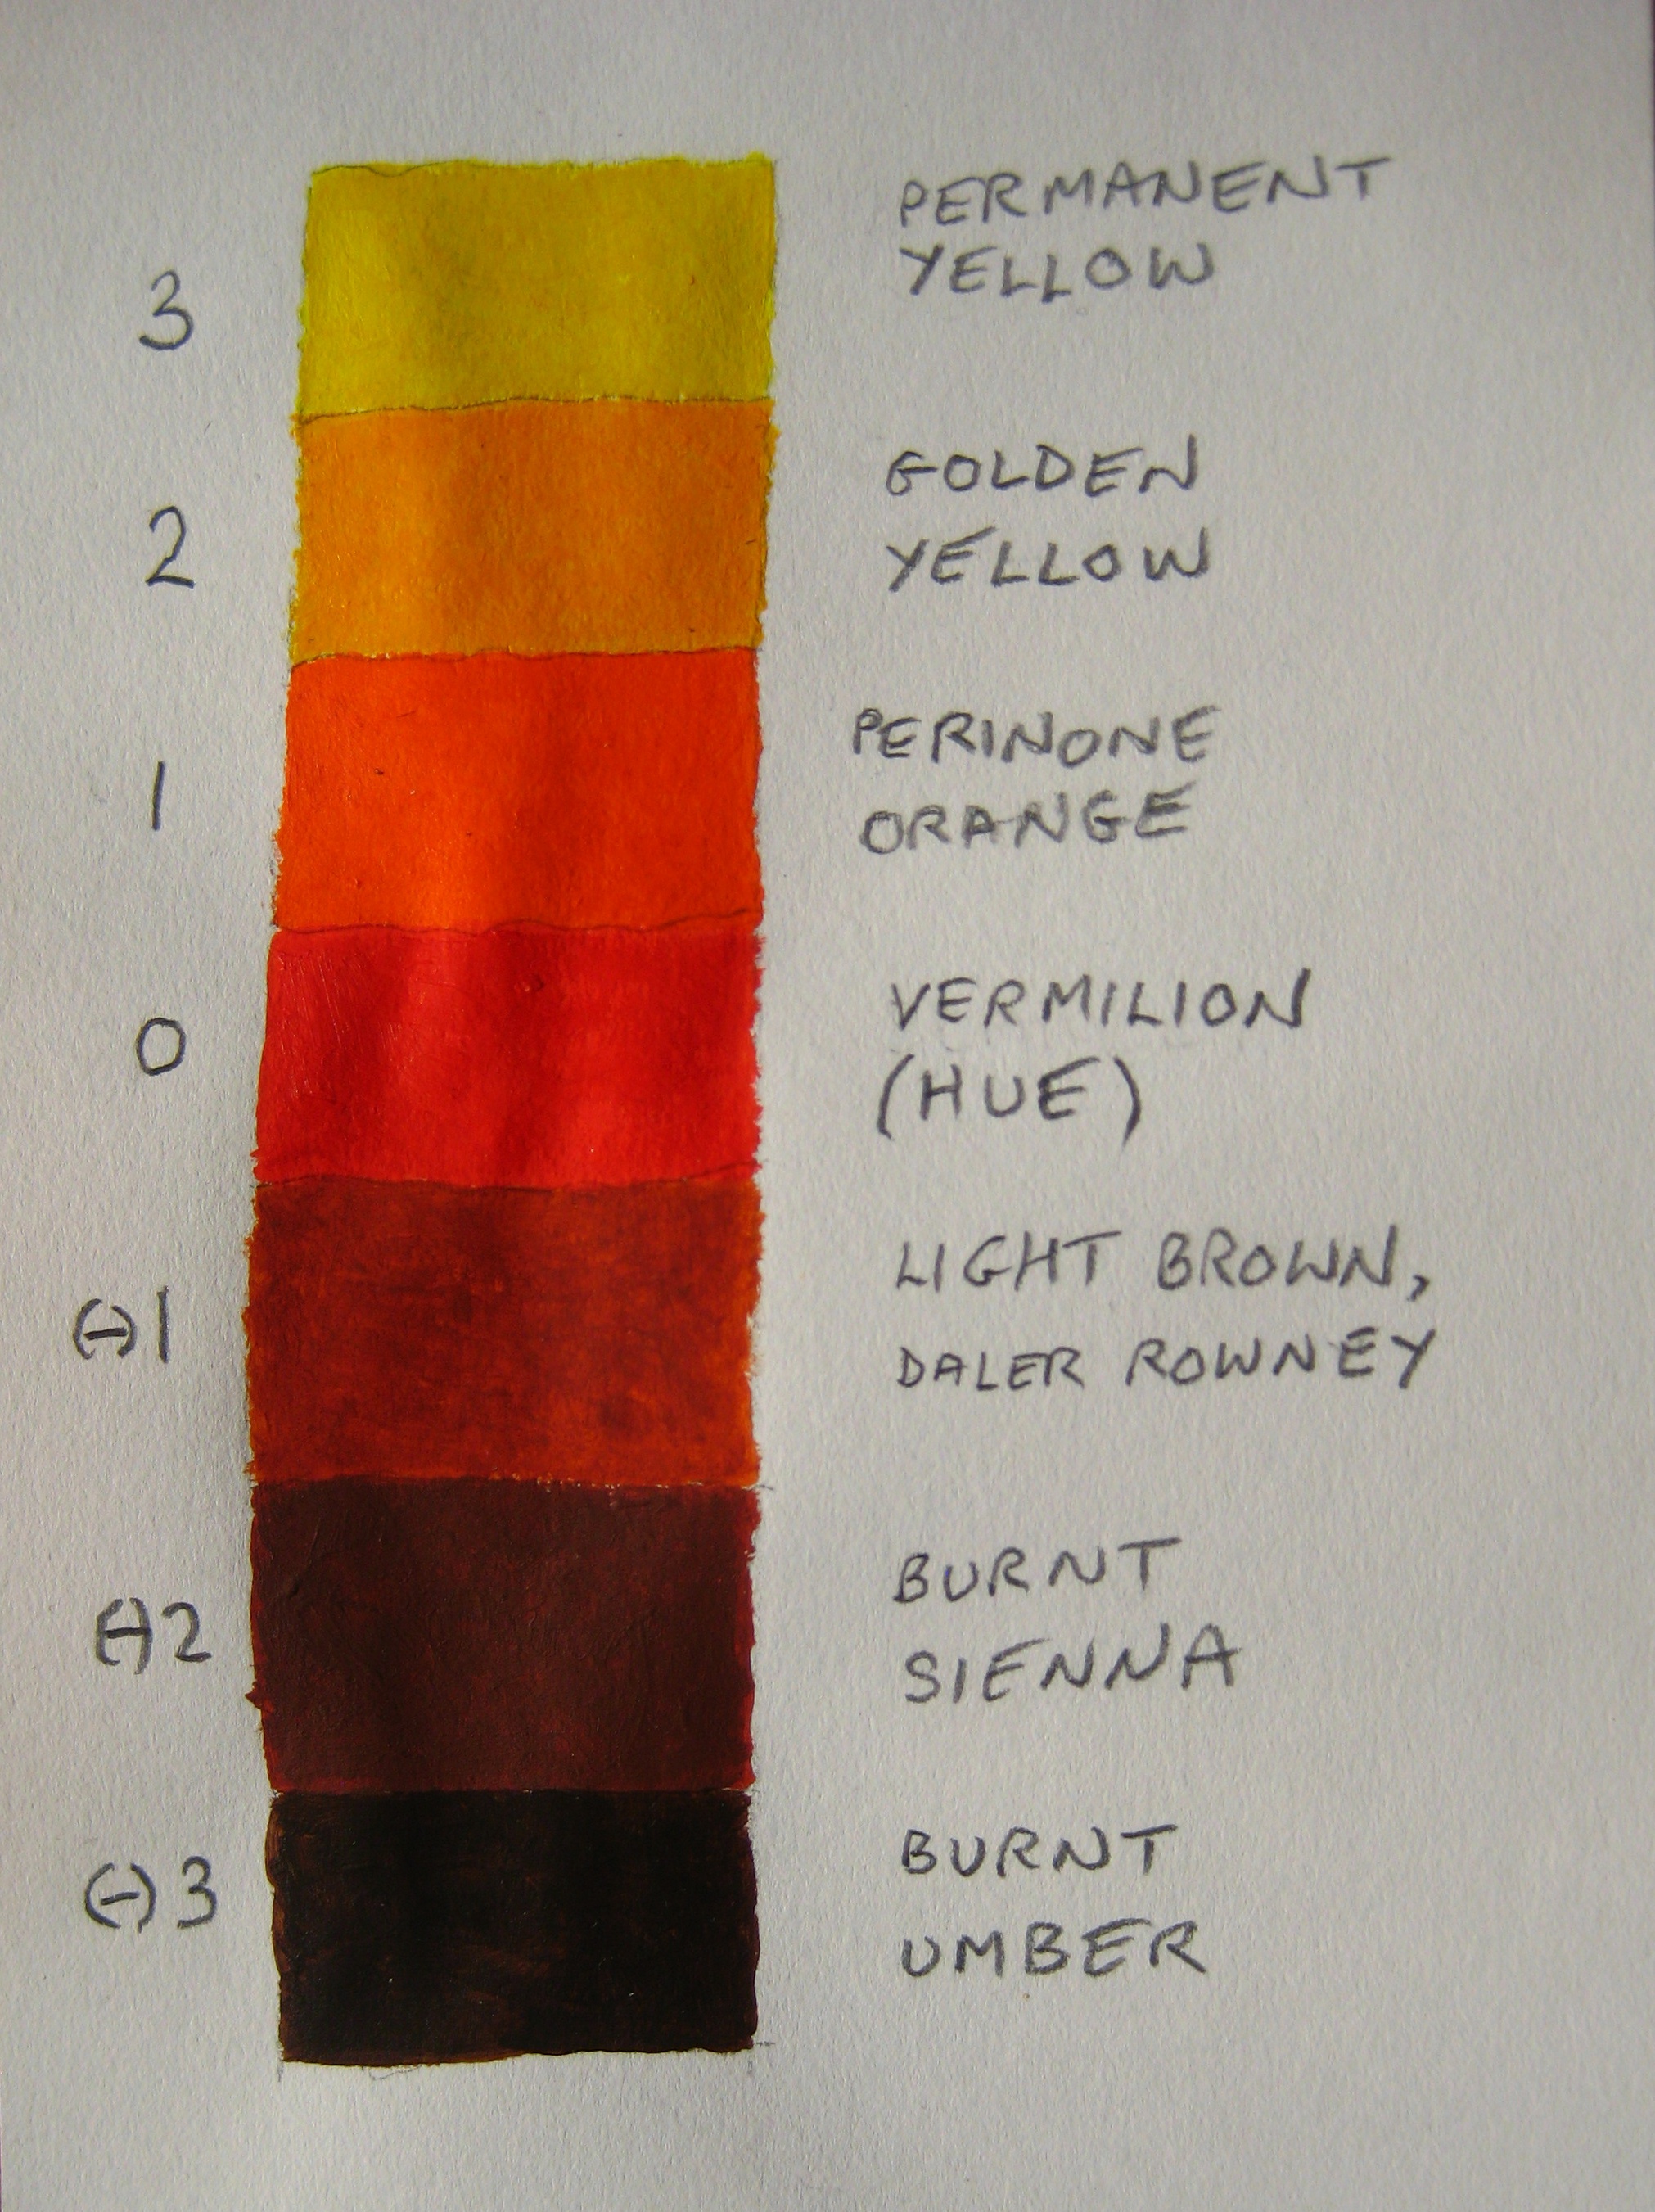
So far, in my colour sequence numbering based upon Alternate Overdraw, I had not had a sequence of colours greater than about nine. If I used the Winding Number method and continued to wind around counter-clockwise many times I could have a long colour sequence. I went a bit mad with the Whirlpool, which was done on a spherical basis (allowing drawing out of one side of the paper and back in at the opposite side), and has a sequence of 20.
I did not simply go from light to dark over the whole 20 (the steps in shade between each colour would have been too small), but oscillated up and down with a smaller range of colours similar to a rainbow. I had seen the rainbow effect produced by sunlight on petrol spilt on a puddle.
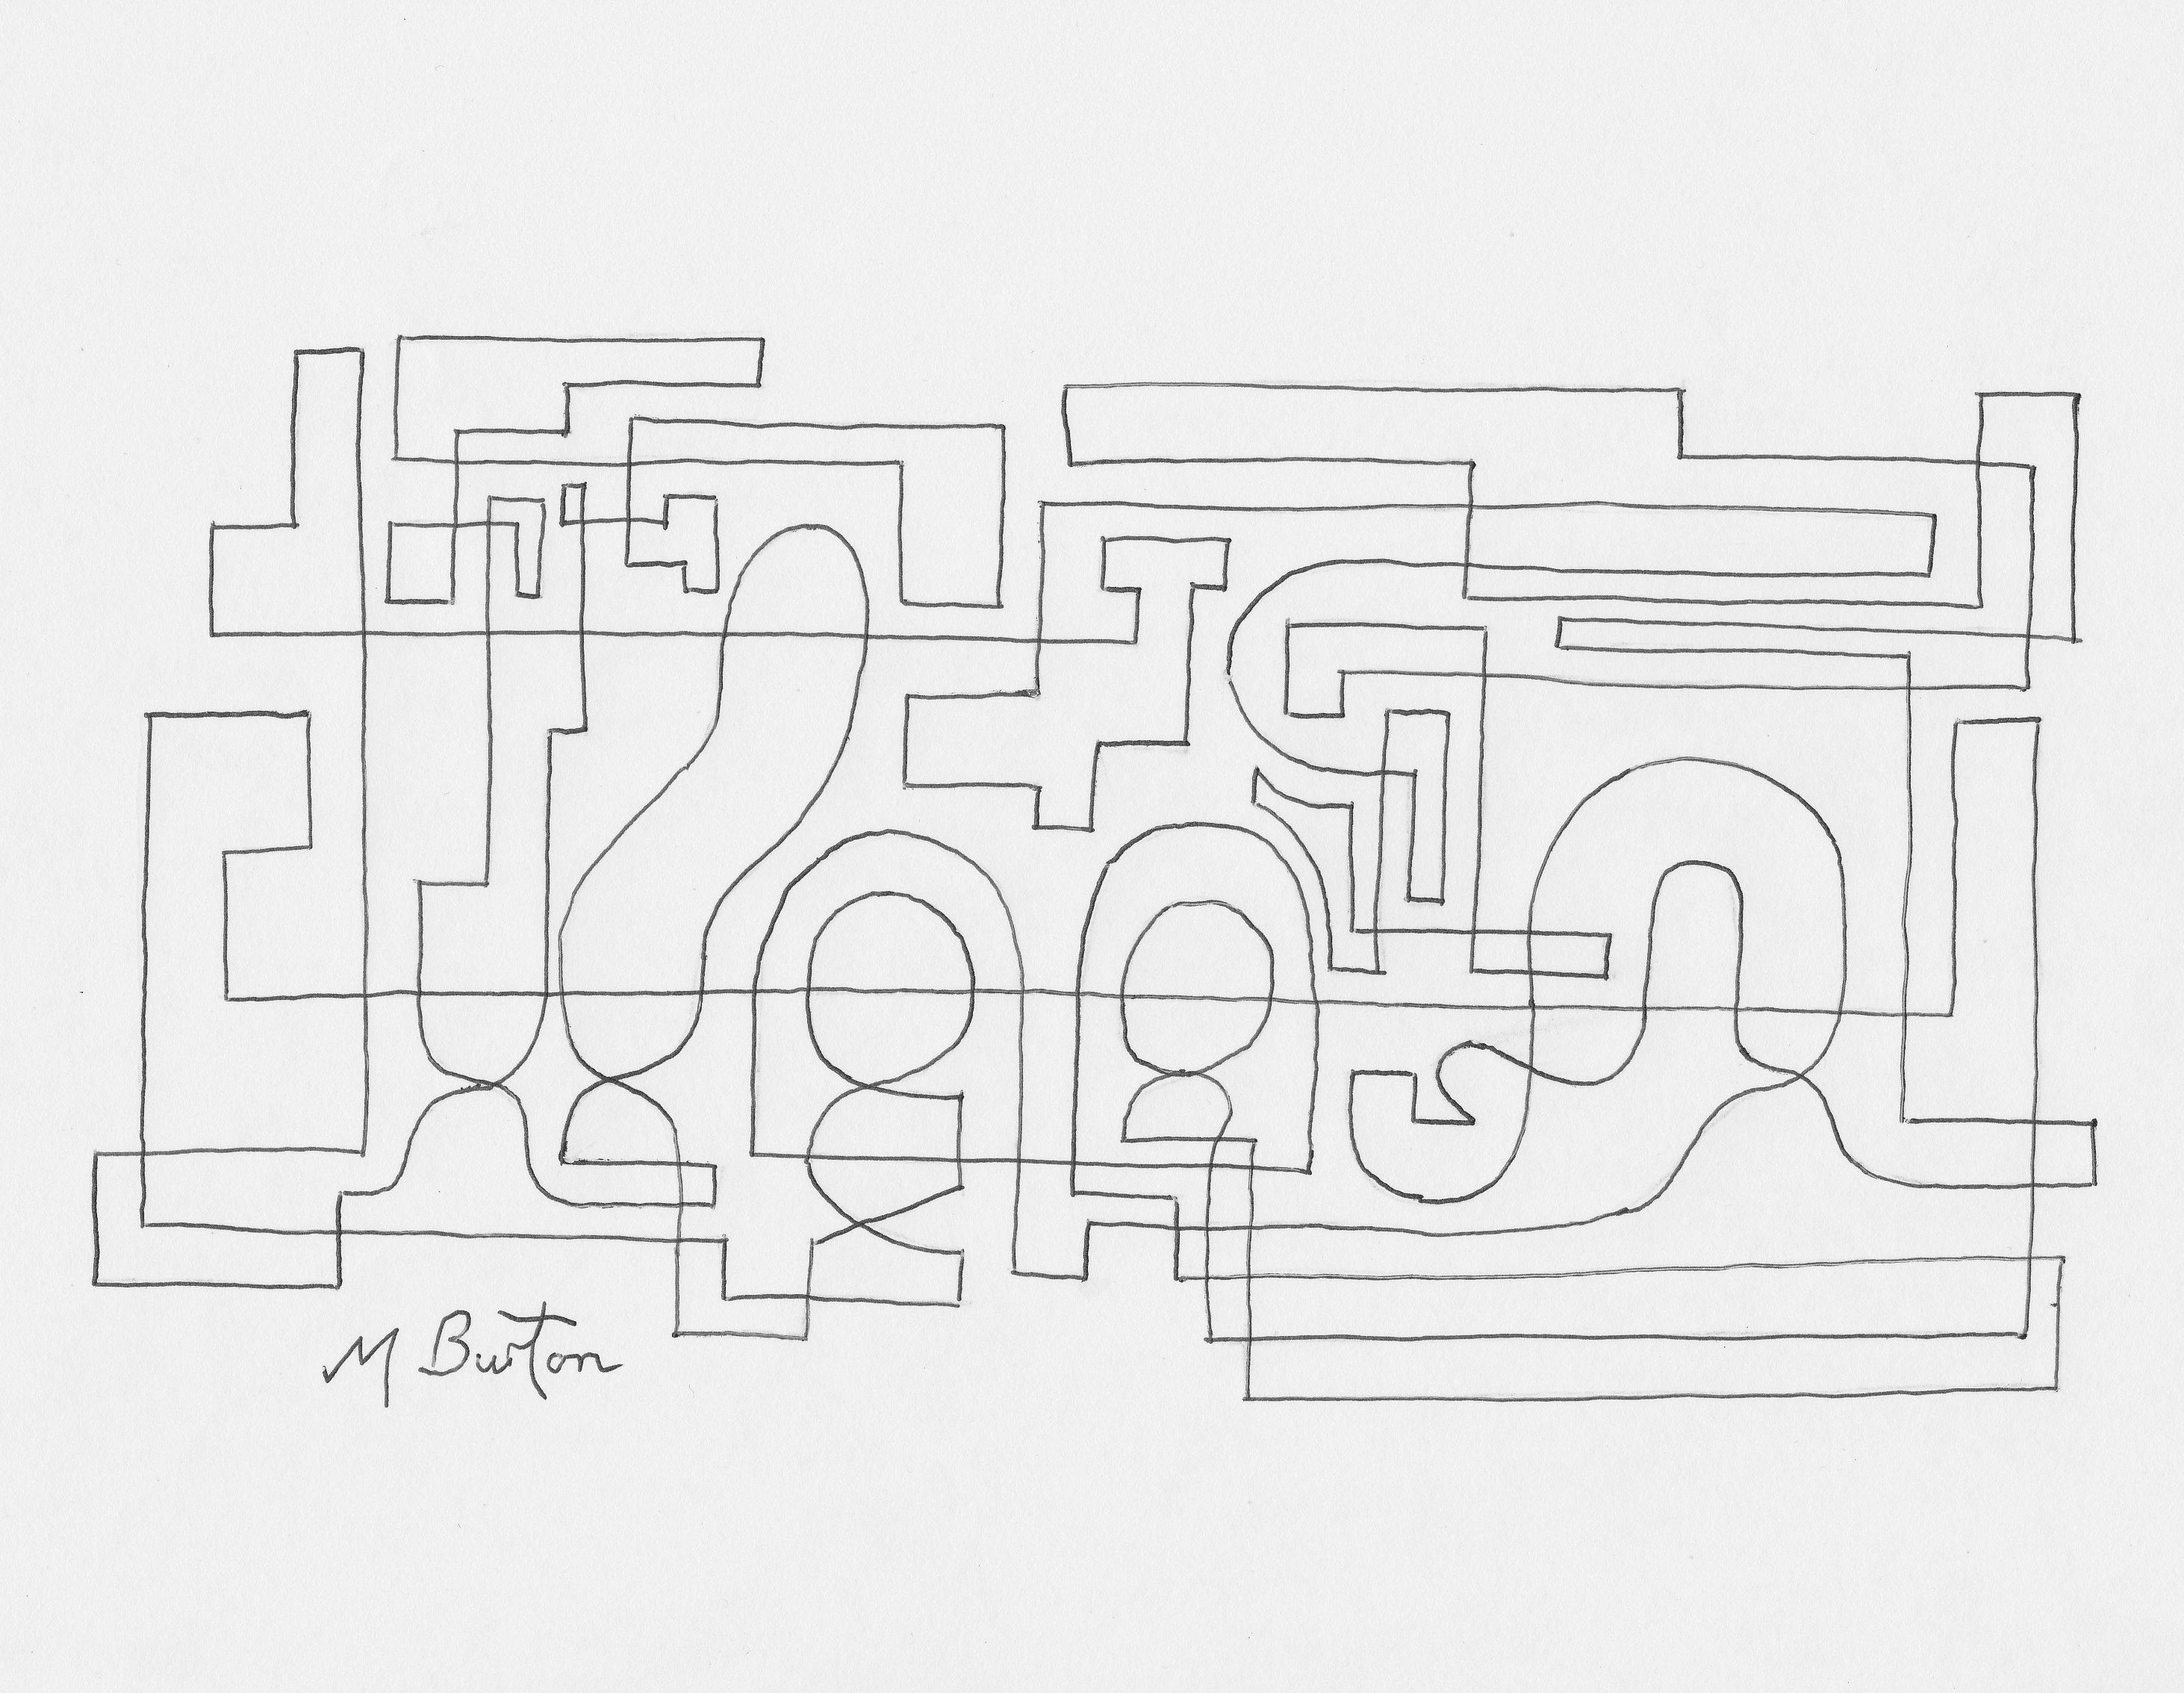
Alternate overdraw with colour sequence numbers. Continuous Line, Mick Burton.
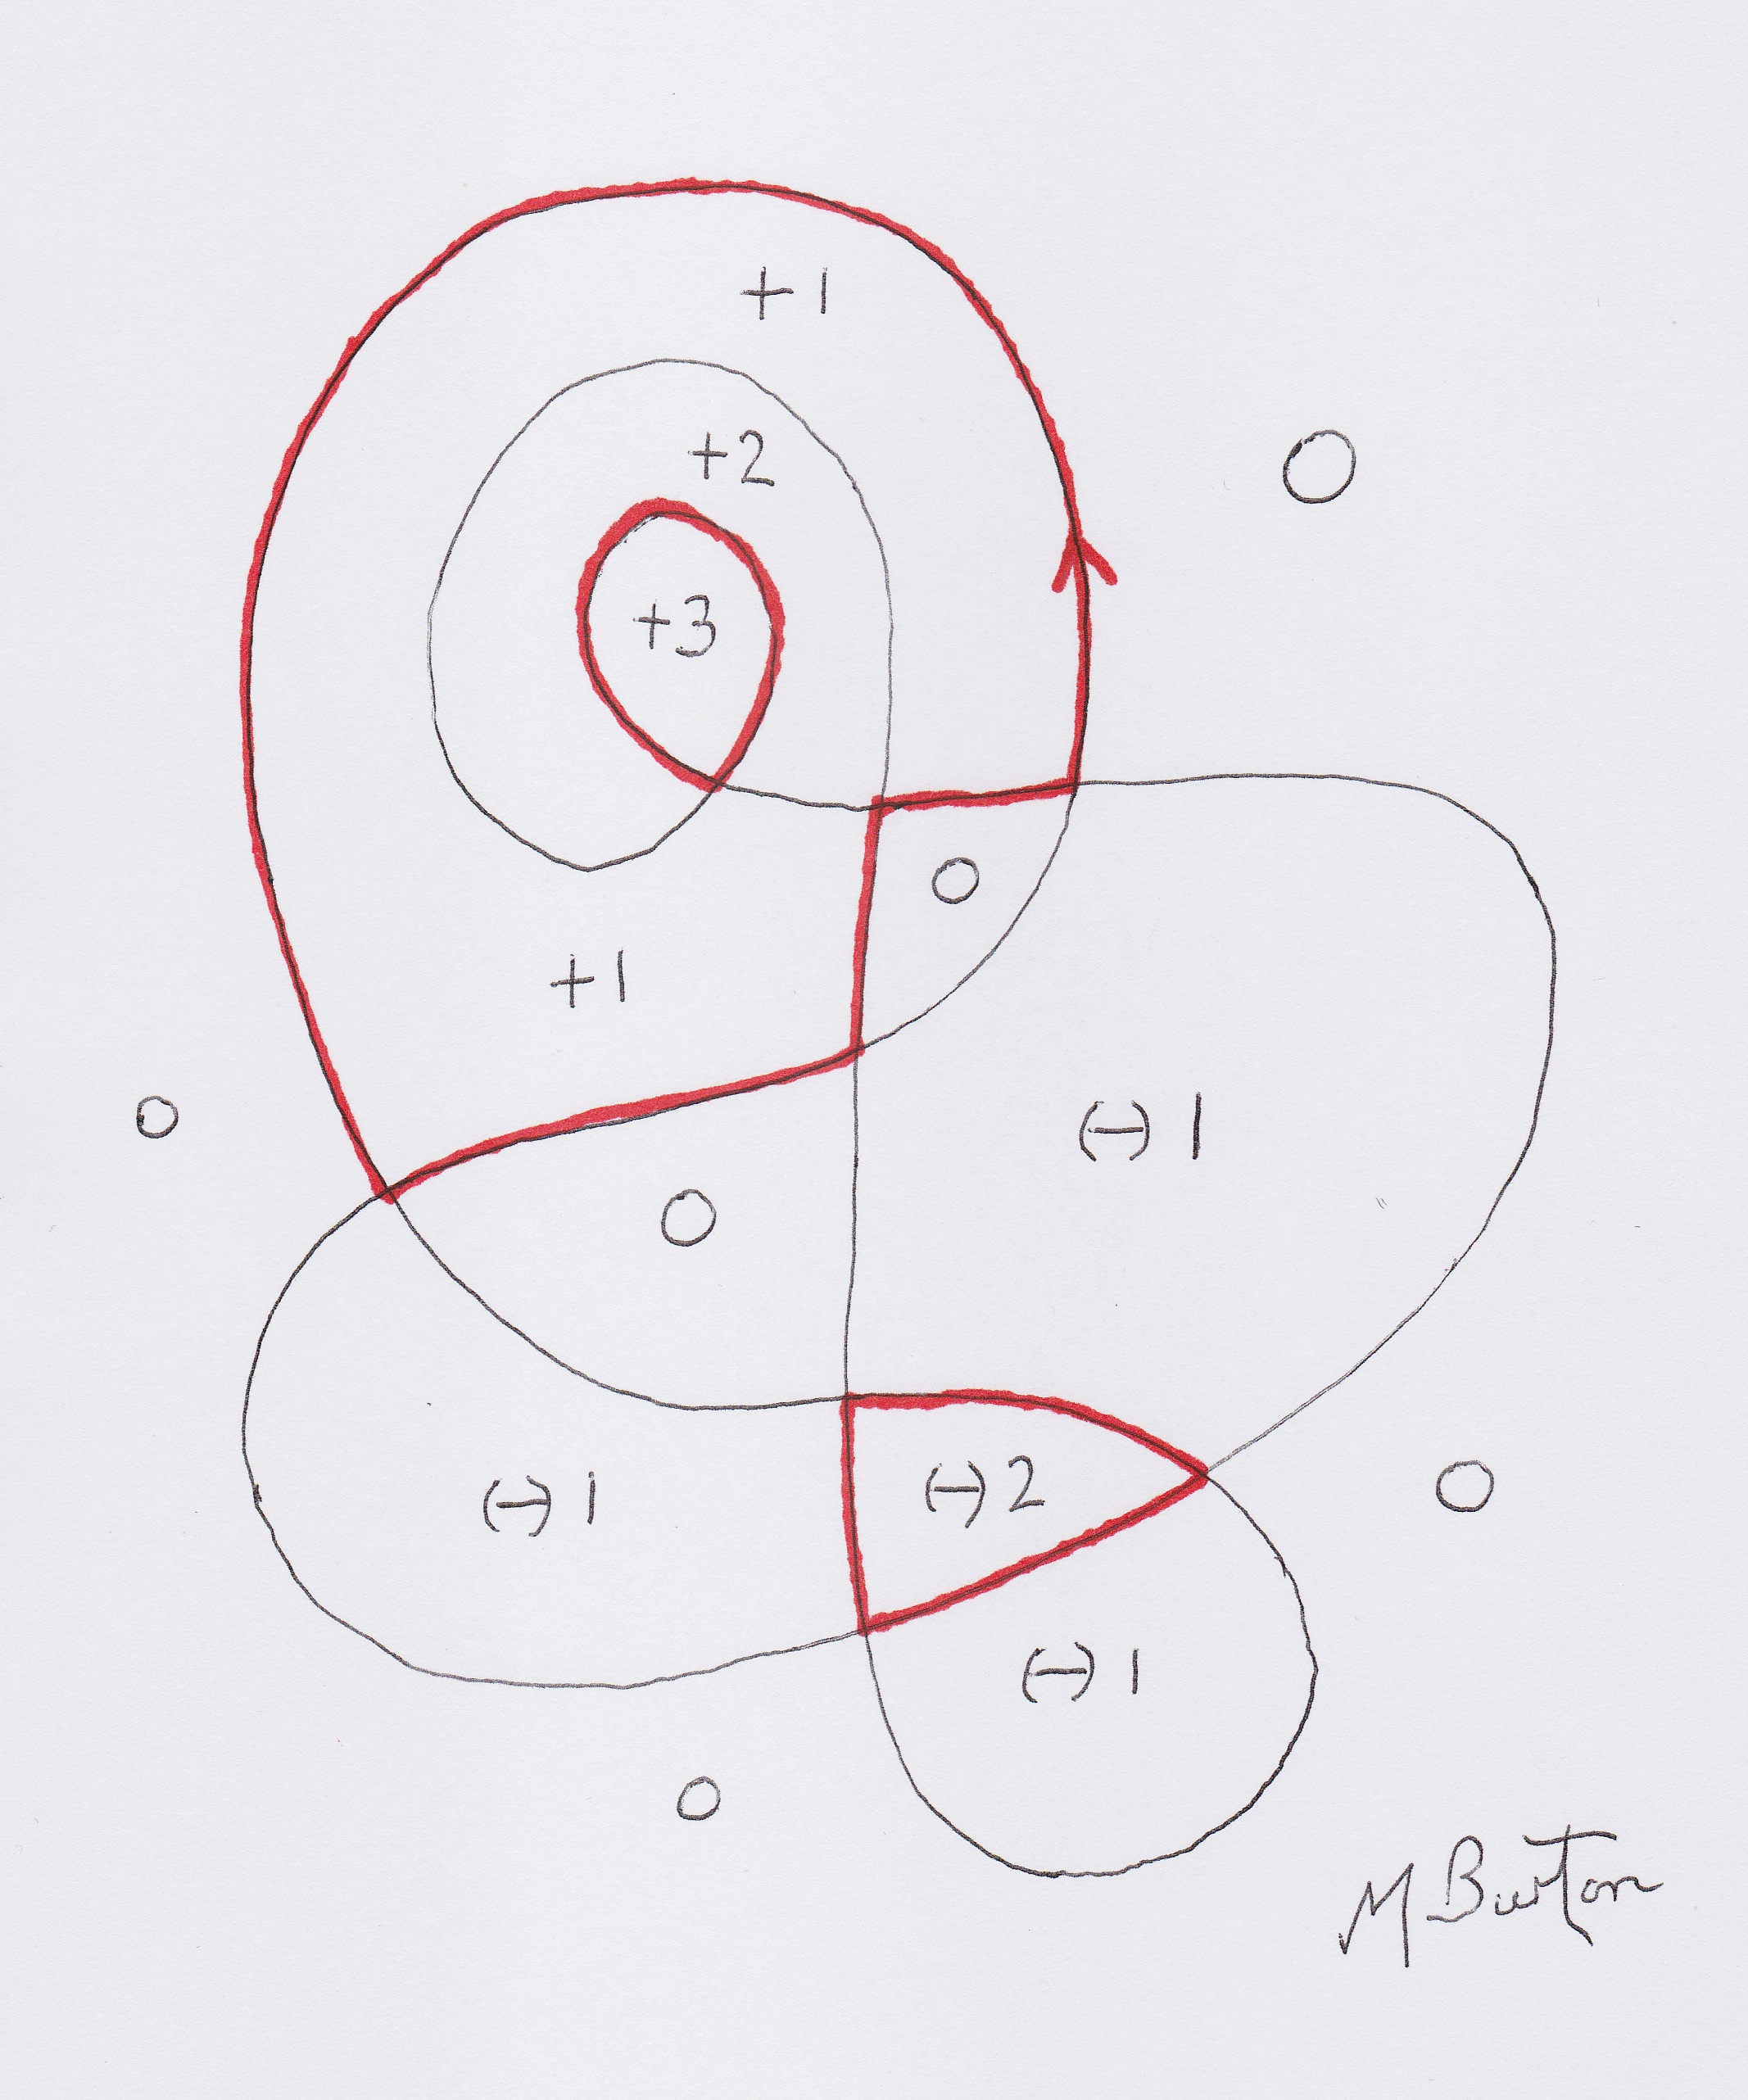
To illustrate the difference between my Alternate Overdraw and the Winding Number, I start with the Alternate Overdraw in Red on the left. As shown in earlier posts, each channel of areas between overdraws has two numbers alternately. You move naturally up to a higher channel or down to a lower channel, through the red line and continue the numbering.
As before, you start with “0” on the outside and 0 can also appear within the drawing.
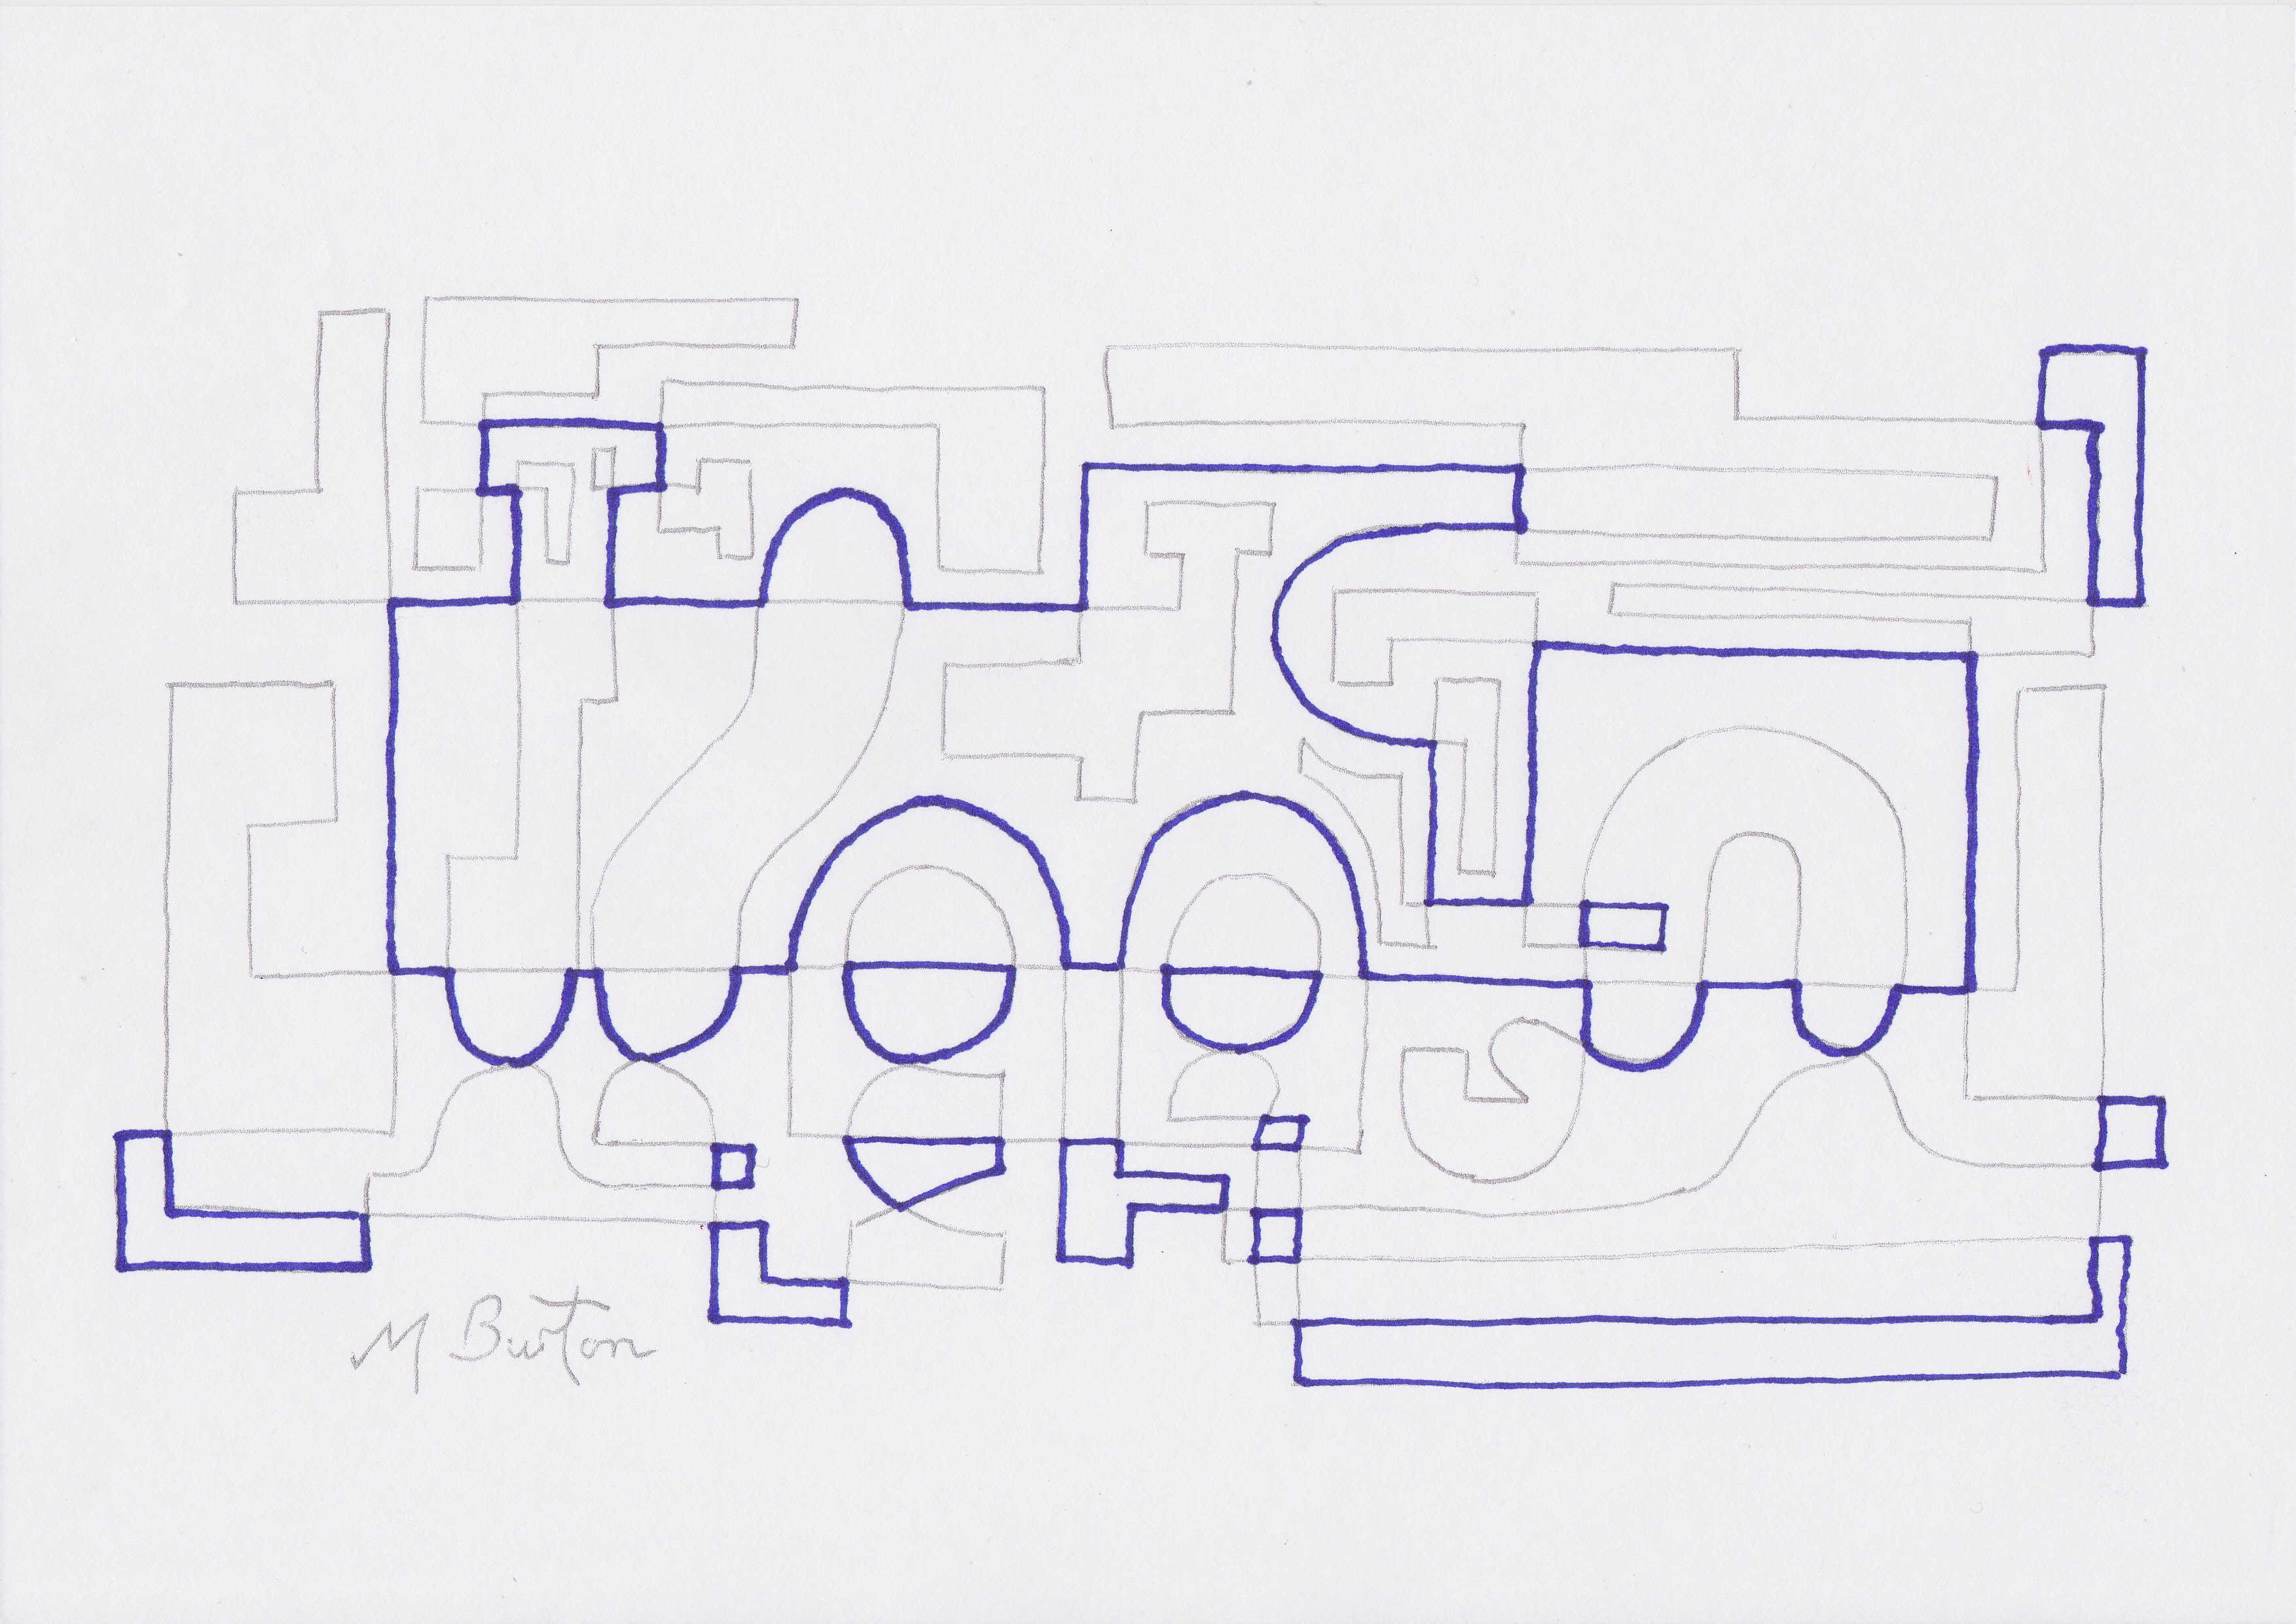
When we come to Winding Number allocation, we can use the same basic drawing with little arrows showing the direction it has been drawn. It can be either direction of course, but I have chosen one which will match the result above.

Winding number allocation. Continuous Line, Mick Burton.
Starting at “0” for the outside, if we cross to another area through a counter-clockwise border for that area, it will be a level higher. If we cross through a clockwise line we reach a lower area.
Here the + areas are of course higher levels and the (-) areas are lower.
The numbering matches the Alternate Overdraw illustration above.
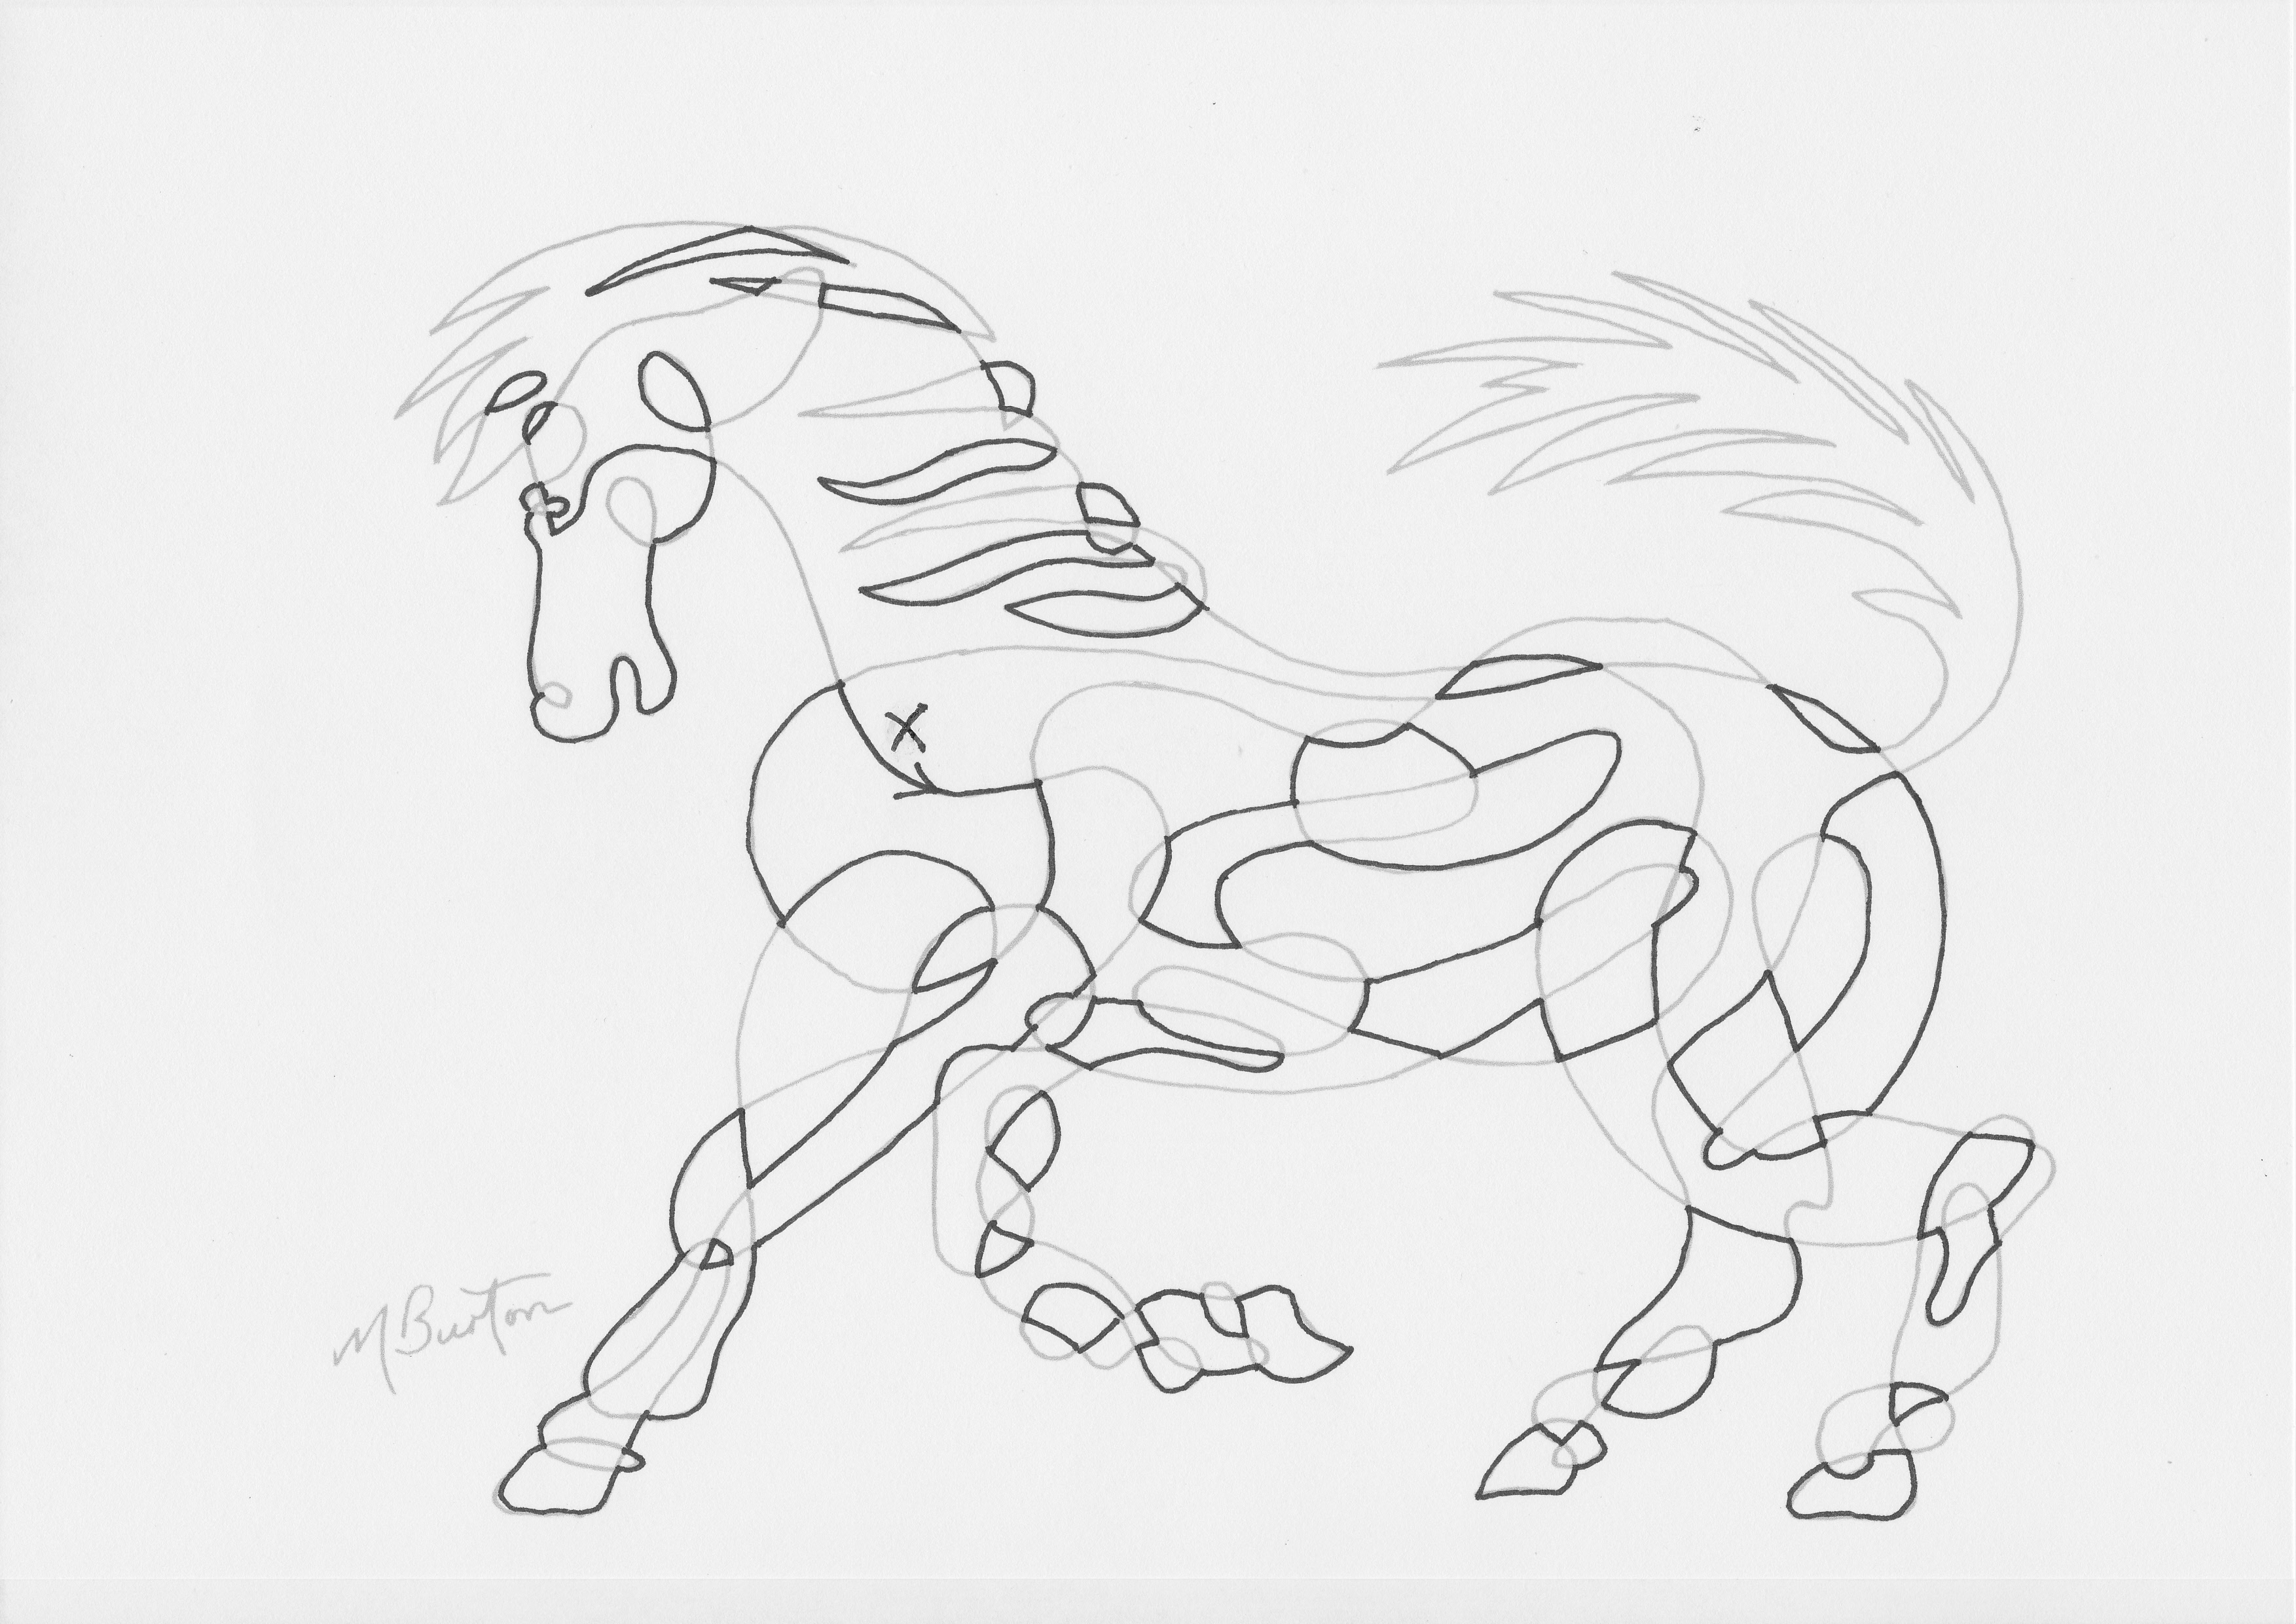
Now, just to show the initial thrust of the drawing for the Whirlpool, with many levels, the next illustration shows a line spiralling from the centre outwards and I have shown just 13 winds.
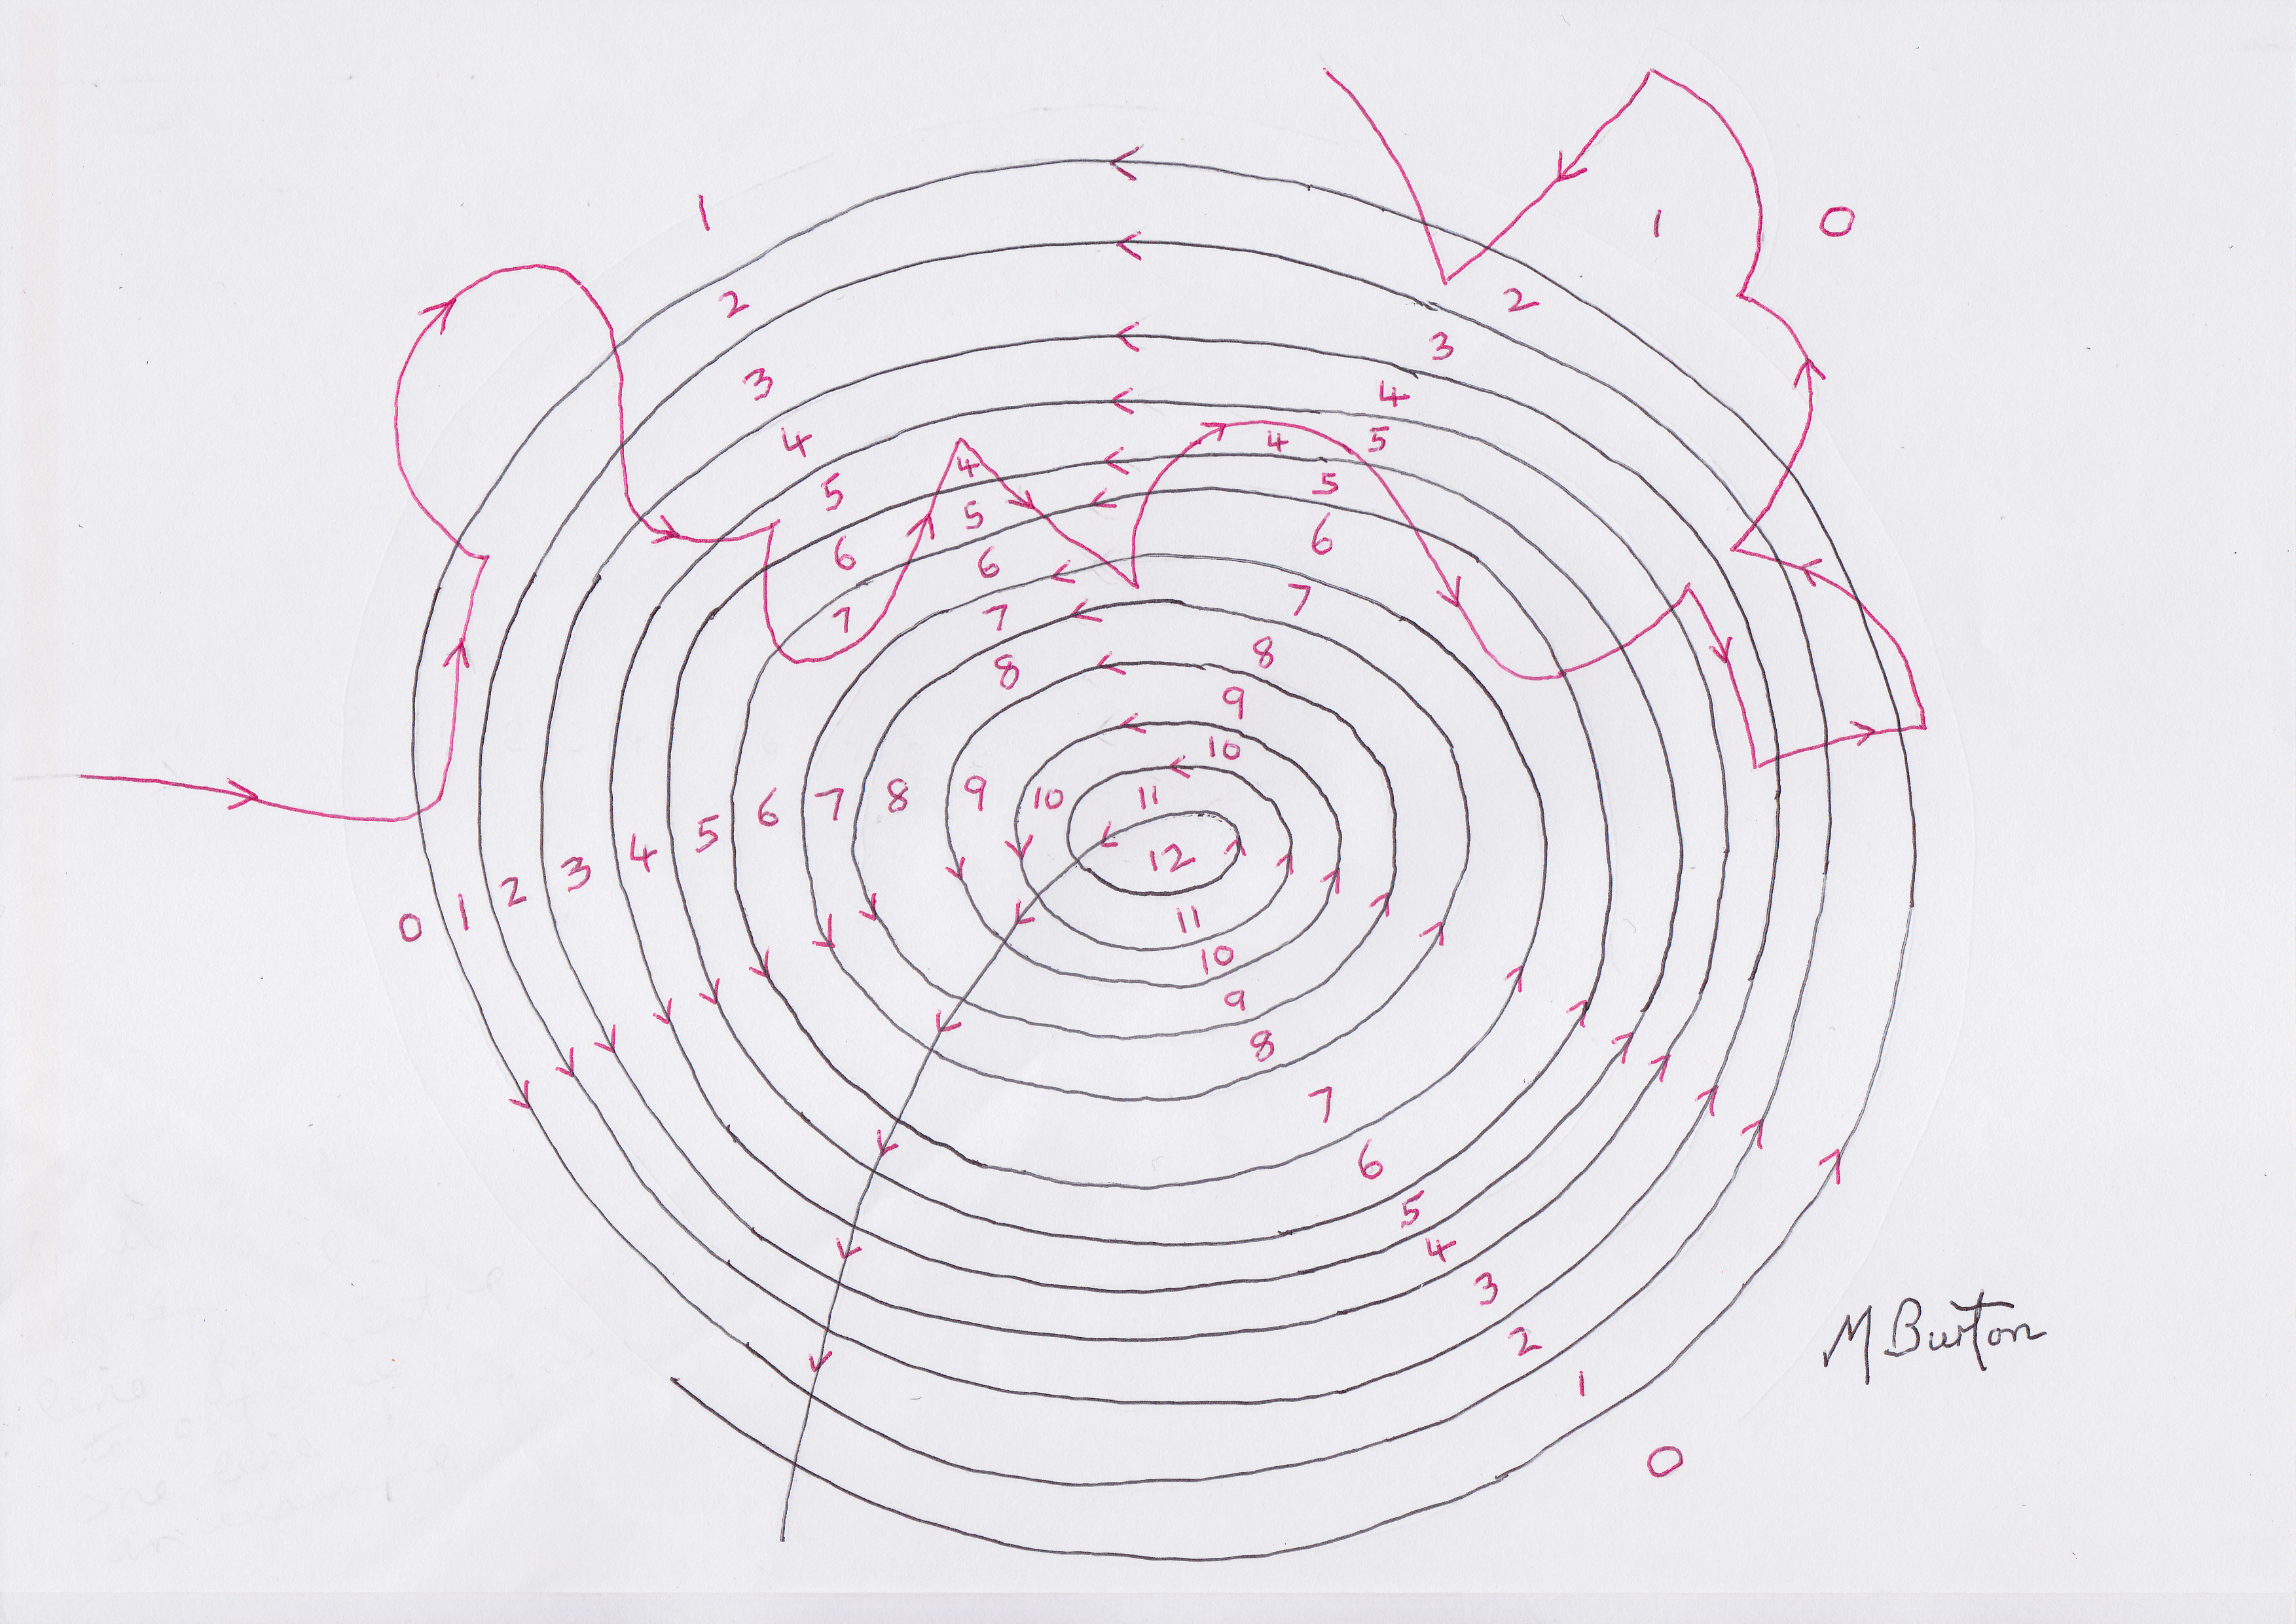
Part of initial Winding Number spiral for the Whirlpool in Space painting. Mick Burton, single continuous line drawing.
Then I have drawn a line from the centre of the spiral directly back to the bottom of the picture as the first phase of breaking up the spiral so that lots more areas start to appear. The next such phase is a meandering line near the top of the picture.
As I have said, this is a shorter version than the one usd for the main Whirlpool in Space picture above.
Next I have decided that the direction of the line will be counter-clockwise starting from the bottom of the spiral, so that the levels go up towards the centre. The numbers have then been added.
On the original painting, which is 24″ x 20″, I used alternate overdraw to allocate the colours. This was because I was used to using that method and I think it is better for an artist anyway. The Winding Number theory was simply the inspiration for producing a sequence of 20 or more.
Now, to go off at a tangent, I am interested in other artists in the family who keep coming to light. As part of my research into my mother’s family, the Mace’s from Bedale (from 1825) and much earlier from Cambridge, I have come across a book by Thomas Mace called “Musick’s Monument” published originally in 1676. It was published again about six years ago. Amongst his own illustrations within the book is this one of a spiral depicting his idea of God’s world.
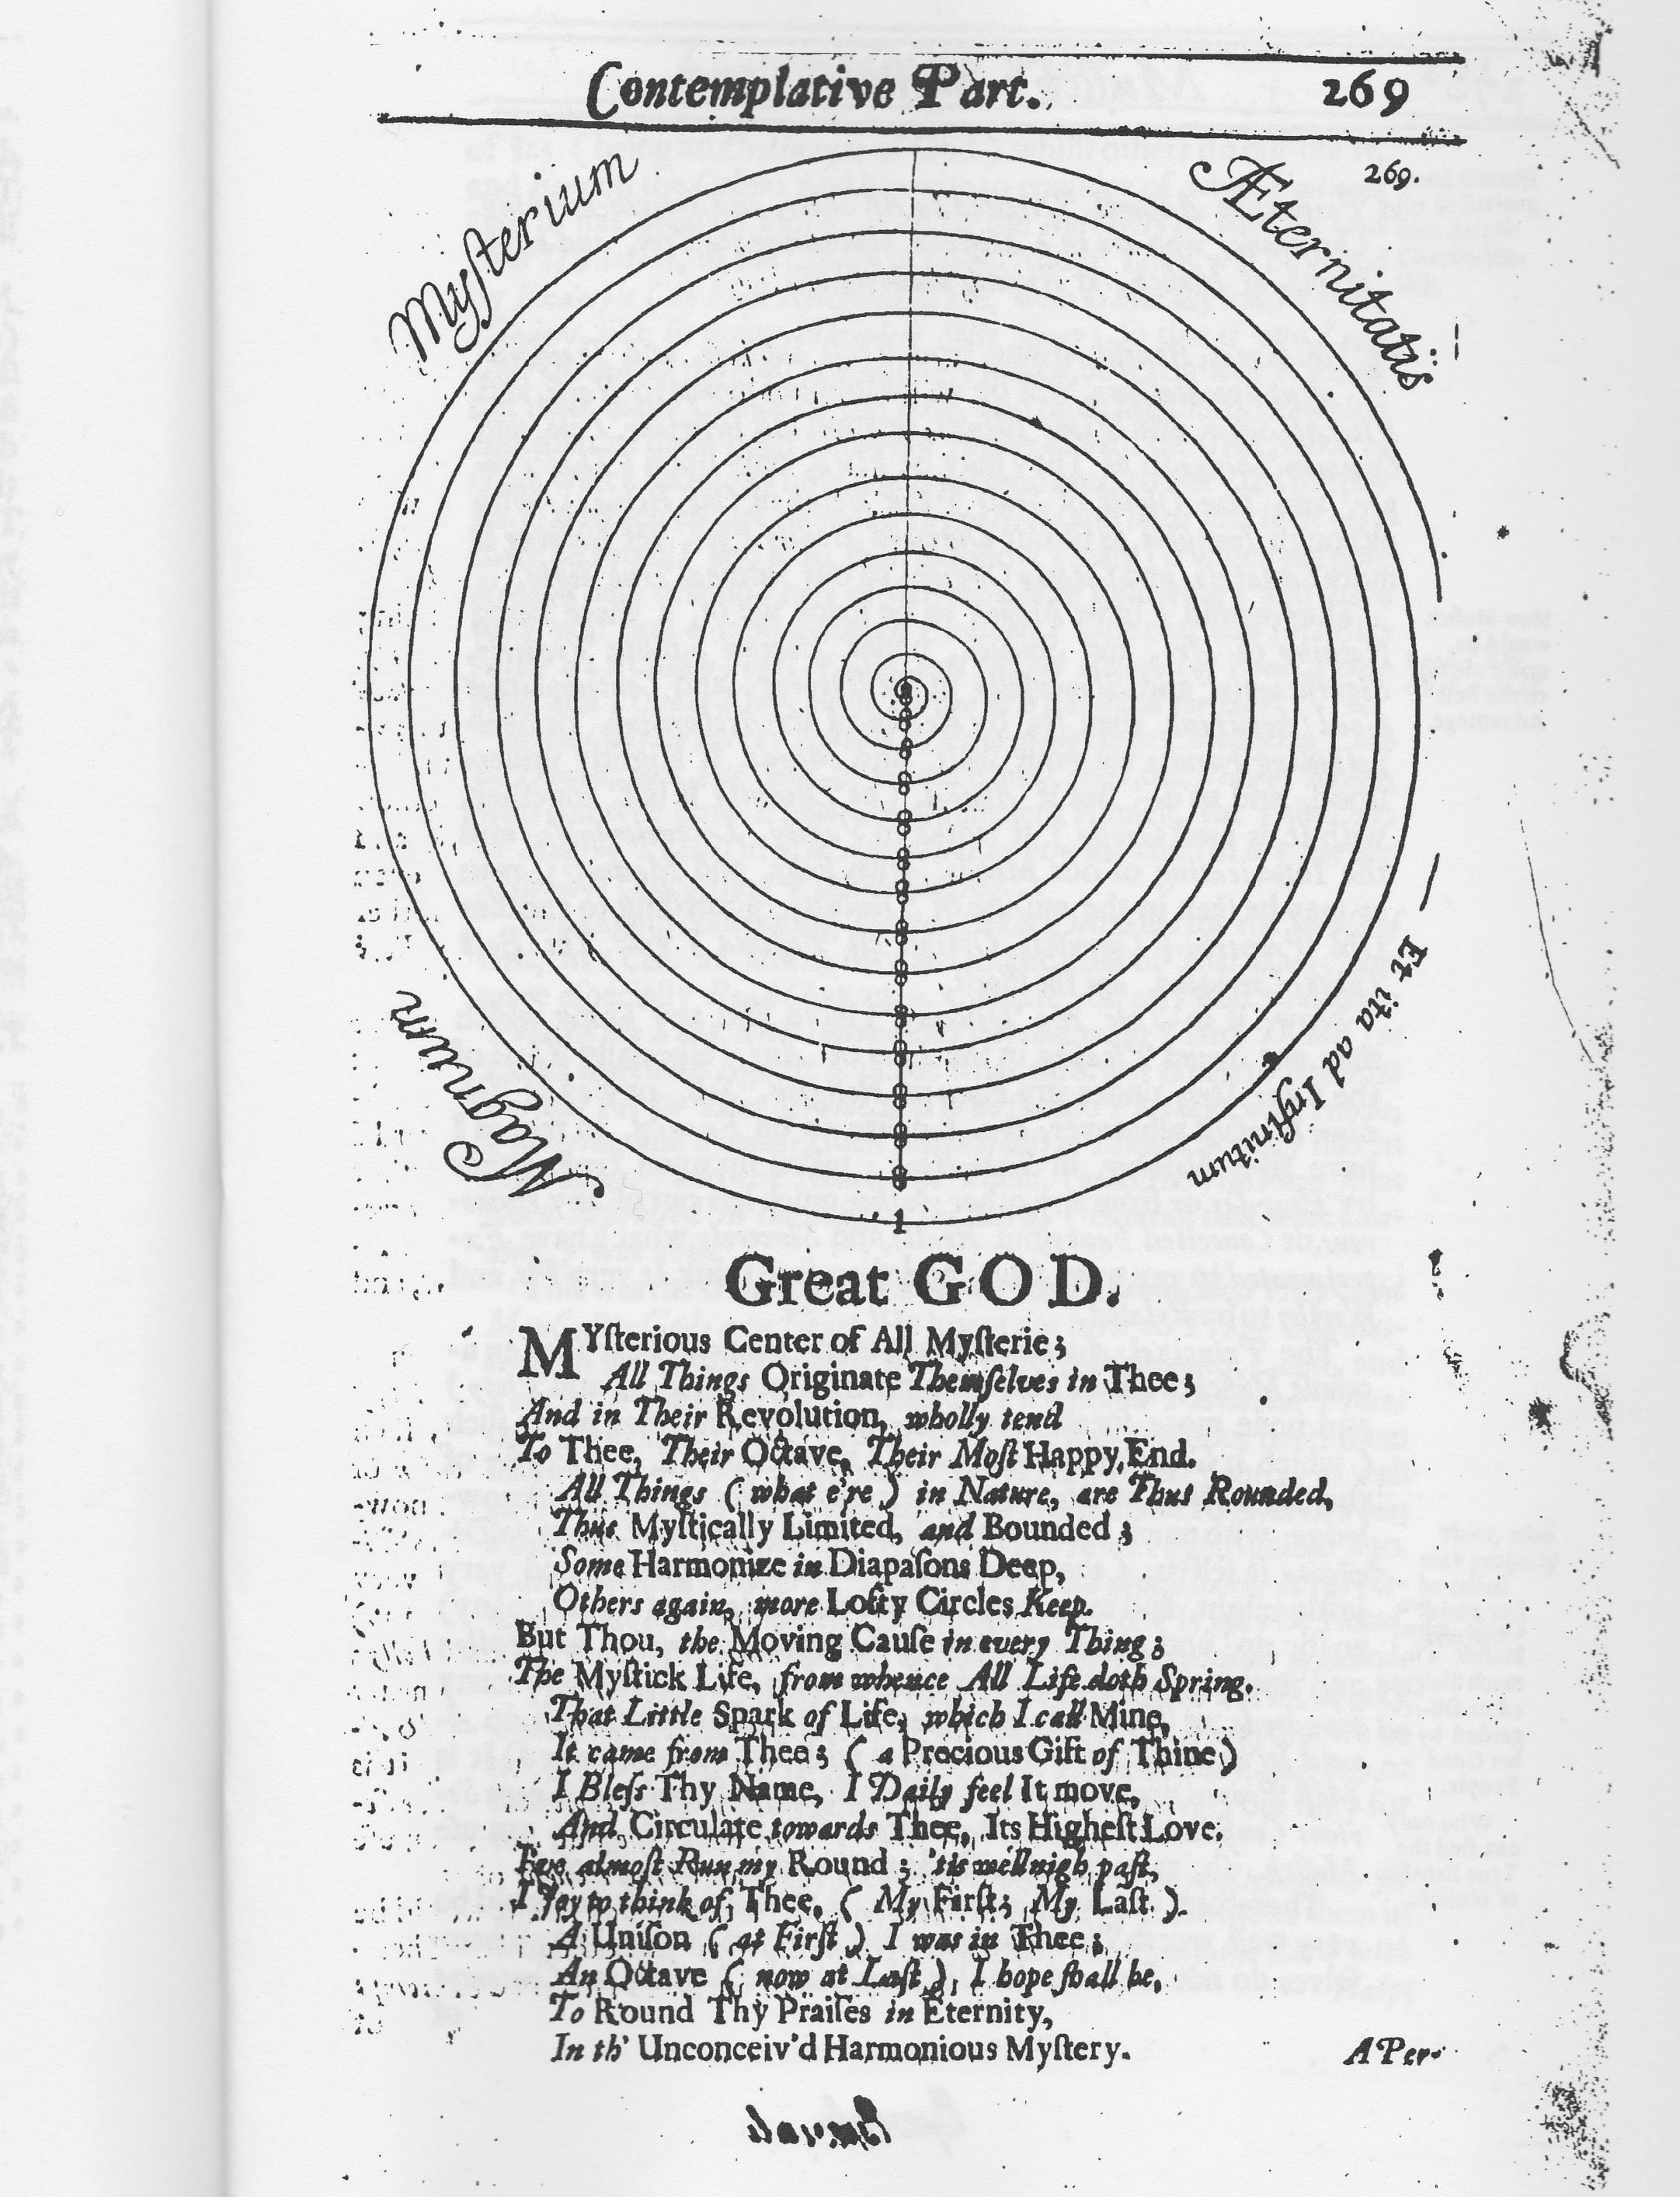
“Mysterious Centre of All Mysterie…” in Musick’s Monument, by Thomas Mace, 1676. Continuous Line, Mick Burton.
Thomas was a famous composer of the 17th century, and craftsman who made lutes and viols, whose main job was a chorister at Trinity College, Cambridge.
To add to this “sort of” co-incidence, my Uncle Harry Mace from Bedale, North Yorkshire, was a joiner and builder. When he retired he started to make old style instruments, such as viols, and sold them to a music shop in Leeds. I am sure he did not know about Thomas of Cambridge.
Thomas was not too impressed with a relatively new instrument in his time, the violin.