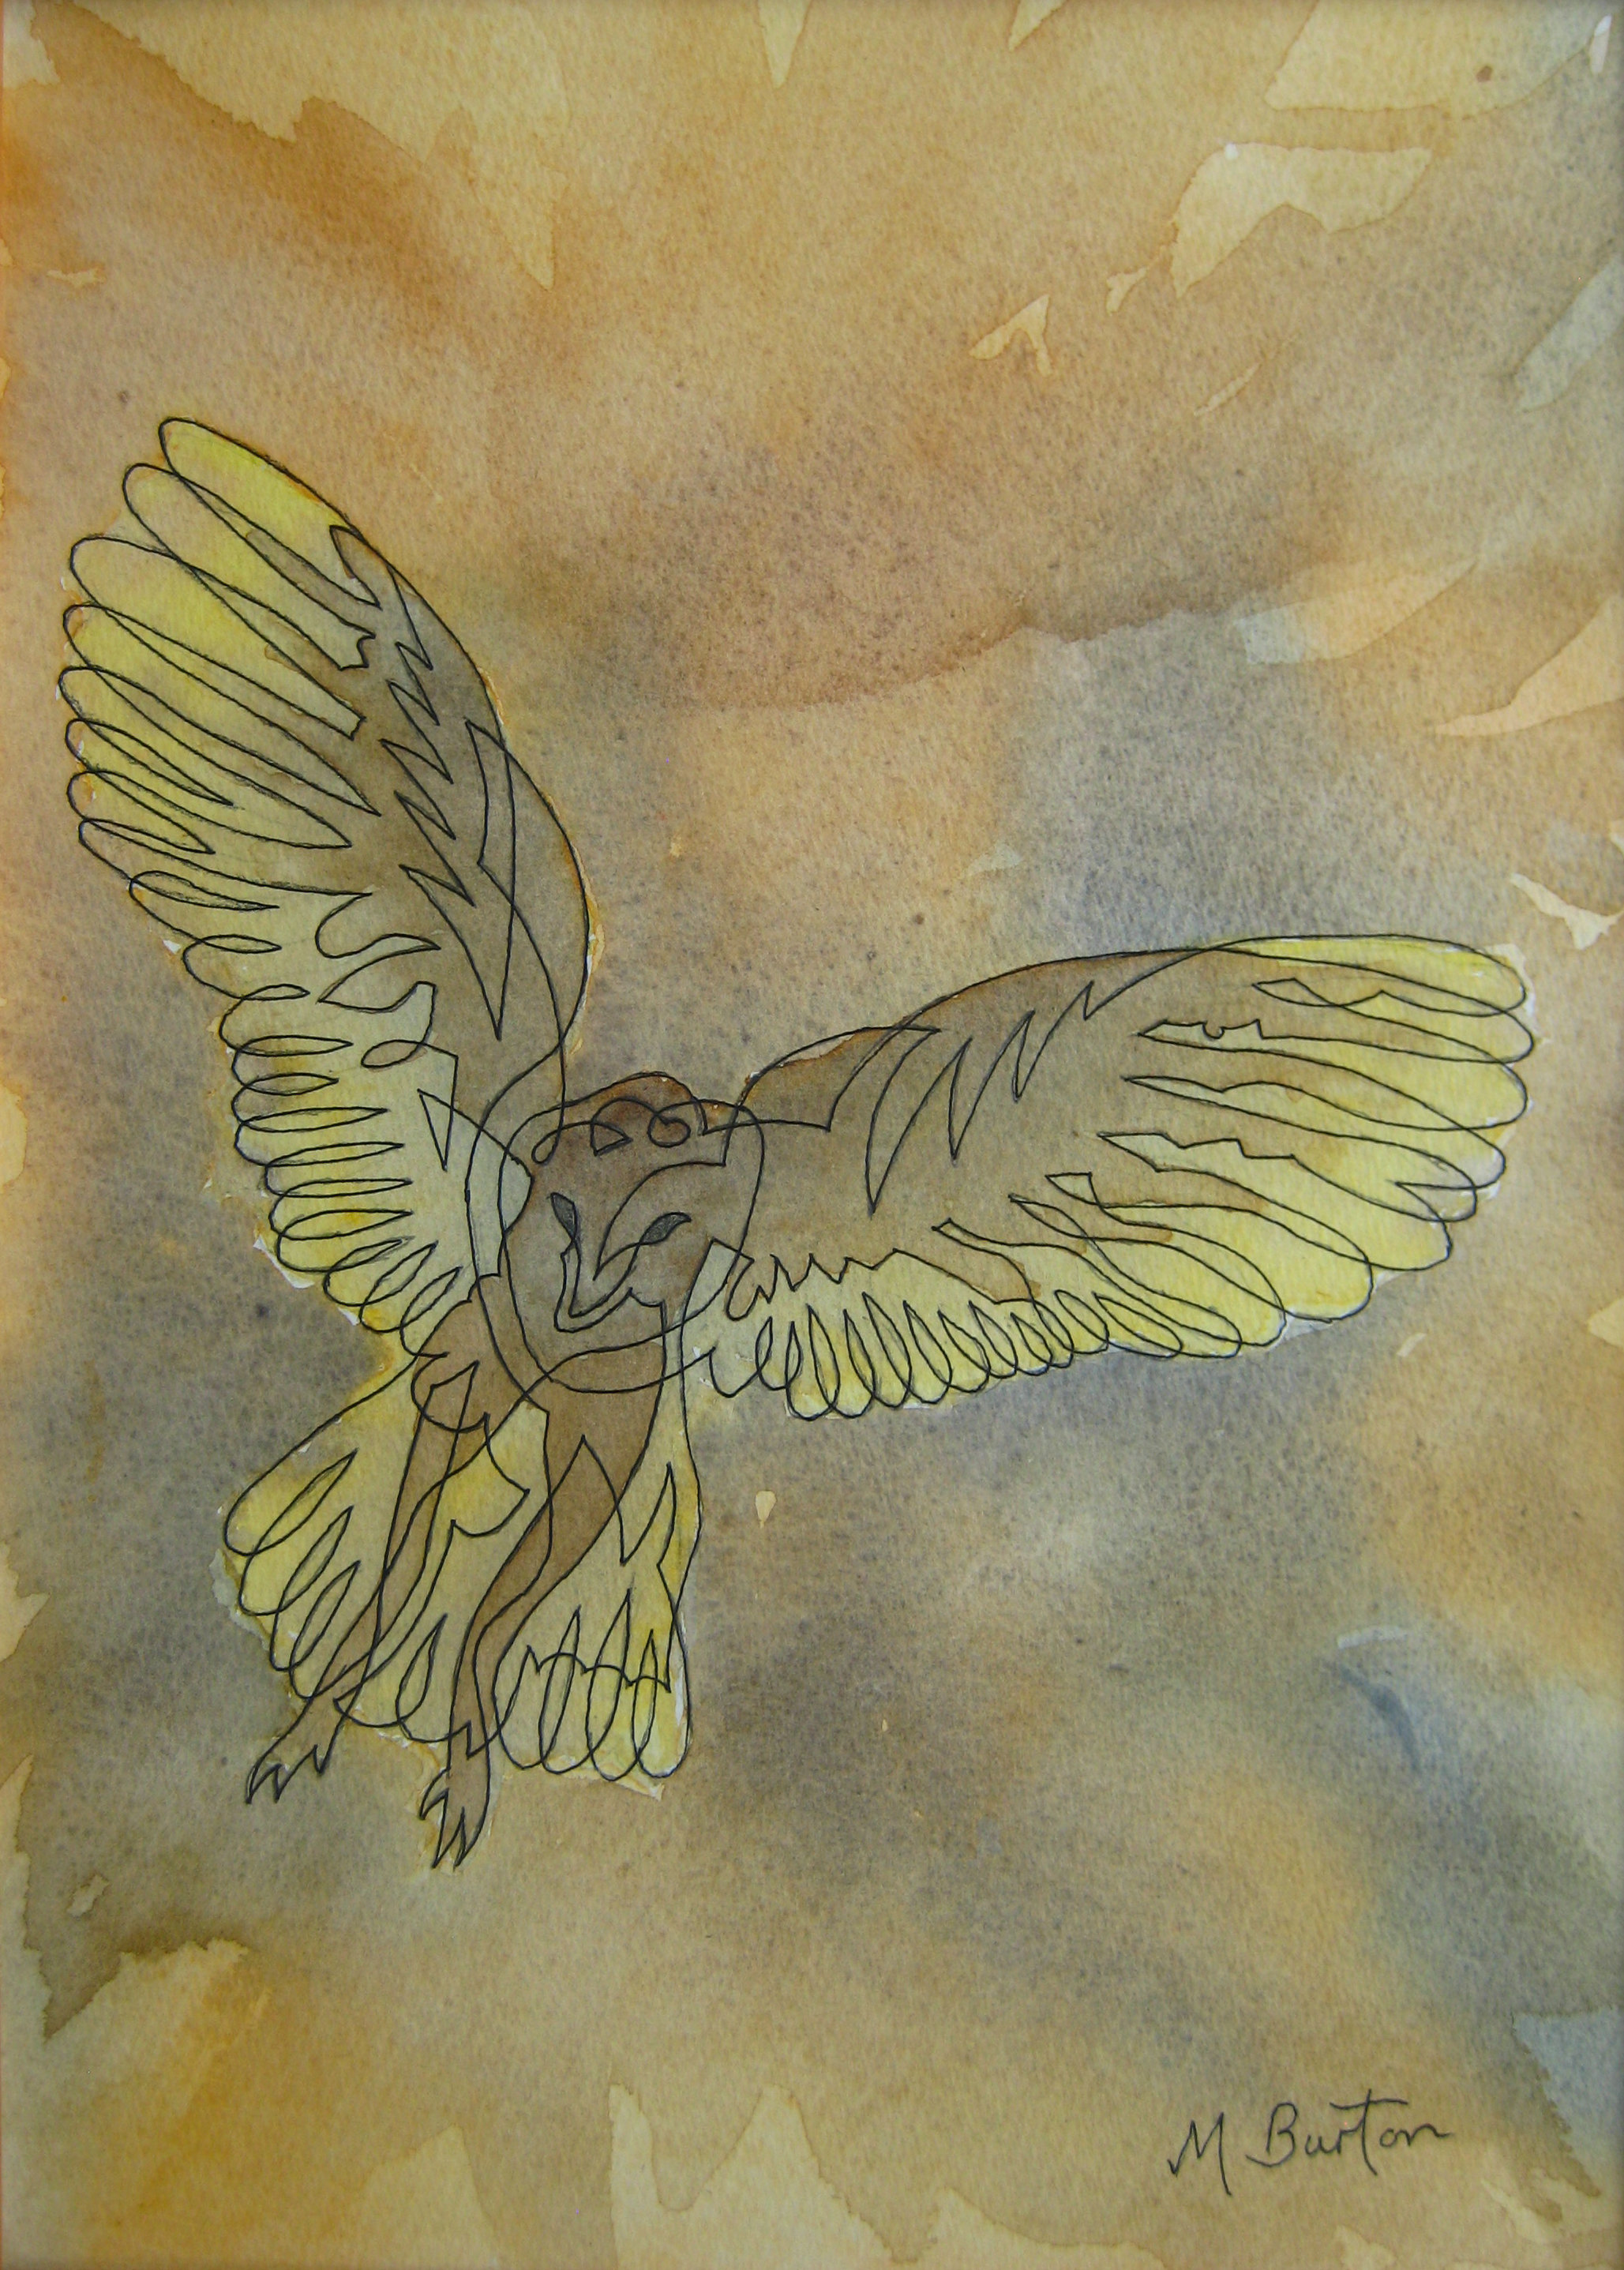
Single continuous line drawing of Barn Owl onto Wet on Wet watercolour. Mick Burton continuous line artist, 2015.
This Barn Owl painting will be one of my eight pictures on display at the Harrogate and Nidderdale Art Club Autumn Exhibition in Ripley Town Hall, near Harrogate, on 21 & 22 November 2015. I then intend to submit it to the next Association of Animal Artists Exhibition.
Harrogate and Nidderdale Art Club exhibition at Ripley Town Hall, near Harrogate, 21 & 22 November 2015.
Visiting demonstrators at art clubs are amazingly varied and it is usually useful to attempt whatever they ask the club members to do. I have done some workshops myself and appreciate the efforts of club members who really have a go at continuous line drawings, and associated things I show, even though to is unlikely that any of them will take up my technique as a main style. Hopefully people can pick up things which can apply to other styles, such as building abstract patterns, using colour sequences, drawing key identifying parts of a subject and trying to manage a picture which sometimes appears to be drawing itself !
Charles Kelly from Bradford, who I have seen doing demonstrations before, came to Stainbeck Arts Club a couple of months ago and said he was doing a workshop this time. Watercolour tends to be the most popular topic at art clubs, but Charles has a spectacular approach to “wet on wet” and this time we were doing it too. Here is an example of his work from a demonstration to Alwoodley Art Group in 2013.

A Pair of Geese, painted by Charles Kelly in a demonstration at Alwoodley Art Group in 2013.
My usual style of strong lines and flat colours (acrylic or poster colour) are poles apart from watercolour but I always learn something. I have to say that using a big brush to coat large proportions of the paper with water in advance (up to selected boundaries of course) and then squeezing brush loads of watercolour in dollops all over is a bit “hairy”. Then picking up the paper and waving it about so that the colour swishes around, like tides on a beach, reminds me of relatives of mine “panning” for gold in Victoria in the 1850’s.
Charles had brought many reference pictures which we could use and I chose one of a barn owl. I thought that I could do washes up to the outline of the owl and also within the owl and later put a continuous line on top which more or less matched the washes. Here is a copy of the wash I did initially, helped by some tips from Charles along the way.
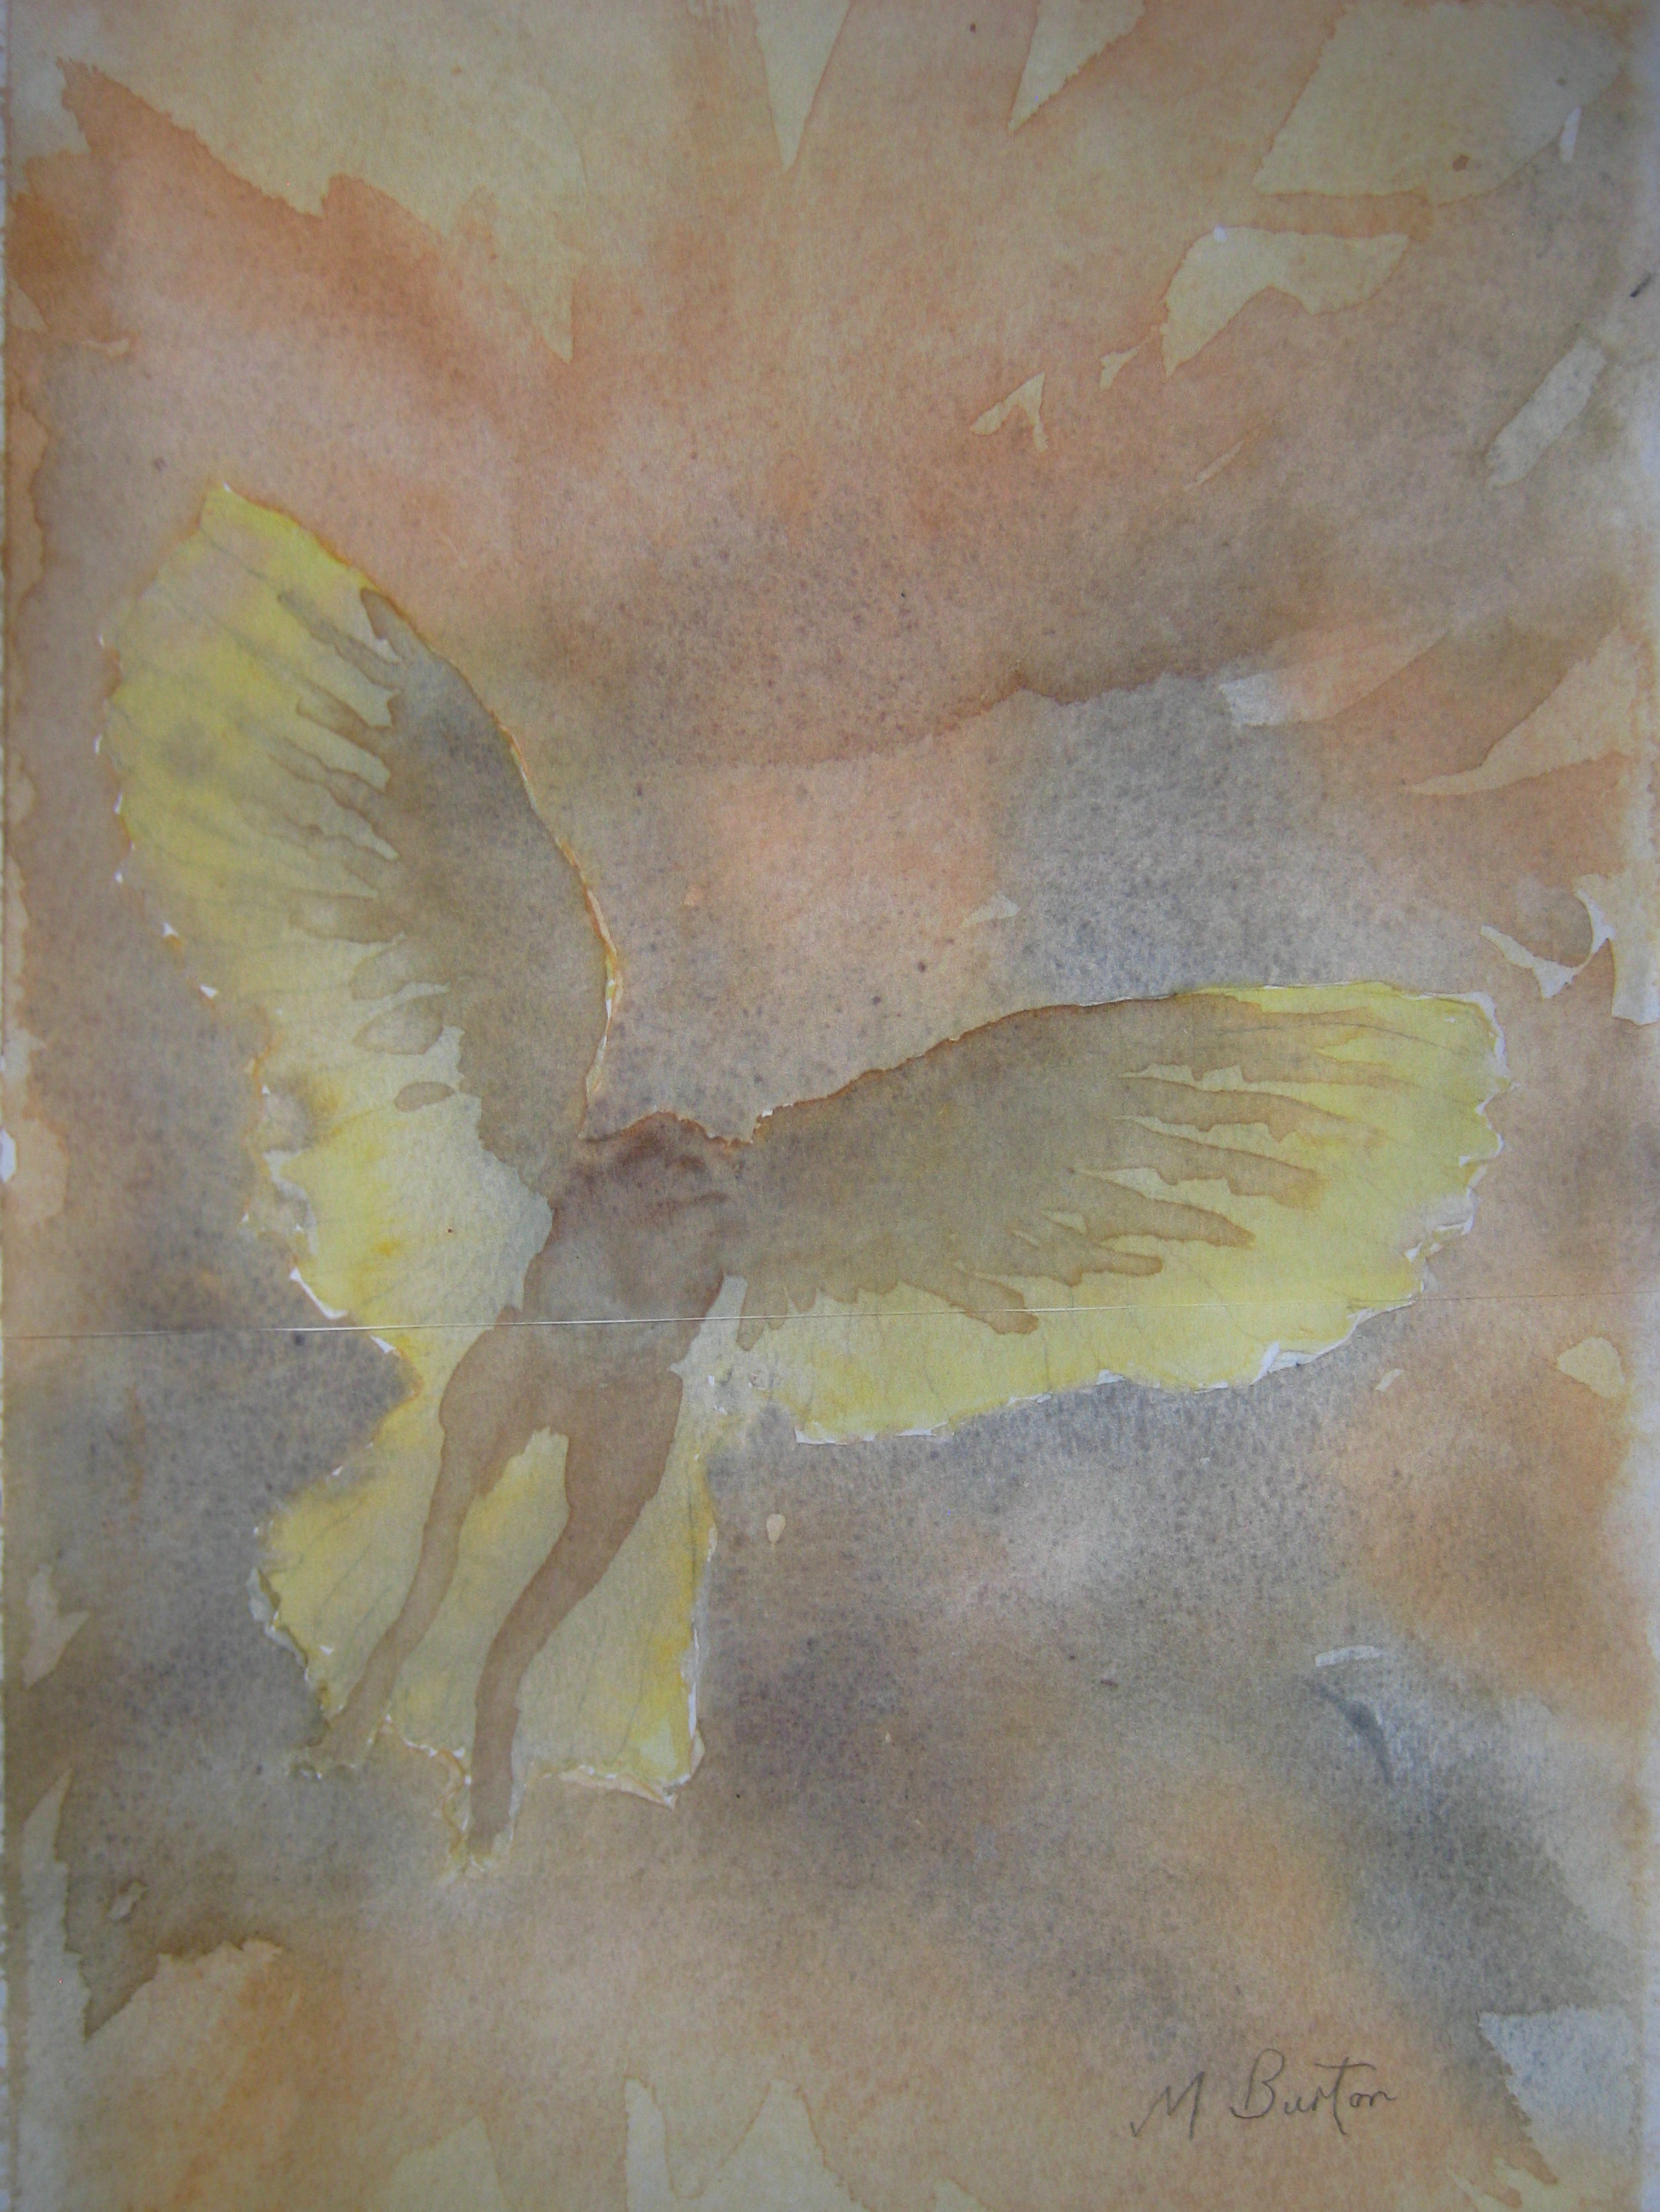
Copy of Wet on Wet watercolour of Barn Owl, before I attempted the continuous line drawing. Mick Burton.
Later, at home, I worked on the continuous line on top of the above copy. I started by putting key lines along the outline of the owl, feathering and other features – to match the borders of colours as far as I could. Then I added more connecting pattern and finally joined everything up and made sure I had a continuous line.
Once I was satisfied with this I traced the continuous line down onto my watercolour painting and drew over the lines in acrylic pen making final changes as I saw how the firm line was developing.
I think that the translucent effect of the feathering has worked well, although this view may not be appreciated by a victim mouse in its last moments.