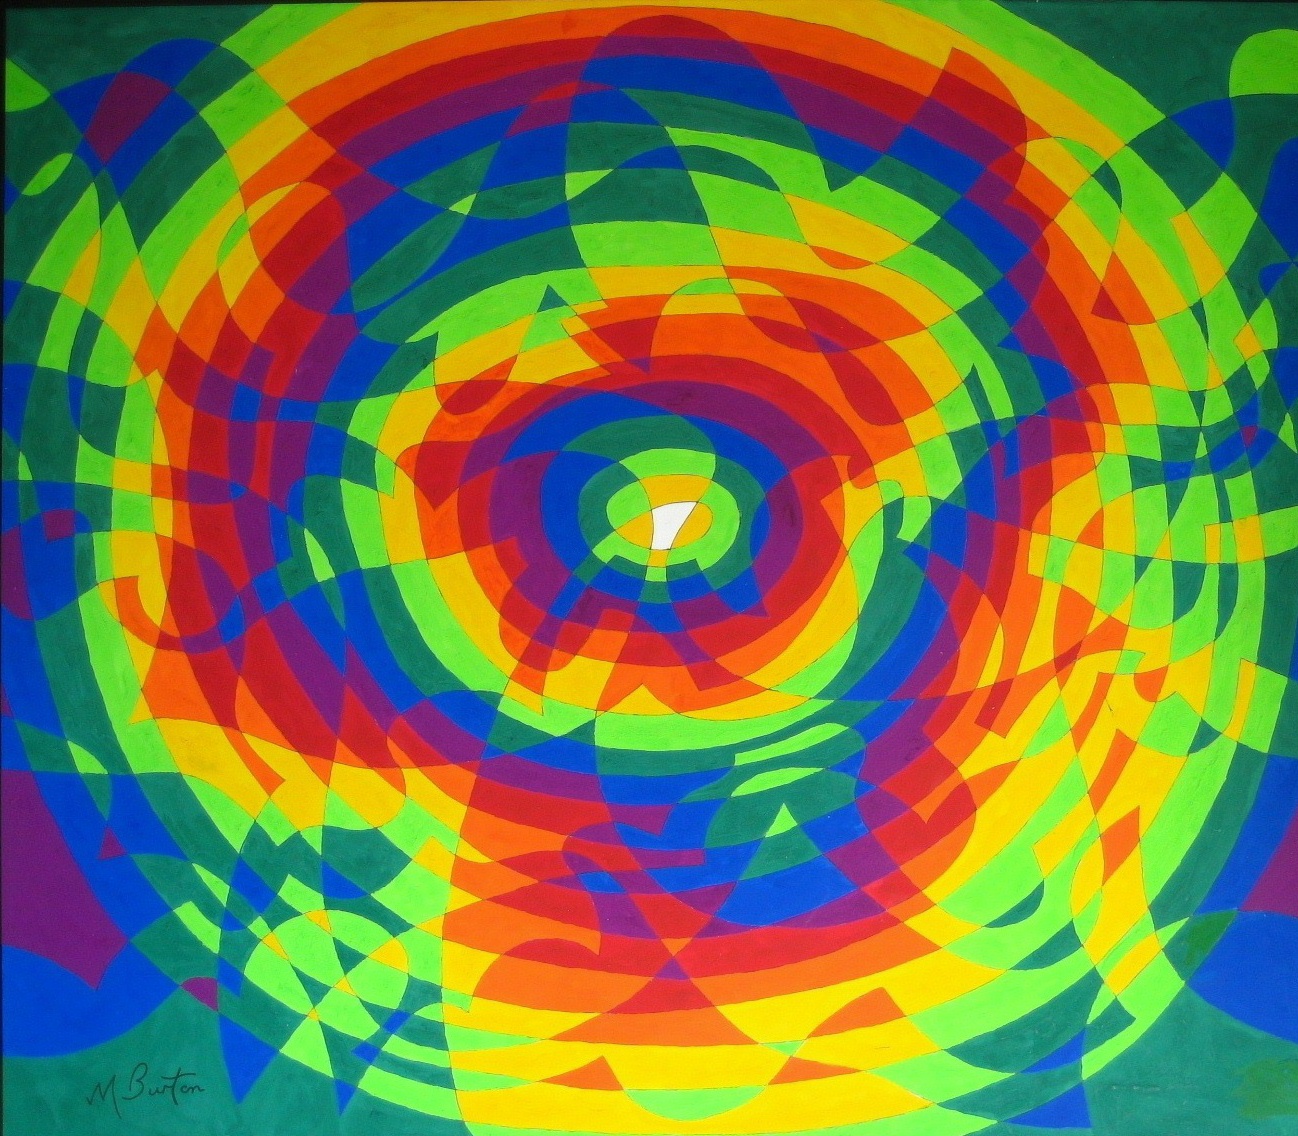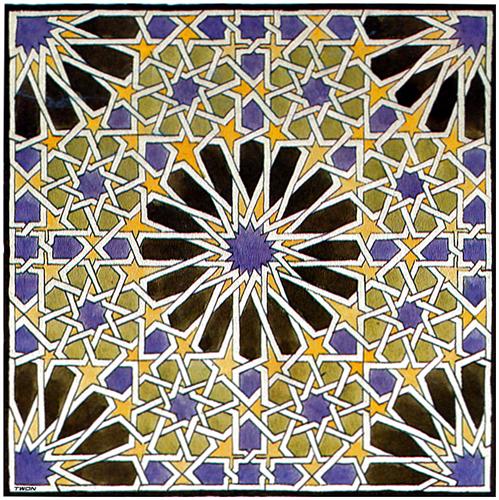
Escher painting 1922 of Islamic Mosaic tile at the Alhambra. WikiArt. Continuous line study by Mick Burton.
I look for continuous lines in all forms of art. I first saw this design in my daughter Kate’s book “Escher, The Complete Graphic Work”, by J.L. Locher. We are both long term admirers of this artist. Escher did this detailed painting in 1922 when in Granada at the Alhambra, and its quality really hit me. It was of an Islamic mural Mosaic tile, which was made up of those geometric lines which are often seen in Islamic art, and I assessed it for continuous lines.
I could see that the overall symmetrical pattern and I saw that Escher had painted the design BORDER, which seemed to indicate what happened to the lines after they hit the sides of the square. I then worked out, from the Border Pattern, that the lines were fed back in the same routes on all four sides of the square. From the point of view of finding a single continuous line, in my experience, such overall symmetry of the structure meant that it was very unlikely that there was only one line.
Here is the basic structure which I arrived at, which shows the “wiring” connections indicated by the border. Let’s see how many continuous lines there are.

Escher Islamic Tile. Basic line structure, with border connections. Mick Burton continuous line study.
When I traced over the lines I found that there were in fact two continuous lines making up the whole design. Here are the two results, a Main continuous line (in red) and a Minor one (blue).
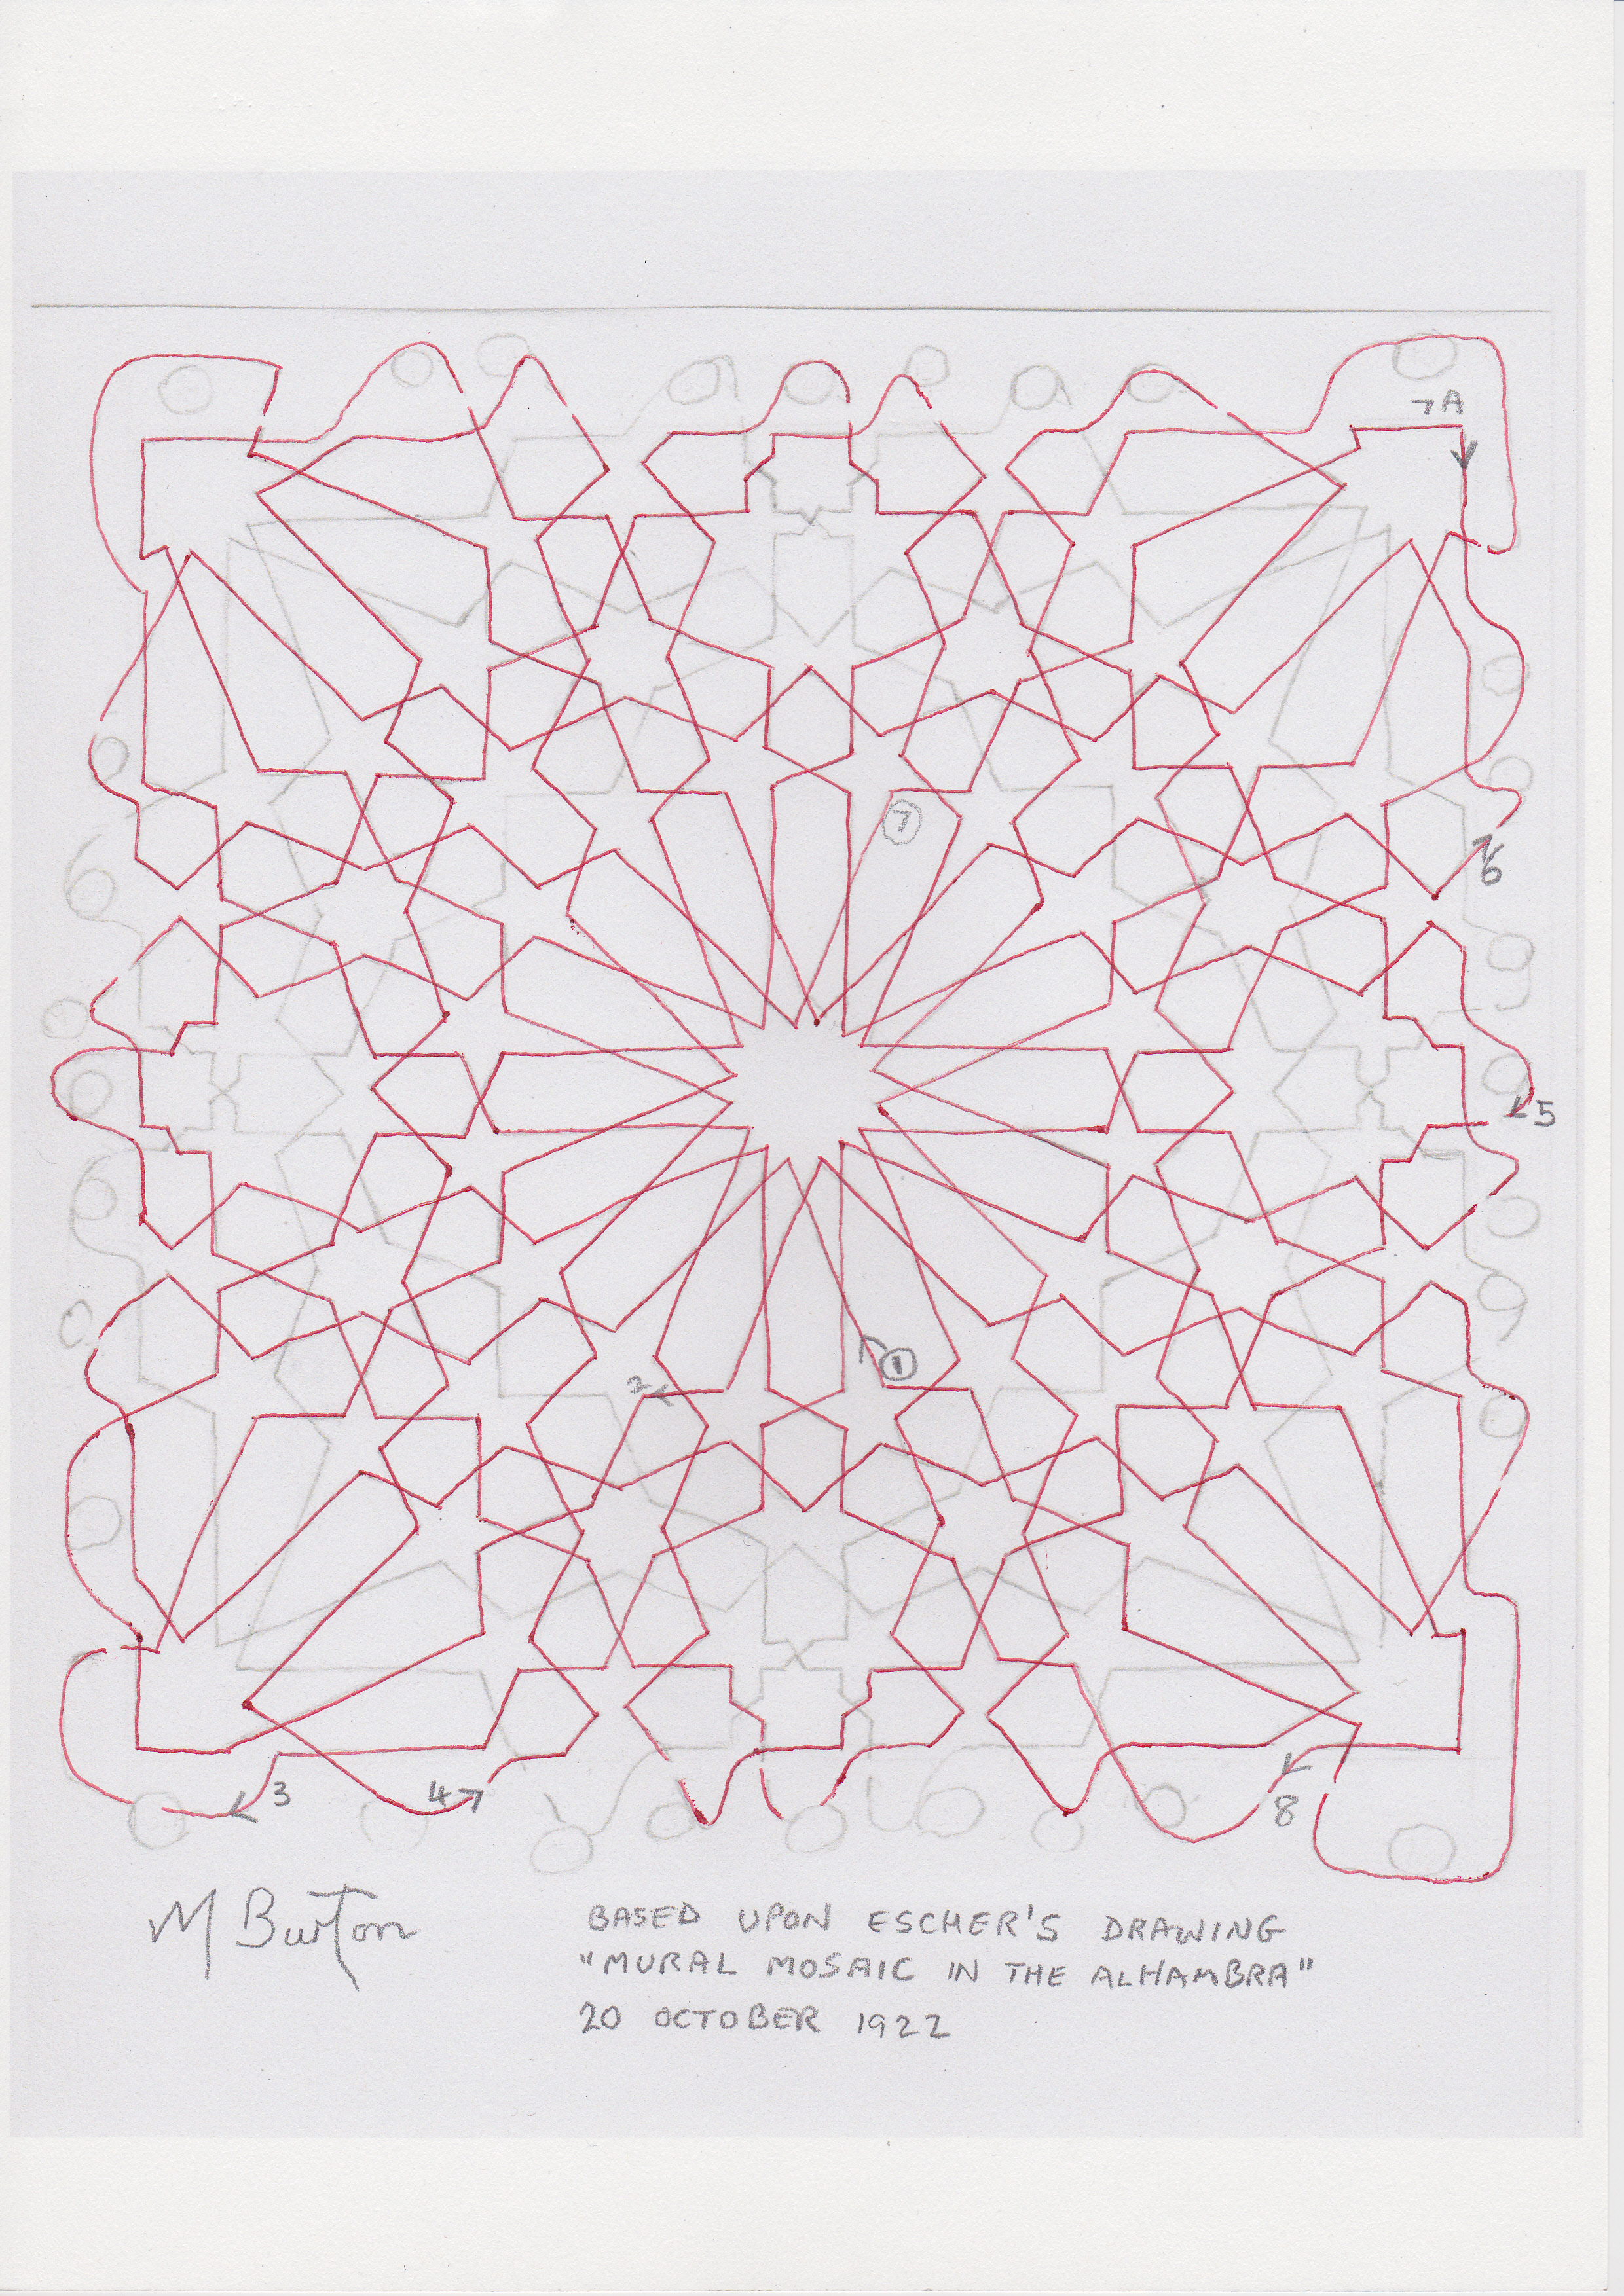
Main continuous line, one of two. Escher Islamic tile design. Mick Burton continuous line study.
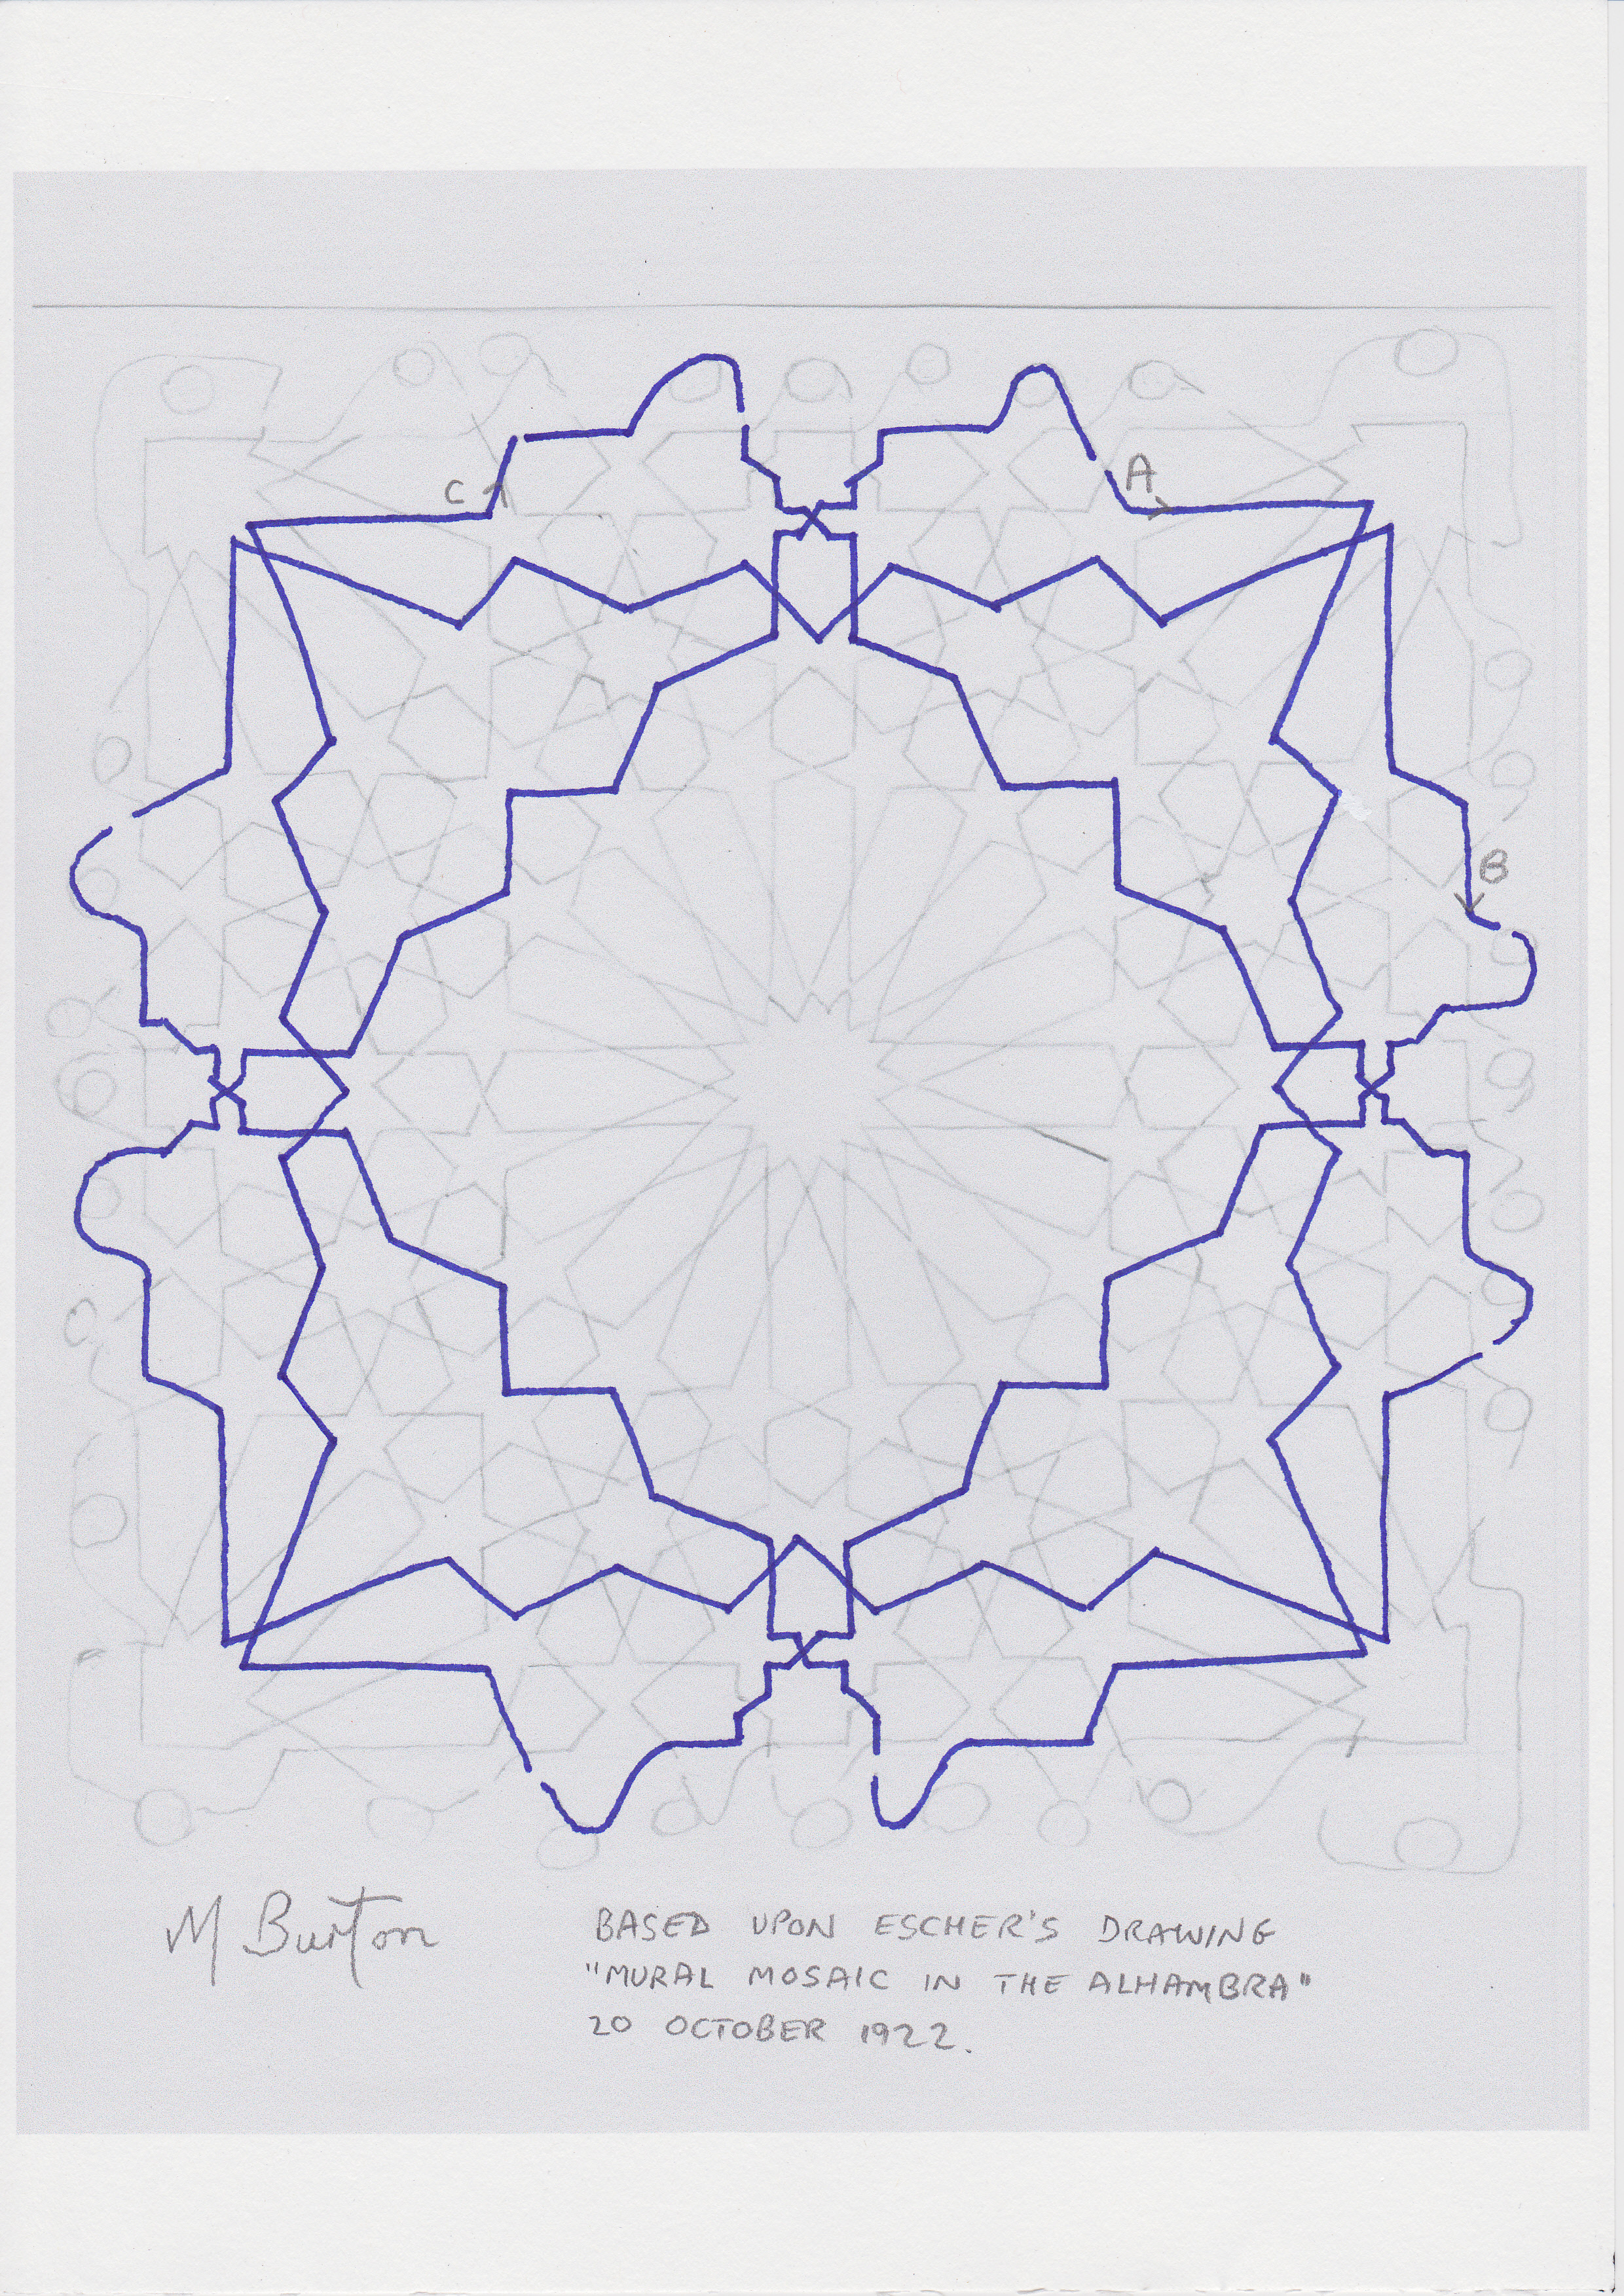
Minor continuous line, 2nd of two. Escher Islamic tile design. Mick Burton continuous line study.
By experimenting with border changes, a bit like swapping wiring connections, I did come up with a single continuous line, but the borders were no longer symmetrical. It seems likely that the artist realised that two continuous lines was the best he could hope for whilst retaining overall symmetry. In a LATER POST I will show how a border can be “tweaked” by a slight alteration to make one continuous line in the mural mosaic, and how this answer is achieved. I will also show how the artist is likely to have worked out how to achieve two continuous lines by connecting up the correct loose ends.
I now needed to know “How important continuous lines were, within this design, to the artist?” It could be that Continuous Lines were incidental to other aims, or they may have been of prime importance.
In my NEXT POST I will apply my Alternate Overdraw technique to produce a Template of closed lines, which I use to decide upon the colours to allocate. I will also suggest what the artist’s ideas were for the design and his colour selection. In a FURTHER POST you will see how my colour allocation compares with the original colours and to what extent I feel that my ideas were the same or similar to those used by the artist.
All this has been done without any reference to the construction of the original line structure. I have taken the completed structure as a starting point to apply my ideas. I did not research in any detail on Islamic line construction, until after my whole study was completed.
I have recently found YouTube demonstrations by Eric Broug entitled “How to Draw a Mamluk Quran Page” and “How Grids and Patterns Work Together”, which gave me a good insight into pattern construction and include an explanation of a larger tile containing this Escher Mosaic design as a section. This is a fascinating process used by the Islamic artists over 500 years ago. Otherwise, I have not found any reference to borders, colouring, or specific meaning of this design.
Possibly my ideas will generate a new view on aspects of the creation of this and other Islamic designs.
Mick Burton, Continuous Line Blog. Continue reading